Best Selling Products
Instructions for the fastest way to lengthen legs with photoshop!
Nội dung
Let's explore with SADESIGN extremely quick and convenient leg lengthening methods using Photoshop thanks to the built-in Free Transform and Puppet Warp features.
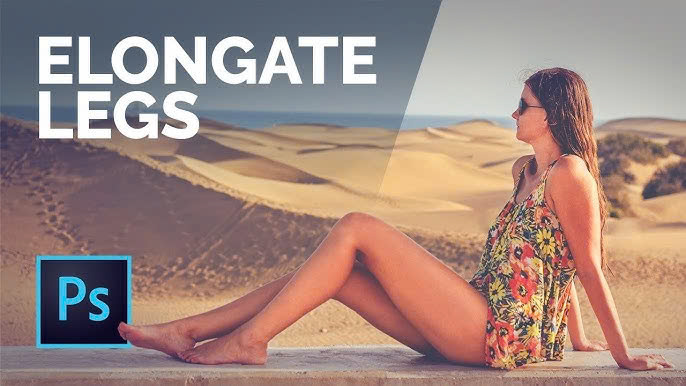
Lengthening legs with Photoshop is a feature that helps to fix the problem of models being "drowned" in photos. Let's explore with SADESIGN 2 extremely quick and convenient methods of lengthening legs in Photoshop below!
Photo stretching tools in Photoshop
Photoshop is a popular photo editing software with many outstanding features, including the ability to stretch photos, often applied when taking portrait photos of characters.
.jpg)
To perform photo stretching in Photoshop, we can use many different tools, of which 2 useful tools, commonly used by editors are:
- Free Transform
- Puppet Warp
Specifically, how to do it, please refer to the following content.
Lengthen legs in Photoshop with Free Transform
This is the easiest way to lengthen legs that you can apply to your photos. The steps are as follows:
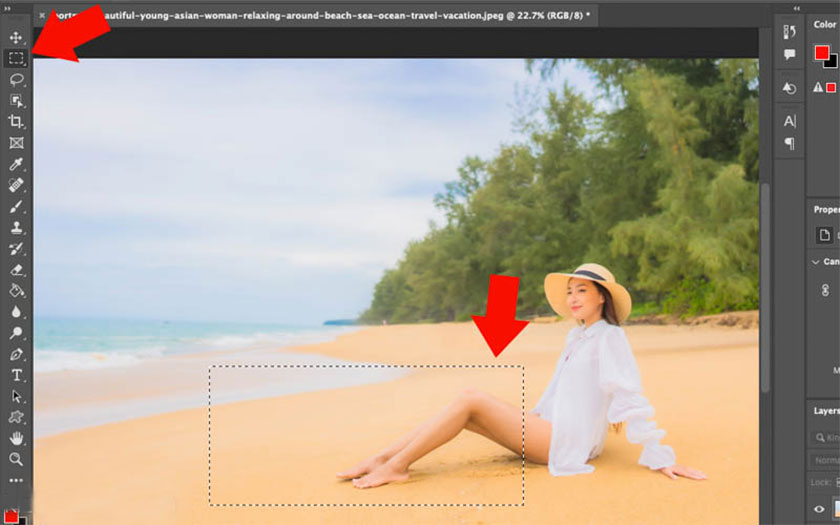
First, you need to open Photoshop and upload the image that needs to be edited -> select the area with the Marquee Tool -> press Ctrl + J to put the selected area into a new Layer.
In this example, we will cut from the model's thigh to help bring better results. To help the legs naturally long, take both the thigh and the shin to cut.
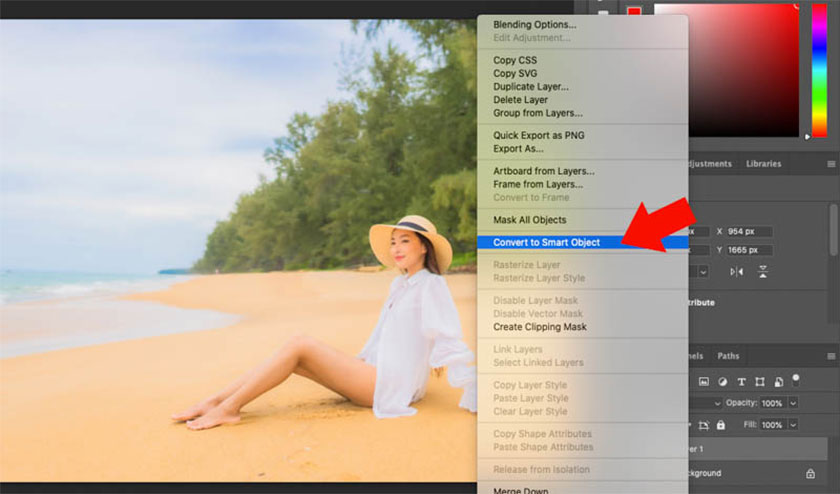
Next, right-click on Layer 1 => select Convert to Smart Object to help the selected area not break when increasing or decreasing the size. If you use a normal Layer, the image will break after shrinking or enlarging.
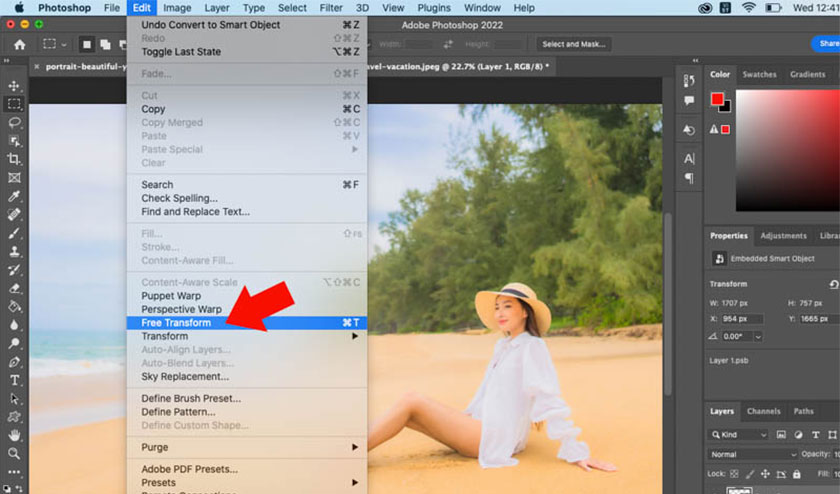
Next, click Edit => select Free Transform or press the shortcut Ctrl + T.
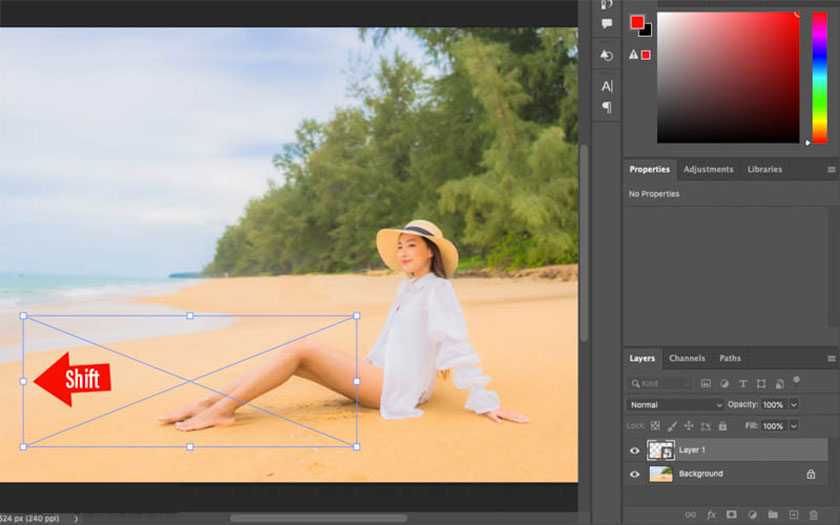
Here we will lengthen the leg to the left, including the thigh and shin. So press and hold the Shift key, hold the mouse on the white anchor point and drag it to the left. The result can be seen that the model's legs are longer and more natural.
However, some areas are skewed, to handle this problem you just need to create a Layer Mask for Layer 1 => use a black Brush to paint over the smudged areas to restore the details of the original image.

The result is that the leg is still lengthened without changing the other details in the image.
How to lengthen legs in Photoshop using Puppet Warp
In addition to lengthening legs with the Free Transform tool, we have another very simple way to lengthen legs, which is to use the Puppet Warp tool.
First, we need to create a selection around the model's legs using the Lasso Tool -> Press Ctrl + J to copy the selection to a new Layer -> Right-click and select Convert to Smart Object to resize the selection without breaking the image.

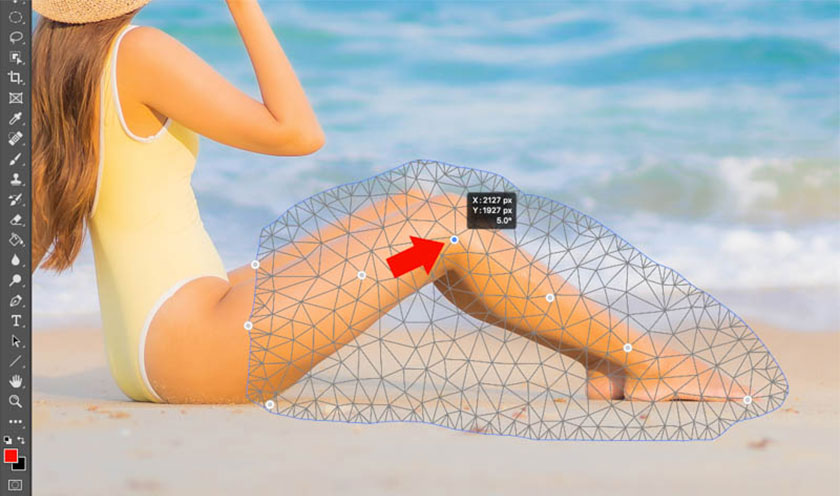
Click on Edit => select Puppet Warp, this is an advanced feature in Photoshop. Immediately after that, you will see a grid covering the selection => left-click to create anchor points.

In this example, we drag the anchor point on the model's thigh to the right, so we only need the thigh to be longer, which is a bit different from using Free Transform. You can create multiple anchor points for more detailed adjustments. With this tool, you can straighten your legs in any direction.
Continue to drag the anchor point on the shin to the right to make them longer, and customize to get the desired result. You can adjust both the ankle and foot to make the photo more beautiful.
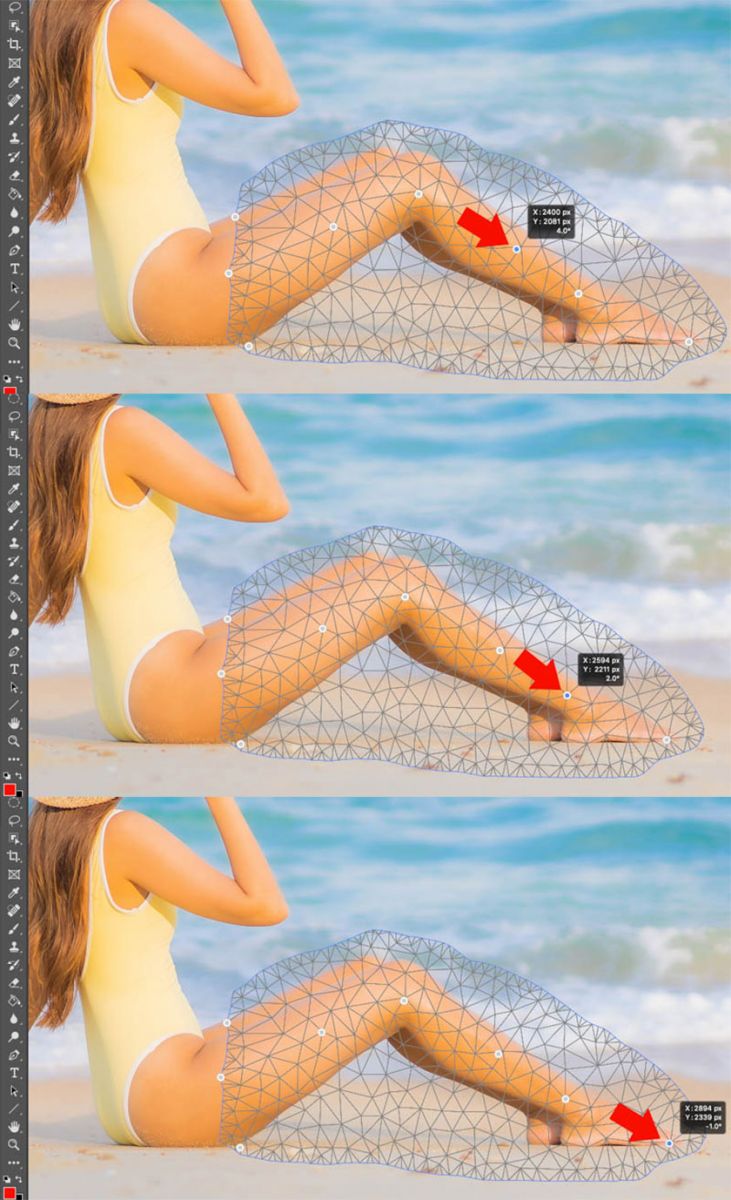
Compared to Free Transform, this tool is a bit more difficult to use. To make the legs longer and slimmer, you can create an anchor point on the calf and then push it in to help slim the legs.
.jpg)
To adjust the smudged area, create a Layer Mask => use the black Brush tool => press the [ ] key to change the size => paint on the smudged area to help restore the details of the original photo. In this example, we only lengthen the legs, so just keep the changed leg to complete.

Here are 2 ways to lengthen your legs with Photoshop, the simplest and easiest to do. Hope you can apply them successfully to create many beautiful photos!
Installation and support contact information:
🏡 SADESIGN Software Company Limited
📨 Email: phamvansa@gmail.com
🌍 Website: https://sadesign.ai


.png)


