Best Selling Products

Upgrade Duolingo Super
29 USD

Genuine Adobe Illustrator account
99 USD

Freepik Premium Account
59 USD

Capcut Pro 1 Year
39 USD

Adobe Premiere Pro Account
99 USD

Windows 10 & 11 Pro Key
36 USD

MidJourney Account
29 USD

ChatGPT Plus Account (GPT-4)
16 USD

Adobe Photoshop Copyright - Full App
120 USD

Upgrade Genuine Office 365
49 USD

Upgrade genuine Capture One account
120 USD

Plugin Retouch4me
69 USD

Copyright Adobe Lightroom Account
59 USD

Autodesk All App Account Copyright
120 USD

Genuine Cheap Canva Pro
39 USD
Secrets to Naturally Lengthen Legs in Photoshop: A Detailed and Effective Guide
Nội dung
- 1. Core principles of adjusting body proportions in post-production
- Golden ratio and body harmony
- Preserving background and surrounding objects
- 2. Quick leg-lengthening method using Marquee Tool and Free Transform
- Step 1: Select the area to adjust
- Step 2: Activate Free Transform
- Step 3: Handle transitions and finalize
- 3. Content-Aware Scale technique: The pinnacle of intelligence
- How the Content-Aware algorithm works
- Advanced implementation steps
- 4. Using Liquify to refine curves and slimness
- Forward Warp Tool in Liquify
- Maintaining leg straightness with Freeze Mask
- 5. Combining Crop Tool to optimize body proportions
- Rule of space under the feet
- Expanding space above the head
- 6. Important notes to avoid “over-photoshopped” errors
- Checking joint consistenc
- Pay attention to shadows and reflections
- Sharpness and skin texture
- 7. Using grid filters to detect background distortion
- Aesthetic thinking in body editing
- 8. The art of waist slimming and creating an S-curve with Liquify
- Using Pucker Tool to reduce the waist
- Adjusting waist curves with Forward Warp Tool
- 9. Techniques to slim arms and adjust shoulders
- Subtle arm slimming Use Freeze Mask and Forward Warp carefully.
- Enhancing shoulder shape for elegance
- 10. Unifying color and lighting after body editing
- Contouring with Burn and Dodge
- Balancing skin texture with High Pass
- 11. Conclusion
Discover how to naturally lengthen legs in Photoshop without distorting the background. A detailed guide to Content-Aware Scale, Liquify, and Marquee Tool techniques to perfectly enhance body proportions.
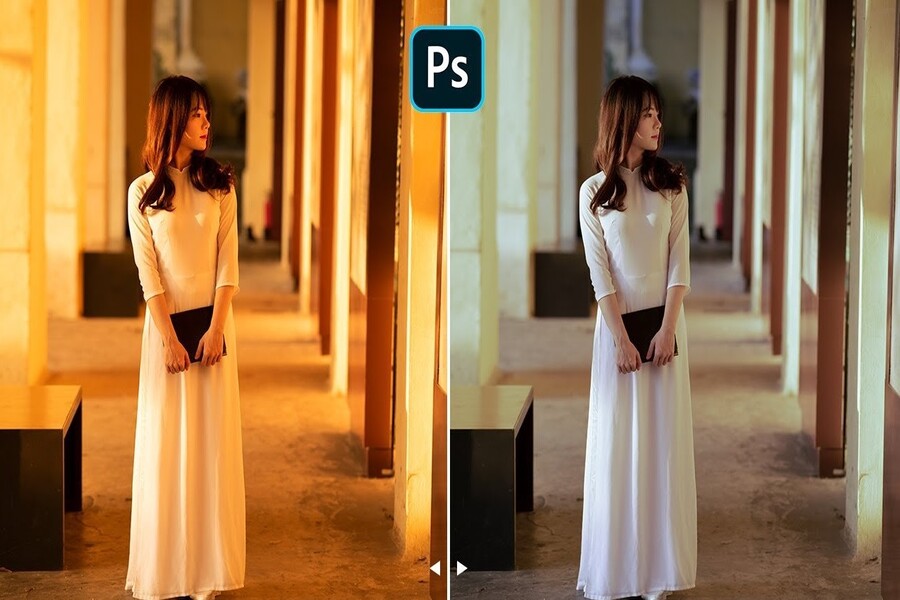
1. Core principles of adjusting body proportions in post-production
Altering body shape requires an understanding of basic anatomy and strong aesthetic sense to avoid unrealistic results. Leg-lengthening should focus on creating the illusion of slimmer legs without changing bone structure or distorting surroundings.
(2).jpg)
Golden ratio and body harmony
The human body has natural proportions between the upper body and legs. When lengthening legs in Photoshop, it is recommended to increase only about 5% to 10% of actual length to maintain natural appearance. Over-editing makes legs look unnatural and easily noticeable. The key is adjusting so the legs appear longer while hips, calves, and ankles retain their natural elegance.
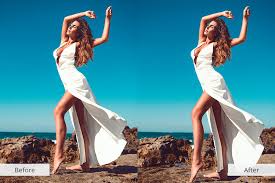
Preserving background and surrounding objects
A common mistake is distorting background elements like horizons, fences, or floor tiles when stretching legs. Professional techniques require isolating the subject or using smart tools so Photoshop preserves unrelated objects. This ensures consistency and keeps viewers focused on the subject.
2. Quick leg-lengthening method using Marquee Tool and Free Transform
This method is common and suitable for simple backgrounds like studio settings or plain walls.
Step 1: Select the area to adjust
Use the Rectangular Marquee Tool (shortcut M). Select from the upper thigh down to the feet. The selection should start from the upper thigh so the stretch is evenly distributed.
Step 2: Activate Free Transform
Press Ctrl + T (Windows) or Cmd + T (Mac). Hold Shift (in older versions) to maintain width, then drag the bottom edge downward moderately.
Step 3: Handle transitions and finalize
Press Enter to confirm. If visible seams appear, use Eraser or Layer Mask to soften transitions. This method is fast and effective.
3. Content-Aware Scale technique: The pinnacle of intelligence
.jpg)
For complex backgrounds, Content-Aware Scale helps extend legs without distorting surroundings.
How the Content-Aware algorithm works
This tool detects low-detail and high-detail areas. It stretches less important areas while preserving key elements.
Advanced implementation steps
Duplicate the layer, select Content-Aware Scale from Edit, and stretch downward. Use Layer Mask to protect the upper body for better results.
4. Using Liquify to refine curves and slimness
Liquify allows sculpting body shape for better proportions.
Forward Warp Tool in Liquify
Press Ctrl + Shift + X and use Forward Warp Tool (W). Gently push areas inward for slimming effects.
Maintaining leg straightness with Freeze Mask
Use Freeze Mask Tool (F) to protect areas from distortion.
5. Combining Crop Tool to optimize body proportions
Rule of space under the feet
Too much space under the feet makes the subject look shorter. Crop the lower area.
Expanding space above the head
Leave more space above the head to create a taller illusion.
6. Important notes to avoid “over-photoshopped” errors
.jpg)
Checking joint consistenc
Ensure knee position remains natural.
Pay attention to shadows and reflections
Adjust shadows to match stretched legs.
Sharpness and skin texture
Use Sharpen or Add Noise to maintain texture.
7. Using grid filters to detect background distortion
Use Grid or Rulers (Ctrl + R) to check straight lines and fix distortions.
Aesthetic thinking in body editing
Editing should enhance natural beauty, not completely change it.
8. The art of waist slimming and creating an S-curve with Liquify
(1).jpg)
Using Pucker Tool to reduce the waist
Use Pucker Tool (S) to shrink the waist area.
Adjusting waist curves with Forward Warp Tool
Use soft brush settings to shape a natural curve.
9. Techniques to slim arms and adjust shoulders
Subtle arm slimming
Use Freeze Mask and Forward Warp carefully.
Enhancing shoulder shape for elegance
Slightly lift shoulders and narrow the neck area.
10. Unifying color and lighting after body editing
Contouring with Burn and Dodge
Enhance highlights and shadows to add depth.
Balancing skin texture with High Pass
Use High Pass filter with Overlay blending to restore details.
11. Conclusion
Leg-lengthening in Photoshop is a powerful technique for improving appearance. By combining tools like Marquee Tool, Content-Aware Scale, and Liquify, anyone can achieve model-like proportions. The key is subtlety, patience, and attention to detail to maintain natural results. Practice regularly to master these techniques and produce professional-quality images.


VIP Products


Best Selling Products
Upgrade Duolingo Super
29 USD
Genuine Adobe Illustrator account
99 USD
Freepik Premium Account
59 USD
Capcut Pro 1 Year
39 USD
Adobe Premiere Pro Account
99 USD
Windows 10 & 11 Pro Key
36 USD
MidJourney Account
29 USD
ChatGPT Plus Account (GPT-4)
16 USD
Adobe Photoshop Copyright - Full App
120 USD
Upgrade Genuine Office 365
49 USD
Upgrade genuine Capture One account
120 USD
Plugin Retouch4me
69 USD
Copyright Adobe Lightroom Account
59 USD
Autodesk All App Account Copyright
120 USD
Genuine Cheap Canva Pro
39 USD