Best Selling Products
Sharing a very simple way to edit gif photos with Photoshop
Nội dung
- 1. How to create GIF images with Photoshop
- 1.1. Create a new Gif image
- 1.2. How to make GIF images from existing image folders
- 2. How to edit gif images with Photoshop
- 2.1. Open the GIF image file that needs to be edited
- 2.2. Resize GIF images
- 2.3. Edit frames in Photoshop's timeline
- 2.4. Apply adjustment layers
- 2.5. Repeat GIF
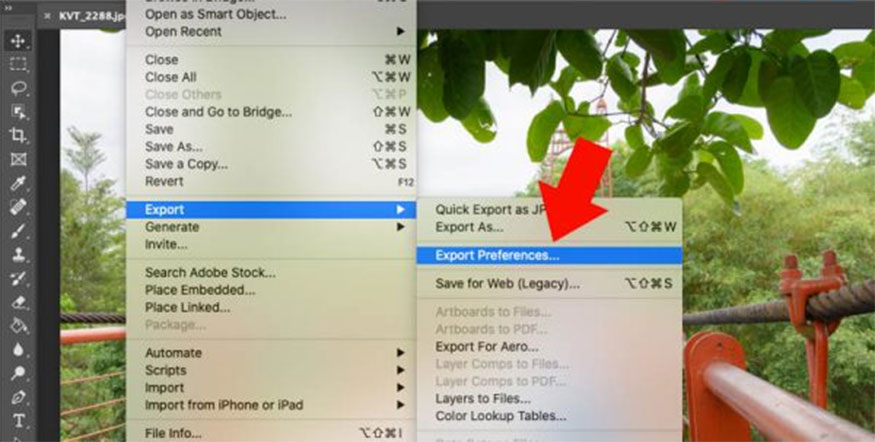
- 2.6. Export using the Save for Web option
- 3. How to separate gif image background with Photoshop
- 4. Frequently asked questions
- 4.1. Is it possible to add text to GIF images in Photoshop?
- 4.2. Is a GIF a video?
- 4.3. What is the file size of a GIF?
GIF images are animated images, so many people think that editing this type of image is quite difficult. However, we can completely do it edit gif photos with photoshop Extremely simple with just a few steps. Detailed instructions will be introduced by Sadesign in the following article.
1. How to create GIF images with Photoshop
1.1. Create a new Gif image
To create a new image GIF: First, you need to prepare an object to insert onto the image, requiring this object to be an image with the background removed. After having the background separated image, do the following:
-
Step 1: Open Photoshop, go to the File tab => select the New command => choose an arbitrary size, the specialized ratio is 1:1 to help GIF images display best.
-
Step 2: Use the Paint Bucket Tool to fill the background color of the image.
-
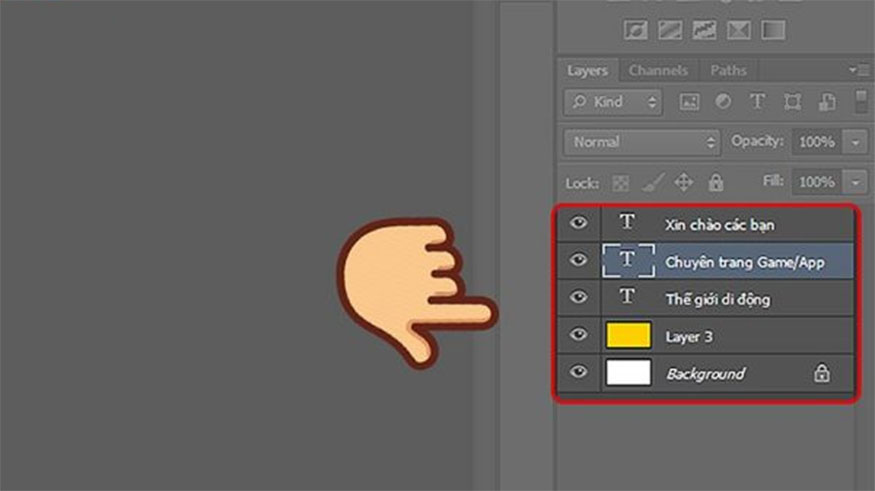
Step 3: Use the Rectangle Marquee Tool to create a selection surrounding the object => press Ctrl + C to copy. Switch to the background image file made in step 2 then press Ctrl + V to paste the object on the image. Immediately after that you will see a new layer created above the background layer.
-
Step 4: Do the same until all objects have been placed on the background image. The position and size of objects can be arranged as desired with the application of the Move Tool and Free Transform.
-
Step 5: Go to the Window tab to open Timeline in Photoshop => select Create Frame Animation.
-
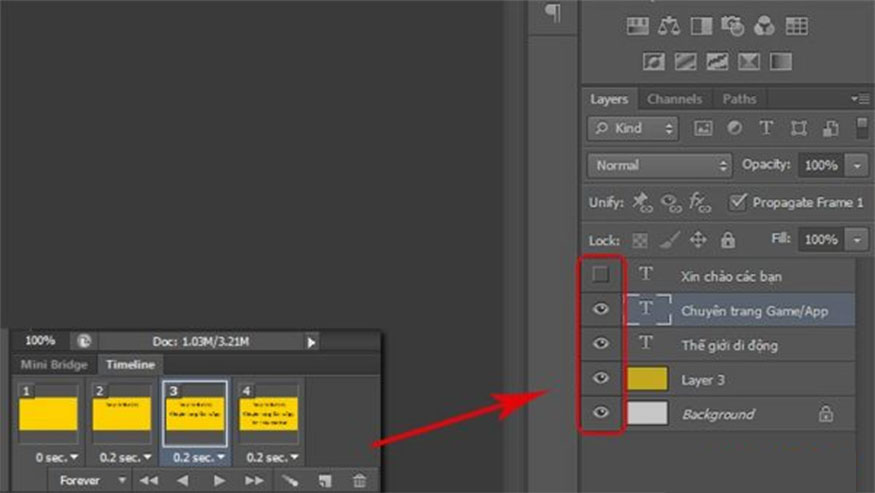
Step 6: To create a GIF image, place the following layers at a starting position a short distance behind the previous layer. Drag the time bar on the Timeline to a certain point to create a landmark. Shorten the display duration of all layers on the Timeline by the position of this landmark.
-
Step 7: To preview the results, select Play in the lower left corner of the Timeline. When you are satisfied with the editing results, you can export the GIF image file by going to the File tab => selecting the Save for Web command => GIF format, choosing the number of colors and image quality as desired => Save to save the file. GIF images to your computer.
1.2. How to make GIF images from existing image folders
If you have a folder containing many photos and want to create GIF images with Photoshop, do the following:
-
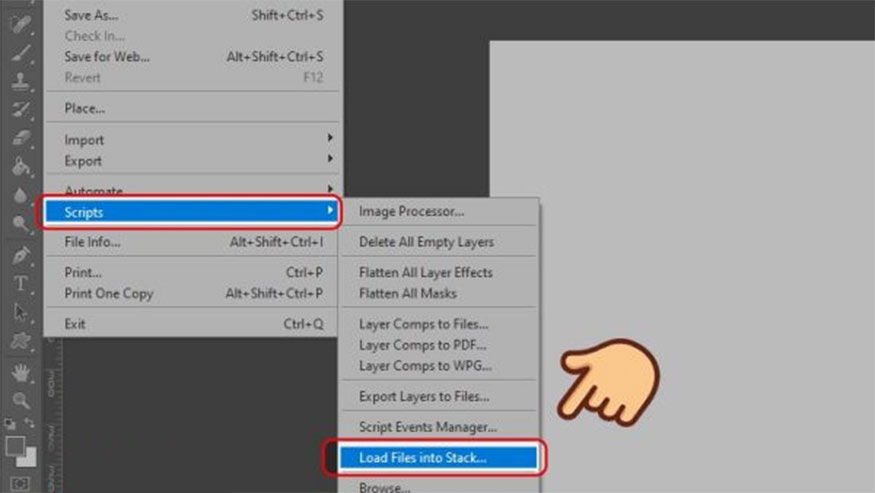
Step 1: Open Photoshop => File => Select Scripts command => Select Load Files into Stack command. Click Browse to select the folder containing the images you want to create GIF => click OK.
-
Step 2: Select the photo you want to make a gif in Photoshop software, use the Horizontal Type Tool (T) to write text on the photo.
-
Step 3: Go to the Window tab to open Timeline in Photoshop => click Create Frame Animation, a frame will appear right at the bottom of Photoshop's working screen.
-
Step 4: Click on the three dashes icon right in the upper right corner of the Timeline => select Make Frames From Layers to have the layers converted into frames on the Timeline.
-
Step 5: If you want to change the order of appearance of the frames, drag and drop them as desired. To change the display duration of each frame, click the water drop icon right below each frame, then select the desired values.
-
Step 6: Click the Play button to preview the result. If satisfied, save the file by clicking Save for Web => select GIF format, number of colors, image quality => select Save to save the GIF image file about computers.
2. How to edit gif images with Photoshop
2.1. Open the GIF image file that needs to be edited
If you want to open GIF file in Photoshop, follow these steps:
-
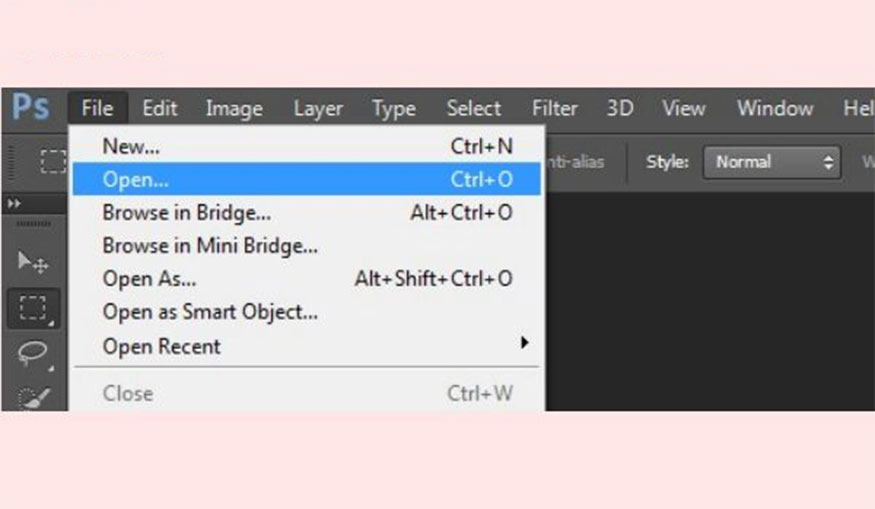
Step 1: Open Photoshop software, then select the File tab => select the Open command => find the GIF file you want to edit then double-click it.
-
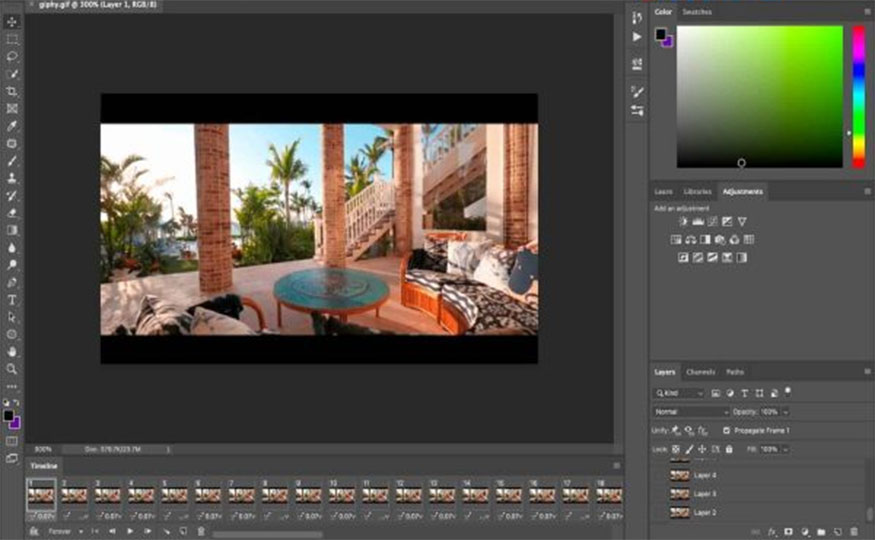
Step 2: Open the GIF file in Photoshop and you will see the image's layer displayed right in the Layers window. At the same time, the image frames are displayed in the Timeline window. Click Play to preview the GIF.
2.2. Resize GIF images
If you want to change GIF size in Photoshop we do as follows:
-
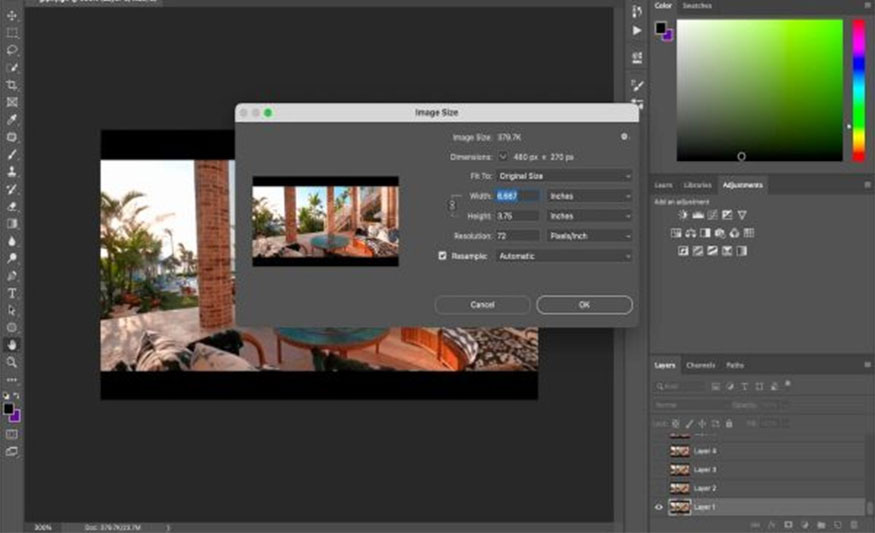
Step 1: Right on the menu bar, go to the Image tab => select Image Size command. Here enter the desired width and height values for the GIF image => click Constrain Proportions to maintain the image aspect ratio.
-
Step 2: Click OK to confirm the size change. You will immediately see the GIF image has been reduced or enlarged according to the value you just entered.
2.3. Edit frames in Photoshop's timeline
To fix the frame in dPhotoshop's timeline is as follows:
-
Step 1: Right on the menu bar, go to Window => click Timeline to open the Timeline window and you will see the frame of the GIF image displayed as a small square.
-
Step 2: If you want to delete a frame, right-click on that frame and then select the Delete Frame command.
-
Step 3: To move the frame, drag and drop this frame to the desired position on the Timeline.
-
Step 4: If you want to copy a frame, right-click on that frame => select Duplicate Frame command => drag and drop the copy to the desired location on the Timeline.
-
Step 5: To adjust the frame content, click on the frame to activate the corresponding layer. Use the same adjustment layer tool to transform the layer.
2.4. Apply adjustment layers
Apply an adjustment layer to the photo GIF in Photoshop we follow these steps:
-
Step 1: Right in the menu bar, go to the Window tab => select the Adjustments command and you will see icons of adjustment layers such as Brightness/Contrast, Hue/Saturation, Color Balance, Curves, Levels and other layers.
-
Step 2: Click on the icon of the adjustment layer you want to apply to the GIF image, then a new adjustment layer will be created, they will be above the other layers.
-
Step 3: To adjust parameters for adjustment layers by dragging the slider or entering values as desired. Press the Auto button so Photoshop can automatically adjust.
-
Step 4: Apply adjustment layers to all frames of the GIF image, create a group containing all the layers and adjustment layers by pressing Ctrl + A, then press Ctrl + G to create a new group => drag the adjustment layer into this group.

2.5. Repeat GIF
To repeat GIF in Photoshop, do the following:
-
Step 1: Go to the Window tab => open the Timeline window and you will see the GIF image frame displayed as a small square.
-
Step 2: In the left corner of Timeline you will see an icon in the form of two curved arrows, click on this icon to open the menu to choose the number of GIF repetitions.
-
Step 3: Choose the number of times to repeat the GIF as desired. If you want the GIF to run continuously without stopping, select Forever.
2.6. Export using the Save for Web option
To export a GIF image file with the Save for Web option, do the following:
-
Step 1: Go to the File tab => select Save for Web (Legacy) and you will see a new window appear with options to optimize the GIF image file.
-
Step 2: Choose the GIF format and the desired number of colors. You should keep the color number at 256 to ensure the highest image quality.
-
Step 3: Choose the compression type Lossy to reduce the image file size, remember to set the lowest Lossy value to avoid reducing image quality.
-
Step 4: Click Play in the lower left corner of the Save for Web window to preview. If you are satisfied, click the Save button to save the GIF image file.
3. How to separate gif image background with Photoshop
To separate image background gif using Photoshop, we do the following:
-
Step 1: Open the GIF file in Photoshop => select the frame you want to separate the background. Next, select the layer corresponding to the frame in the Layers window.
-
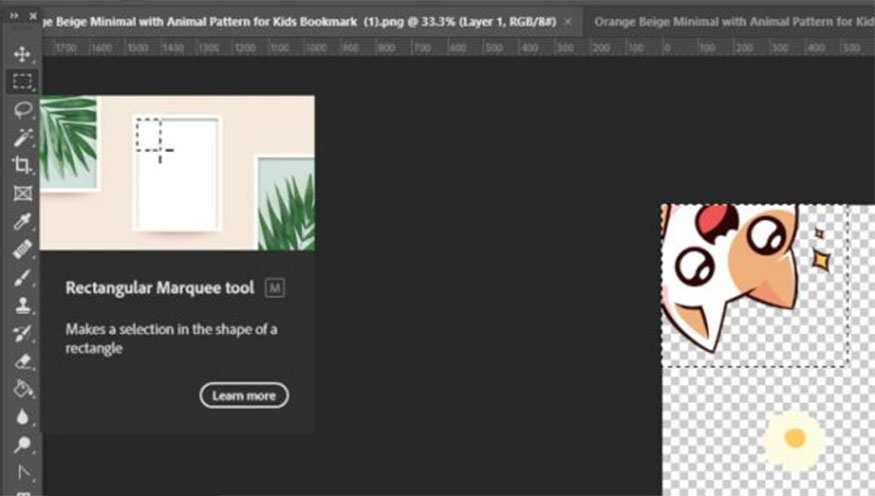
Step 2: Use the Magic Wand Tool to select the background of the image. The tool's sensitivity can be adjusted by changing the Tolerance value. To select many different background areas, you can press the Shift key combination.
-
Step 3: Once you have selected the background, press the Delete key combination to delete the background from the layer. So we can separate the image from the background.
-
Step 4: Repeat steps 2 to 4 for the remaining frames of the GIF image. After separating, export the GIF image file as instructed above.
4. Frequently asked questions
4.1. Is it possible to add text to GIF images in Photoshop?
We can completely add text to gif images with the following steps:
-
Step 1: Open the GIF file in Photoshop => select the frame you want to add text => select the layer corresponding to the frame in the Layers window.
-
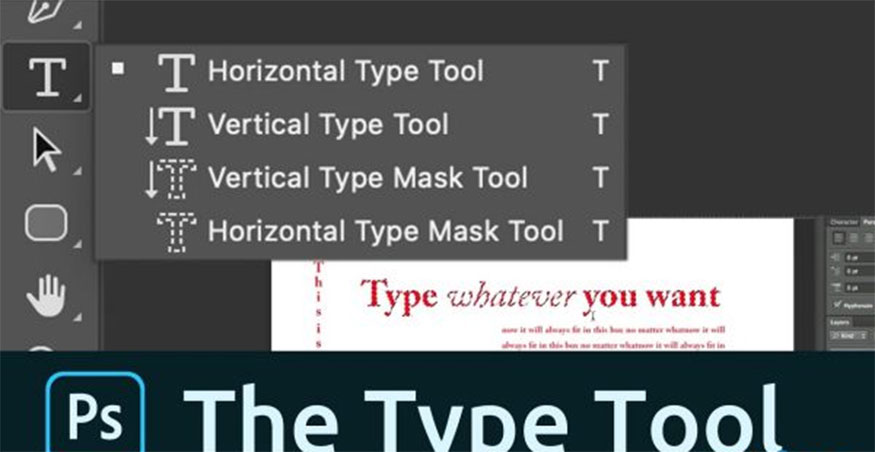
Step 2: Use the Type Tool to create a selection for the text, then enter the text you want to display on the GIF image. Adjust the size, font style, color, and text alignment as desired.
-
Step 3: After entering the text, click outside the selection area and you will see a new layer created containing the text.
-
Step 4: Repeat for the remaining frames of the GIF image. After adding text, you can export the GIF image file according to the instructions.
4.2. Is a GIF a video?
GIF is not the same as Video, instead, GIF is a form of animation without sound. This type of photo is created by stitching multiple still images together. Meanwhile, video is a multimedia medium, created by recording images and sounds in real-time. The video may contain many different effects, sounds, and transitions.
4.3. What is the file size of a GIF?
The file size of GIF depends on many factors such as: Number of frames, color, size, compression type. Usually, the file size of GIF is larger than other formats like JPEG or PNG.

Because GIF often uses a fixed color palette of 256 colors, other formats have millions of colors. We can reduce GIF file size by using specialized software or websites to optimize GIFs.
Hopefully, the sharing that Sadesign brings in the above article has helped you get the job done edit gif photos with Photoshop!


