Best Selling Products

Adobe Premiere Pro Account
99 USD

Genuine Cheap Canva Pro
39 USD

MidJourney Account
29 USD

Plugin Retouch4me
69 USD

Genuine Adobe Illustrator account
99 USD

ChatGPT Plus Account (GPT-4)
16 USD

Autodesk All App Account Copyright
120 USD

Copyright Adobe Lightroom Account
59 USD

Upgrade Duolingo Super
29 USD

Windows 10 & 11 Pro Key
36 USD

Upgrade genuine Capture One account
120 USD

Upgrade Genuine Office 365
49 USD

Freepik Premium Account
59 USD

Adobe Photoshop Copyright - Full App
120 USD

Capcut Pro 1 Year
39 USD
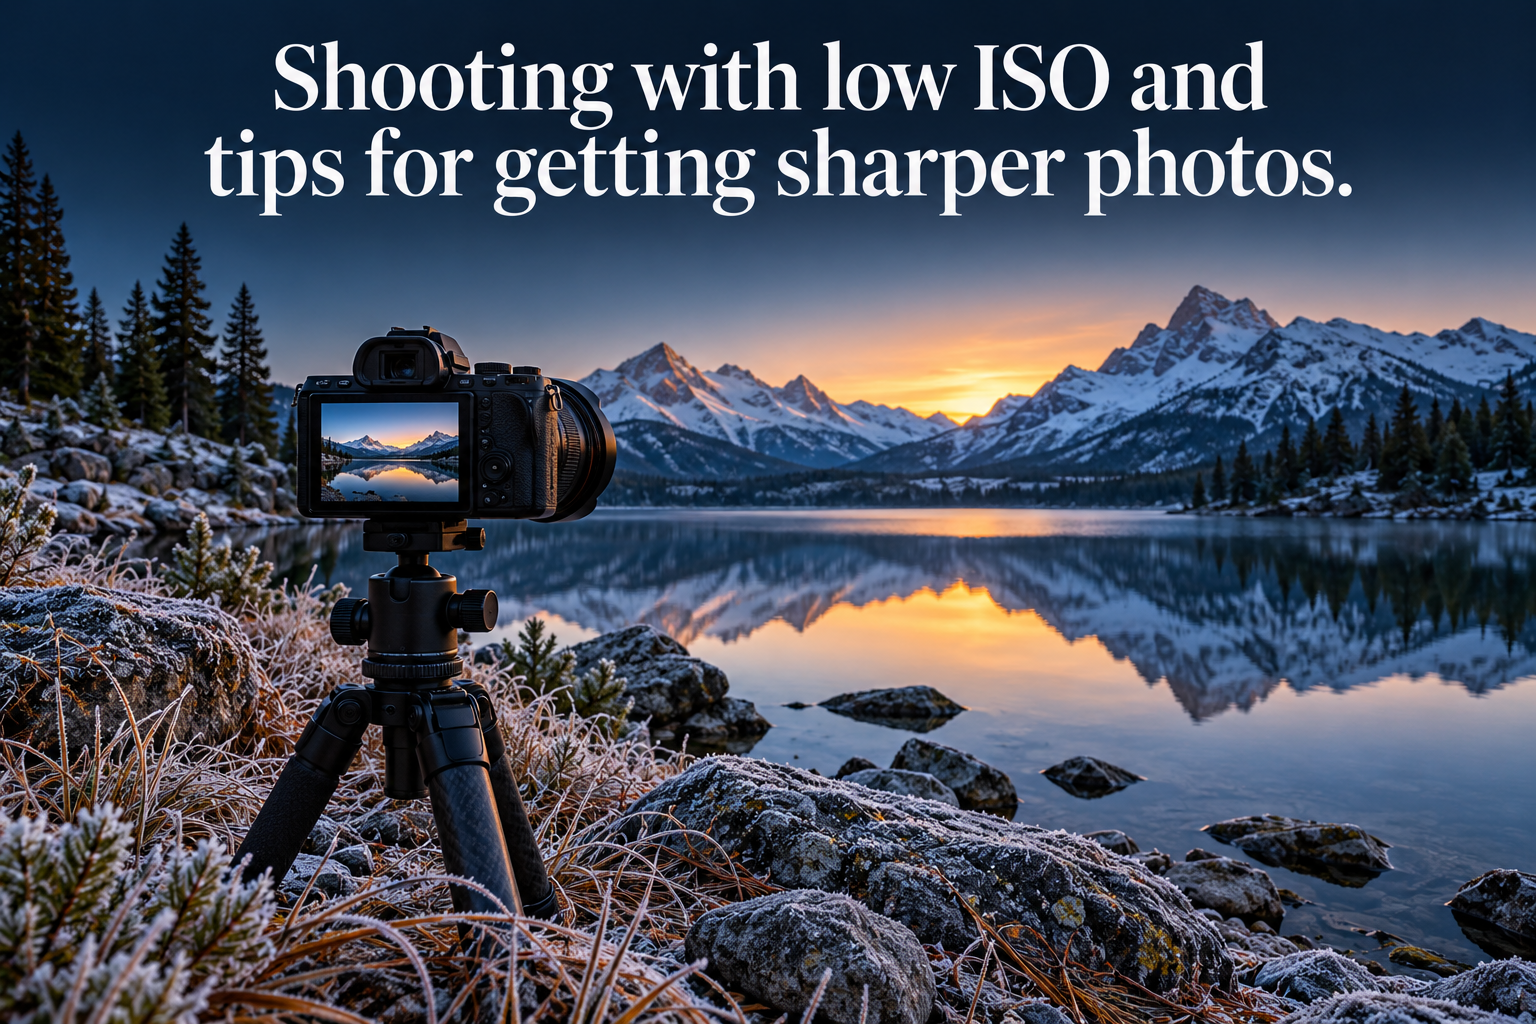
Shooting with low ISO and tips for getting sharper photos.
Nội dung
- 1. The outstanding benefits of shooting at low ISO.
- 1.1 When should you increase the ISO before noise appears?
- 1.2 Comparing high ISO and low ISO during post-production editing
- 2. Precise lighting technique with low ISO setting.
- 3. Tips for taking quality photos at low ISO in low light conditions.
- 4. Controlling light sensitivity and its impact on content quality.
Many photographers encounter the same problem when reviewing photos on a computer. Fine grain appears on portrait skin, details in landscape photos are blurred, and dark areas are speckled with unpleasant color spots. The cause often lies in how the sensor handles light sensitivity. Lowering the ISO significantly reduces digital noise, resulting in clearer images. However, this requires the photographer to work more actively with lighting and camera settings; otherwise, the frame is easily overexposed or blurry. This article will help you understand why low ISO delivers superior quality and how to apply it in practice.
1. The outstanding benefits of shooting at low ISO.
ISO determines the degree of signal amplification by the sensor. At low values such as 50, 100, or 200, the sensor operates closest to its natural state, meaning it interferes least with the original light signal. This results in a range of clear benefits for image quality.
The first benefit is a significant reduction in noise. Noise doesn't disappear completely, as every sensor produces a certain amount of background noise, but at low ISO it's so minimal that it's almost imperceptible to the naked eye, even when viewing images at large sizes.
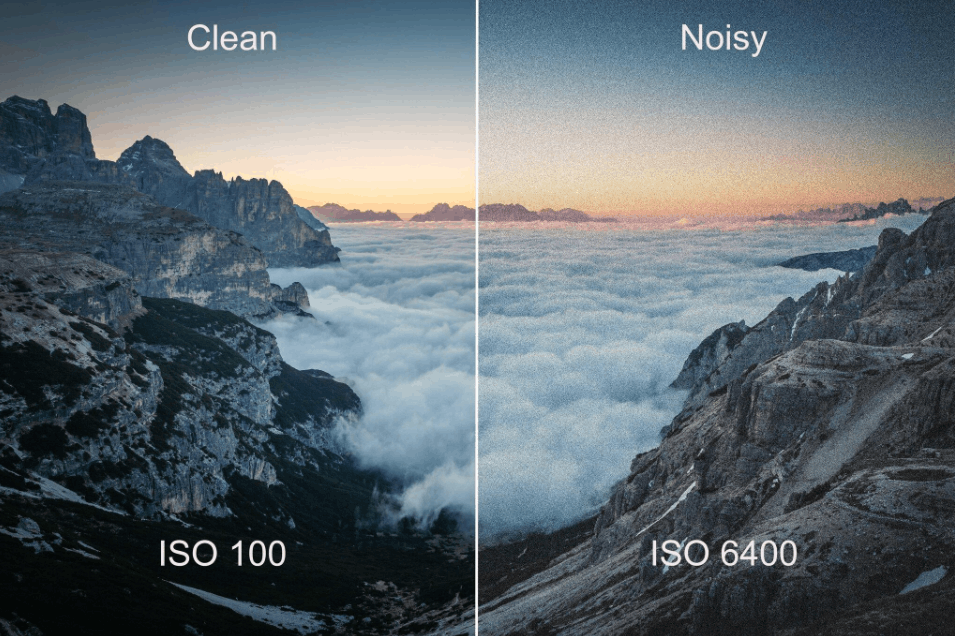
The second benefit is a wide dynamic range. The sensor captures detail in both deep shadows and bright highlights, so shadows and highlights don't clump together into solid patches. This results in better depth of field in the image, even in scenes that don't have strong contrast.
The third benefit is accurate color reproduction. Because the sensor isn't over-amplified, color transitions are smooth and vibrant. This is why low ISO is particularly well-suited for landscape and street photography, where the sky, water, and flat surfaces require seamless color transitions.
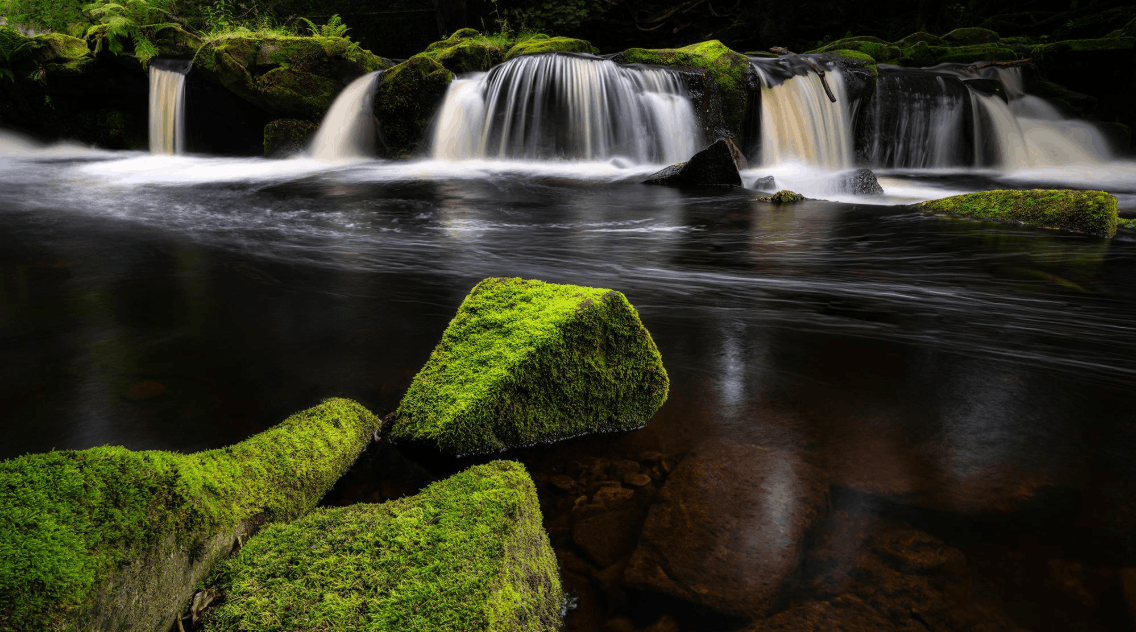
The fourth benefit is maximum detail. Small textures like stone patterns, fabric fibers, feathers, or pores are reproduced clearly instead of blending into the background. Thanks to this accuracy, you'll have more room to maneuver when adjusting colors or processing specific areas of the image.
A common mistake beginners make is thinking they can shoot in very dark areas and then adjust the brightness using software. In reality, grain is always present in the image, and when you drastically increase the brightness, both noise and color flakes hidden in the dark areas are also pushed up. The result is often much worse than getting the exposure right from the start.
1.1 When should you increase the ISO before noise appears?
Contrary to popular belief, high ISO itself doesn't directly create noise. Grain and color dots appear because the actual amount of light hitting the sensor isn't enough. When you increase the ISO, the camera only amplifies the existing signal, making the image brighter and the noise already present in that signal more apparent. Therefore, the correct principle is to prioritize finding more natural light first, before considering increasing the ISO.
You should increase the ISO when you've optimized the aperture, shutter speed, and added light sources, but the image still lacks the necessary brightness. At this point, a slightly grainy but sharp image is much better than a clean image that's blurry or has a shaky subject.
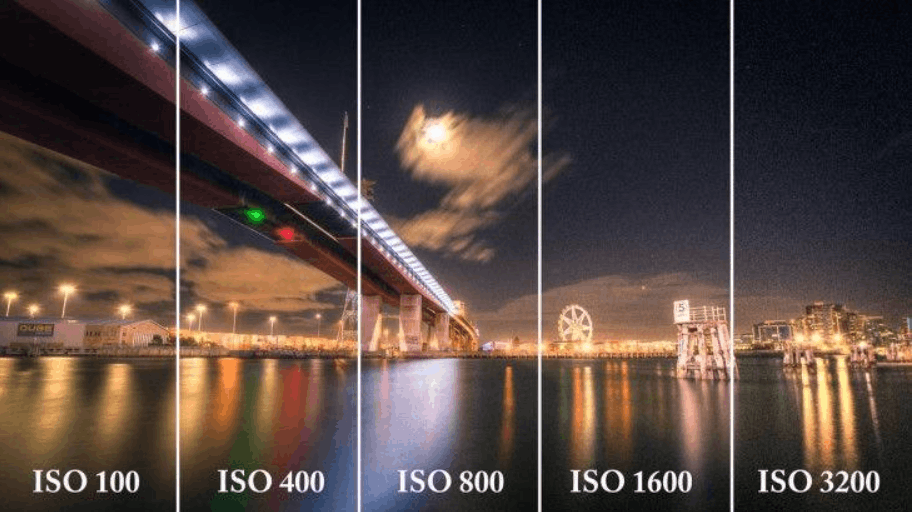
For example, when shooting indoors in low light, you can set the ISO to between 800 and 1600. This is sufficient to capture everyone in the frame without extending the exposure time, thus avoiding motion blur. For landscape photography, the ISO value changes constantly depending on the weather. When it's cloudy, 600 to 800 is usually enough. At late sunset or early morning, you should set it to between 1600 and 3200 if you're not using a tripod.
It's important to note that the numbers above are for reference only. Newer cameras with larger sensors can handle high ISOs much better than older cameras or those with smaller sensors. The best way is to test your camera yourself by shooting the same scene at different ISO levels, then zooming in to see where the noise starts to cause problems.
1.2 Comparing high ISO and low ISO during post-production editing
When editing, photos taken at low ISO yield much more natural results. Because the original file is very clean, all operations from color correction to contrast enhancement go smoothly. Photos taken at high ISO do not have this advantage, and each time you increase the brightness or adjust the color, the grain becomes more prominent.
The differences are most apparent in more advanced adjustments. When adjusting color aggressively, high-ISO images quickly show off-tone colors in neutral areas, while low-ISO images maintain smooth color transitions even when the sliders are pushed to extremes. When increasing detail, noise reduction in high-ISO images often blurs fine textures, while low-ISO images retain sharpness after noise reduction. When increasing structure and contrast, high-ISO images make grain stand out on flat surfaces, while low-ISO images highlight edges without damaging the background. When adjusting brightness intelligently, high-ISO images are prone to amplifying color patches in dark areas, while low-ISO images allow for enhancing neutral areas without distorting the color tone.
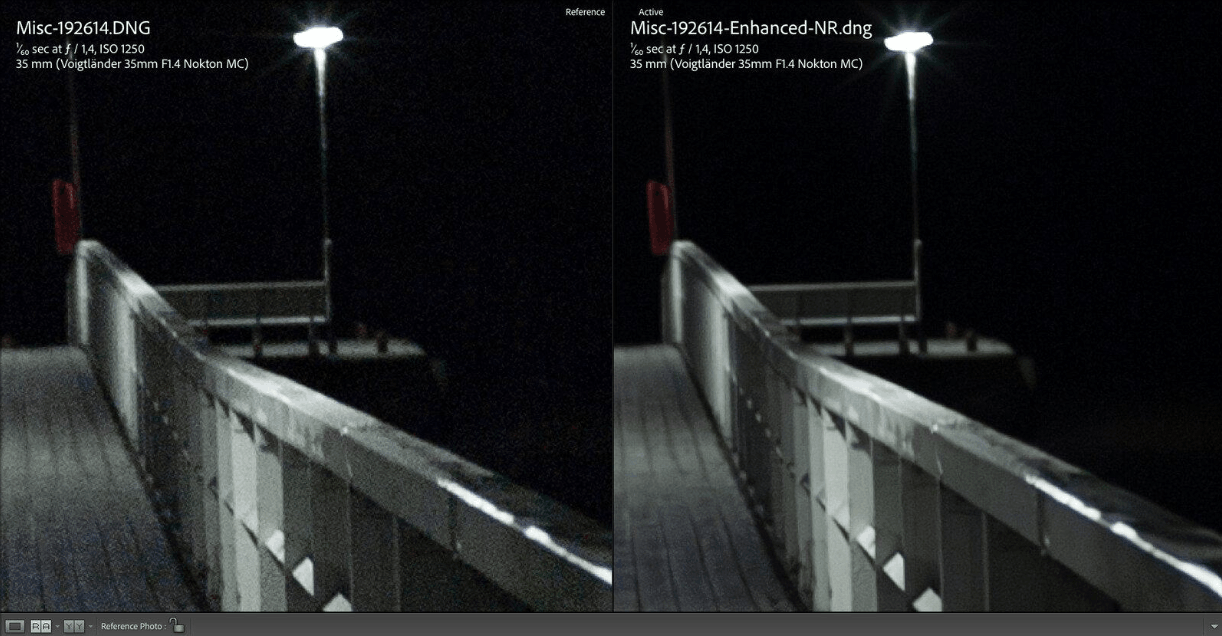
This gap widens when using AI-powered editing tools. These features suggest layouts that analyze the frame's content to recommend cropping based on key elements. Noise interferes with the recognition of faces, silhouettes, or small objects, causing the algorithm to misjudge their importance. Skin retouching tools can easily mistake noise for moles or blemishes, and erase or smooth the wrong areas. For large operations like changing the sky or adjusting lighting, the cleaner the file, the higher the chance the algorithm will produce satisfactory results on the first try.
To take full advantage of this, enable RAW format on your camera. Unlike JPEG, which is already compressed and processed, RAW files retain the maximum amount of information. Small objects and shadows are not blended into the background, so post-processing algorithms have more data to work with and produce more accurate results.
2. Precise lighting technique with low ISO setting.
Thanks to low ISO, you can obtain incredibly clear photos. However, if the exposure triangle isn't properly balanced, most photos will be underexposed or blurry. When working in the ISO range of 50 to 200, you need to adjust both your equipment and shooting habits to adapt to the new conditions. The three factors below are fundamental to this approach.
-
Find abundant light sources. To get low-ISO photos with clean, noise-free images, you need plenty of light. When shooting outdoors, look for open shaded areas, wait for cloudy weather, or use a large white wall as a reflector. In a studio, this is easier; just arrange the main light, auxiliary lights, and backlight appropriately for the subject.
-
Widen the aperture. Set the aperture between f/1.8 and f/2.8, or at least between f/3.5 and f/5.6 if you're using a kit lens. The smaller the f-number, the larger the aperture and the more light enters. When done correctly, you can still take sharp photos at ISO 100 even in the shade. Remember that a large aperture reduces the depth of field, so focus very carefully, especially for close-up portraits.
-
Choose an appropriate shutter speed. When handheld, a safe threshold to avoid blur from camera shake is usually 1/125 or 1/160 second. If the light is still insufficient, you can lower it to 1/60 or 1/80 second, but then you'll need to keep your elbow close to your body to reduce shake, or use a tripod. Cameras with in-body or lens image stabilization will give you a few more levels of safety, however, for moving subjects, you'll still need a faster shutter speed.
In addition to the three factors above, get into the habit of monitoring the histogram instead of just looking at the screen. Adjust the exposure so that the histogram leans to the right without being overexposed, because the bright areas of the sensor contain more information and less noise than the dark areas. With RAW files, this method helps you get a rich and clean dataset, then slightly reduce the exposure in post-processing if needed.
You can also use the flash to add some extra light when using low ISO. This method has a drawback to be aware of. If there are no other light sources around, the subject will appear flat. Low sensitivity prevents the camera from capturing reflected light from walls or ceilings, so when using a direct flash, you lose the depth created by shadows. To overcome this, point the flash at the ceiling or wall, or use a diffuser for softer, more natural light.
3. Tips for taking quality photos at low ISO in low light conditions.
When light is almost nonexistent, keeping the ISO low requires more technique. Here are some methods to help you get clean photos even in the dark.
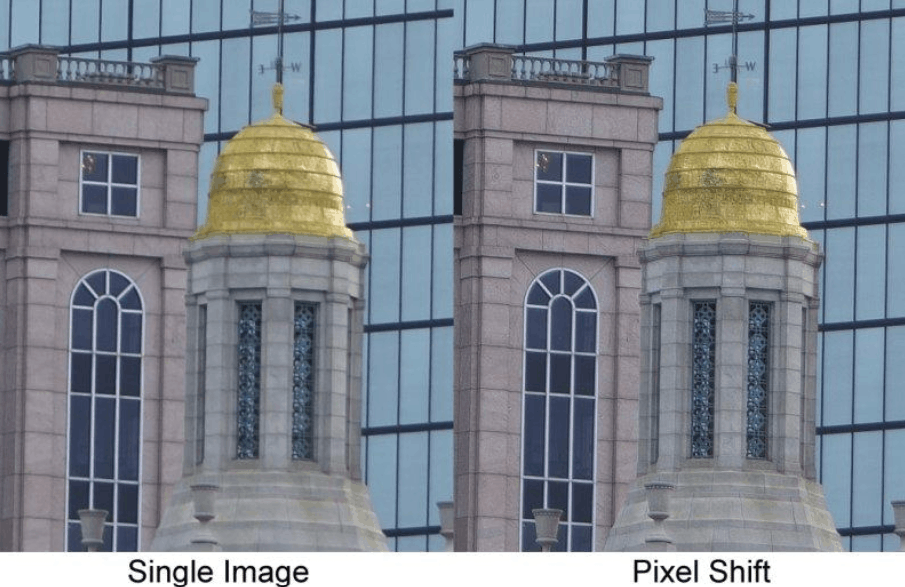
First is the Pixel Shift technique. The camera takes a series of small frames in quick succession, with the sensor shifting a very short distance between shots, thereby capturing full color information at each pixel. When the frames are combined, the resolution increases and color noise is partially reduced. This technique is most effective with static scenes and requires a very stable tripod.
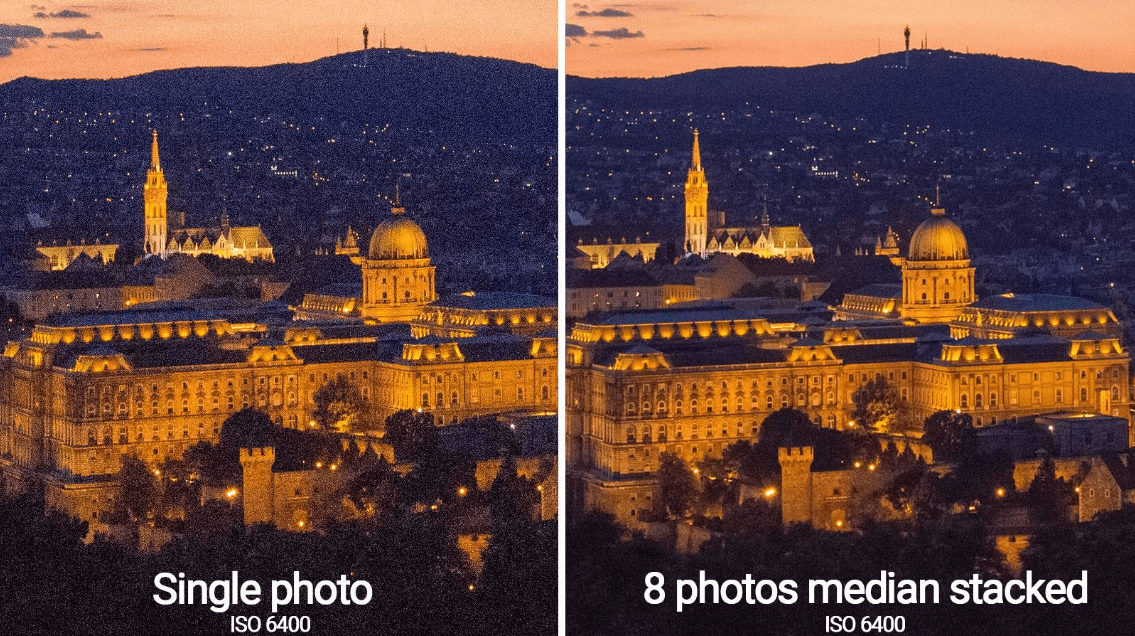
Next is the method of averaging multiple frames. You take multiple shots with the same settings, then import them into RAW processing software to combine them. Because random noise changes with each shot while the image content remains the same, the algorithm will remove most of the random noise. The image doesn't automatically become brighter, but the noise is significantly reduced, sometimes disappearing completely. Then you adjust the brightness and saturation in image editing software. This method is very suitable for starry skies or still night scenes.
A tripod is an almost indispensable companion. When the camera is stable, you can extend the exposure time by a few seconds or even tens of seconds, while keeping the ISO at 100. This is the most direct way to compensate for insufficient light without sacrificing image quality. Combine this with a remote shutter release or timer mode to avoid camera shake when pressing the shutter button, and turn off image stabilization if the camera is mounted on a tripod.
One often overlooked factor is sensor temperature. During continuous shooting, the sensor gradually heats up and generates significant thermal noise. If your photos look cluttered even at low ISO, it's possible the camera has been working for too long without a break. Simply pausing for a few minutes and turning off the screen is enough to reduce abnormally bright pixels, resulting in cleaner images. For long night shoots, this should become a habit.
You can also take advantage of available artificial light in the scene, such as streetlights, signs, or window lights. A well-planned composition will place the subject near these light sources to increase the amount of natural light reaching the sensor. If you must bring a light source, choose a small, dimmable LED light to supplement the lighting without disrupting the scene's atmosphere.
4. Controlling light sensitivity and its impact on content quality.
Controlling ISO sensitivity isn't just a technical issue. It directly impacts the commercial value and visual style of the product you create. By keeping the ISO as low as possible, photographers preserve perfect detail, natural texture, and image flexibility in subsequent processing steps. The result is a noise-free original file, ready for editing, printing, or uploading to various platforms while maintaining quality.
For professional content creators, this offers several tangible benefits. Commercial product photos need a smooth surface and accurate colors to build customer trust. Portrait photos require skin with a natural texture, free from grain. Landscape photos need a smoothly transitioning sky and clear, detailed shots of distant objects when printed in large formats. Even social media content, often viewed on small screens, benefits from clean source files because image compression platforms are very aggressive and easily reveal noise.
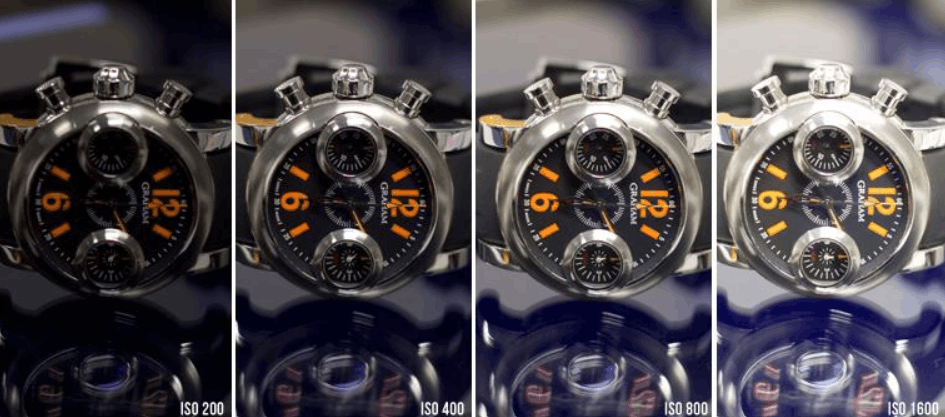
Equally important is productivity. A clean file results in shorter editing times, less need for denoising or error correction, and more reliable results from automated tools. This allows you to dedicate more time to creative thinking.
Finally, remember that low ISO is a goal, not a rigid rule. A crucial moment sometimes requires accepting a high ISO to maintain the necessary speed and sharpness. The important thing is to understand the trade-offs involved, always prioritize finding more light first, intentionally balancing aperture, shutter speed, and ISO before deciding to increase sensitivity. Once you master this principle, you'll be able to capture clear, detailed images in most lighting conditions.





















VIP Products








Best Selling Products
Adobe Premiere Pro Account
99 USD
Genuine Cheap Canva Pro
39 USD
MidJourney Account
29 USD
Plugin Retouch4me
69 USD
Genuine Adobe Illustrator account
99 USD
ChatGPT Plus Account (GPT-4)
16 USD
Autodesk All App Account Copyright
120 USD
Copyright Adobe Lightroom Account
59 USD
Upgrade Duolingo Super
29 USD
Windows 10 & 11 Pro Key
36 USD
Upgrade genuine Capture One account
120 USD
Upgrade Genuine Office 365
49 USD
Freepik Premium Account
59 USD
Adobe Photoshop Copyright - Full App
120 USD
Capcut Pro 1 Year
39 USD