Best Selling Products
Simple and Effective 4x6 Photo Editing Instructions
Nội dung
- 1. Why is it necessary to edit 4x6 photos properly?
- 2. Simple steps to edit 4x6 photos
- 2.1. Choose photo editing software
- 2.2. Set photo size 4x6
- 2.3. Adjust color and light
- 2.4. Save images in the correct format
- 3. Benefits of Professional 4x6 Photo Editing
- 3.1. Ensure standard size and perfect proportions
- 3.2. Increase image quality for printing and display
- 3.3. Create a personal mark and high aesthetics
- 3.4. Save time and money
- 3.5. Increase applicability for multiple purposes
- 3.6. Make an impression on customers or partners
- 3.7. Easy sharing and storage
- 4. Notes when editing 4x6 photos
- 4.1. Use high quality original images
- 4.2. Check the aspect ratio before printing
- 4.3. Don't overdo editing
- Conclude
In the age of modern technology, 4x6 photo editing has become extremely popular, especially for those who need to prepare ID photos, profile photos or souvenir prints.
In the modern technology era, editing 4x6 photos has become extremely popular, especially for those who need to prepare ID photos, profile photos or souvenir photos. The 4x6 photo size (4x6 inches) is a widely used standard in printing services and applications in many fields. So how to edit 4x6 photos to the correct size, standard color and best quality? This article will guide you in detail on how to do it.
1. Why is it necessary to edit 4x6 photos properly?
The 4x6 photo size is a common standard in printing, with the corresponding size being 10x15 cm. Correctly resizing helps:
- Photos are not cropped or lost in detail when printed.
- Ensures harmonious proportions, suitable for photo frames or required documents.
- Enhance image quality, making photos sharper and more professional.
In addition, editing 4x6 photos also helps you optimize light, color, and remove unwanted details.
2. Simple steps to edit 4x6 photos
2.1. Choose photo editing software
To edit 4x6 photos, you can use popular software such as:
- Adobe Photoshop : Professional software with full editing tools.
- Canva: Suitable for beginners with friendly interface.
- Microsoft Paint or Photos (Windows): Basic, easy-to-use choice.
- Snapseed or PicsArt (mobile): For those who want quick editing on their phone.
2.2. Set photo size 4x6
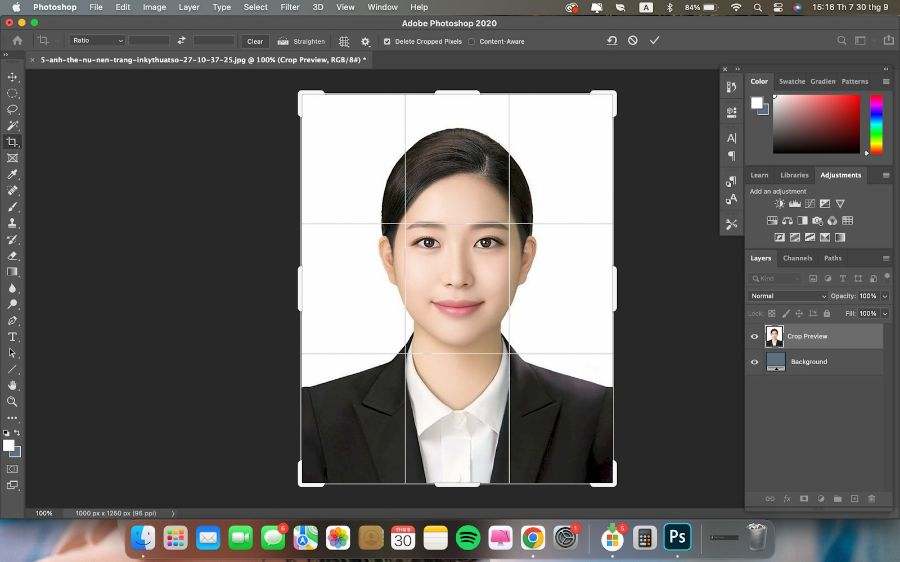
To create a standard 4x6 photo, you need to resize it:
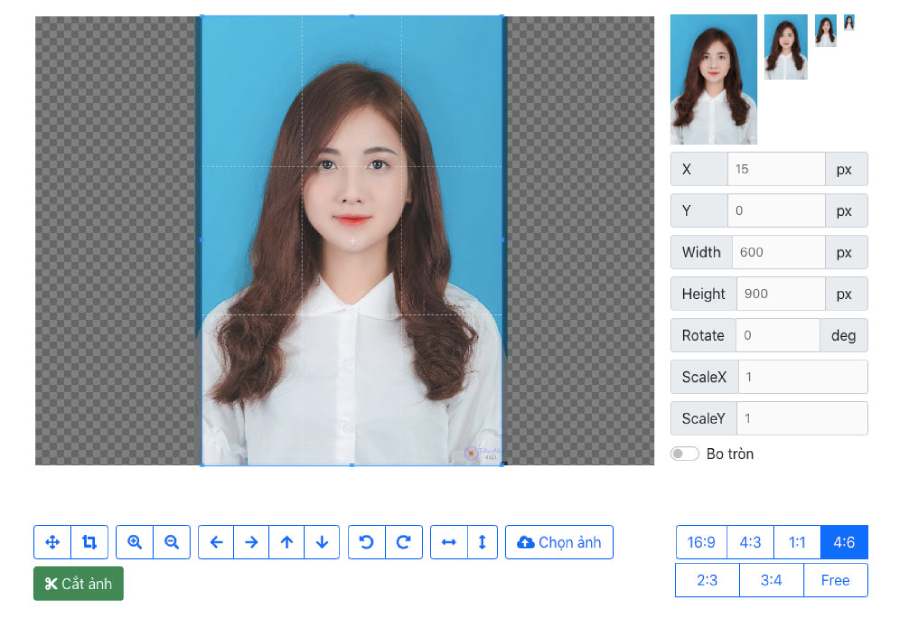
- Size in pixels: 1200x1800 pixels (at 300 DPI resolution).
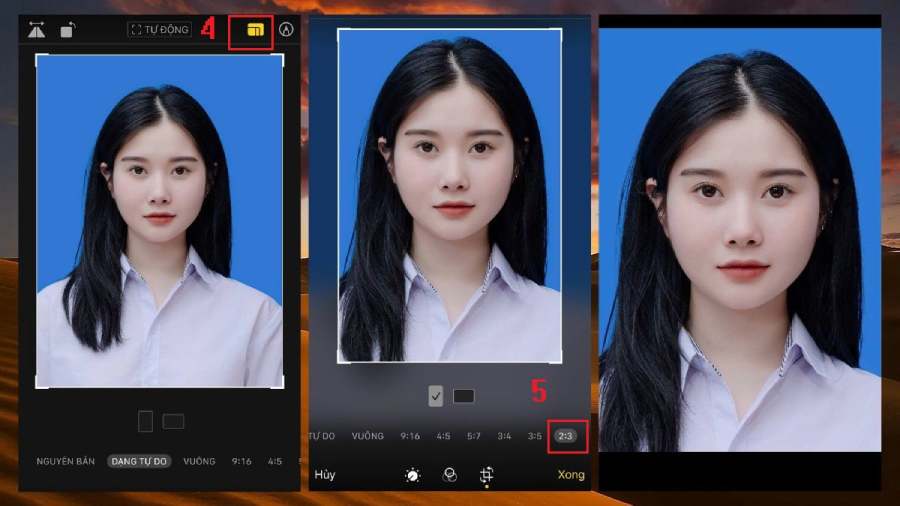
- Crop Tool: In software like Photoshop, select a 2:3 ratio or enter the 4x6 inch dimensions directly.
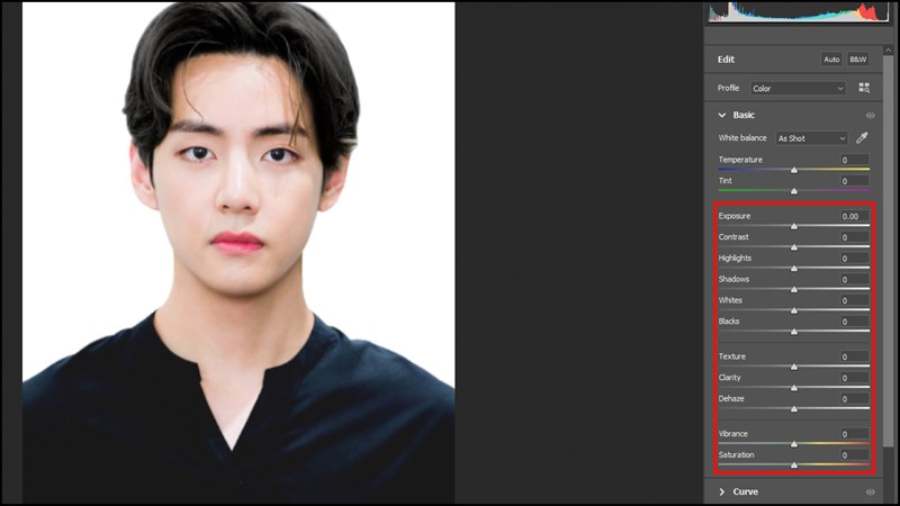
2.3. Adjust color and light
A photo with good color and light will be more attractive. You should:
- Use the Brightness/Contrast tool to adjust the lighting.
- Use Color Balance to adjust colors more naturally.
- Remove excess details using the Spot Healing Brush or Clone Stamp (in Photoshop).

2.4. Save images in the correct format
After editing, save the image in the appropriate format:
- JPEG: For printing and sharing.
- PNG: Long-term storage, no quality loss.
Don't forget to choose high resolution (300 DPI) to ensure sharp printed images.
3. Benefits of Professional 4x6 Photo Editing
4x6 photos are one of the most popular photo sizes, widely used in many fields such as souvenir printing, ID photos, job applications, and personal documents. However, not everyone realizes the importance of professional 4x6 photo editing. This is not only a way to improve image quality but also brings many practical benefits, helping you optimize your work and create a strong impression.
3.1. Ensure standard size and perfect proportions
By editing your 4x6 photo professionally, you can easily ensure that the photo is the correct size and proportions. This is especially important in cases where the photo is to be printed or used for official purposes such as ID photos or job applications.
Without proper editing, photos can appear distorted, cropped, or out of frame. Professional editing helps you:
- Set the correct size to 4x6 inches (10x15 cm) or equivalent to 1200x1800 pixels (300 DPI) when printing.
- Maintains standard aspect ratio without losing important details in the image.
3.2. Increase image quality for printing and display
Sharp images and bright colors always create a better impression. Professional 4x6 photo editing helps:
- Enhance Resolution: Eliminates blurry, grainy, or otherwise unfocused images.
- Adjust light and color: Ensure images are displayed realistically, naturally, and suitable for the intended use.
- Blemish Removal: Fix issues like red eye, scratches, or uneven lighting.
Thanks to professional tools, your photos will be of the highest quality, ready for printing or use in important documents.

3.3. Create a personal mark and high aesthetics
A professionally edited photo not only looks great, but also shows your care and professionalism. This is especially useful when using a 4x6 photo for purposes such as:
- Personal ID Photo: Helps you make a better impression on your resume, employee ID, or official documents.
- Souvenir Photo: Preserve memorable moments with beautiful, sharp and vivid images.
- Business Photos: Edit product or service photos in 4x6 size for use in advertising or marketing materials.
High aesthetics in each photo not only pleases viewers but also creates professionalism for you or your brand.
3.4. Save time and money
Professional 4x6 photo editing saves you a significant amount of time and money compared to having to edit manually or print over and over again:
- Process Optimization: Use specialized tools and software to get results quickly without too many skills.
- Avoid waste: Ensure photos are right the first time, reducing the need for reprints due to incorrect size or poor quality.
3.5. Increase applicability for multiple purposes
Professional 4x6 photos can be used flexibly for many different purposes, from work to personal life:
- Job applications and administrative documents: Correct size and color correction make ID photos look professional, meeting the requirements of agencies.
- Advertising and Communications: Beautifully edited 4x6 photos can be used in advertising publications, websites, or marketing campaigns.
- Souvenir Photos: Create beautiful, high-quality photos to keep memories or give as gifts.
3.6. Make an impression on customers or partners
For photographers, designers or businesses providing photo printing services, professional 4x6 photo editing will help enhance your reputation and attract customers. A beautiful, perfect photo in every way will not only satisfy customers but also help you build a long-term brand.
3.7. Easy sharing and storage
Professional 4x6 photos often have optimal capacity, making it easy for you to store or share via email, social networks without worrying about losing quality. This is especially useful when you need to send photos to customers, partners or share with friends and family.
4. Notes when editing 4x6 photos
4.1. Use high quality original images
Good resolution original images are important to ensure sharp and clear editing results when printed. Avoid using blurry images or images from unclear sources.
4.2. Check the aspect ratio before printing
Some printing services may require 4x6 photos with a slight edge margin. Make sure important content fits within the safe area of the frame.
4.3. Don't overdo editing
When editing your photos, keep them natural. Overdoing it or using too many effects can make your photos look unrealistic.
Conclude
4x6 photo editing is a useful skill that will help you get the right and beautiful photos for your personal or professional needs. Whether you use professional software like Photoshop or simple online tools, the most important thing is to pay attention to image quality, aspect ratio and color to create the best product. Try it today to create the perfect 4x6 photos your way!


