Best Selling Products

Upgrade Genuine Office 365
49 USD

MidJourney Account
29 USD

Adobe Photoshop Copyright - Full App
120 USD

Copyright Adobe Lightroom Account
59 USD

Genuine Cheap Canva Pro
39 USD

Adobe Premiere Pro Account
99 USD

Freepik Premium Account
59 USD

Upgrade Duolingo Super
29 USD

Upgrade genuine Capture One account
120 USD

Plugin Retouch4me
69 USD

ChatGPT Plus Account (GPT-4)
16 USD

Autodesk All App Account Copyright
120 USD

Genuine Adobe Illustrator account
99 USD

Windows 10 & 11 Pro Key
36 USD

Capcut Pro 1 Year
39 USD
Simple Guide to Creating AI Stickers for Kids
Nội dung
- 1. Tips for preparing original photos to preserve facial features
- 2. How to create AI stickers for your child on Hypic
- 2.1 Step 1: Access the sticker template link
- 2.3 Step 3: Upload your child’s photo
- 2.4 Step 4: Check and edit the sticker set
- 2.5 Step 5: Export the sticker images
- 2.6 Step 6: Save or share the stickers
- 3. How to create stickers for your child with Gemini AI super easily
- 3.1 Step 1: Access and log in to Gemini AI
- 3.2 Step 2: Upload your child’s photo
- 3.3 Step 3: Enter the sticker creation prompt
- Step 4: Wait for AI to process and generate images
- 4. Creating AI stickers for children may pose security risks, what should parents keep in mind?
- 5. Suggested prompts for creating stickers in various styles
- 5.1 Basic prompt – easy to use, suitable for beginners
- 5.2 Playful style prompt – humorous and trendy
- 5.3 Gentle style prompt – cute and pure
- 6. Conclusion
With just a few simple steps, you can turn your child’s everyday photos into lively, adorable sticker sets for chatting, printing, or keeping as precious memories.
1. Tips for preparing original photos to preserve facial features
To create beautiful AI stickers for your child while preserving natural facial expressions, preparing the original photo is an extremely important step. You should choose photos with good lighting, clear resolution, and a front-facing angle so AI can easily recognize the face. The clearer the details, especially around the eyes, nose, and mouth, the more realistic and adorable the sticker results will be. Avoid using blurry, poorly lit photos or photos with overly strong filters, as this may cause AI to “misinterpret” the face and lose your child’s unique features.
In addition, prioritize photos with simple backgrounds and minimal details so AI can easily separate the subject from the background. Avoid overly tilted angles, covered faces, or too many obstructions, as these reduce processing accuracy. When the input photo is well-prepared, AI can recreate expressions more naturally, helping the sticker set not only look cute but also preserve your child’s unique “spirit,” exactly as you want.
2. How to create AI stickers for your child on Hypic
2.1 Step 1: Access the sticker template link
First, open the browser on your phone and visit the template link: m.hypic.com/s/ZS9SetG6X/. This is a ready-made template that helps you create stickers quickly without designing from scratch. When the interface appears, you will see a preview of the sticker set along with the “Use template in Hypic” button.
At this point, tap the button to open the template directly in the app. This is an important step that saves time while ensuring the sticker set has a beautiful layout, follows trends, and is easier to edit for beginners.
(1).jpg)
2.2 Step 2: Choose to use the template
After switching to the app, the screen will display full template information such as sample images and the sticker set name. You just need to tap the “Use template” button at the bottom to begin editing.
This step is like “activating” the template, allowing you to replace the existing image with your child’s photo. Thanks to this, you do not need to understand much about design yet can still create a professional sticker set in just a few minutes.
.jpg)
2.3 Step 3: Upload your child’s photo
Next, the system will ask you to select a photo from your phone library. Choose a sharp, front-facing, well-lit photo where the face is not covered so AI can accurately recognize facial features.
After uploading the image, Hypic will automatically process and generate stickers. During this process, the screen will display the status “Loading…”. You just need to wait a few seconds to a few minutes and avoid exiting the app to ensure the process is not interrupted.
.jpg)
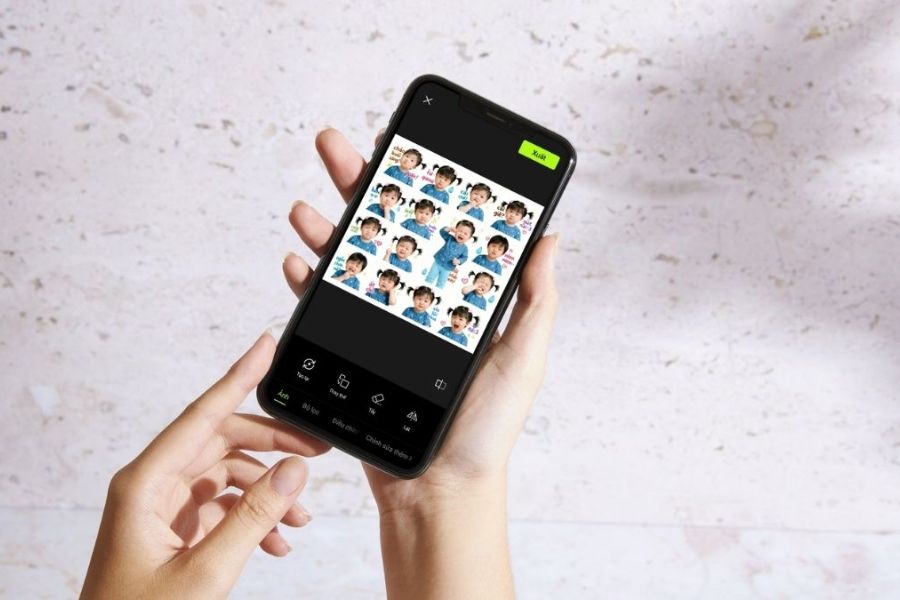
2.4 Step 4: Check and edit the sticker set
Once completed, you will see a sticker set with multiple expressions (usually around 16 images) displayed on the screen. This is when you should carefully review details such as the face, expressions, text, and layout.
If you are not satisfied, you can use editing tools such as Regenerate, Replace, Erase, or Flip to fine-tune. This helps the sticker set look more natural and better match the style you want.
.jpg)
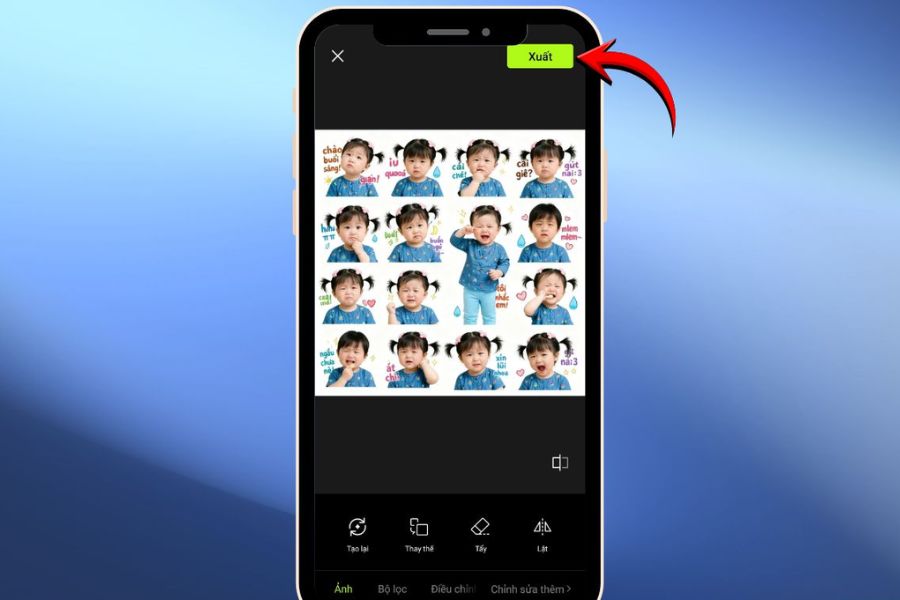
2.5 Step 5: Export the sticker images
After editing is complete and you are satisfied, tap the “Export” button in the upper-right corner of the screen. The app will process and save the entire sticker set as a completed file.
This step helps you “package” the final product, ready for use in chat applications or for long-term storage.
2.6 Step 6: Save or share the stickers
Once the export is successful, Hypic will take you to the “Project Saved” screen. Here, you can continue editing if you want further optimization or keep the result as is.
In addition, you can directly share the sticker set on social media platforms such as TikTok or Lemon8. This is a wonderful way to show off your child’s adorable sticker set and keep up with the currently “viral” trend.
(1).jpg)
3. How to create stickers for your child with Gemini AI super easily
3.1 Step 1: Access and log in to Gemini AI
First, open the browser on your computer and access Gemini. On the homepage, the system will require login, you just need to choose Sign in with your Google account to begin. This process is quick and completely free, very suitable even for first-time AI users.
After logging in successfully, the main interface will display a text input box along with options below. Here, click Tools and select Create Image to activate AI image generation mode. This is an important step to switch from normal chat mode to creative sticker generation mode.
.jpg)
3.2 Step 2: Upload your child’s photo
Next, click the “+” icon in the lower-left corner of the chat box. A menu will appear with options such as Upload file, Add from Drive, or Photos.
Choose the appropriate source and upload a clear photo of your child’s face. The photo should be high quality, well-lit, and without facial obstruction so AI can recognize it more accurately. This is an important factor that determines how similar and natural the sticker set will look after creation.
.jpg)
3.3 Step 3: Enter the sticker creation prompt
When the image appears in the chat box, the system will automatically recognize and briefly describe it. At this point, you need to enter a prompt (descriptive command) asking AI to create a sticker set in your desired style.
You can write a simple prompt such as: “Create a cute sticker set for a child with multiple expressions like happy, sad, surprised, cartoon style, bright colors.” The more detailed the prompt, the more accurate the result, helping the stickers become lively and match the vibe you want.
.jpg)
Step 4: Wait for AI to process and generate images
After sending the prompt, Gemini will begin processing the image. Usually, you only need to wait about 1–2 minutes for the system to analyze the face and generate multiple expressions from the original image.
Once completed, the sticker set will appear directly in the chat box. You can click on each image to view details and download them if satisfied. If the result does not meet expectations, adjust the prompt and try again to get a more perfect sticker set.
.jpg)
4. Creating AI stickers for children may pose security risks, what should parents keep in mind?
Although creating AI stickers for children is an interesting and creative trend, it still comes with risks related to personal data and children’s privacy. When you upload your child’s photo to AI platforms such as Gemini or Hypic, the image may be stored or used to improve the system if you do not carefully check the terms and conditions. The concerning part is that these risks often do not happen immediately, making many parents easily overlook them. Therefore, using AI should always come with caution to both follow trends and ensure your child’s safety.
Some important notes parents should remember:
Prioritize reputable AI platforms with clear and transparent privacy policies.
Carefully read the terms of use before uploading images, especially sections related to data storage.
Avoid using overly private photos or those containing sensitive information such as addresses, schools, or uniforms.
Do not share your child’s sticker set too widely on social media unless necessary.
Use photos with moderate recognizability to reduce the risk of unauthorized misuse.
5. Suggested prompts for creating stickers in various styles
5.1 Basic prompt – easy to use, suitable for beginners
Create a sticker set of 16 expressions from the face in the photo 📸. Keep the child’s real face unchanged, photo-realistic style, clear lighting, natural colors. 4x4 grid layout, simple clean background.
Expressions include: smiling 😄, crying 😭, sleepy 😴, surprised 😲, thinking 🤔, eating 🍽️, grimacing 😖, cute 🥰.
Add short Vietnamese text with emojis such as: “good morning ☀️”, “what’s that 🤨”, “huhu 😭”, “so sleepy 😪”, “wow 😮”, “always ok 👍”, “hey there 😆”, “mlem mlem 😋”, “I’m mad 😤”, “huh??? 🤯”, “good night 🌙”, “sorryyy 🥺”, “so loveable 💖”, “am I cool yet 😎”.
5.2 Playful style prompt – humorous and trendy
Create a 16-expression sticker set from the face in the photo 📸. Keep the real face unchanged, realistic photo style but with lively, playful, slightly “mischievous” and humorous expressions. 4x4 layout, bright white background, sharp details.
Add fun Vietnamese text with emojis such as: “let’s go 🔥”, “save me 💀”, “legendary 👍”, “what’s up 🤔”, “so tasty 😋”, “not accepting this 😤”, “bleh 😛”, “showing off 😏”, “laughing dead 🤣”, “too wild 😆”, “I give up 😵”, “let’s do it 💥”.
5.3 Gentle style prompt – cute and pure
Create 16 baby stickers from the photo 📸, keeping the real face unchanged. Realistic photo style, soft lighting, gentle pastel tones, warm and adorable feeling. 4x4 layout, simple background.
Gentle, adorable expressions such as smiling, shy, slightly sad, cheerful. Add Vietnamese text with emojis such as: “so lovely 🥰”, “wait a sec ⏳”, “moa moa 💋”, “sleep well 🌙”, “keep going ✌️”, “thankful 🙏”, “hehe 🎀”, “miss you 🥺”, “so well-behaved 💕”.
6. Conclusion
It can be seen that creating AI stickers for children is not only simple but also brings a lot of joy to the whole family. From familiar everyday photos, you can completely create countless adorable, unique stickers carrying your child’s own special touch in just a few minutes. Whether using a phone or laptop, with just a little creativity and the right prompt, you can instantly have an extremely cute “emotion collection” to share every day. Don’t hesitate to experiment with different styles to find the sticker version you love most for your child!


VIP Products


Best Selling Products
Upgrade Genuine Office 365
49 USD
MidJourney Account
29 USD
Adobe Photoshop Copyright - Full App
120 USD
Copyright Adobe Lightroom Account
59 USD
Genuine Cheap Canva Pro
39 USD
Adobe Premiere Pro Account
99 USD
Freepik Premium Account
59 USD
Upgrade Duolingo Super
29 USD
Upgrade genuine Capture One account
120 USD
Plugin Retouch4me
69 USD
ChatGPT Plus Account (GPT-4)
16 USD
Autodesk All App Account Copyright
120 USD
Genuine Adobe Illustrator account
99 USD
Windows 10 & 11 Pro Key
36 USD
Capcut Pro 1 Year
39 USD