Best Selling Products

ChatGPT Plus Account (GPT-4)
16 USD

Plugin Retouch4me
69 USD

Genuine Cheap Canva Pro
39 USD

Upgrade Genuine Office 365
49 USD

Autodesk All App Account Copyright
120 USD

Upgrade genuine Capture One account
120 USD

Copyright Adobe Lightroom Account
59 USD

Adobe Photoshop Copyright - Full App
120 USD

Upgrade Duolingo Super
29 USD

Genuine Adobe Illustrator account
99 USD

Adobe Premiere Pro Account
99 USD

Windows 10 & 11 Pro Key
36 USD

Capcut Pro 1 Year
39 USD

MidJourney Account
29 USD

Freepik Premium Account
59 USD
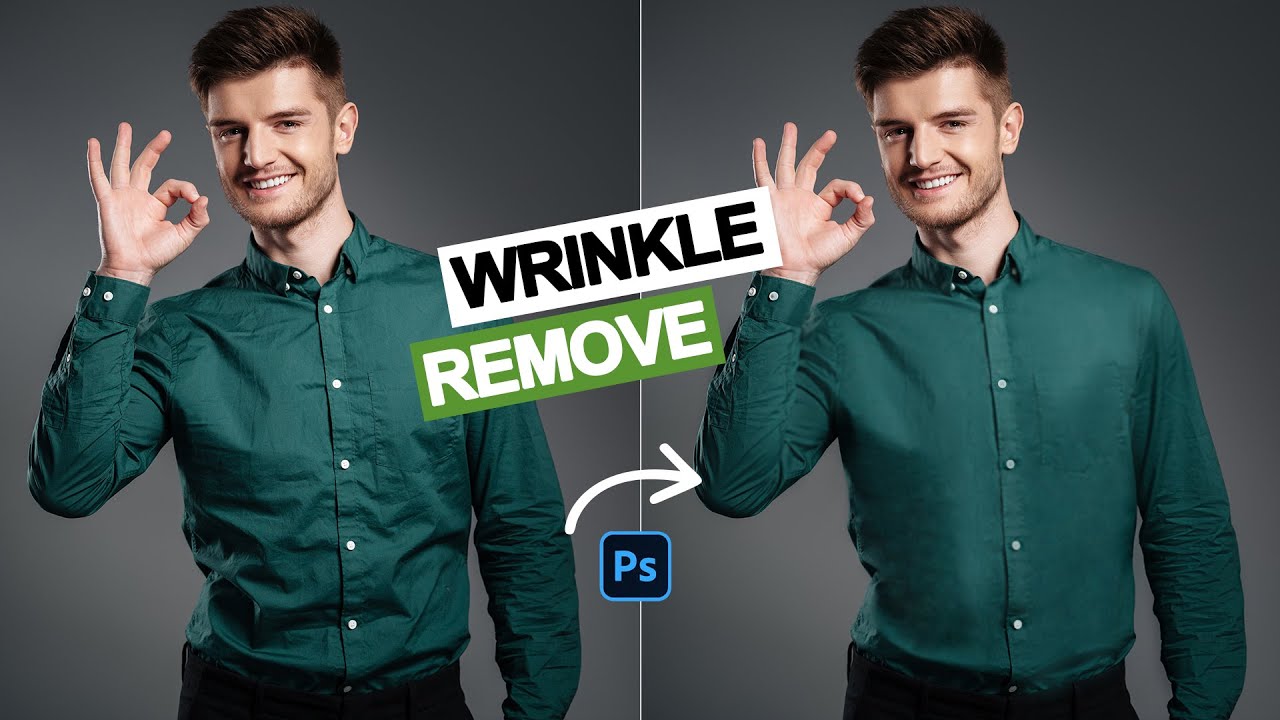
Simple Guide to Using Photoshop to Remove Wrinkles from Clothes
Nội dung
- 1. Why use Photoshop to remove wrinkles from clothes?
- 2. What is the Healing Brush tool in Photoshop?
- 3. Guide to using Photoshop to remove wrinkles from clothes
- 3.1 Step 1: Open the image to edit in Photoshop
- 3.2 Step 2: Select the Spot Healing Brush Tool
- 3.3 Step 3: Set the appropriate Painting Mode
- 3.4 Step 4: Choose the appropriate Healing Type
- 3.5 Step 5: Adjust the Brush (size and hardness)
- 3.6 Step 6: Remove the wrinkles
- 3.7 Step 7: Finalize and refine
- 4. Conclusion
With wrinkled, creased, or unnatural-looking clothing in photos, instead of using a real iron, users can completely fix it right on their computer using just a few simple tools such as Clone Stamp, Healing Brush, or Frequency Separation.
1. Why use Photoshop to remove wrinkles from clothes?
Using Photoshop to remove wrinkles from clothes has become increasingly important for creating more professional and attractive product images. A photo with smooth, wrinkle-free clothing helps viewers focus on the shape, material, and design of the product instead of being distracted by unaesthetic details. This is also why photographers, designers, and online shop owners all prioritize carefully retouching clothing before posting images. When applying Photoshop correctly, you not only improve photo quality but also enhance the product’s value in customers’ eyes, helping increase conversion rates and build a more professional brand image.
Helps clothing in photos appear smoother, more natural, and more aesthetically pleasing
Increases professionalism for product images when selling online or designing lookbooks
Removes wrinkles and folds that distract viewers from focusing on the product
Creates the impression of newer, cleaner, and more premium-looking clothing in customers’ eyes
Supports building a polished, consistent, and trustworthy brand image
Saves time compared to retaking photos multiple times when clothing is wrinkled
Helps products stand out more, thereby increasing attraction and purchase conversions
.jpg)
2. What is the Healing Brush tool in Photoshop?
During photo editing, especially when retouching clothing, using Photoshop to remove wrinkles with the Healing Brush tool is one of the most commonly used and effective methods. Healing Brush can simply be understood as a “repair tool,” functioning to cover imperfections by sampling from a clean area of the image and blending it into the area that needs editing. Thanks to this mechanism, wrinkles on clothing can be softened or removed naturally without affecting the overall fabric texture, making the image smoother and more professional.
The strength of this tool is its ability to automatically balance color and lighting between the sampled area and the edited area, helping the result look harmonious, not “fake” or mismatched in tone. Among the Healing tools, the most popular is the Spot Healing Brush Tool – a more convenient version where users simply brush over the wrinkled area, and Photoshop automatically analyzes and fills imperfections using surrounding data. As a result, clothing retouching becomes fast, easy to use, and suitable even for beginners.
3. Guide to using Photoshop to remove wrinkles from clothes
3.1 Step 1: Open the image to edit in Photoshop
To begin the process of using Photoshop to remove wrinkles from clothes, first you need to import the image into the software. Open Photoshop, then select File from the menu bar and click Open, or use the shortcut Ctrl + O for faster operation. Here, locate the image containing the wrinkled shirt or clothing item you want to edit, then click OK to load it into the workspace. This is the foundational step that allows you to begin all subsequent editing actions accurately.
Once the image has opened successfully, you should observe the overall composition, especially areas with many wrinkles or fabric folds. Identifying the areas to edit in advance will help you work faster and avoid unnecessary adjustments. For highly detailed images, you can zoom in for easier observation of each small wrinkle, helping you better prepare for using the Healing Brush tool later.
.jpg)
3.2 Step 2: Select the Spot Healing Brush Tool
At this step, you will begin using the main tool in the Photoshop wrinkle-removal process, which is the Spot Healing Brush Tool. On the left toolbar in Photoshop, locate the Band-Aid icon and select Spot Healing Brush Tool, or press the shortcut key J for quick access. This tool is specifically designed for correcting small imperfections such as wrinkles, folds, or uneven skin/fabric areas.
After selecting the tool, you can move your cursor over the clothing area to check the initial response. Spot Healing Brush works by automatically sampling surrounding areas to fill the area you brush over. This makes wrinkle removal quick and simple without requiring complicated actions, making it ideal when you want to smooth clothing in a short amount of time.
.jpg)
3.3 Step 3: Set the appropriate Painting Mode
To improve effectiveness when using Photoshop to remove wrinkles from clothes, you need to adjust the Painting Mode on the options bar at the top. By default, this mode is usually set to Normal, but you can change it to other modes such as Screen, Multiply, Lighten, or Darken depending on the color and darkness of the wrinkle. Choosing the correct mode helps edited areas blend more naturally with the fabric texture.
In practice, if wrinkles are darker than the shirt color, you can select Lighten mode to brighten that area. Conversely, if the area to fix is brighter, Darken mode will be more suitable. For beginners, Content-Aware or Screen mode is often recommended because it is easy to use and produces fairly natural results without requiring too much refinement.
.jpg)
3.4 Step 4: Choose the appropriate Healing Type
Next in the Photoshop wrinkle-removal process, you need to set the Healing Type to determine how Photoshop handles the edited area. On the options bar, you will see choices such as Content-Aware, Create Texture, and Proximity Match. Each mode produces different results depending on the material and complexity of the image.
In most clothing-editing cases, Content-Aware is the optimal choice because it allows Photoshop to analyze surrounding areas and naturally recreate the fabric surface. Thanks to this, wrinkles can be softened or removed without losing the fabric structure, making the image appear more realistic.
.jpg)
3.5 Step 5: Adjust the Brush (size and hardness)
After setting the mode, you need to adjust Brush Size and Hardness to suit each wrinkle area. This is a very important factor in the Photoshop wrinkle-removal process because if the brush is too large or too soft, the result may become blurry or unnatural. You can start with a small size (around 20–30px) and hardness around 50–70%.
For larger wrinkles, increase the brush size for faster editing, while for smaller wrinkles, reduce the brush size for more precision. Flexible adjustment helps you better control edited areas, ensuring that clothing retains its natural shape and does not look “fake” or lose important detail.
.jpg)
3.6 Step 6: Remove the wrinkles
Once all settings are complete, begin removing wrinkles by moving the cursor and gently brushing over folded areas. Photoshop will automatically analyze and replace the selected area with data from surrounding regions, instantly making the fabric surface smoother. You should work slowly, especially on larger areas, to avoid image distortion.
During this process, you can zoom in or out for better control of each detail. It is best to start with larger wrinkles first, then handle smaller ones to ensure the overall garment looks balanced and natural. This is the key step that determines the final quality of the image.
.jpg)
3.7 Step 7: Finalize and refine
After removing most wrinkles, you need to review the entire image to ensure there are no areas with color mismatches or unnatural appearances. This is the finishing step in the Photoshop wrinkle-removal workflow, helping the image become cleaner and more professional. If you notice any unsatisfactory areas, you can go back and readjust the brush to fix them.
Finally, zoom out to review the full image. If the clothing now looks smooth, natural, and harmonious with the overall lighting, you can save the final product. With just a few simple actions, you can transform a wrinkled shirt into a professional image suitable for design, selling, or a personal portfolio.
.jpg)
4. Conclusion
It can be said that editing clothing in Photoshop is like a “digital iron” that saves time while still ensuring high visual quality for images. Instead of worrying about wrinkles, folds, or imperfect details, you only need to master a few basic tools to make your photos much smoother, more professional, and more eye-catching. However, the important thing is to use editing techniques appropriately to preserve the natural feel of the fabric and avoid making the image look “fake” or lose its inherent realism. When you know how to balance technique and aesthetics, Photoshop truly becomes a powerful tool that helps elevate image quality in every field, from personal use to business. Photoshop is not merely a photo-editing tool but also a “powerful assistant” that helps increase image value in every field. Whether for personal purposes, artistic creativity, or business, mastering clothing-editing techniques will help you create professional, impressive images with stronger persuasive impact in viewers’ eyes.


VIP Products


Best Selling Products
ChatGPT Plus Account (GPT-4)
16 USD
Plugin Retouch4me
69 USD
Genuine Cheap Canva Pro
39 USD
Upgrade Genuine Office 365
49 USD
Autodesk All App Account Copyright
120 USD
Upgrade genuine Capture One account
120 USD
Copyright Adobe Lightroom Account
59 USD
Adobe Photoshop Copyright - Full App
120 USD
Upgrade Duolingo Super
29 USD
Genuine Adobe Illustrator account
99 USD
Adobe Premiere Pro Account
99 USD
Windows 10 & 11 Pro Key
36 USD
Capcut Pro 1 Year
39 USD
MidJourney Account
29 USD
Freepik Premium Account
59 USD