Best Selling Products

Capcut Pro 1 Year
39 USD

Upgrade Genuine Office 365
49 USD

Adobe Premiere Pro Account
99 USD

Freepik Premium Account
59 USD

Upgrade Duolingo Super
29 USD

Plugin Retouch4me
69 USD

Copyright Adobe Lightroom Account
59 USD

ChatGPT Plus Account (GPT-4)
16 USD

Genuine Cheap Canva Pro
39 USD

Autodesk All App Account Copyright
120 USD

Windows 10 & 11 Pro Key
36 USD

Upgrade genuine Capture One account
120 USD

Adobe Photoshop Copyright - Full App
120 USD

Genuine Adobe Illustrator account
99 USD

MidJourney Account
29 USD
How to create text shadows in Photoshop
Nội dung
- 1. Learn about the text shadow feature in Photoshop
- 2. Share the 3 simplest ways to shade text in Photoshop.
- 2.1. Text shadow in Photoshop
- 2.2. Instructions for creating short shadows
- 2.3. Instructions for long shadows
- 3. Instructions for shading and creating borders for text in Photoshop
- 4. Tips for creating beautiful, unique text shadows in Photoshop
- 4.1. Using Layer Styles feature
- 4.2. Adjusting Opacity
- 4.3. Adjusting Distance and Spread
- 4.4. Adjusting Size and Angle
- 4.5. Customize shadow color
- 4.6. Using Background Blur
- 5. Text shadow image combined with light
Text shadows in Photoshop are effects that contribute to making edited images more interesting and impressive. Some of the following simple ways to perform shading that Sadesign introduces will help you successfully perform shading for text on the first try.

Text shadows in Photoshop are effects that contribute to making edited images more interesting and impressive. Some of the following simple ways to perform shading that Sadesign introduces will help you successfully perform shading for text on the first try.

1. Learn about the text shadow feature in Photoshop
Text shadow in Photoshop is a feature that creates a 3D effect for writing, thereby helping the text stand out more on the background. The fact that the text is shaded helps create a greater sense of depth, helping to create emphasis for the image.
With this feature, users can adjust the color, size, direction or opacity of the shadow to ensure it matches their ideas. Thanks to its ability to create depth in photos, this feature is used by many designers to create highlights for their work.
Creating a shadow for text is quite simple. To help create an impressive shadow effect, you can combine it with many different editing tools in Photoshop to get the best effect. Specifically, how does the shading take place? Please continue to follow the content below.
2. Share the 3 simplest ways to shade text in Photoshop.
Depending on your specific needs as well as the design image, you can choose to shade text with the following ways:
2.1. Text shadow in Photoshop
To perform text shadow in Photoshop, you need to follow the following instructions:
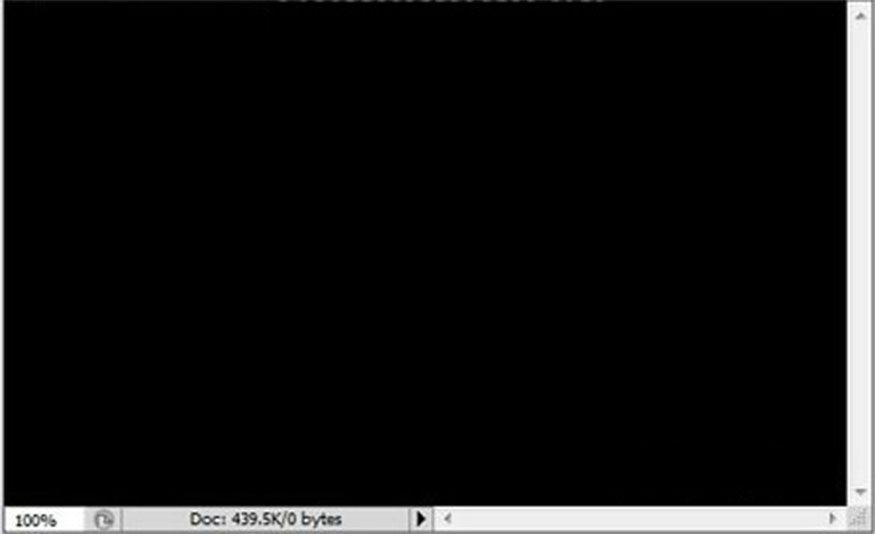
Step 1: Go to Photoshop and create a new image file with arbitrary size and background color by selecting File => New right on the toolbar or you can also press the keyboard shortcut Ctrl+N.
You can set the parameters for the new file as follows:
- Width: 500 pixels
- Height: 300 pixels
- Background Contents: Optional
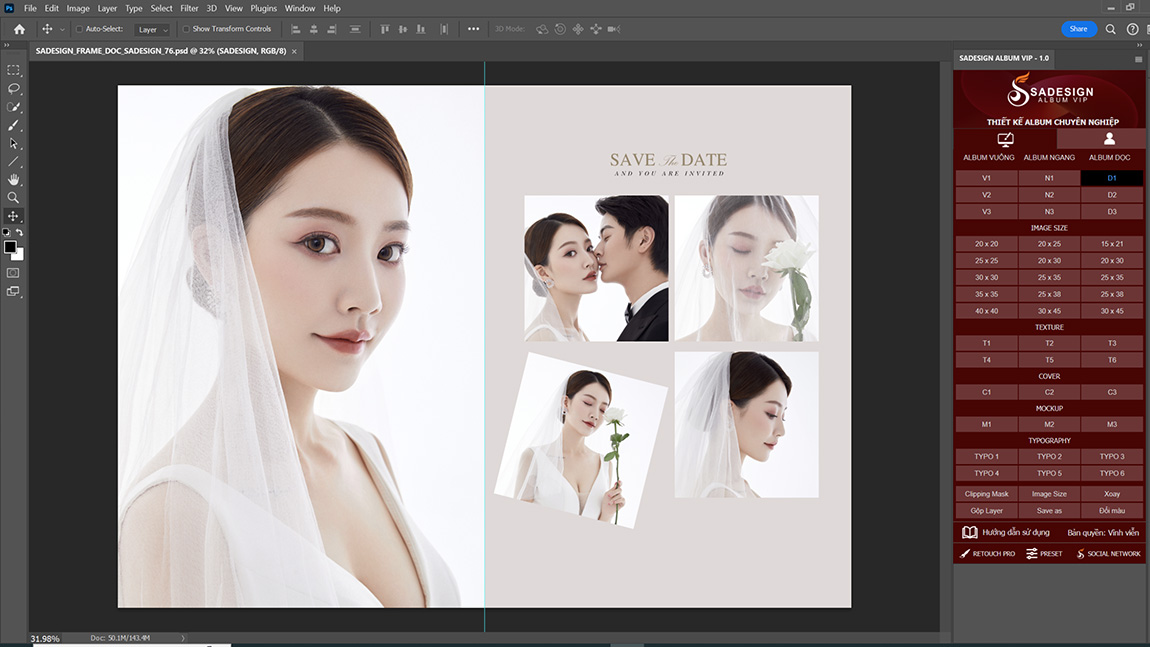
In this example we choose the background color to be black, with color code #000000. (Picture 1)
Step 2: Select the Text tool to type any text => Customize the font, size, color to create shadow for the text in Photoshop. In this example we set:
- Font: Arial
- Size: 45
- White with color code #ffffff.
- The text that creates the effect is “DESIGN”.

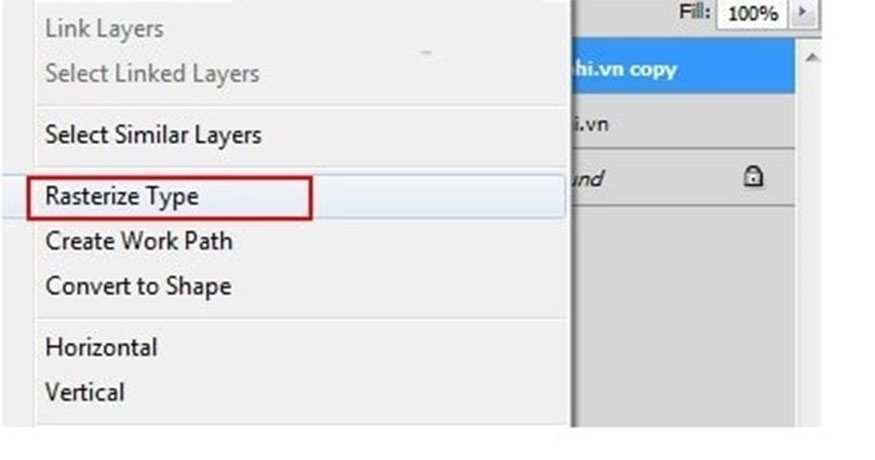
Step 3: Duplicate the text layer by clicking Layer => Duplicate Layer right on the toolbar.
Step 4: Select the duplicated layer and press the keyboard shortcut Ctrl+T to adjust the position of this layer. Right-click and select Flip Vertical to rotate the new layer compared to the original position.
Step 5: Use the Move Tool (V) to move the layer below the original layer. This is a shadow layer to create a shadow effect in Photoshop.
Step 6: Right-click on the layer you just edited, then select Rasterize Type to change the Graphic. (Picture 2)
Step 7: Create a mask on this layer by clicking Vector mask.
Step 8: Select the Add Vector mask area of the Layer copy => select Gradient Tool (G) to fill the text color. Next, choose the Gradient style as shown below. (Picture 3)
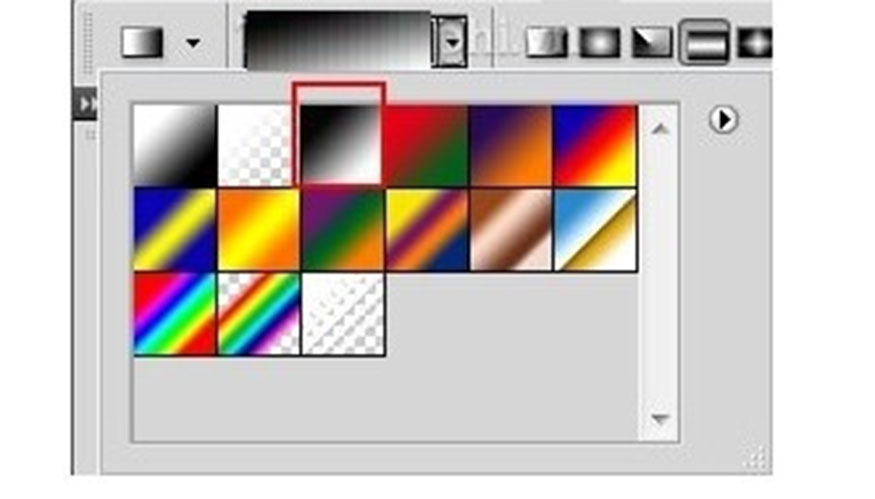
Click, hold and drag the mouse on the layer from top to bottom.
Note: To create shadow letters, pull them straight to help the letters look beautiful and the shadows fall more naturally when pulled sideways.
Step 9: Adjust the Opacity for the newly created layer. You should set the opacity to 50% so the text looks more natural.
Step 10: Press the key combination Ctrl+Shift+E after completion to combine the layers with the original wallpaper => Save the image in the desired format.

2.2. Instructions for creating short shadows
This method helps you create a short shadow effect for writing, similar to letters printed on paper. To make text shadow, follow the specific instructions as follows:
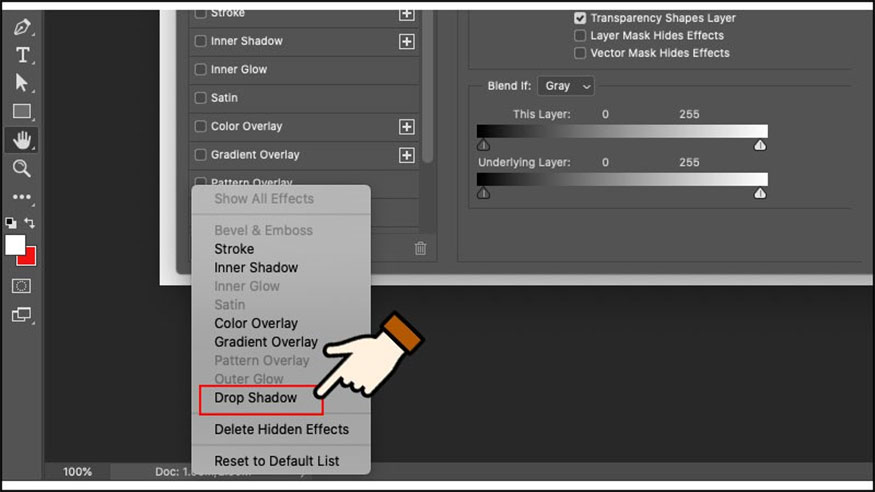
Step 1: Go to the text layer and select Blending Option to create a shadow effect.
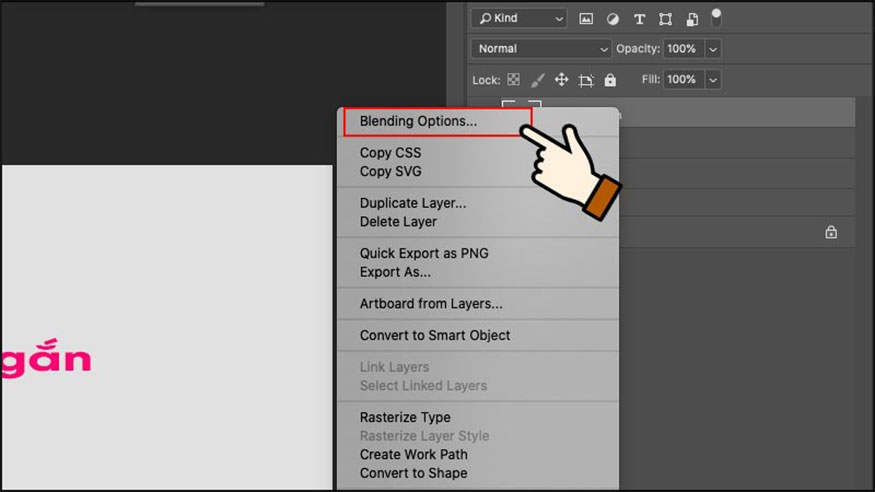
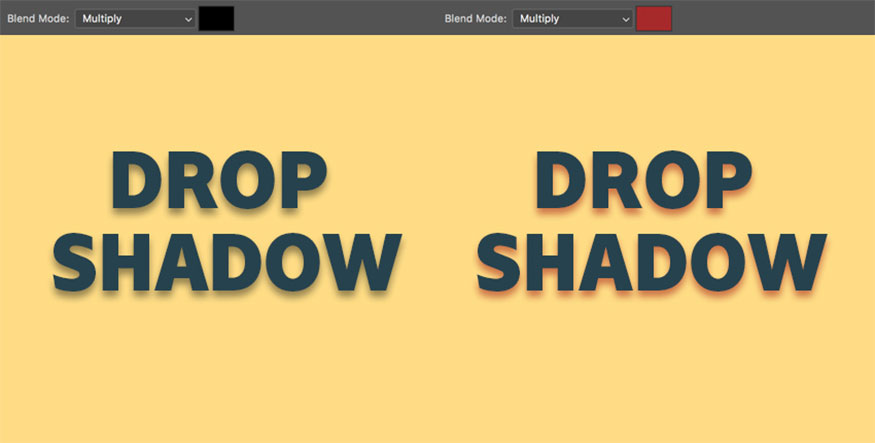
Step 2: Select Drop Shadow then adjust the parameters:
- Angle: Shadow tilt
- Distance: Shadow distance
- Spread: 100%
- Size: Optional
After that, we will receive results as shown below:

2.3. Instructions for long shadows
The long shadow effect is similar to when we shine from a distant light source. The simple way to create a long shadow is as follows:
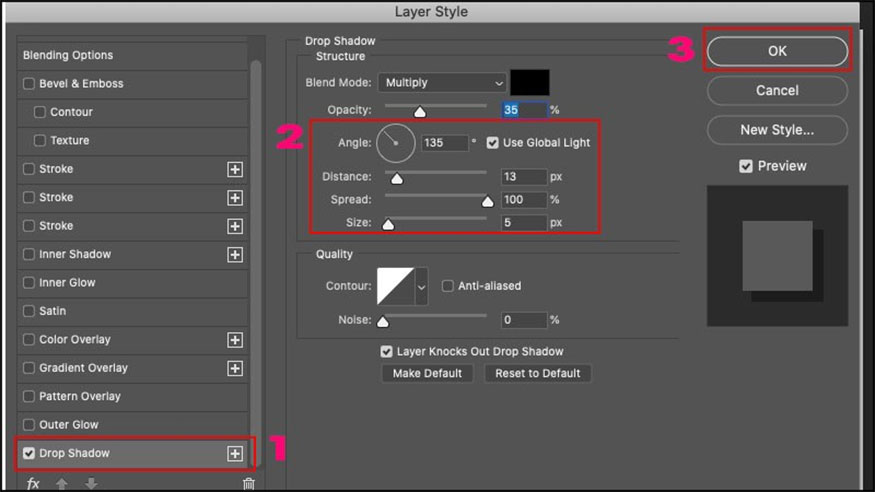
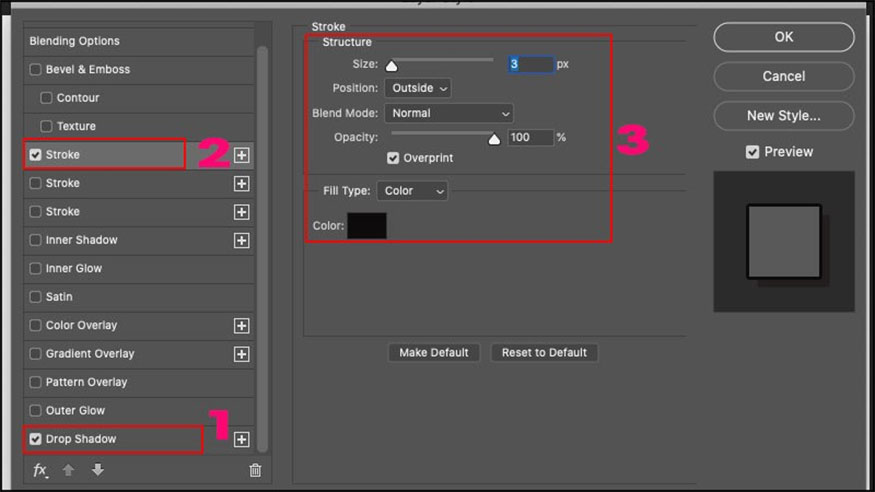
Step 1: Select Layer => Blending Option => click on both Drop Shadow and Stroke at the same time and adjust the parameters as follows:
- Size: Text border size
- Position: Outside.
- Color: Text border color
Step 2: Select the fx item to create drop shadow
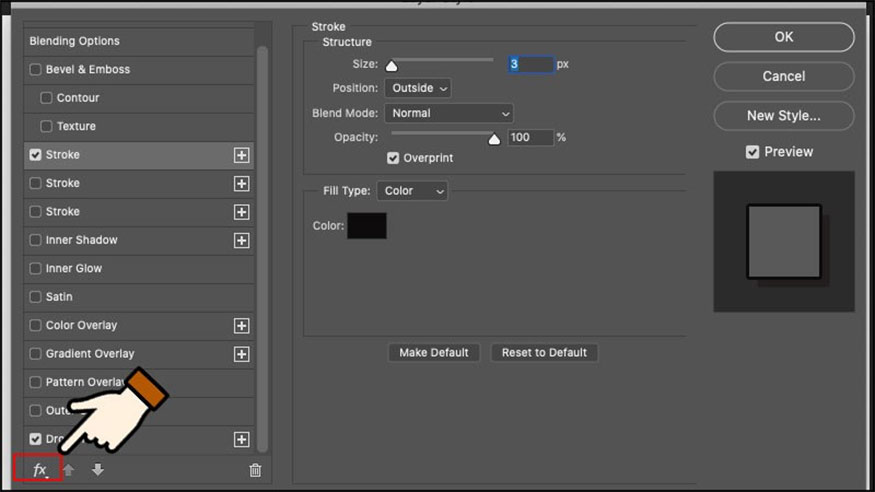
Step 3: Go to Drop Shadow to increase Distance
Step 4: Adjust Drop Shadow and Distance similarly to step 2.
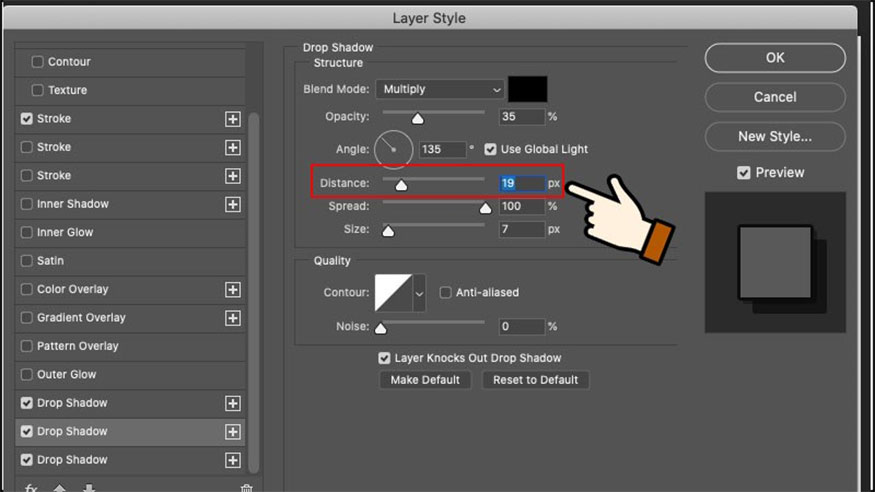
As a result, we will get a long text shadow as shown below:

3. Instructions for shading and creating borders for text in Photoshop
Besides shading the text, you can also create text borders to help the text stand out more on the background. Creating borders for text in Photoshop is not complicated with just 4 steps:
- Step 1: Create a new layer then fill the entire layer with white
- Step 2: Select the Type Tool (T) and type text on the layer white. Then choose the font, size, and color according to your needs.
- Step 3: Right-click on the layer containing the text => select Blending Options or you can do it by clicking the fx icon in the lower right corner of the Layer Panel.
- Step 4: At the Layer Style window => check Stroke to adjust parameters such as: Position, Blend Mode, Size, Opacity, Fill Type, and Color for the border of the text is complete.

4. Tips for creating beautiful, unique text shadows in Photoshop
It can be seen that shading text is quite simple and does not require too much experience. If you are just starting to get acquainted with Photoshop, you can apply the following tips to create the most beautiful shadow effect for yourself:
4.1. Using Layer Styles feature
The Layer Styles feature is especially useful in Photoshop, it allows users to add many different effects to layers such as: Inner Shadow, Outer Glow, Bevel and Emboss, Gradient Overlay,...
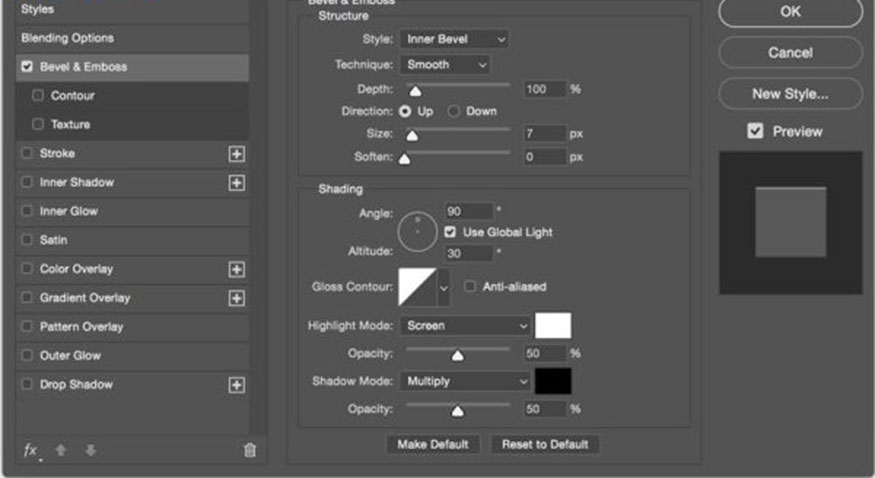
Users can combine these effects with Drop Shadow in Photoshop to design more complex and impressive shadow effects. Besides, you can also save the Layer Styles settings to reapply to other layers.
4.2. Adjusting Opacity
Opacity is an important parameter when you make shadows for text in Photoshop, they directly affect the transparency of the shadow. Adjust the Opacity of the shadow in the Layer Style window when selecting Drop Shadow.
The trick is to keep the Opacity of the shadow lower than the Opacity of the text to create a feeling of greater depth.
4.3. Adjusting Distance and Spread
Distance and Spread are parameters that users can adjust when performing text shading in Photoshop. The Distance parameter is the distance between the text and the shadow, and Spread is the spread of the shadow.
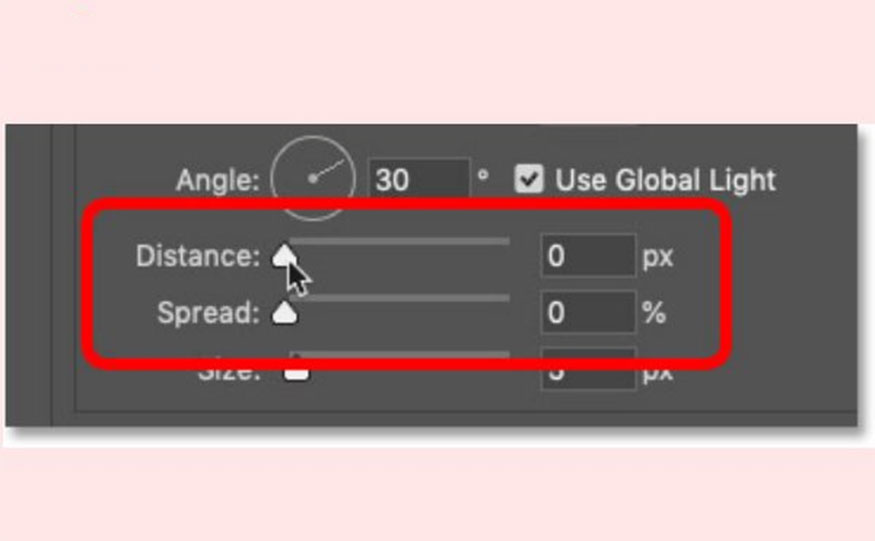
You can flexibly increase or decrease Distance and Spread to design a variety of different shadow effects that best suit your needs.
4.4. Adjusting Size and Angle
The two parameters Size and Angle are related to the size and direction of the shadow. If Size is a parameter about the size of the shadow, then Angle is a parameter about the angle of the shadow relative to the text.
Changing Size and Angle will help make the shadow effect for text in Photoshop more vivid and attractive. Therefore, you absolutely pay attention to these two parameters during the process of implementing your shading!
4.5. Customize shadow color
By default shadow color in Photoshop is always black, but you can completely change them to the color you desire. You can choose the shadow color inside the Layer Style window when selecting Drop Shadow.

The color you choose can match the color of the text and contrast with the text to create a highlight and attract attention when looking at the photo. For designs with excess text, you should delete the text on the image to make the design look neater, easier to see and more beautiful.
4.6. Using Background Blur
The Background Blur technique helps blur the background behind text to make your shadow effect clearer. To shade text with this method, follow these steps:
- Step 1: Create a new layer, make the entire layer white
- Step 2: Select the Type Tool (T) => Type text on the white layer. Then choose the size, font and color for the text.
- Step 3: Right-click on the layer containing the text to select Blending Options. Add Drop Shadow effect to the layer containing the text => Adjust appropriate parameters.
- Step 4: Select the white background layer and press Ctrl + J to create a new copy of the layer. Rename this layer as Blur.
- Step 5: Select Filter => Blur => Gaussian Blur and adjust the Radius so that the background is blurred moderately.
- Step 6: Select the Eraser Tool (E), then erase the background hidden by the text, which will help the shadow stand out more.

5. Text shadow image combined with light
To get more ideas for your designs, you can immediately refer to the shadow types that we introduce below. Below is a combination of lighting that will help increase the appeal of your design. Here are some samples that we have designed for your reference:


We hope the detailed instructions on how to use shadows in Photoshop above will be very useful, so that you can apply them in your design. You can create edited images with beautiful and impressive designs.
If you need to install more editing features or want to install Photoshop copyright, please contact Sadesign immediately for our quick support!


VIP Products


Best Selling Products
Capcut Pro 1 Year
39 USD
Upgrade Genuine Office 365
49 USD
Adobe Premiere Pro Account
99 USD
Freepik Premium Account
59 USD
Upgrade Duolingo Super
29 USD
Plugin Retouch4me
69 USD
Copyright Adobe Lightroom Account
59 USD
ChatGPT Plus Account (GPT-4)
16 USD
Genuine Cheap Canva Pro
39 USD
Autodesk All App Account Copyright
120 USD
Windows 10 & 11 Pro Key
36 USD
Upgrade genuine Capture One account
120 USD
Adobe Photoshop Copyright - Full App
120 USD
Genuine Adobe Illustrator account
99 USD
MidJourney Account
29 USD