Best Selling Products

Windows 10 & 11 Pro Key
36 USD

Upgrade Duolingo Super
29 USD

Genuine Cheap Canva Pro
39 USD

Genuine Adobe Illustrator account
99 USD

Capcut Pro 1 Year
39 USD

Upgrade Genuine Office 365
49 USD

MidJourney Account
29 USD

Adobe Premiere Pro Account
99 USD

ChatGPT Plus Account (GPT-4)
16 USD

Upgrade genuine Capture One account
120 USD

Plugin Retouch4me
69 USD

Adobe Photoshop Copyright - Full App
120 USD

Autodesk All App Account Copyright
120 USD

Copyright Adobe Lightroom Account
59 USD

Freepik Premium Account
59 USD
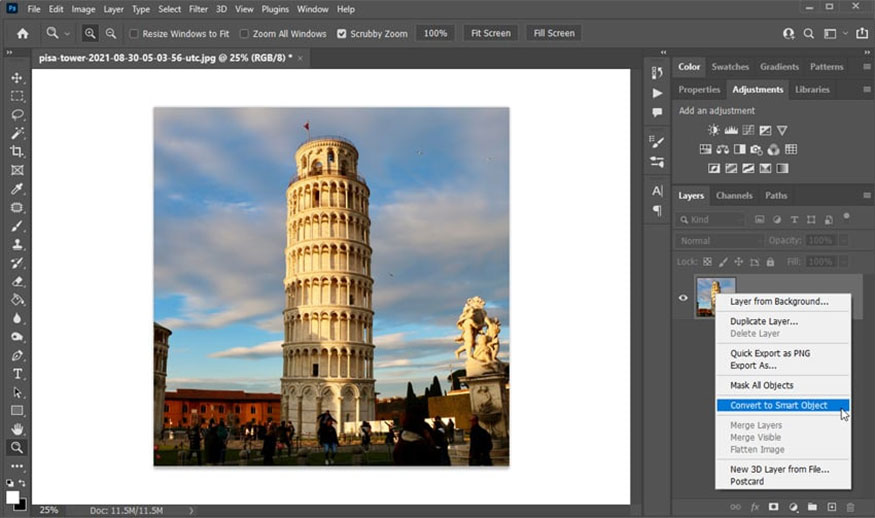
Learn the Liquify tool in Photoshop with SaDesign
Nội dung
The Liquify tool in Photoshop is one of the useful features that helps users perform effective photo editing. If you do not know and understand this tool, please refer to the detailed information that Sadesign brings in the following article!
The Liquify tool in Photoshop is one of the useful features that helps users perform effective photo editing. If you do not know and understand this tool, please refer to the detailed information that Sadesign brings in the following article!

1. Where is the Liquify tool in Photoshop?
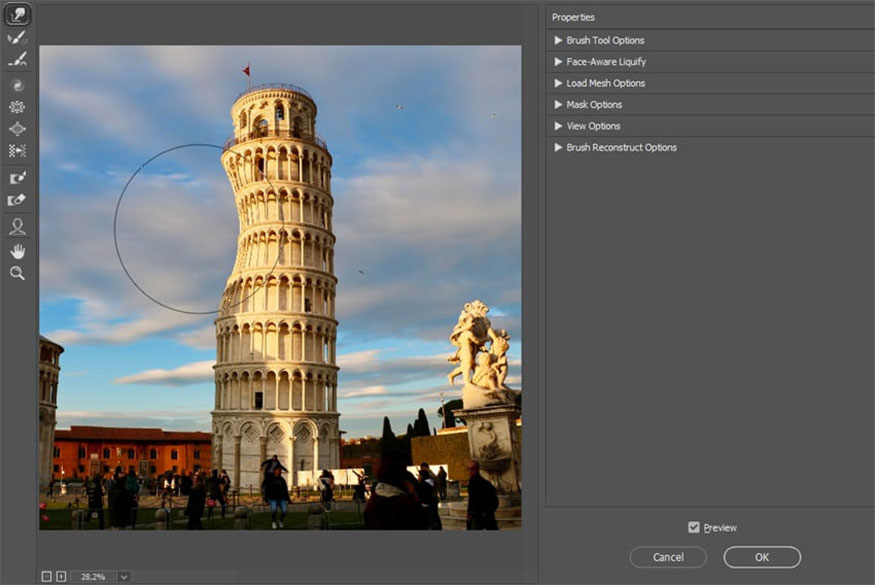
The Liquify tool in Photoshop allows users to push, pull, rotate,... any area of the image. The distortion you create can be very subtle or strong. Therefore, this tool is effective in creating artistic effects for edited images.
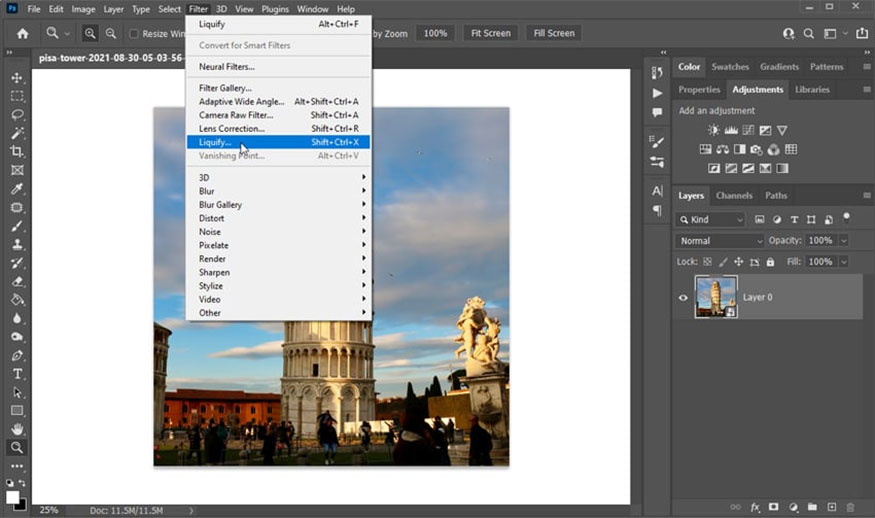
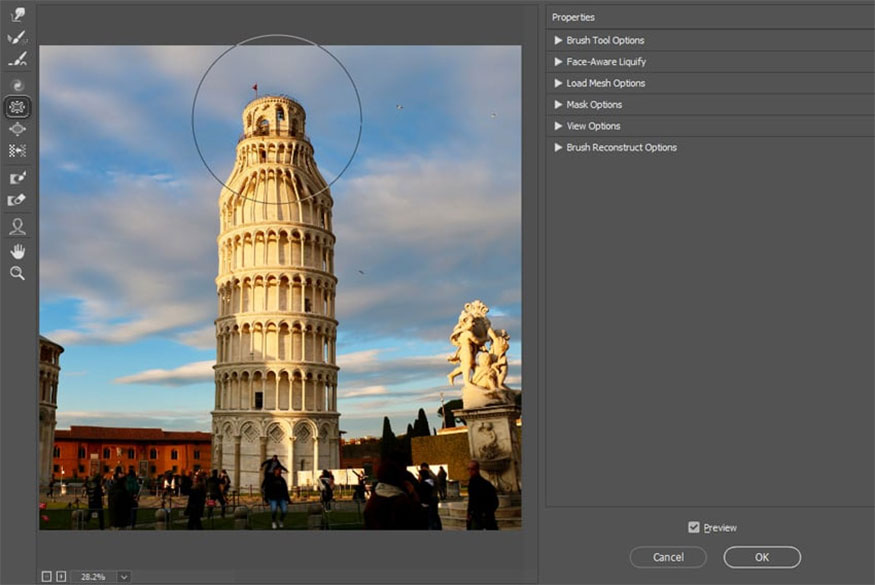
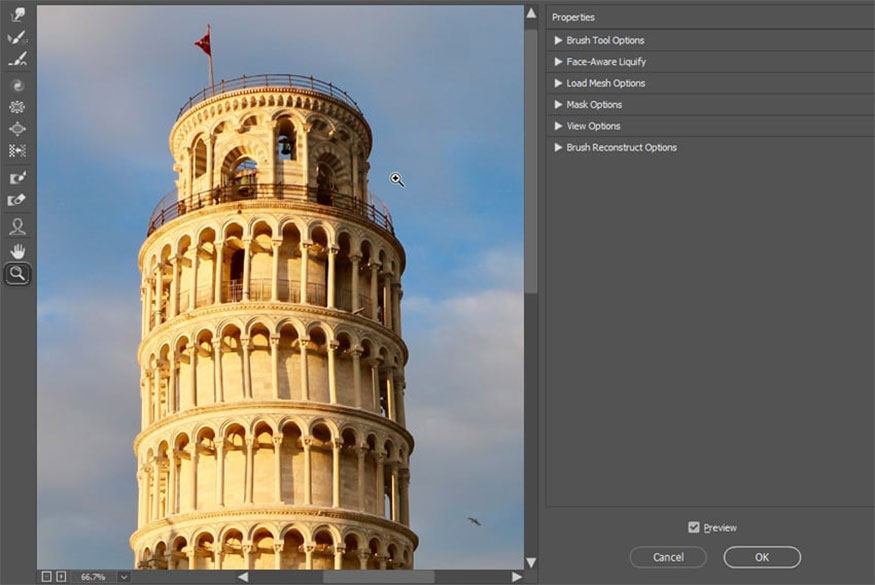
To open Liquify in Photoshop, first go to Filter => Liquify or pressing the keyboard shortcut Shift+Ctrl+X.
2. Different Liquify Photoshop tools
Liquify includes many different tools to help users perform effective editing:
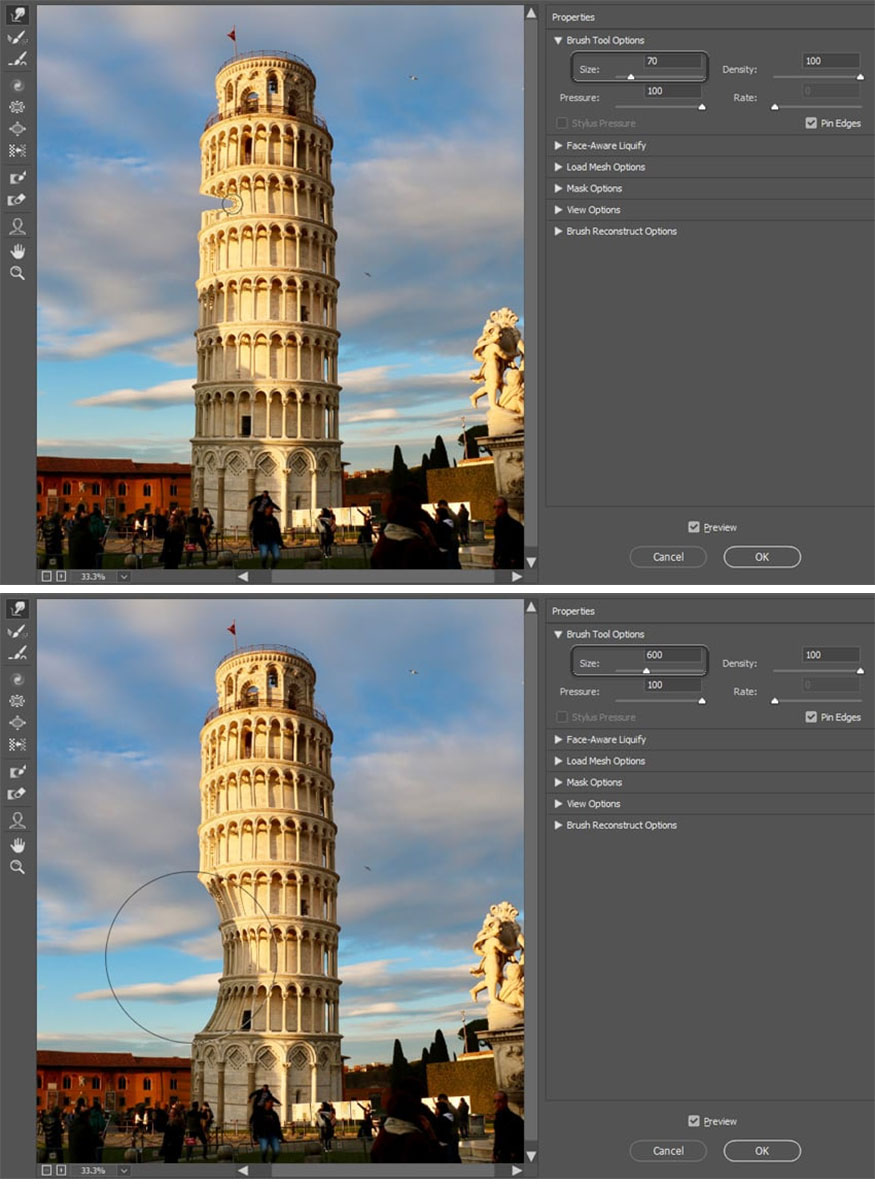
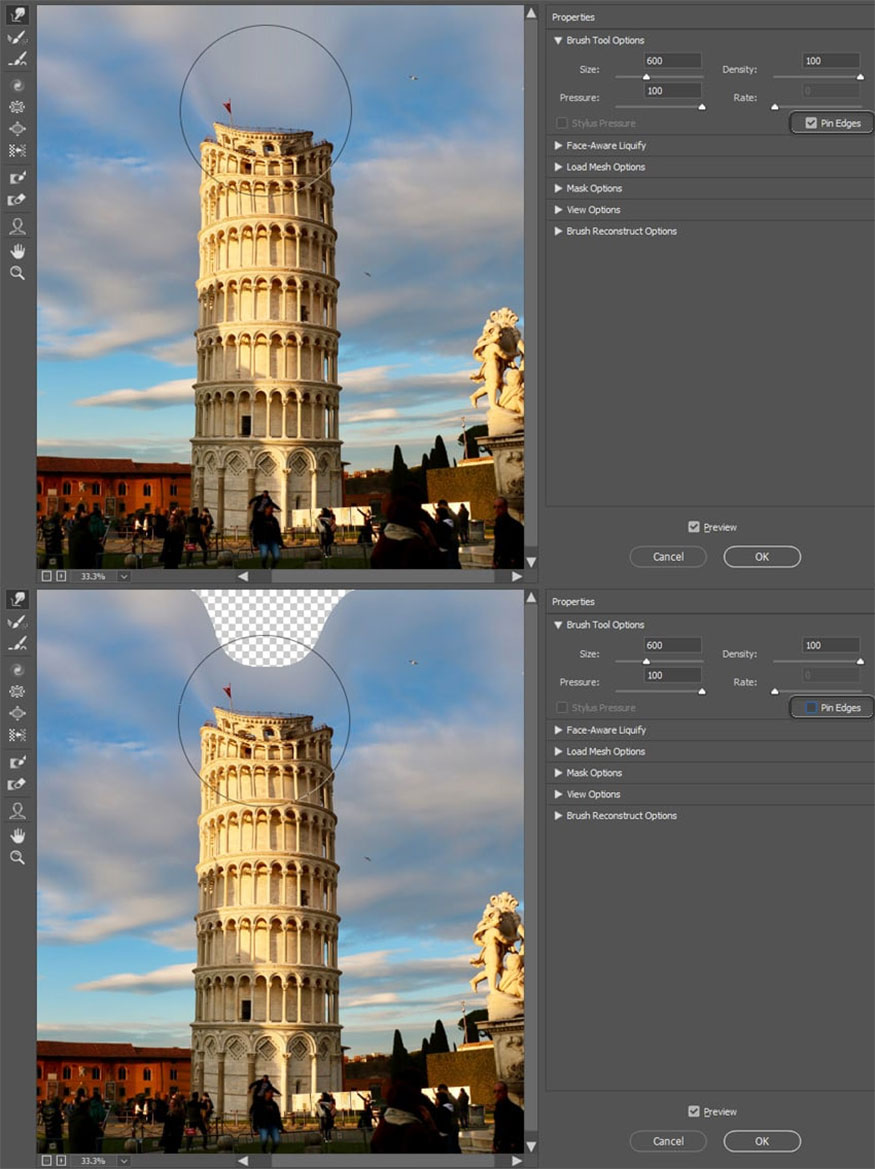
Forward Warp Tool (W): Allows you to "push" an area image in the selected orientation. This is the perfect tool for you to make adjustments to the shape of something.
Reconstruct Tool (R): Helps undo previous edits. You can use the Undo function by pressing Ctrl-Z to go back a few steps.

Smooth Effect (E): This tool helps you slightly reduce the strength of the applied effect, helping you achieve the desired effect.

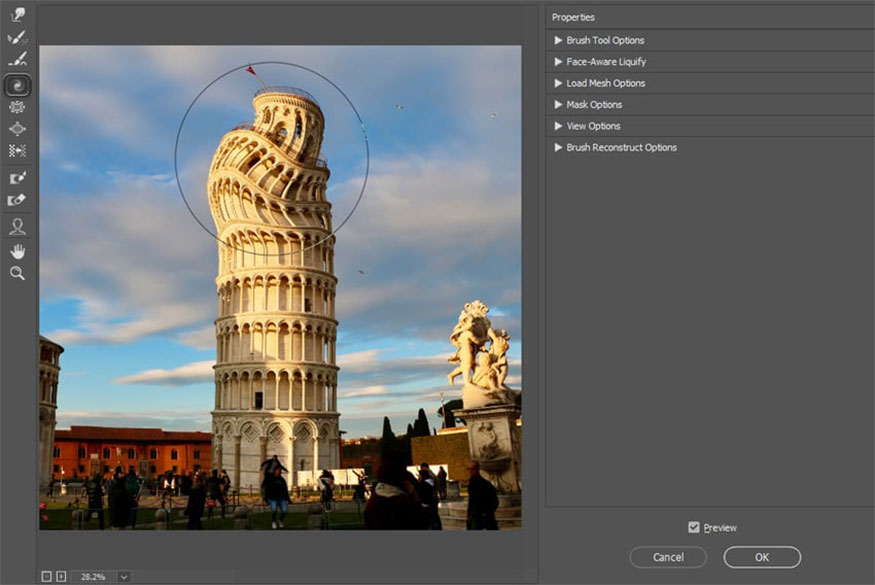
Twirl Clockwise Tool (C): This tool helps "rotate" a part of the image. If you want to change the rotation direction, press and hold the Alt key.
Pucker Tool (S): This is a tool that works to shrink the selected area. To achieve the opposite effect, press and hold the Alt key.
Bloat Tool (B): This tool helps to enlarge the selected area. Press and hold the Alt key to achieve the opposite effect.
Push Left Tool (O): This tool is used to push the selection to the right. Pressing and holding the Alt key will allow you to switch to the left side.
Freeze Mask Tool (F): When applying modifications, it will affect the entire image. If you want to keep any part of the image intact, use this tool to draw over the area you want to keep intact. Hold down the Alt key to delete the mask.

Thaw Mask Tool (D): This tool acts as an eraser for the mask. If you hold down the Alt key, you can use it to draw the mask.
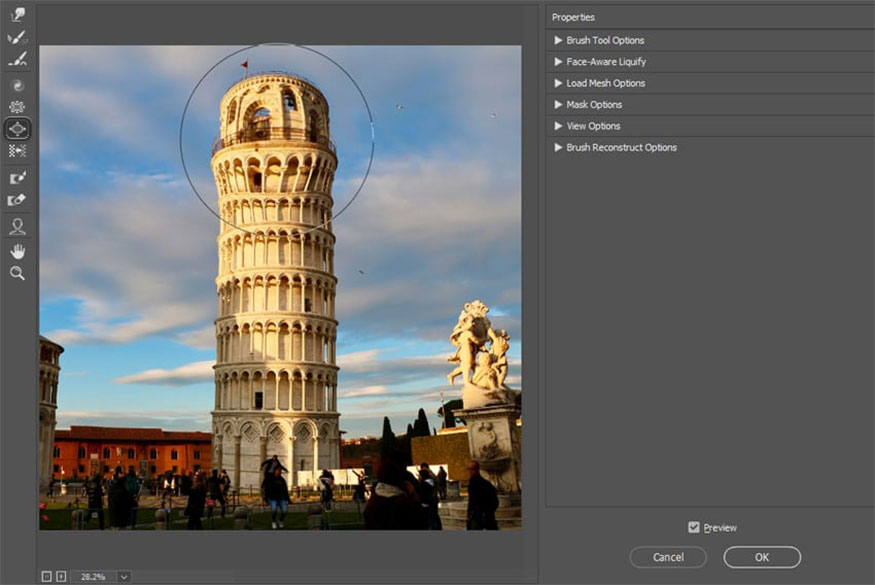
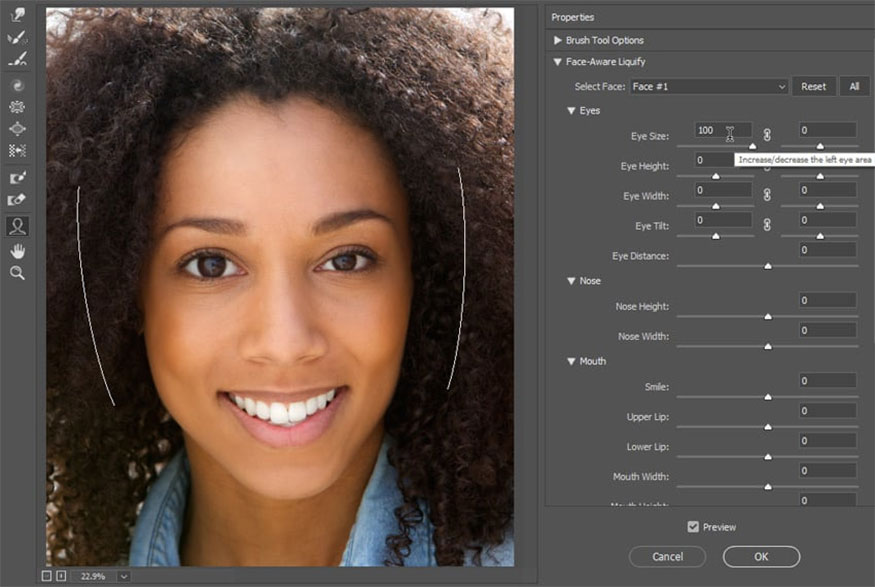
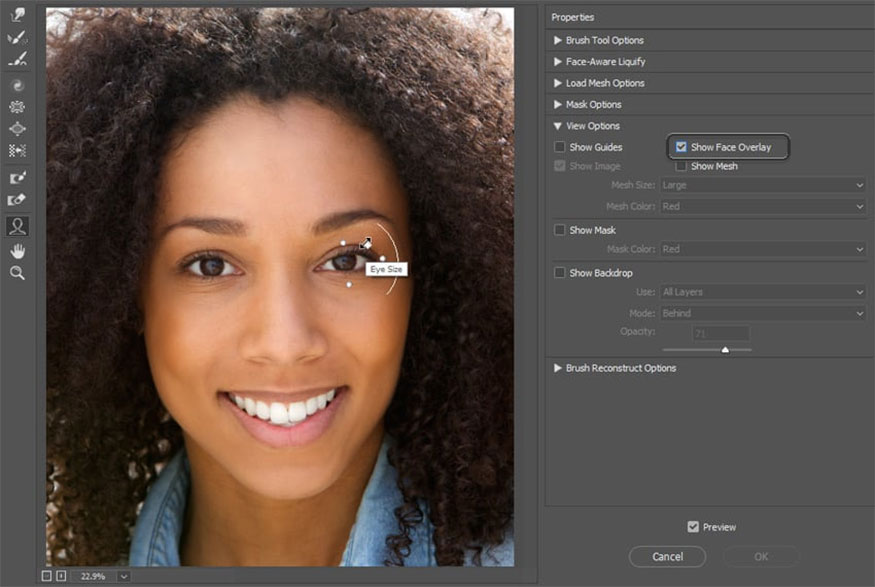
Face Tool (A): If your image has human faces, Photoshop will recognize and allow you to modify them individually. You move the mouse to the face section then click and drag the marker to change the angle, width, and height.

Hand Tool (H): This tool allows you to move through the photo. Hold down the Space key to activate it while using another tool.

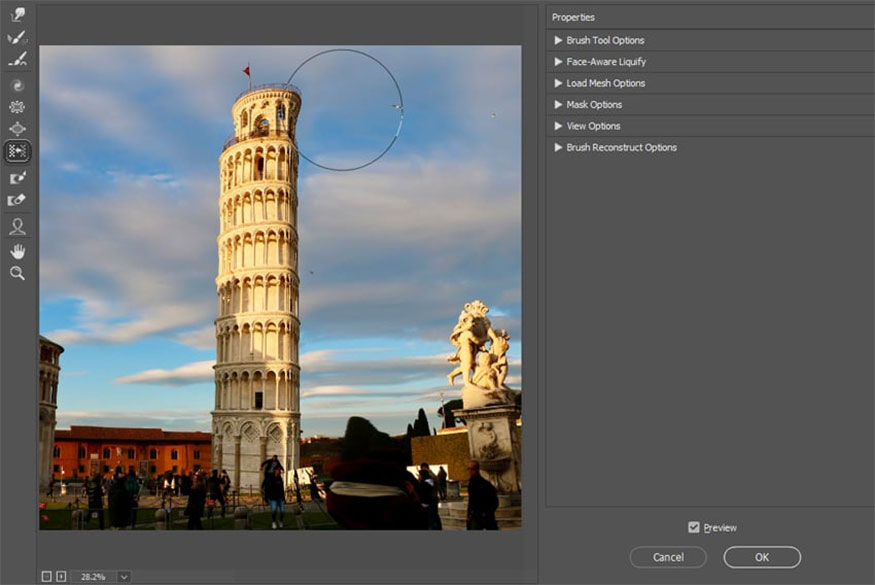
Zoom Tool (Z): Allows users to zoom in images. Hold down the Alt key to zoom out.
3. Liquify filter settings
Photoshop's Liquify filter feature has more settings that you can find on the right or left side of the screen.
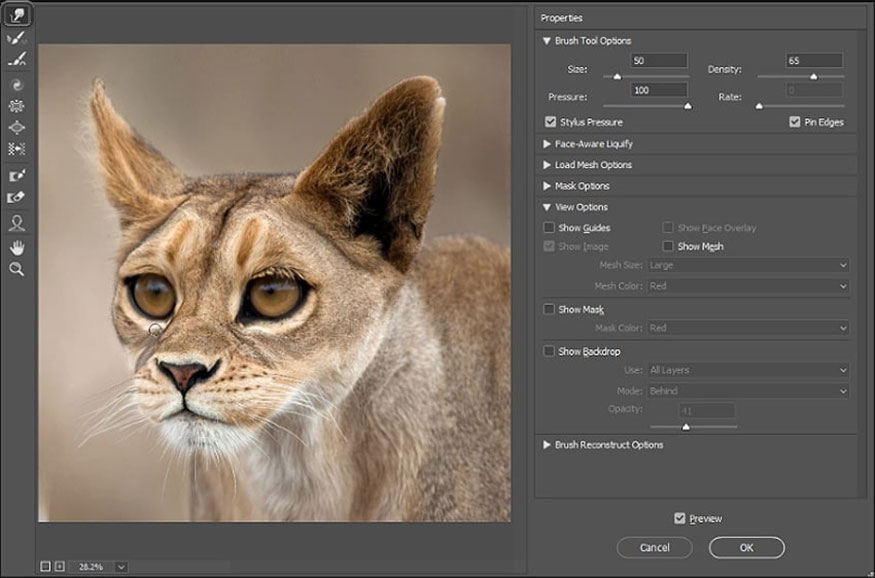
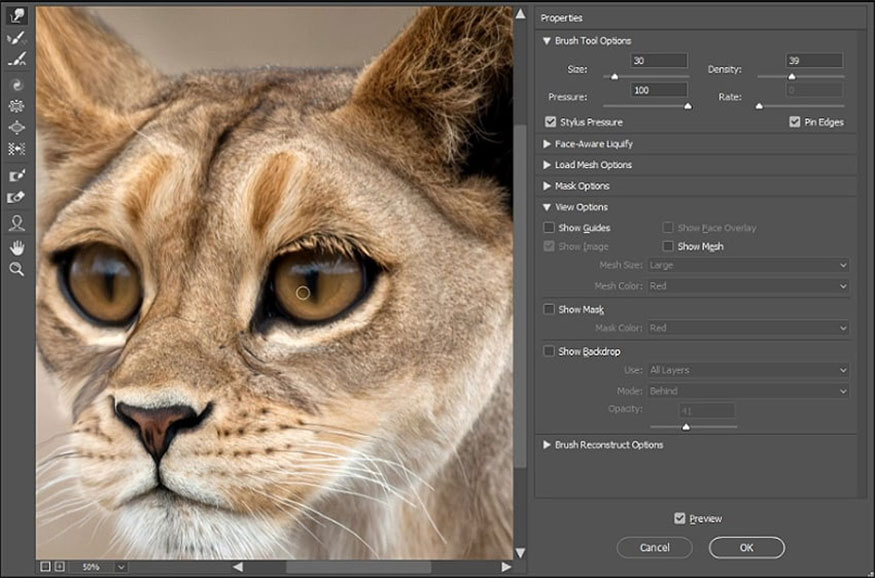
3.1. Brush Tool Options
You can make different settings for the brush such as:
- Change the size of the affected area by changing the slider. The size will determine how much the brush will affect that area.
- The Pin Edges option ensures that the edges of the image stay straight during editing.
- Stylus Pressure allows you to make more precise adjustments if you use a graphics tablet.
3.2. Face-Aware Liquify
These are the same settings that you can adjust using the Face Tool. Here you can access the actual numerical values of each adjustment, so you can make more precise edits.
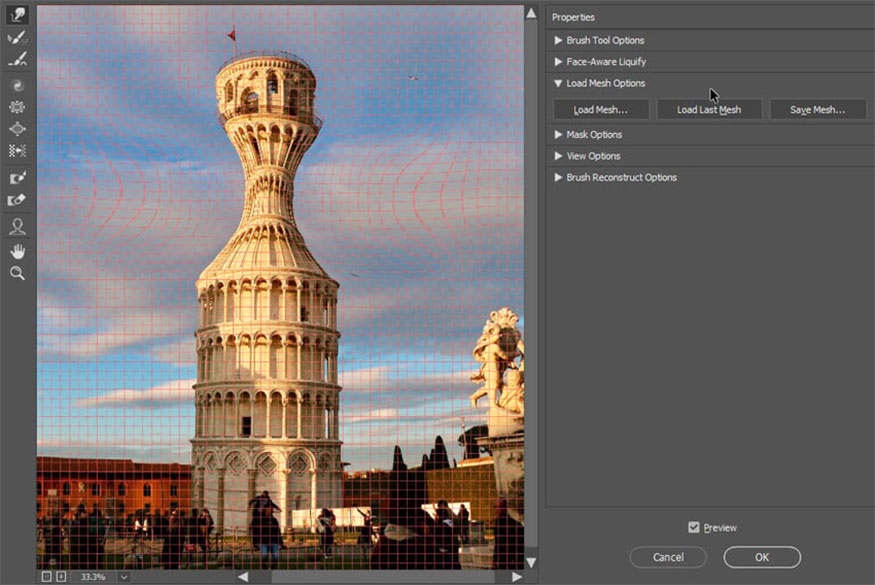
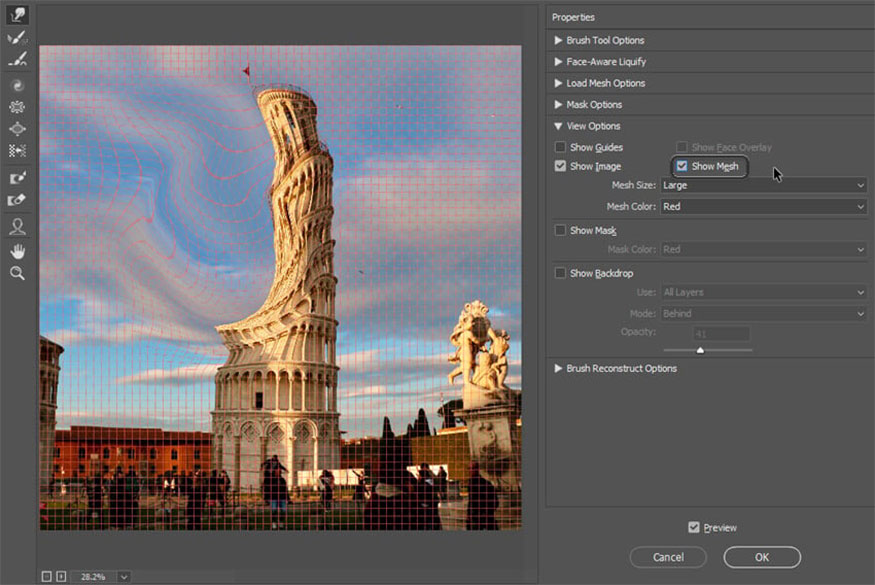
3.3. Load Mesh Options
The Liquify filter places a special mesh on your image, so when editing the image, this mesh will also be modified. Grids can be stored as files. With this method you can modify one image, then apply the same modifications to another image by using the Save Mesh and Load Mesh functions.
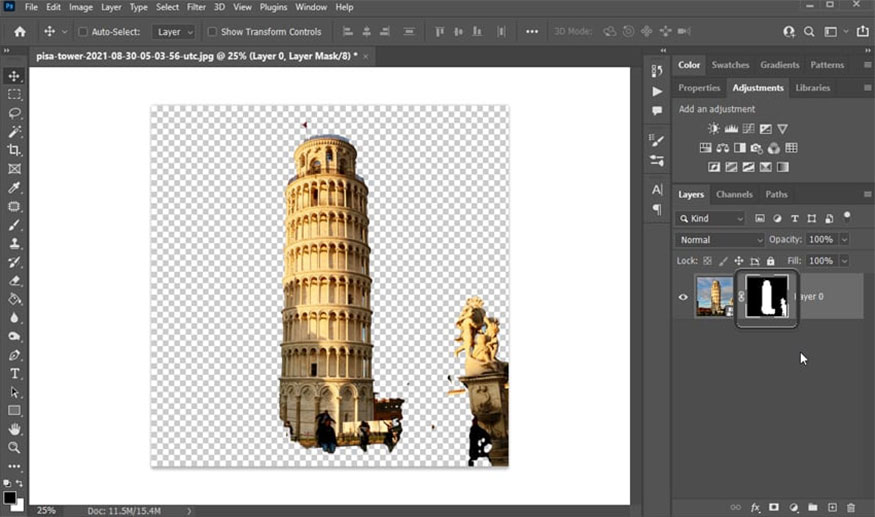
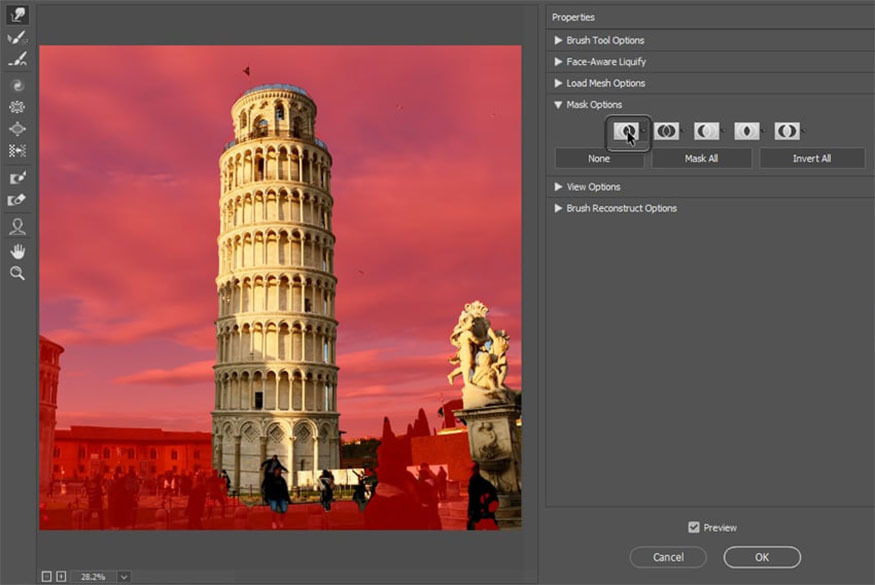
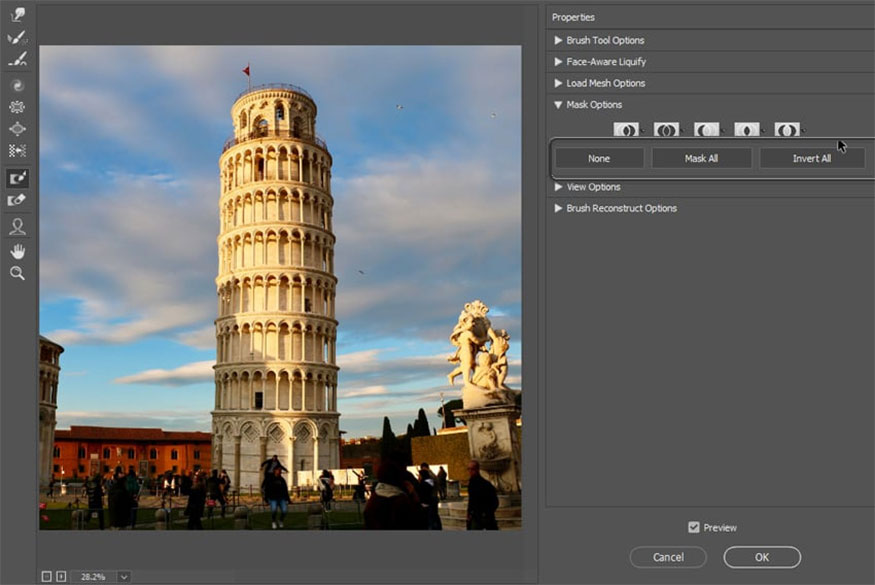
3.4. Mask Options
If you have a Layer Mask on your photo, you can use it here as well.
- Replace Selection turns the black area of the Layer Mask into a Liquify Mask.
- Add to Selection helps remove the Liquify mask from the white area of the Layer Mask.
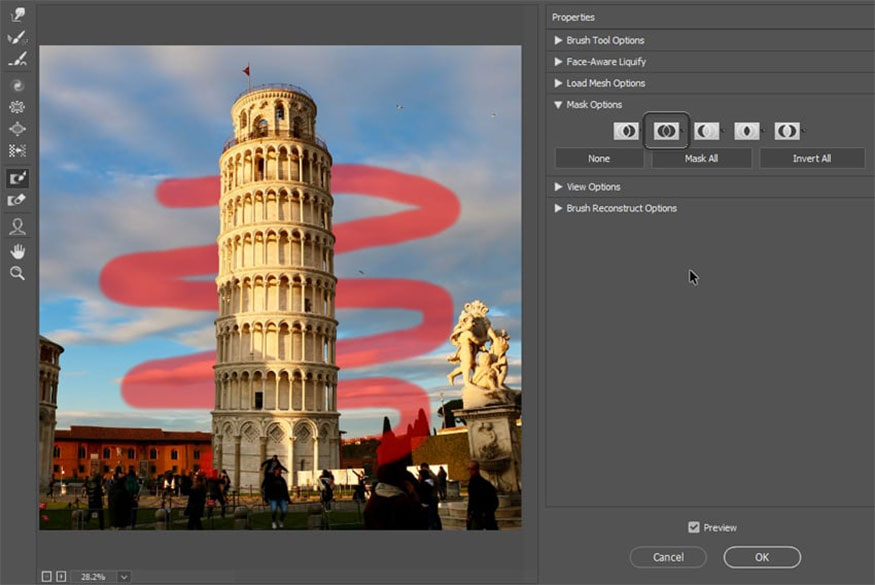
- Subtract from Selection turns the white area of the Layer Mask into a Liquify Mask.
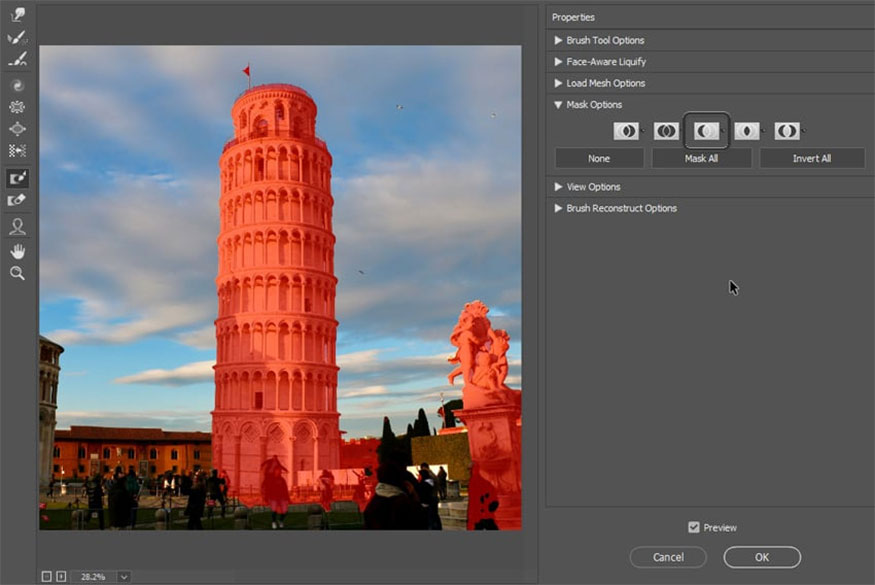
- Intersect with Selection adds the black area of the Layer Mask to the Liquify Mask.
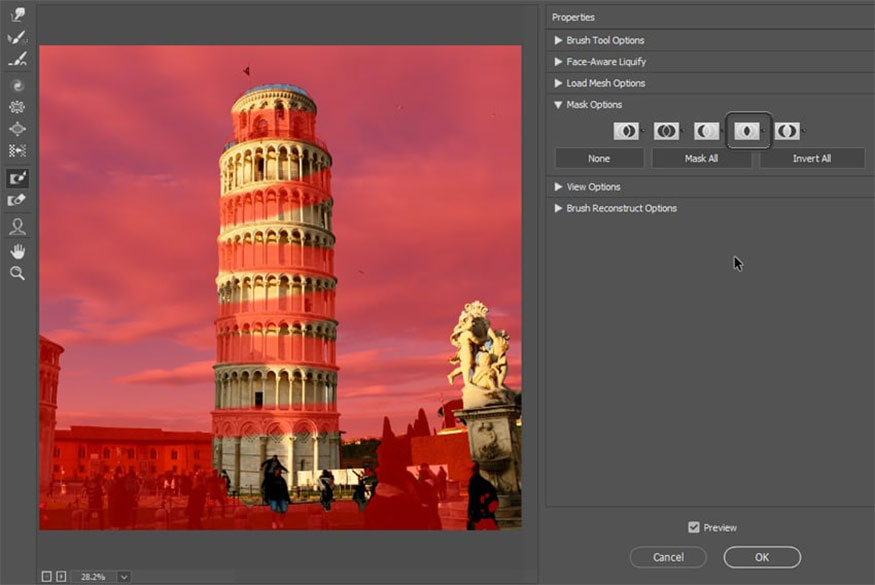
- Invert Selection removes the Liquify mask from the white area of the Layer Mask, while keeping it in the black area.
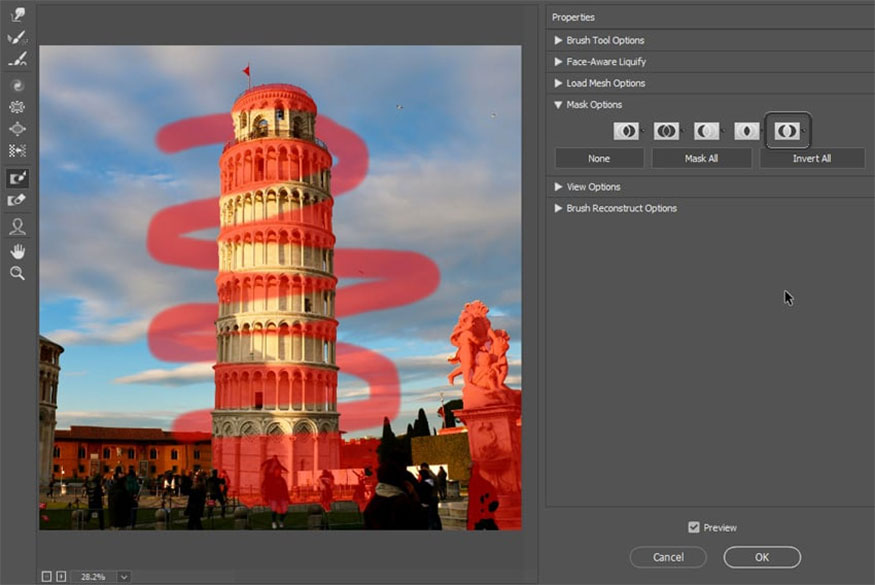
If you do not have a Layer Mask, you can refer to the following adjustment buttons:
- None: Remove the mask.
- Mask All: Turn the entire photo into one large mask that you can selectively erase later.
- Invert All: Turn the covered area into an unmasked area and vice versa.
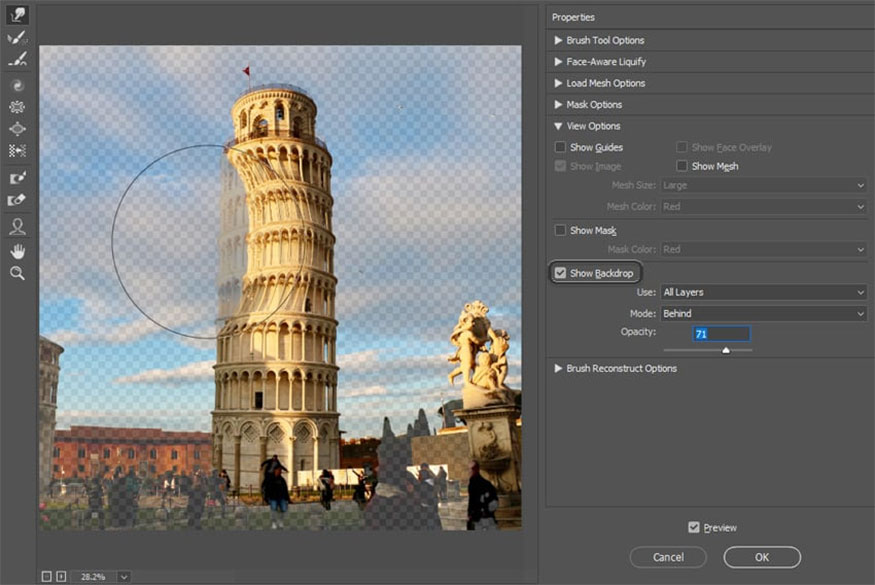
3.5. View Options
These options don't change anything about the photo, instead they just help you work with the filter.
- Show Guides turns on or off the visibility of the guide.

- Show Face Overlay shows and hides the visibility of the guides that appear when you use the Face Tool.
- Show Images shows and hides images in case you want to look at the grid more closely.
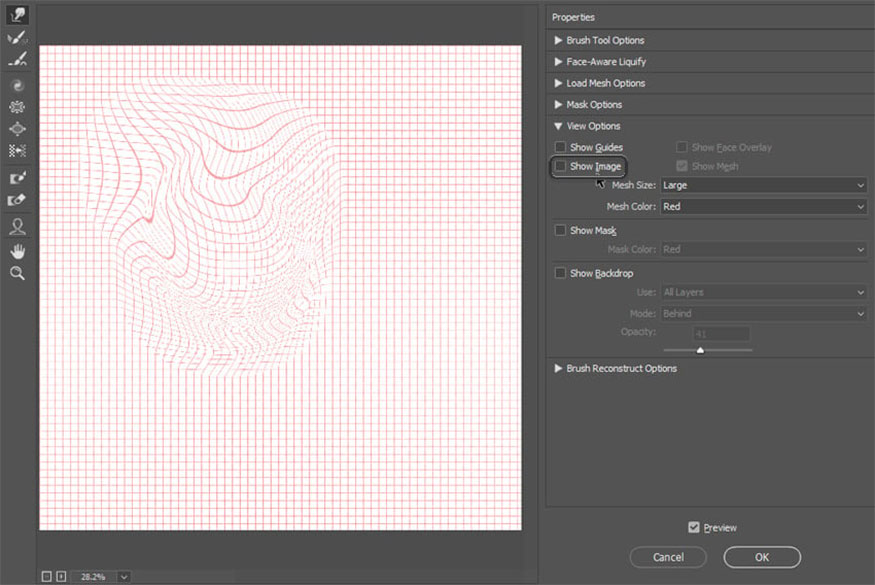
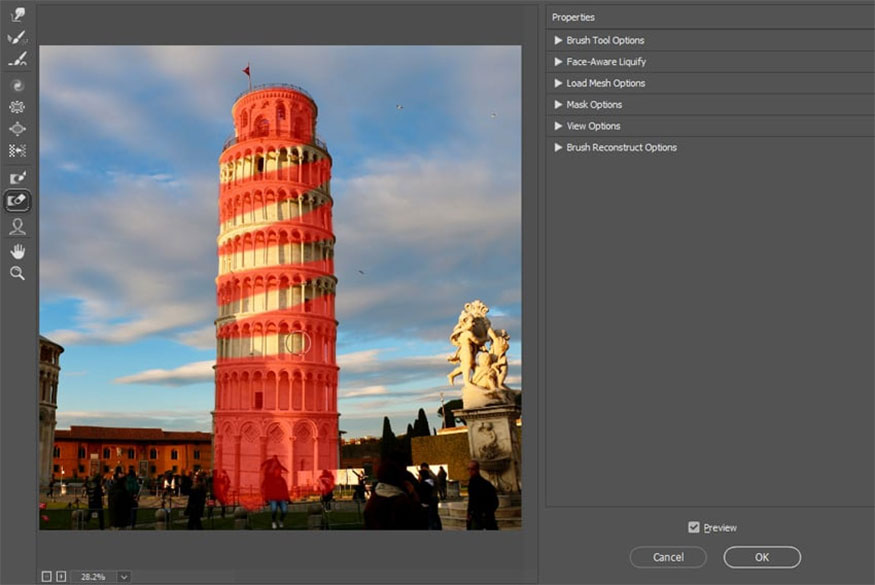
- Show Mesh shows and hides the mesh to which modifications are linked.
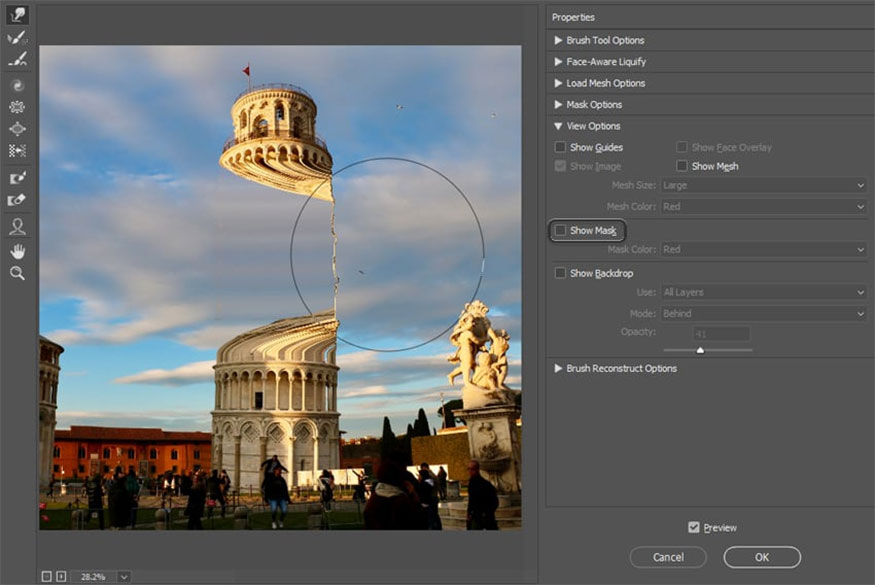
- Show Mask shows and hides the mask drawn in the image. Hidden masks do not lose their effectiveness.
- Show Backdrop allows you to see an unedited version of your photo. You can change the overlay's settings to make it more or less visible.
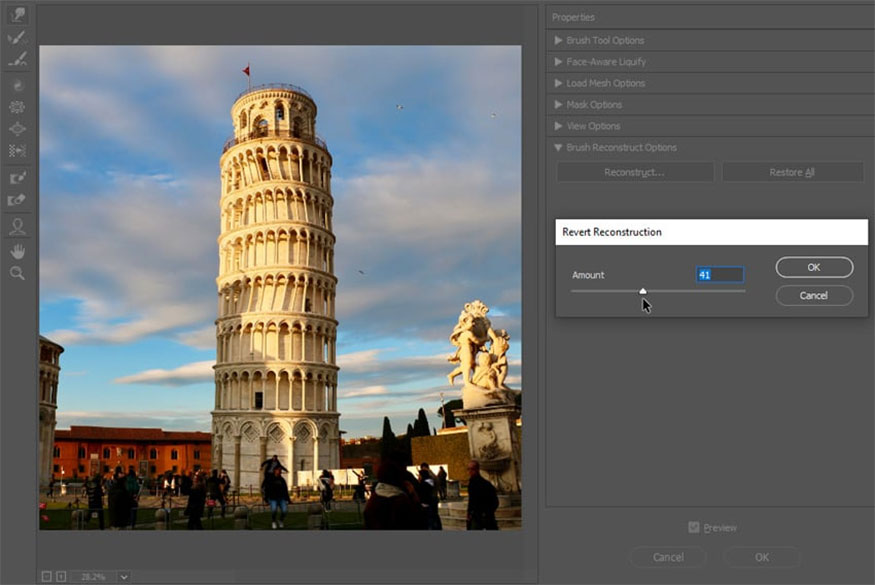
3.6. Brush Reconstruct Options
You can use the Reconstruct function to gradually reduce the amount of change. If you just want to return to the original, click Restore All.
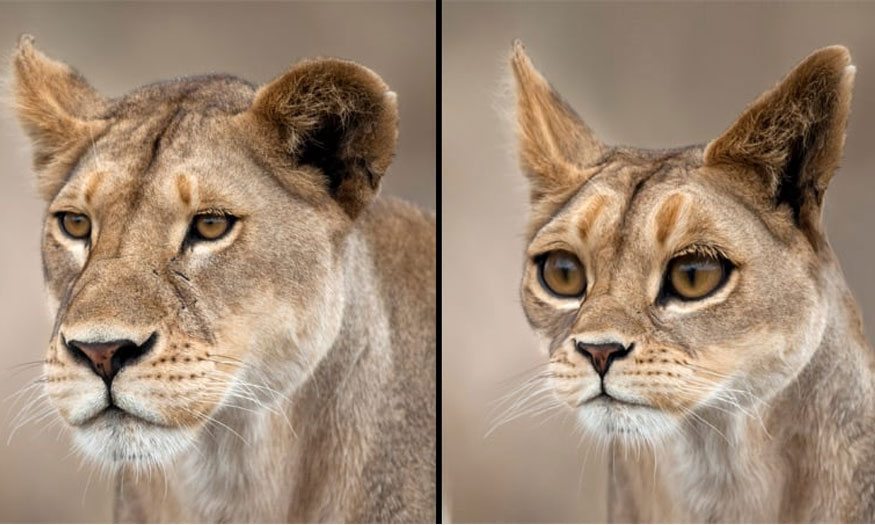
4. How to use the Liquify tool
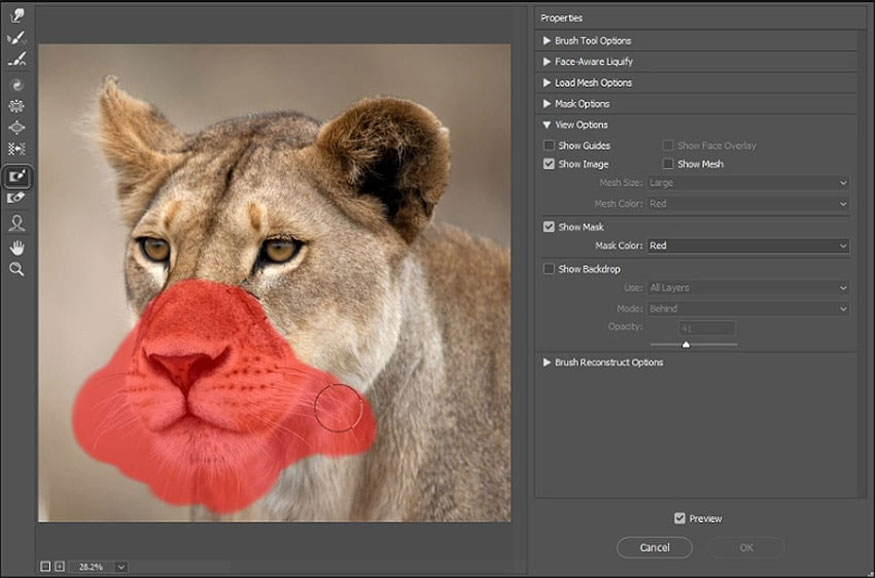
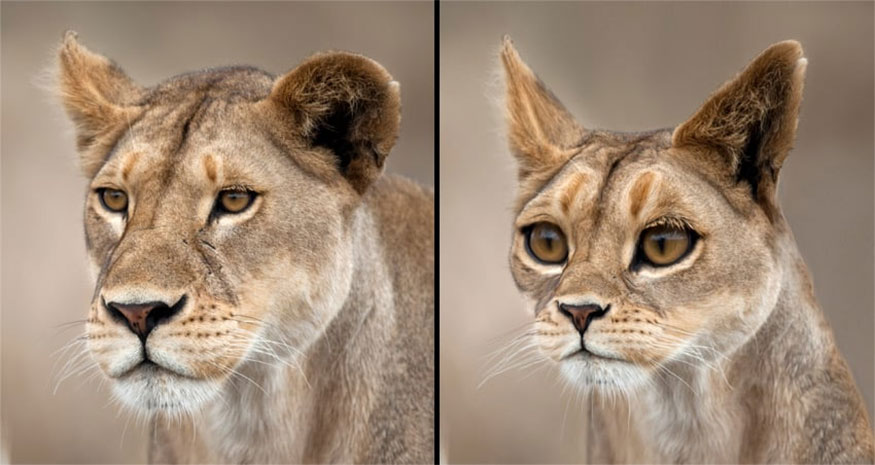
To use the Liquify tool in Photoshop, you can follow the following instructions on how to transform from a lion to a cat:
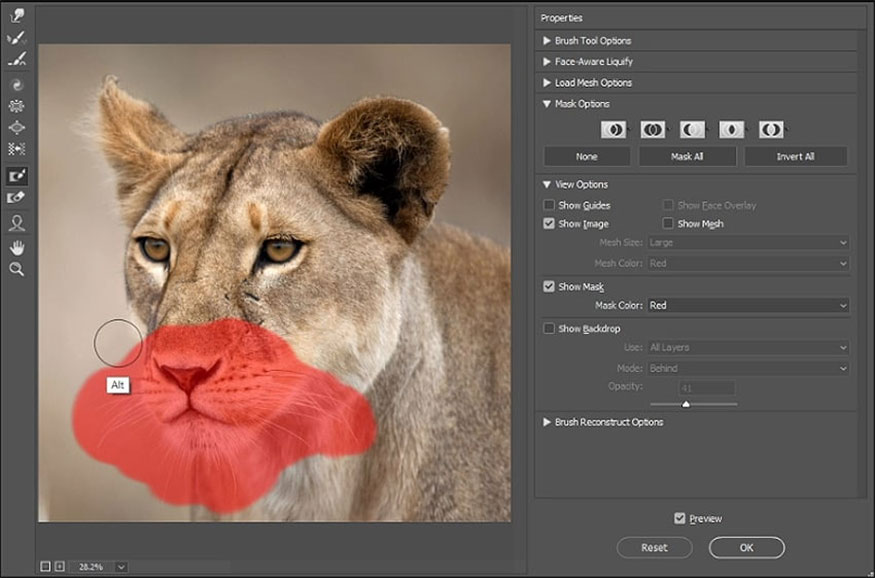
Step 1: Open the image you want to edit, use Freeze Mask Tool (F) to draw on the lion's snout. Then hide the mask and invert it.
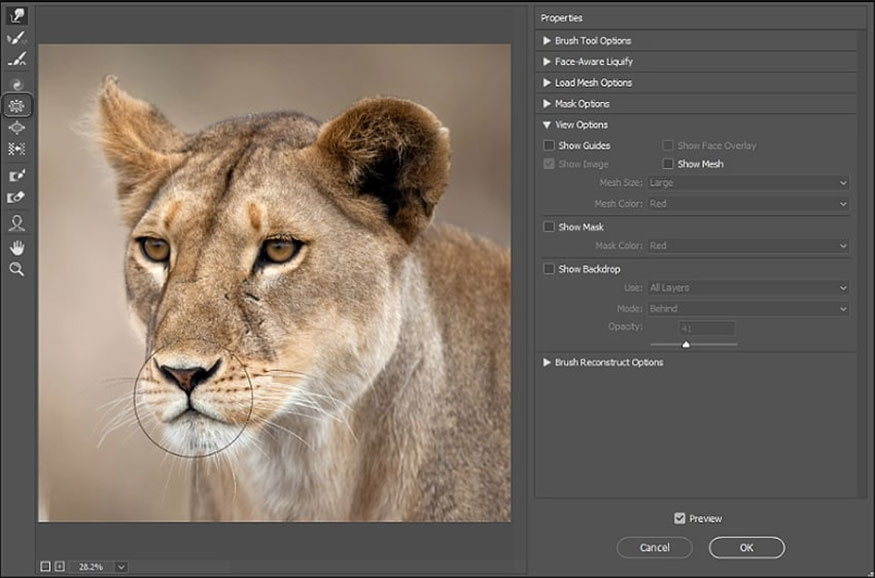
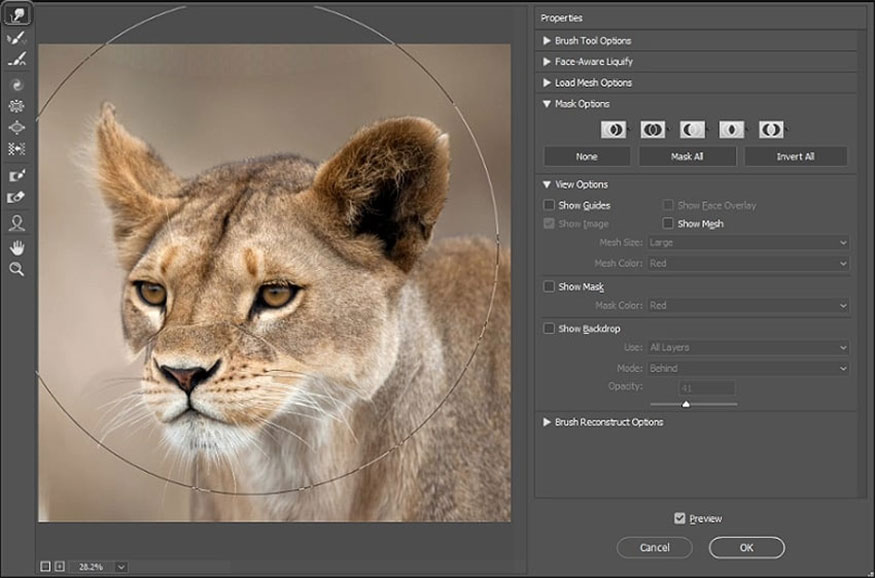
Step 2: Use the Pucker Tool (S) to make the lion's snout smaller. This is the basic difference between lions and cats.
Step 3: Reveal the mask again and reduce the size of the area a bit.
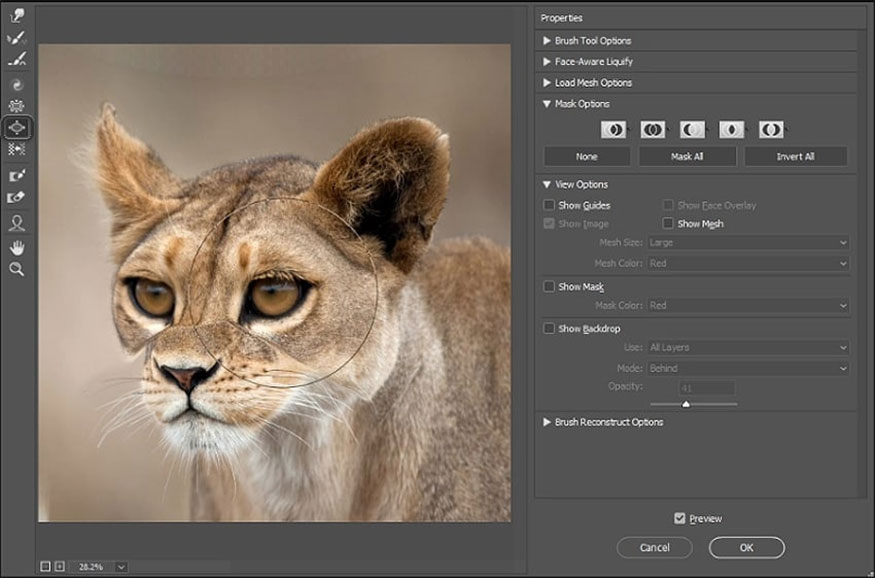
Step 4: Using the Forward Warp Tool (W) with a large brush, pull down the entire top part of the head. This will make the snout look short, suitable for cats.
Step 5: Use Bloat Tool (B) to make the eyes bigger.
Step 6: Remove the mask and use the Forward Warp Tool (W) to adjust the shape of the rest of the head. The transformation makes the ears long and pointed, making the forehead lower and the eyebrows larger. To make the mask's outline less visible, use the Smooth Tool (E) and Reconstruct Tool (R).
Step 7: Cover the eyes, adjust a little more to create a real cat.

Step 8: Invert and hide the mask. Then, use the Forward Warp Tool (W) with a low density brush to pull the pupil down.
Step 9: When you're done, click OK.
To make the final result more convincing, use the Patch Tool (J) to hide the "seams". No matter how powerful the Liquify tool is, you may still need some assistance from other Photoshop tools to achieve perfect results!
Hopefully the sharing that Sadesign brings above has helped readers better understand the Liquify tool in Photoshop, as well as the simplest and most effective ways to use this tool!


VIP Products


Best Selling Products
Windows 10 & 11 Pro Key
36 USD
Upgrade Duolingo Super
29 USD
Genuine Cheap Canva Pro
39 USD
Genuine Adobe Illustrator account
99 USD
Capcut Pro 1 Year
39 USD
Upgrade Genuine Office 365
49 USD
MidJourney Account
29 USD
Adobe Premiere Pro Account
99 USD
ChatGPT Plus Account (GPT-4)
16 USD
Upgrade genuine Capture One account
120 USD
Plugin Retouch4me
69 USD
Adobe Photoshop Copyright - Full App
120 USD
Autodesk All App Account Copyright
120 USD
Copyright Adobe Lightroom Account
59 USD
Freepik Premium Account
59 USD