Best Selling Products
The Secret to Using Layer Masks in Photoshop Most Effectively
Discover how to use Layer Masks in Photoshop to edit and create professional photo effects. This step-by-step guide will help you master this powerful tool, from hiding unwanted areas to creating creative designs with flexibility.

1. What is Layer Mask?
Layer Mask is considered as the layer mask in Photoshop. Layer Mask will cover part or all of your Layer. The thickness (coverage) of the layer mask depends on the darkness of the layer, meaning that if the layer mask is darker black, the layer will be covered more.
Layer Mask is located at the bottom of the Layer panel toolbar, select the desired layer and turn on the mask.
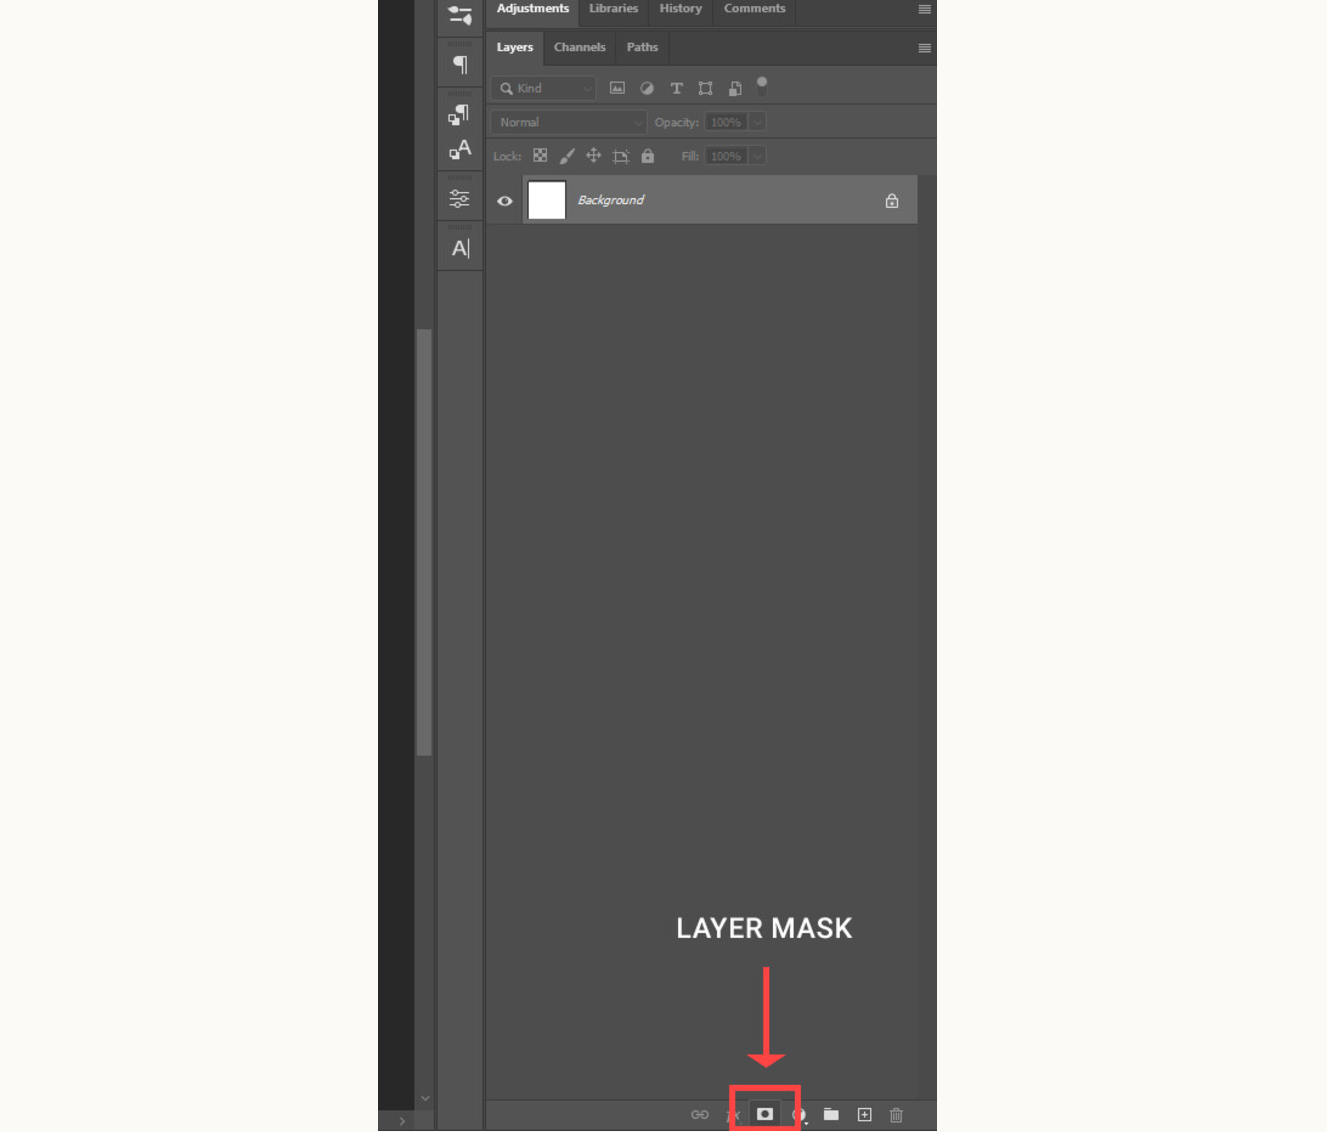
As mentioned above, Layer Mask acts as a mask for your main layer. Suppose you want to use the Brush tool to erase an object in the photo, if you erase directly on the photo layer, you will have to edit it again with Ctrl + Z, which is very time-consuming. But if you turn on Layer Mask, you can easily erase and edit it without much effort, without distorting your original photo.
2. How to use the Layer Mask tool
Use Layer Mask to arrange object position
Suppose SaDesign has a mountain photo and the text “ Hello ” as below, so how to make the text Hello behind the mountain range?

There are 2 ways for you to do this including: Using Layer Mask combined with Brush or using Object Select Tool to separate the mountain object. However, in this article, SaDesign will only mention the Layer Mask method . Don't worry, just read it and you will know how to use it right away!
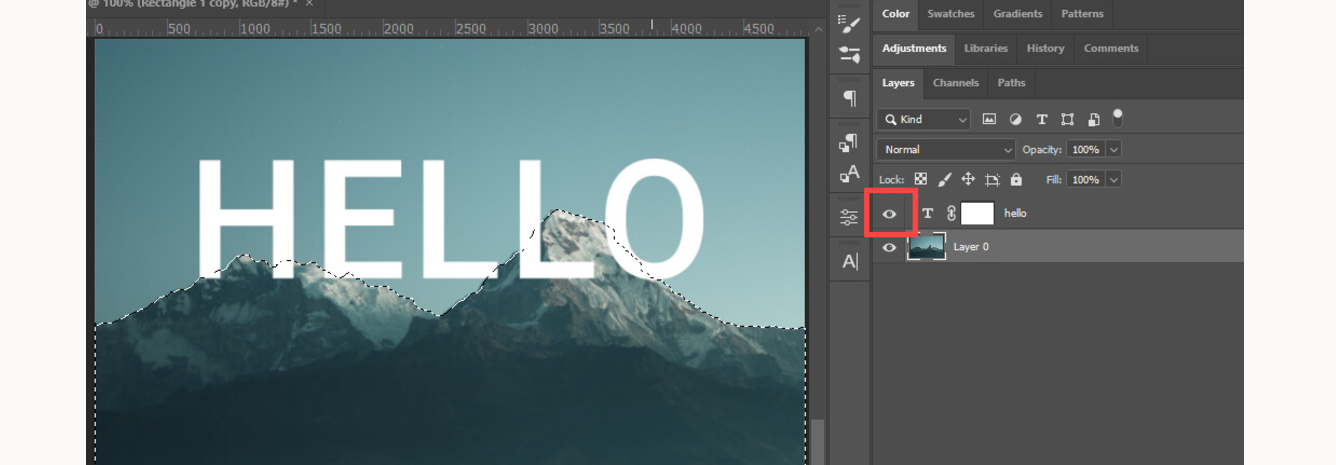
Step 1: Turn on Layer Mask for the Text line layer.
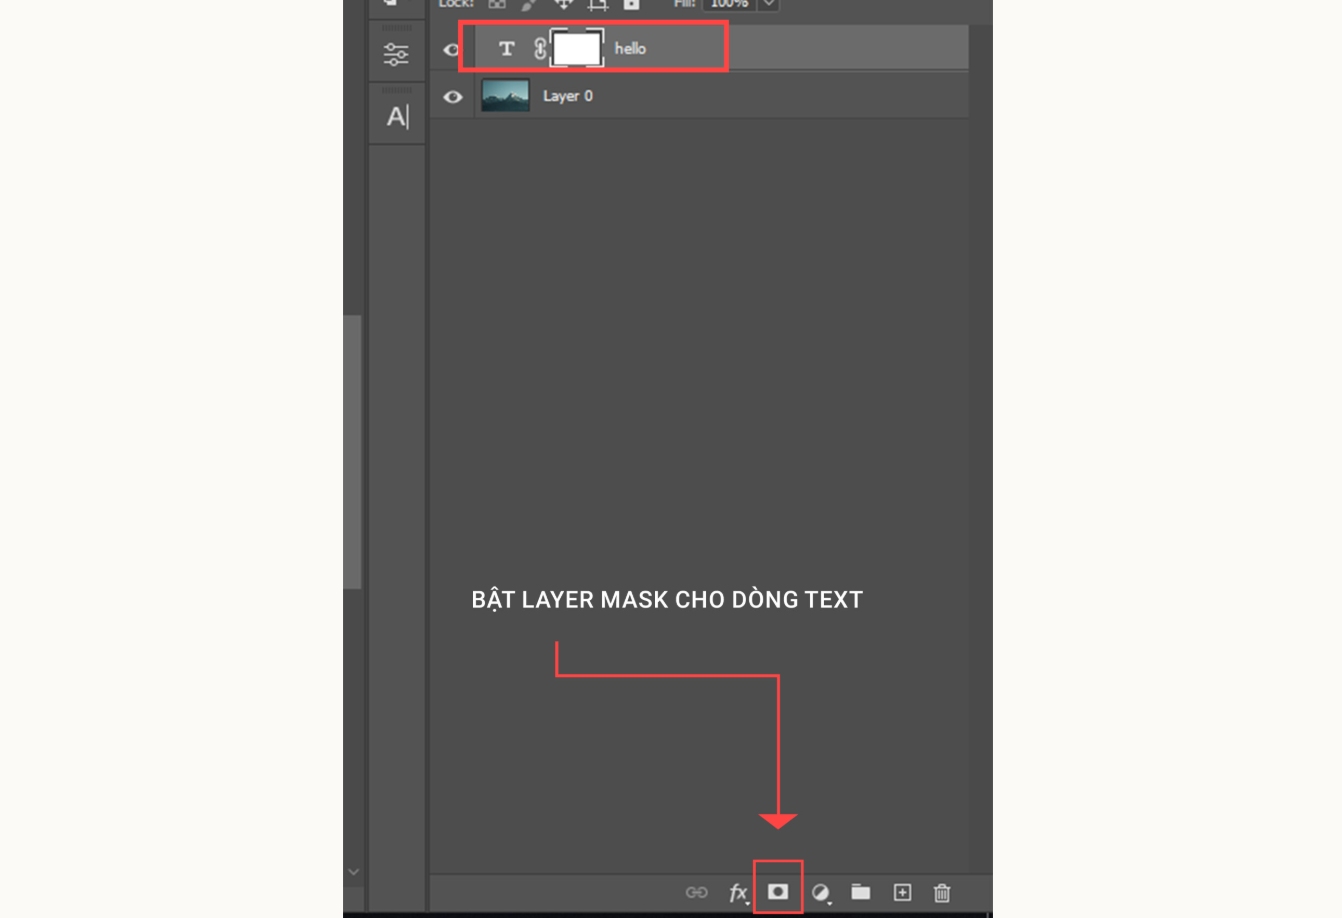
Then, click on the eye icon to turn off this text layer.
Step 2: Move the text behind the mountain range
Select the mountain range photo layer, use the Quick Selection Tool and paint over the areas where the text is being inserted.

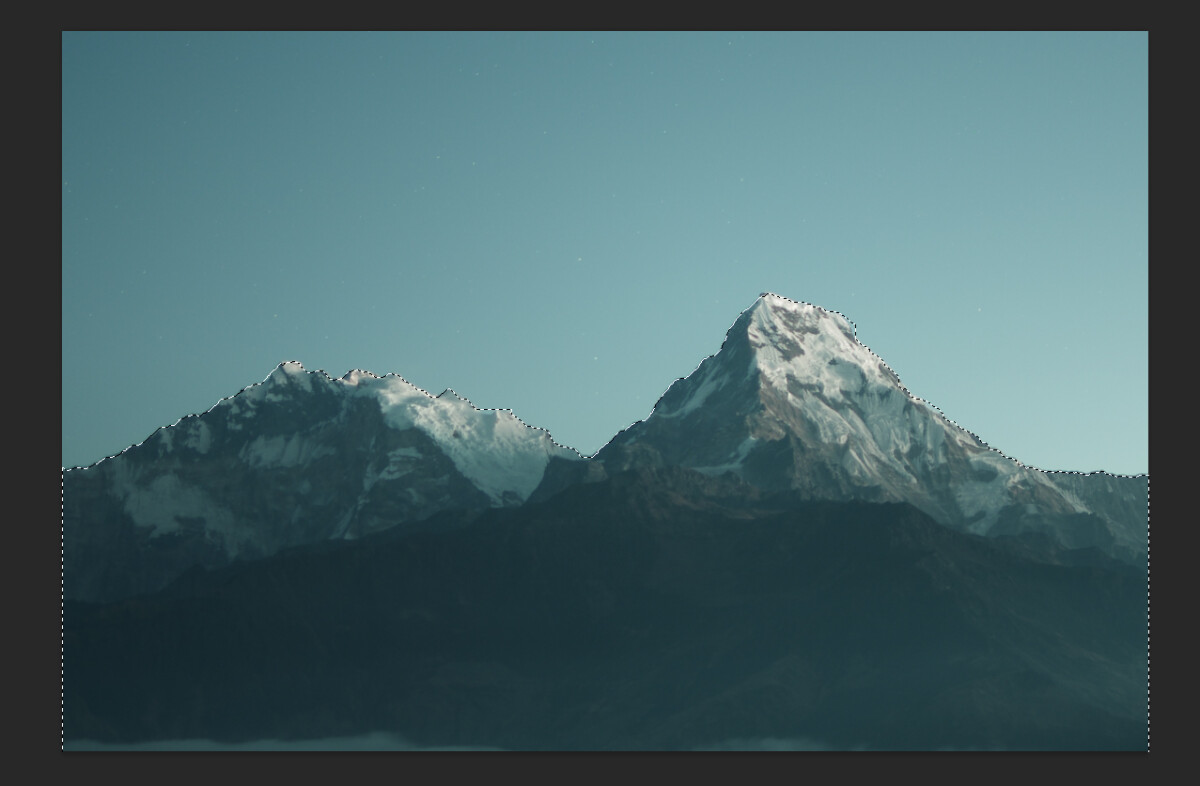
Using the Quick Selection Tool to define a mountain range is like a squiggly line, meaning that whatever you erase will only be within the squiggly line and will not affect the area outside (in this case, the sky). Once you have defined the range, turn on the text layer.
Step 3: Delete the excess text
Now select the Layer Mask of the Text layer that was enabled in step 1.

Use the Brush tool and change the color of the brush to black. The reason is because the Layer Mask of the text line is white (meaning the text layer has a white mask on it), so you have to change the brush color to black to cover that mask.
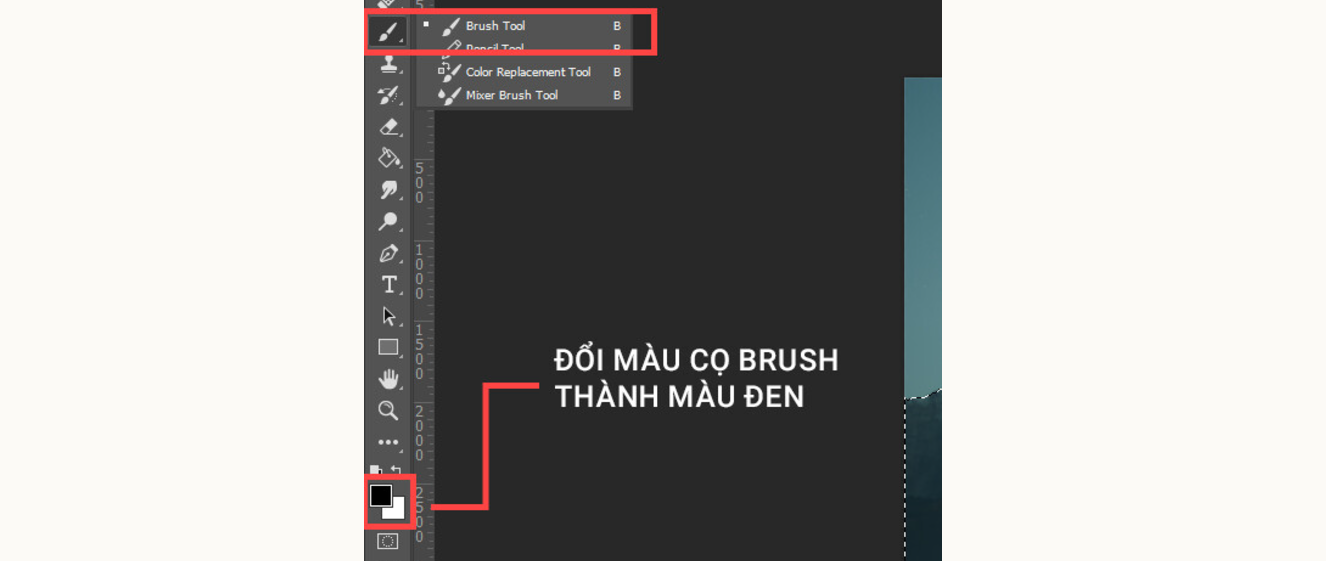
Note: You can use the X key to quickly change the Brush color.
After selecting the Brush tool , click on the Text line's layer Mask and start erasing.
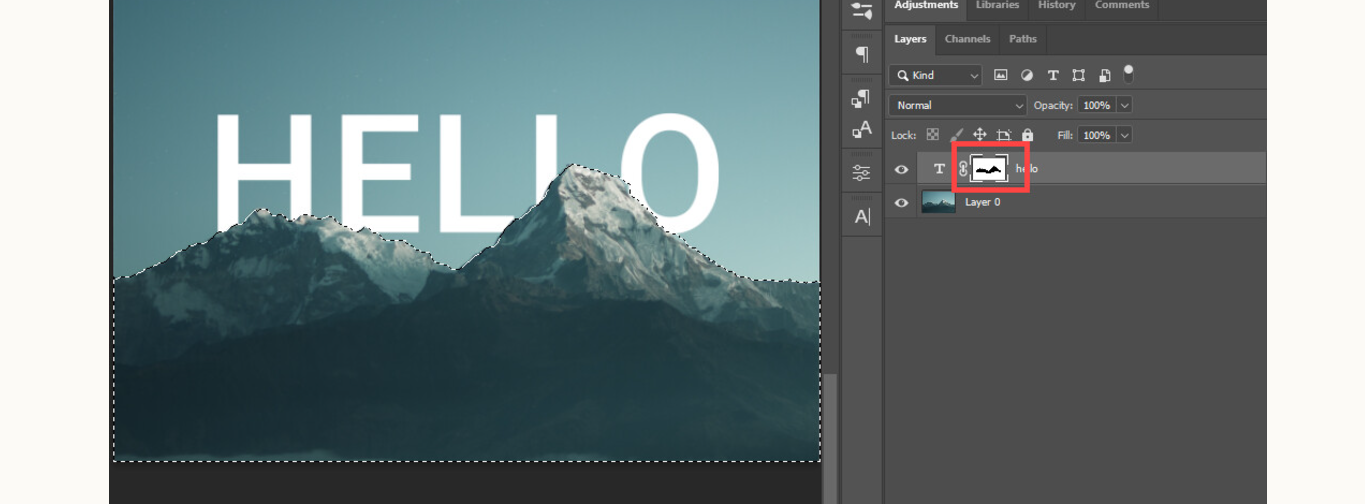
As you can see, a black area appears in the Layer Mask of the Text line, which is the Brush that you have painted over. On the other side of the image, the bottom part of the Text line “ Hello ” has also been removed, making it look like the word Hello is behind the mountains. Pretty cool, right?
Note: In case you want to edit the layer you just deleted, just change the Brush color back to white and paint over the black part.
To turn off the mountain range's ant trails, press Ctrl + D. Add a little more shadow and the effect is complete.

Above is a guide on how to use Layer Mask in Photoshop. You can apply Layer Mask in many different designs to bring the most vivid effects. The above adjustments are for reference only, please try to experience for your own personal experience!
---------------------------
Installation and support contact information:
🏡 SADESIGN Software Company Limited
📨 Email: phamvansa@gmail.com
🌍 Website: https://sadesign.ai


