Best Selling Products

Windows 10 & 11 Pro Key
36 USD

Adobe Premiere Pro Account
99 USD

Autodesk All App Account Copyright
120 USD

Freepik Premium Account
59 USD

Genuine Adobe Illustrator account
99 USD

Capcut Pro 1 Year
39 USD

Upgrade genuine Capture One account
120 USD

Upgrade Genuine Office 365
49 USD

Adobe Photoshop Copyright - Full App
120 USD

ChatGPT Plus Account (GPT-4)
16 USD

Plugin Retouch4me
69 USD

Upgrade Duolingo Super
29 USD

Copyright Adobe Lightroom Account
59 USD

Genuine Cheap Canva Pro
39 USD

MidJourney Account
29 USD
Top apps for editing ID photos on your phone that are professional and fast.
Nội dung
- 1. The outstanding benefits of using photo editing apps for ID photos on your phone.
- 1.1. Maximize savings on travel time and costs.
- 1.2. Actively control facial expressions and angles.
- 1.3. Flexible and diverse background editing capabilities
- 2. Essential features of a high-quality ID photo editing app.
- 2.1. Automatic background removal and font color adjustment features
- 2.2. International Standard Size Format
- 2.3. Tools for light makeup and artificial costume adjustments
- 3. Step-by-step process for taking and processing ID photos at home.
- 3.1. Step one: Prepare the space and lighting conditions appropriately.
- 3.2. Step two: Choose a photo editing app on your phone and upload your photo.
- 3.3. Step three: Change the background and adjust the size according to the intended use.
- 3.4. Step four: Matching the costume and refining facial details.
- 3.5. Step five: Save the file in high quality and print when needed.
- 4. Common mistakes that lead to passport photos being rejected when submitting applications.
- 4.1. Using filters that completely alter facial features.
- 4.2. Disproportionate head and shoulder ratio in the frame.
- 4.3. Low image quality and blurriness due to insufficient lighting.
- 5. Discover the superior smart ID photo creation solution at appvip.ai
- 6. How to optimize your phone's camera quality before taking photos.
- 6.1. Clean the front and rear camera lenses of the device.
- 6.2. Set the camera resolution to the highest possible level.
- 6.3. Use the timer function or the included stand accessory.
- 7. Conclusion
Detailed instructions on how to create your own passport-style photo at home using photo editing apps on your phone. Discover smart photo processing solutions, accurate sizing, and perfect backgrounds at appvip.ai.
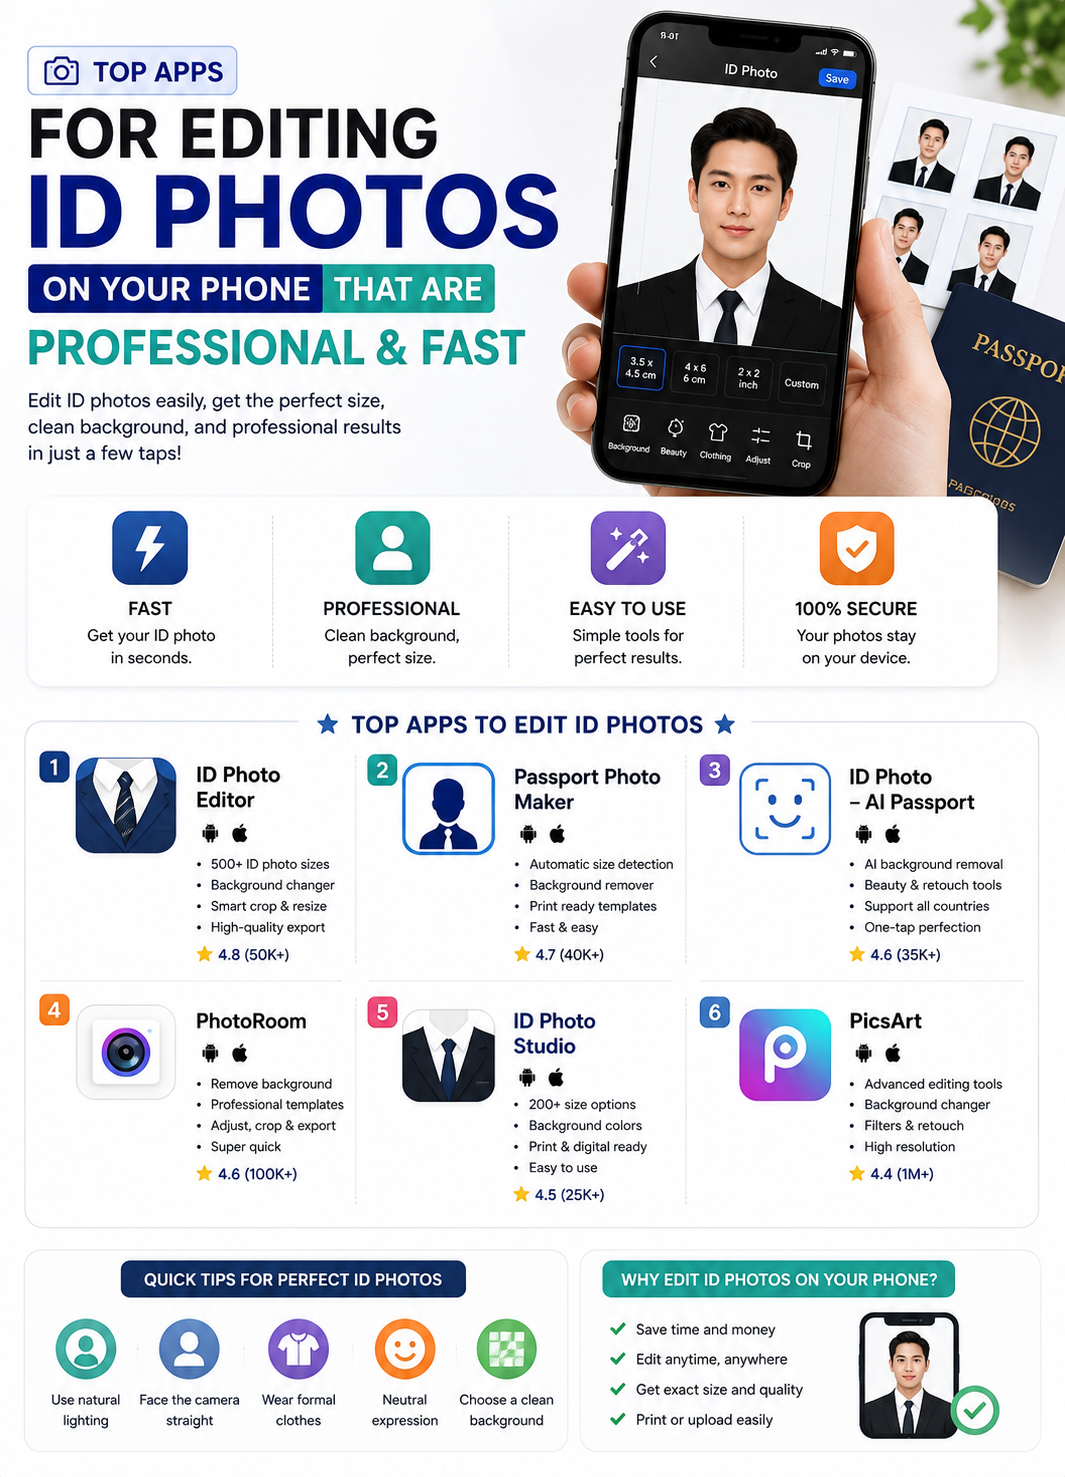
1. The outstanding benefits of using photo editing apps for ID photos on your phone.
1.1. Maximize savings on travel time and costs.
Traveling to a photo studio, waiting for the photographer, editing, and then waiting to pick up the files consumes a significant amount of your day. Using mobile apps, the entire process from taking the picture to post-processing takes only ten to fifteen minutes. You can do this anywhere and at any time, without being dependent on the opening hours of photo studios.
1.2. Actively control facial expressions and angles.
Many people often feel nervous or stiffen their facial muscles when standing in front of a stranger's camera at a photo studio. Taking selfies with a personal device provides a more relaxed mindset, allowing you to easily smile subtly or adjust your facial angle to highlight your best features. You can take dozens of shots until you choose the perfect one to edit and combine.
1.3. Flexible and diverse background editing capabilities
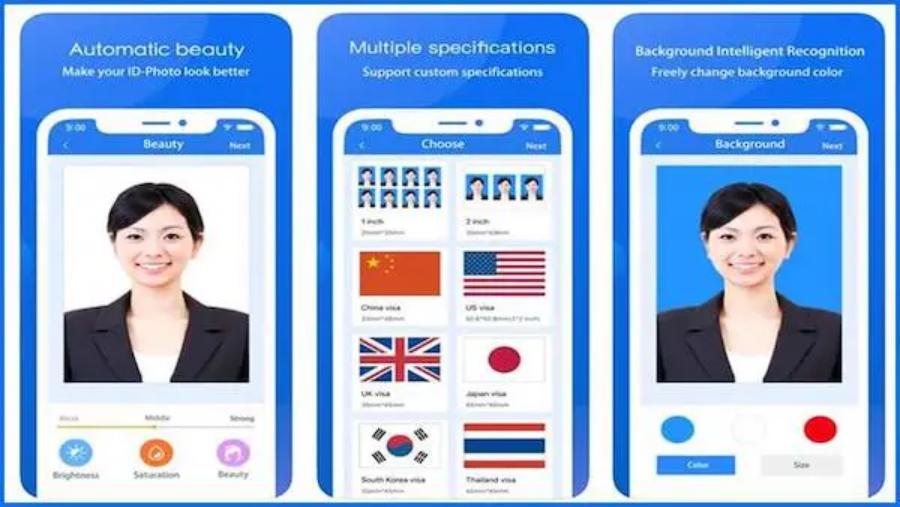
Modern applications incorporate very intelligent facial recognition features for automatic background removal. You don't need to prepare a perfect green or white wall behind you when taking photos. The system will automatically remove the unwanted background and replace it with the standard green or white background required by administrative agencies.
2. Essential features of a high-quality ID photo editing app.
2.1. Automatic background removal and font color adjustment features
This is the most important tool determining the professionalism of a passport photo. A good application must be able to sharply recognize strands of hair and clothing edges to avoid revealing cropping marks when switching to a new background. The transition between a white background (for passports, visas) and a blue background (for driver's licenses, academic records) must be smooth.
2.2. International Standard Size Format
Each type of document has strict size regulations, such as 2x3, 3x4, or 4x6 centimeters. The processing application needs to have these precise grid lines integrated. Users simply need to adjust the image so that the head, shoulders, and distance from the top of the head to the edge are in the correct standard positions on the screen.
2.3. Tools for light makeup and artificial costume adjustments
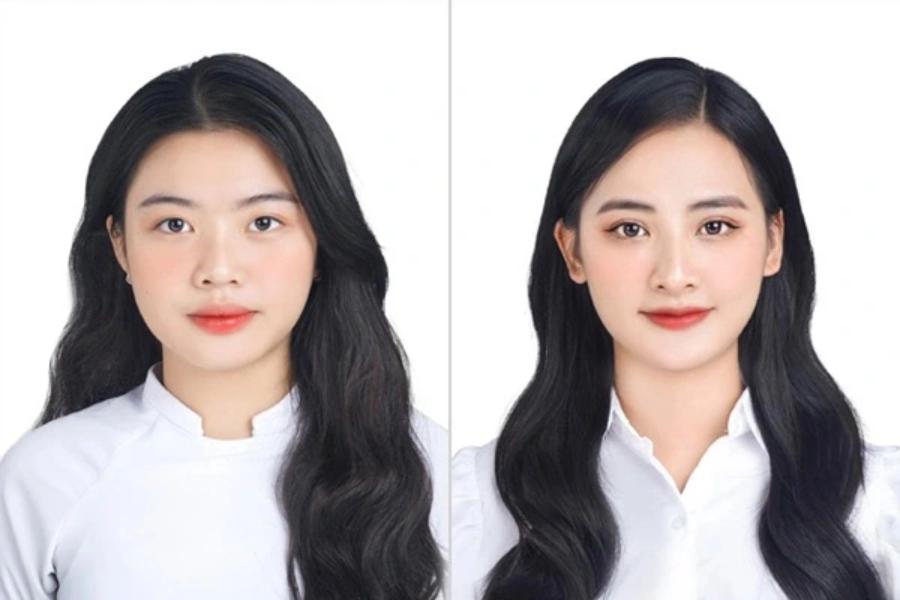
To make the photo look more formal and professional, features like adding shirt collars and vests are essential. Additionally, tools for smoothing skin, brightening eyes, balancing eyebrows, or adding a touch of subtle lipstick will help brighten the face without altering core identifying features.
3. Step-by-step process for taking and processing ID photos at home.
3.1. Step one: Prepare the space and lighting conditions appropriately.
You should choose a spot facing a natural light source such as a window or a room with evenly lit electric lights. Avoid standing under direct overhead lighting as this will create patchy shadows on your face. Hold your phone at eye level and keep it about an arm's length away, or ask a family member to take the picture for you.
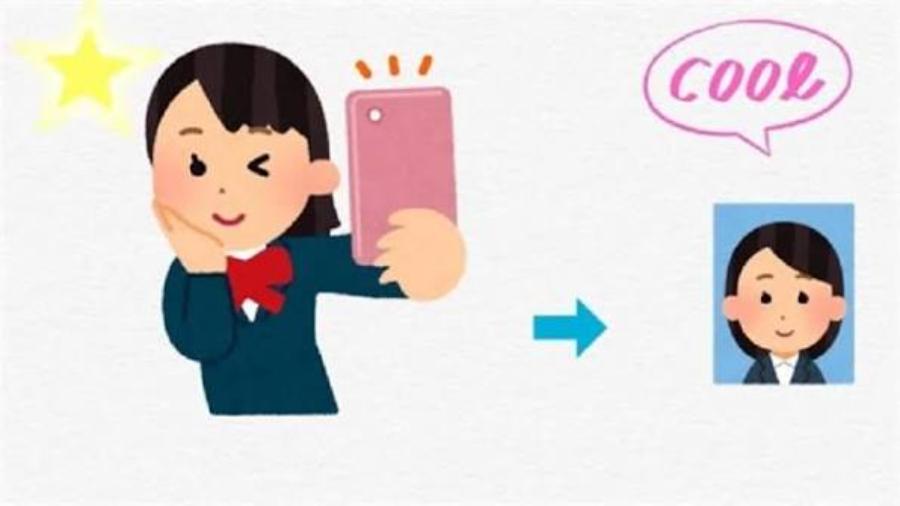
3.2. Step two: Choose a photo editing app on your phone and upload your photo.
Open the installed application and select the dedicated ID photo creation feature. You can take a photo directly using the application's camera or upload a clear portrait photo already taken from your phone's album. Remember to choose photos with a straight-on view, balanced shoulders, and eyes looking directly into the lens.
3.3. Step three: Change the background and adjust the size according to the intended use.
Use the cropping tool to select the appropriate size for the type of application you are creating. Activate the background removal feature so the system automatically filters out the background. Choose a blue or white background color as instructed by the online application receiving agency.
3.4. Step four: Matching the costume and refining facial details.
If your outfit isn't formal enough for the photoshoot, select the "Outfit" option to add pre-made white shirts or vests. Continue to fine-tune the brightness, contrast, and skin smoothing to maintain authenticity. Avoid removing moles or excessive editing that could alter biometric identification.
3.5. Step five: Save the file in high quality and print when needed.
Choose a popular file format like JPEG with the highest resolution to ensure the image doesn't become pixelated or blurry when displayed online. If you need to submit a hard copy, you can save the file as one large image containing multiple smaller passport-sized photos inside for convenient printing at a printing shop.
4. Common mistakes that lead to passport photos being rejected when submitting applications.
4.1. Using filters that completely alter facial features.
Making the chin too sharp, enlarging the eyes too much, or smoothing the skin to the point of losing the natural contours of the face are very serious mistakes. ID photos, used for identification purposes, require the highest level of accuracy. Excessive use of beauty filters will result in your application being immediately rejected during the review process.
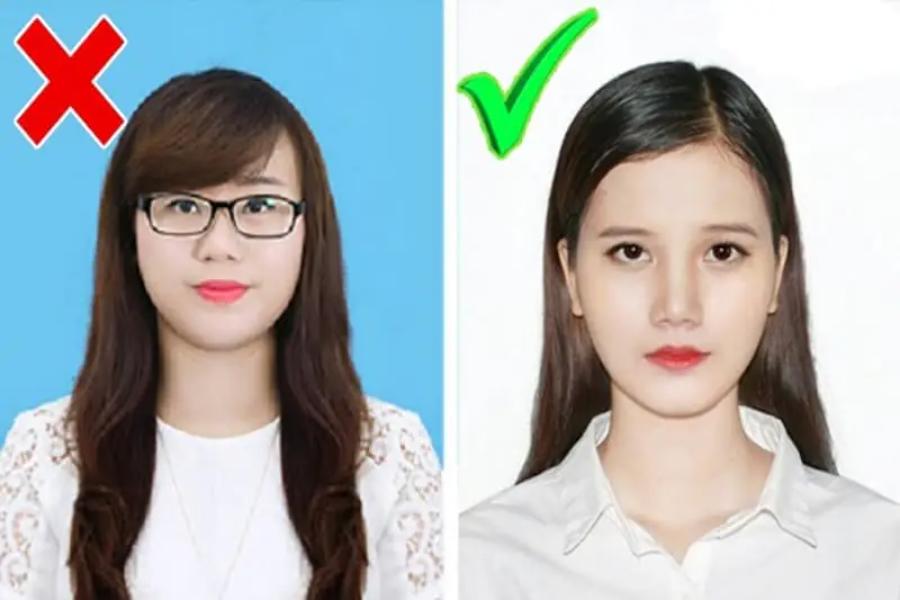
4.2. Disproportionate head and shoulder ratio in the frame.
Many people tend to crop photos too close to the face or leave too much empty space above the head. International passport photo standards always require the face to occupy seventy to eighty percent of the entire photo area. Incorrectly adjusting this ratio makes the photo look unbalanced and invalid.
4.3. Low image quality and blurriness due to insufficient lighting.
When taking photos in dark environments, phone cameras automatically increase the ISO sensitivity, leading to noise and blurring of details. A good ID photo should have high sharpness, clearly showing the pupils and facial features. Using low light completely diminishes the value of the photo after post-processing.
5. Discover the superior smart ID photo creation solution at appvip.ai
If you're looking for a highly accurate online photo editing tool without needing to download resource-intensive applications, the web platform appvip.ai is the perfect answer. Appvip.ai utilizes the most advanced artificial intelligence technologies to automate the entire process of portrait photo recognition and processing. At appvip.ai , the system boasts the ability to accurately separate backgrounds down to individual hair strands and automatically adjust facial proportions according to the strictest international standards. Users simply access appvip.ai , upload their photos, and the AI system will complete every step, from background replacement and brightness adjustment to adding business attire, in just seconds. The convenience, speed, and studio-quality output of appvip.ai are sure to satisfy even the most demanding customers.
6. How to optimize your phone's camera quality before taking photos.
6.1. Clean the front and rear camera lenses of the device.
The phone lens is frequently exposed to fingerprints, sweat, and dirt during daily use. This hazy layer reduces contrast and makes the photo look like it's covered in fog. Use a soft, specialized cloth to clean the camera lens before taking your ID photo.
6.2. Set the camera resolution to the highest possible level.
Access your phone's camera settings to check and enable high-quality image format. If your phone supports high-resolution photography or a professional mode, you should turn it on to retain as much detail as possible, making it easier to zoom in or crop later.
6.3. Use the timer function or the included stand accessory.
Holding your phone to take selfies can sometimes cause your shoulders to be uneven or your hand to shake, resulting in blurry photos. Using a small tripod combined with a three-second or five-second timer gives you enough time to adjust your posture, sit up straight, balance your shoulders, and keep your eyes looking straight ahead in the most natural way.
7. Conclusion
Mastering online technology applications makes our lives much more convenient and proactive. Owning a suitable photo editing app on your phone will help you quickly handle administrative procedures or job applications from home without much effort. By adhering to the correct principles of lighting, proportions, and choosing smart supporting tools, creating internationally standard portrait photos is completely easy. Hopefully, the detailed instructions and sharing in this article have provided you with useful information to confidently design the most perfect ID photos for yourself.





















VIP Products








Best Selling Products
Windows 10 & 11 Pro Key
36 USD
Adobe Premiere Pro Account
99 USD
Autodesk All App Account Copyright
120 USD
Freepik Premium Account
59 USD
Genuine Adobe Illustrator account
99 USD
Capcut Pro 1 Year
39 USD
Upgrade genuine Capture One account
120 USD
Upgrade Genuine Office 365
49 USD
Adobe Photoshop Copyright - Full App
120 USD
ChatGPT Plus Account (GPT-4)
16 USD
Plugin Retouch4me
69 USD
Upgrade Duolingo Super
29 USD
Copyright Adobe Lightroom Account
59 USD
Genuine Cheap Canva Pro
39 USD
MidJourney Account
29 USD
Articles on the same topic