Best Selling Products
Turn an Ordinary Photo into a Small 360 Degree Planet
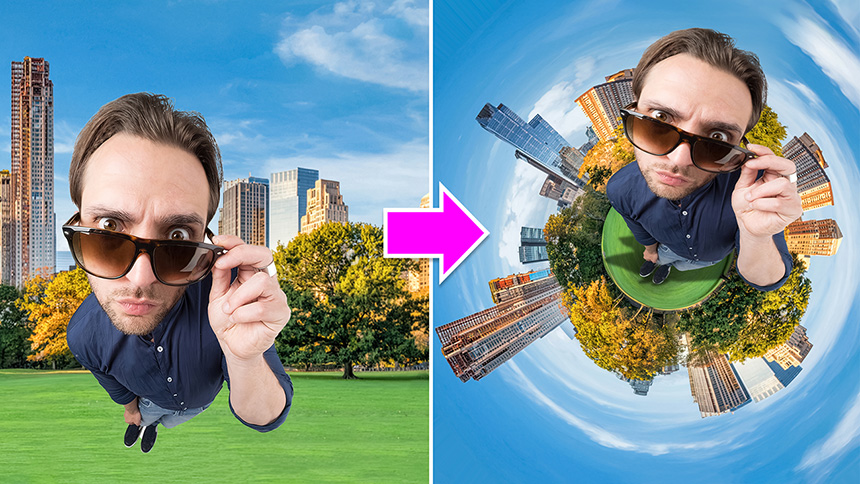
Do you know a way to turn your photos into 360 degrees like a 3D camera?
(1). First thing, we have to look at the image, it looks like there is a lot of sunlight on the right side. So we will crop the right part to the left to create balance for the photo.
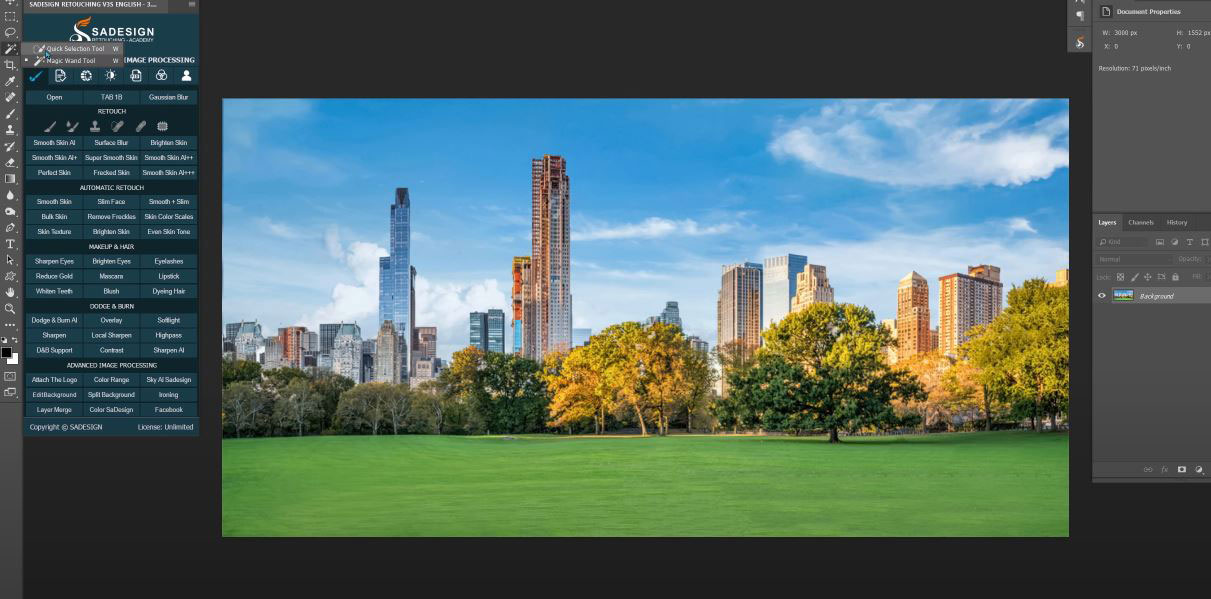
(2).Select “Quick Selection Tool” and select only one building and tree. Shift + F6 to add feathers to it, about 0.5 pixels is OK. Press CTRL or CMD + J to cut this selection into a new layer.
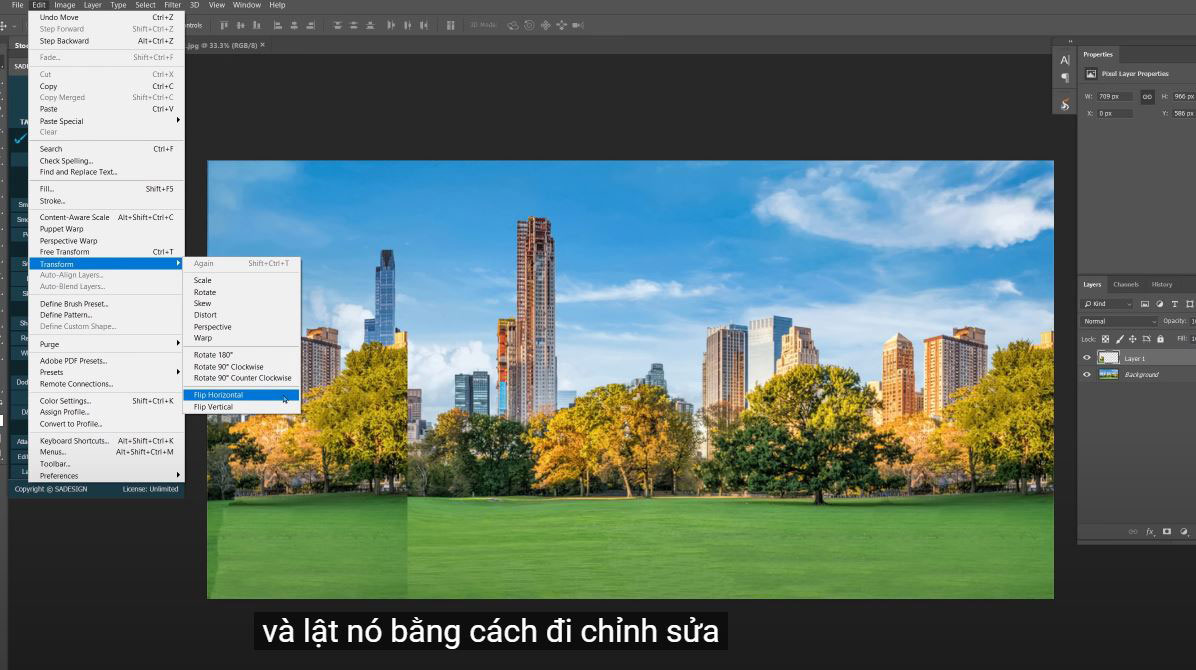
(3). Use the move tool to move this layer to the left and flip it by going to Edit > Transform > Flip Horizontal.
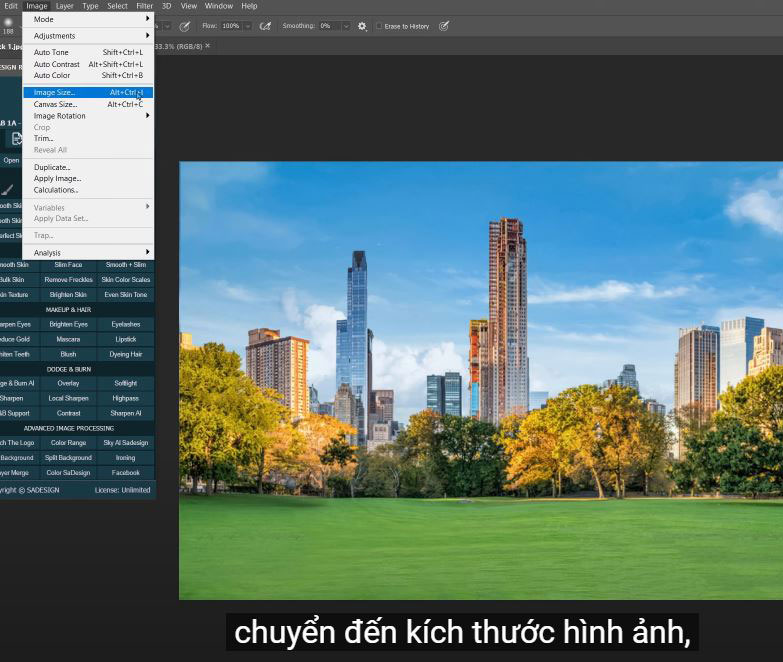
(4). Use the eraser tool to erase the line between layer 1 and the background to make it smoother. Next we will create a 360 degree effect. Go to Image > Image Size > make sure to unbind the width and height connection, so we can modify one of them without touching the other.
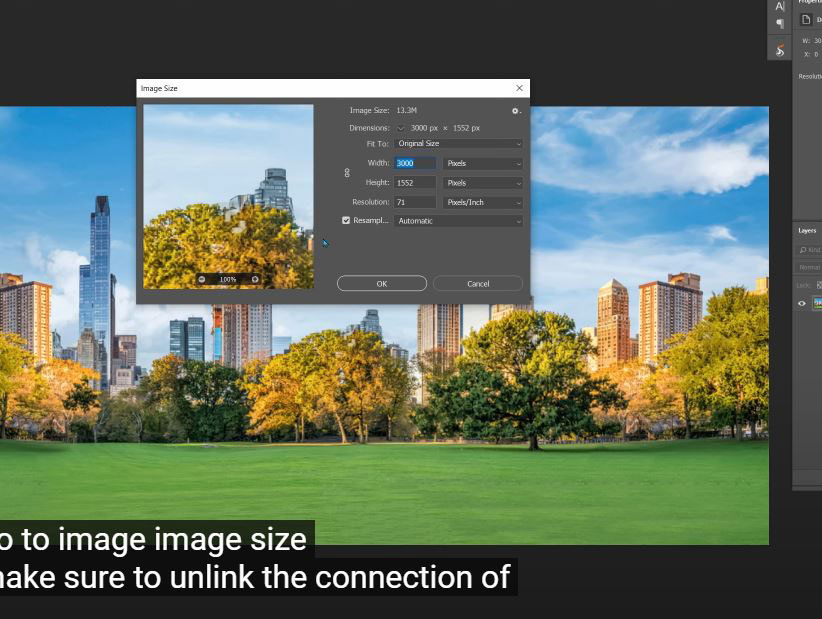
(5). Please resize this photo to square, change height from 1552 to 3000, same width, then confirm. Flip the image upside down, select the whole image (CTRL or CMD + A), go to Edit > Transform > Flip vertical. Deselect with CTRL or CMD + EASY
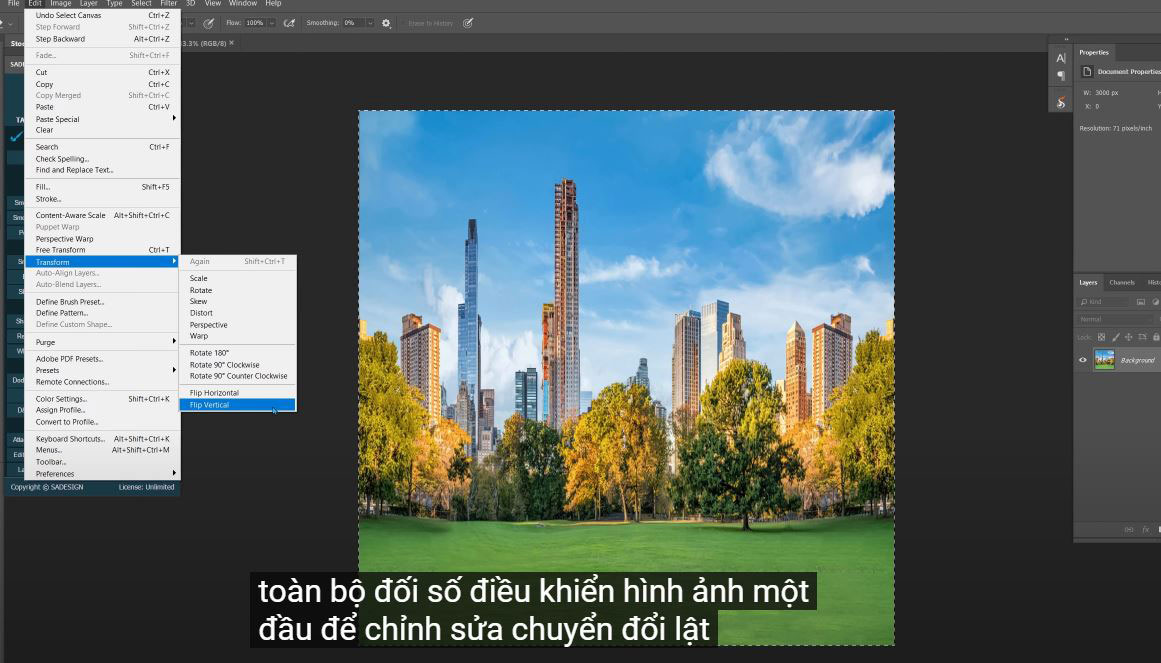
(6). Easy isn't it?
Now, grab the tool you like to erase the top line. I would use the spot healing brush tool.
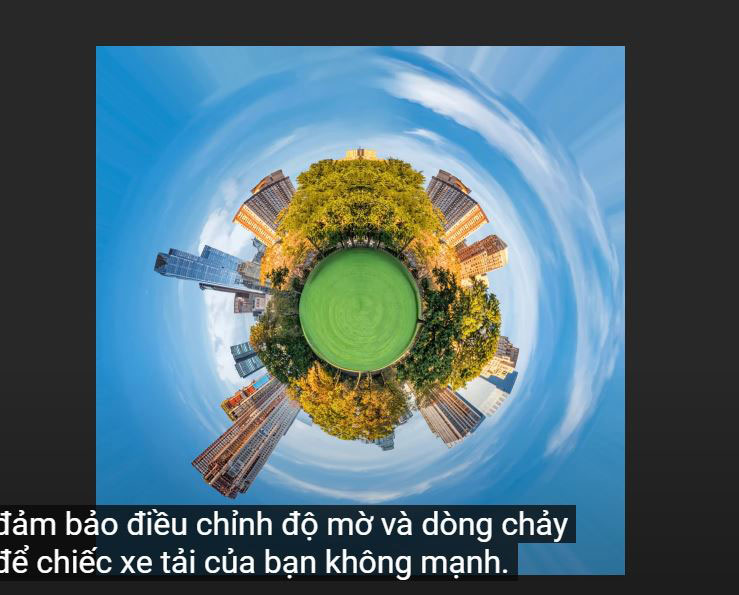
(7). Then use the Clone stamp tool to make the transition smooth. Hold ALT to sample and paint in the areas you want to replace.
Make sure to adjust the opacity and flow so your strokes aren't strong.

(8). Let's put this man in the center of the photo. We will cut the subject out of the foreground. Select > Theme. Use the Quick Select tool to add multiple selections that have not been selected by PTS AI.
Output: select “New Layer” and OK. The subject is now separated from the background. Using the move tool, click and drag to move him to our project.
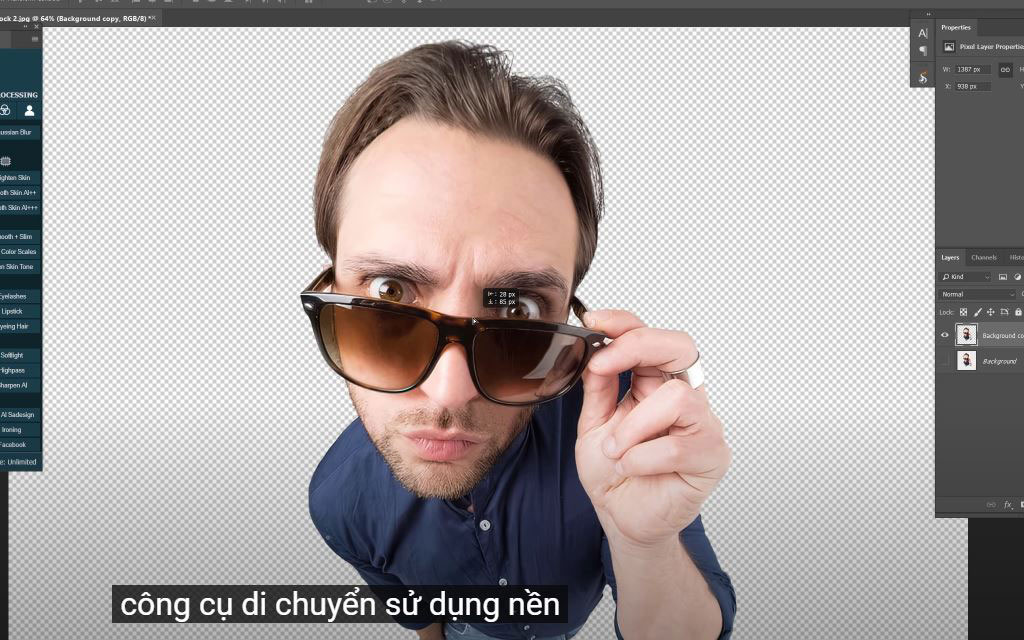
(9). This object is pretty big isn't it, let's give him some tweaking. Edit > Transform > Distort, shorten him a bit and rotate in the direction of the clouds.
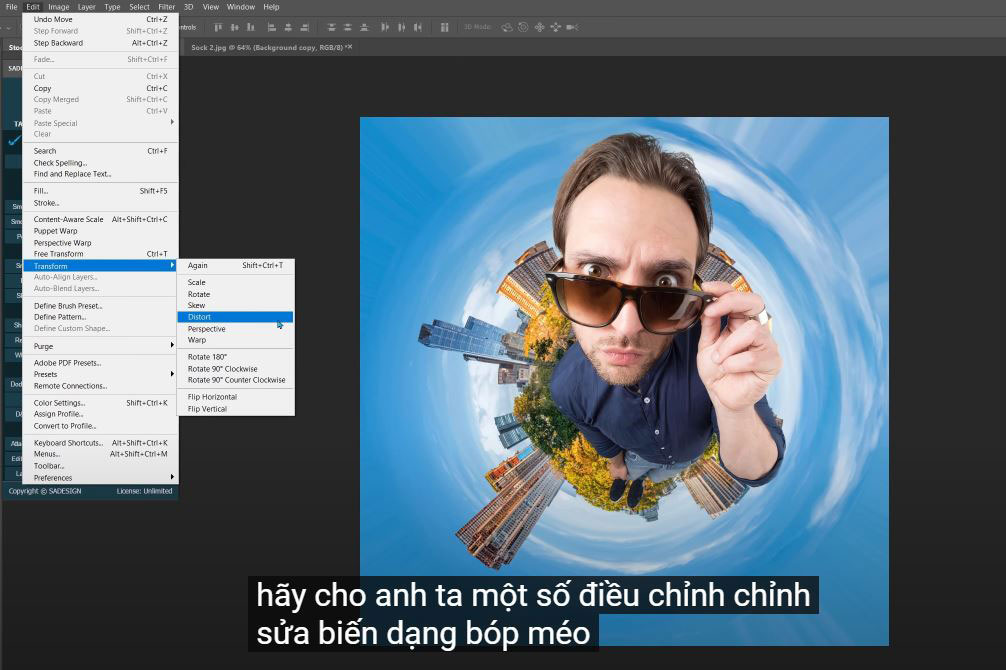
(10). This object is pretty big isn't it, let's give him some tweaking. Edit > Transform > Distort, shorten him a bit and rotate in the direction of the clouds. 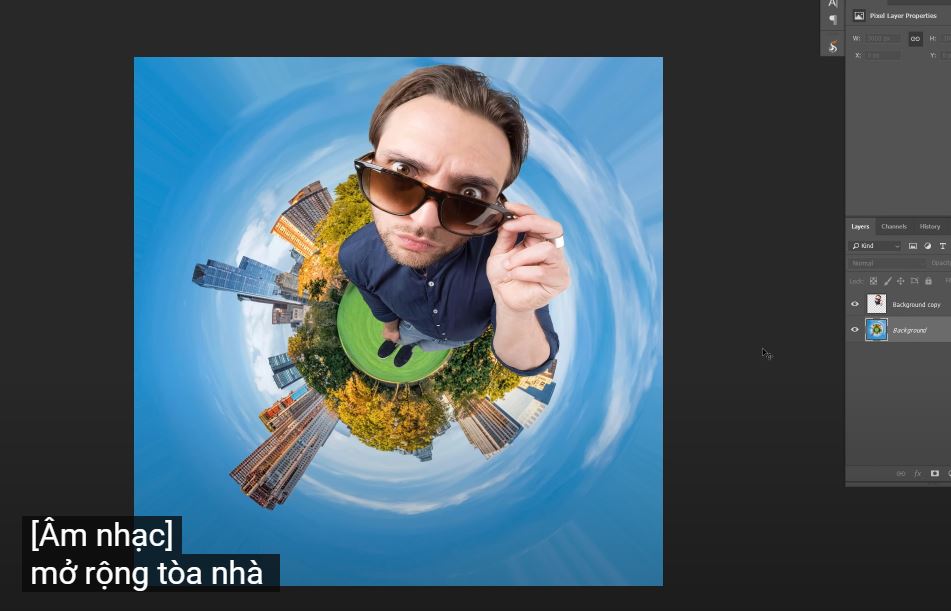
(11). Expand the buildings further, click the padlock icon to unlock the background layer. Press CTRL or CMD + T, hold SHIFT + ALT, click on the corner and drag outward to extend the background from the center without affecting the square.
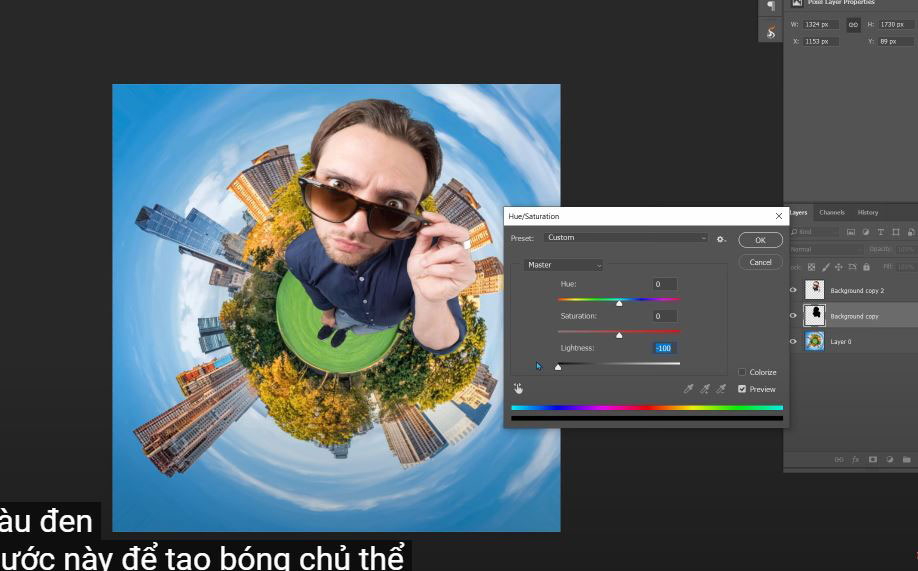
(12).Add dark spots to his feet to make the ball look real. Create a new layer, use the Brush tool (shortcut B), black in the foreground, dot just above his leg and adjust the opacity. Add dark spots to his feet to make the ball look real. Create a new layer, use the Brush tool (shortcut B), black in the foreground, dot just above his leg and adjust the opacity.
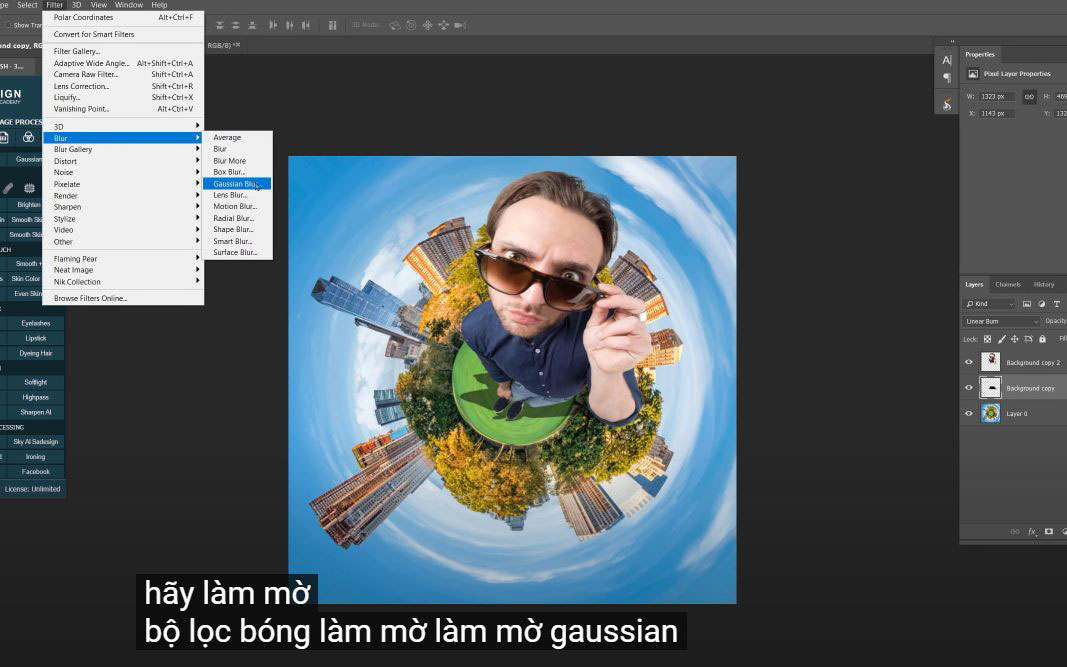
Rotate the background to the left to show other buildings. Select the Magic wand tool to select transparent areas on each corner.
Select > Modify > Expand > 20 pixels to expand the selection.
Shift + F5 to fill this sky of selections by choosing “Content-aware”
Do it! If you liked this tutorial, please click Like, Subscribe and notify to update our latest tricks day by day. See you later!
REGISTER FOR FREE PHOTOSHOP LEARNING
============================
The most powerful Retouch tool processor
DOWNLOAD:
✅ SADESIGN PANEL ENGLISH: https://sadesign.ai/retouching/
✅ SADESIGN PANEL VIETNAM: https://www.retouching.vn/


