Best Selling Products
Use Lightroom to Create or Remove a Vignette Effect
Nội dung
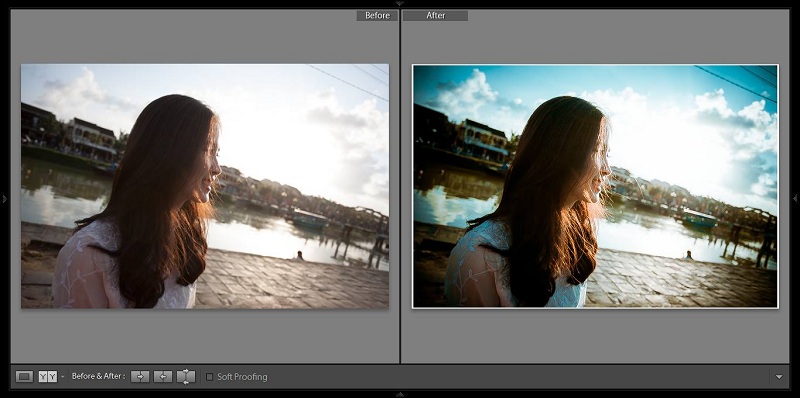
One of the effects that is quite popular today is vignette or the blurred edge effect. This is an effect that helps the photo to be exposed in the middle, but the brightness begins to decrease at the edges of the image. This effect can attract the viewer's attention to the subject of the photo. So how to create or remove this Vignette edge effect. What tricks are needed when editing photos with the Vignette effect?

Causes and common types of vignette effects
In fact, the vignette effect only looks good on portraits, wildlife, or wedding photos. For landscape, interior, or commercial photography, this effect is completely counterproductive.
(1).jpg)
Sidney F. Ray divided the blur effect according to the principles of the blur effect, including the following types:
Mechanical vignette effect
This is an effect that occurs when the off-axis light beam emitted from the subject is partially blocked by other objects such as filters, secondary lenses, unsuitable lens caps, etc. This will change the image size along with the aperture stop corresponding to the off-axis angle. The main cause is that the path of the light ray is partially blocked. Normally, the mechanical vignetting effect can occur gradually or suddenly. The effect occurs suddenly when there is a change in the off-axis angle, due to the smaller aperture. The image may have a part that is not illuminated because the path of the light ray is completely blocked. This phenomenon is called the field of view (FOV) and that part will be black.
Optical Vignette Effect
This phenomenon occurs because lenses are made up of multiple elements. The difference in the size of the elements will lead to the optical effect of vignetting. The edge lenses are often limited by the isometric lens, which affects the angle of the lens opening for off-axis rays. This phenomenon will cause the light reaching the image to gradually decrease at the edges. Optical vignetting is usually dependent on the lens aperture, and can be adjusted by reducing the aperture by 2–3 stops, or increasing the relative aperture number.
Natural blur effect
This phenomenon does not originate from the restriction of the incoming light rays but from natural blurring. This occurs due to the shooting angle and shooting technique of each photographer. Normally, the blurring is approximately cos4, following the "cos 4" blurring law. It is easier to understand that the blurring is proportional to the 4th cosine of the incident angle of the light rays hitting the film or sensor array. Compact cameras or point-and-shoot cameras with wide-angle observation lenses often have natural blurring. Other types of lenses such as telephoto lenses - long-range, wide-angle Angenieux lenses - reverse telephoto lenses on mechanical cameras and telecentric lenses are usually not too affected by the blurring phenomenon. This phenomenon cannot be corrected by adjusting the lens. It is necessary to use a GND filter (graduated neutral density or gradual grey filter) and post-processing techniques. Photographers can also use some modern lenses specially designed to make the light hitting the film parallel or similar. These lenses can eliminate or significantly reduce vignetting like telephoto lenses.
Vignette effect - for digital photos
This effect only occurs with digital cameras due to the angle-dependent nature of digital sensors. And the intensity of light in the perpendicular direction is always stronger than in the oblique direction. However, today's digital cameras are equipped with special image processors to overcome the effect of pixel vignetting and optics when converting images to standard image formats such as JPEG or TIFF. In addition, a micro-correcting lens can be added right in front of the image sensors to overcome the phenomenon of pixel vignetting. In addition, there is another effect that only occurs with mechanical cameras: the film vignetting effect.
Use Lightroom to remove Vignette
If your photo has these issues, use Adobe Lightroom to remove the vignette effect. However, this method only applies when processing RAW files in Lightroom. Follow these steps:
Open a RAW file with a vignette effect in Adobe Lightroom.
Go to the Developer Tab and check the “Enable Profile Redirections” box found under the Lens Corrections tab on the right panel.
Click and use the handy Enable Profile Corrections feature to remove the border effect.
(1).jpg)
This way, Enable Profile Corrections will automatically find the lens, device, and some information, if available, to adjust the vignetting and distortion of the image. Simply adjust and move the sliders manually. Remember, this method does not apply to images in JPEG format.
How to add vignette effect in Lightroom
To add a blur effect to a photo, you can apply the following 2 methods:
Use Post-Crop Vignetting
This is the simplest way to add a close-up to your photo. Select the Post-Crop Vignetting feature in the Effects options bar. Or move the Amount slider to the left to add a whitewash effect. Continue adjusting the Midpoint slider to determine the spread of the whitewash effect in the photo as per your requirement
(1).jpg)
The Roundness slider allows you to define the shape of the border on the photo.
The lets slider is used to create blur to the edges.
The Highlights slider is used to retain highlights from parts of the photo where the blur effect has been applied.
Using Radial Filter
To add or remove a vignette effect in Adobe Lightroom, you can use the Radial Filter. Using the Radial Filter, we can change the location of the area where the effect is applied. We can select an area in the image that will not be changed and apply it to the rest of the image
(1).jpg)
Filter toolbar, there are many different adjustments that can be applied such as: White Balance, Shadows, and Clarity. Just select the area you want to use the effect and drag the adjustment bar to use the whitening effect. To be able to add or remove the edge effect on Lightroom is actually not difficult at all. Read carefully the above shares of SaDesign and practice right away on your photo.


