Best Selling Products
Ways to adjust blue sky color in photoshop
Nội dung
If you are having problems with the gray, pale sky, losing the beauty of the photo, then immediately pocket the following 3 extremely simple ways to adjust the blue sky color in Photoshop. Guaranteed you will be extremely surprised with the results after editing!

1. Adjust the blue sky color in Photoshop using Camera Raw
The above instructions were performed by us on Photoshop 2022, you can do the same on older versions.
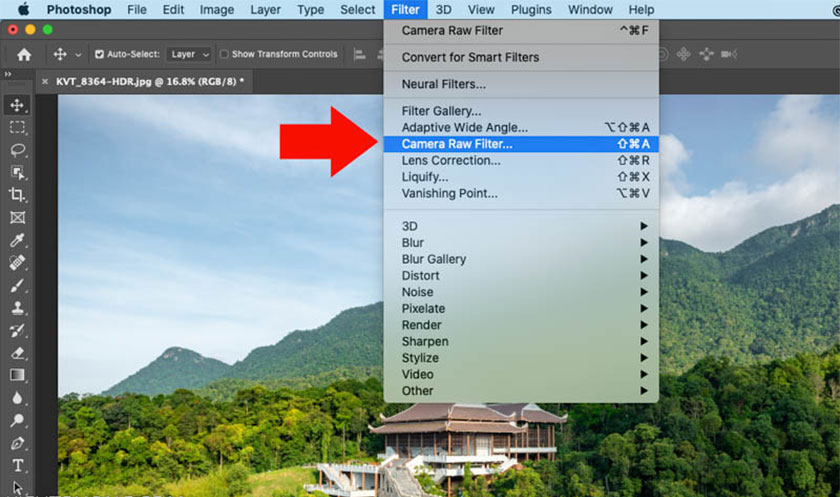
You need to open the photo you need to edit in Photoshop by clicking File => select Open (Ctrl+O), then click Filter => select Camera Raw Filter or press the shortcut Ctrl+Shift+X to open Camera Raw.
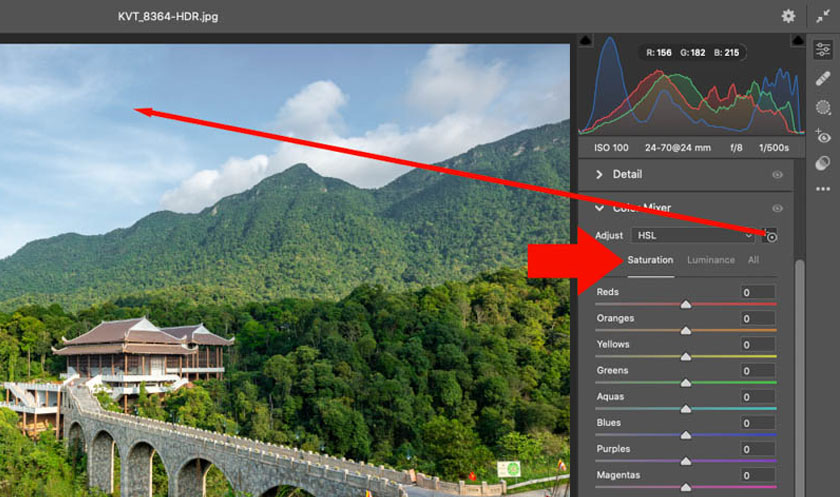
In Camera Raw => Color Mixer => Saturation => click on the sampler tool and click on the blue color in the sky to help Camera Raw understand that we want to affect the blue pixel similar to the sample location.
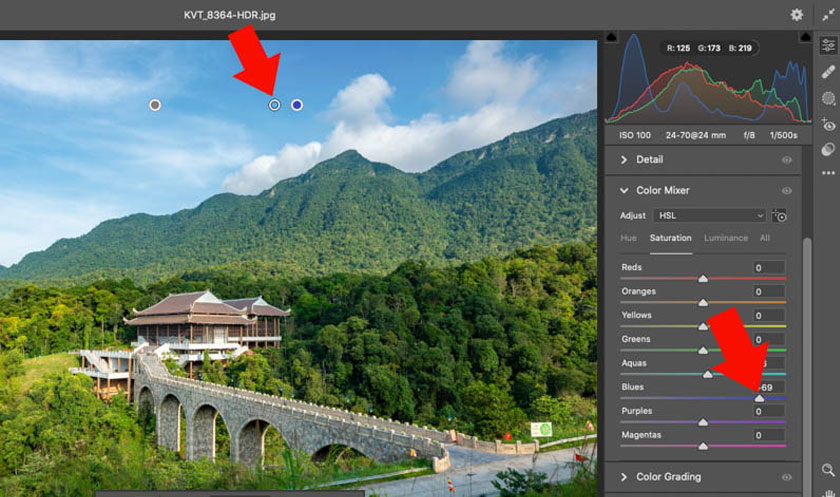
Press and hold the left mouse button to see the 3-point color slider => drag the middle point to the right, to help adjust the color of the sky to be bluer. When dragging, it will help the Blue in Saturation change accordingly. The result is that the sky is much bluer.
The sky is usually brighter than the rest of the image. With areas that are too bright, the sky will not be as clear as expected. If you want to fix it, click on Luminance => click on the blue color in the sky.
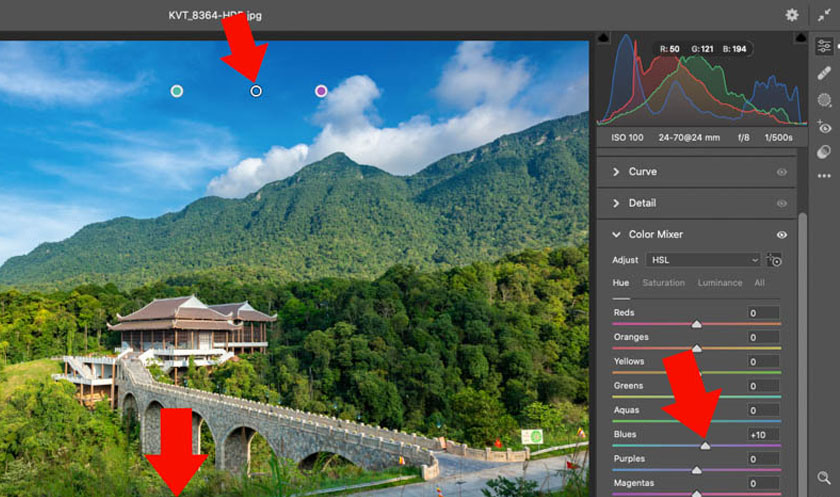
At the blue slider corresponding to Luminance move the center point to the left and observe the change on the screen. The sky is a bit darker and the blue is clearer. This also helps to balance the brightness of the sky as well as other areas on the image. Thus we have a photo with a much bluer sky.
If the blue color of the sky is not as desired, click on Hue => select the blue color in the sky, you will see the Hue slider corresponding to the selected blue color => drag the Hue bar back and forth to switch to different types of blue. You just need to observe the results on the screen to find the most suitable color. You can use the Blue slider on the right side.
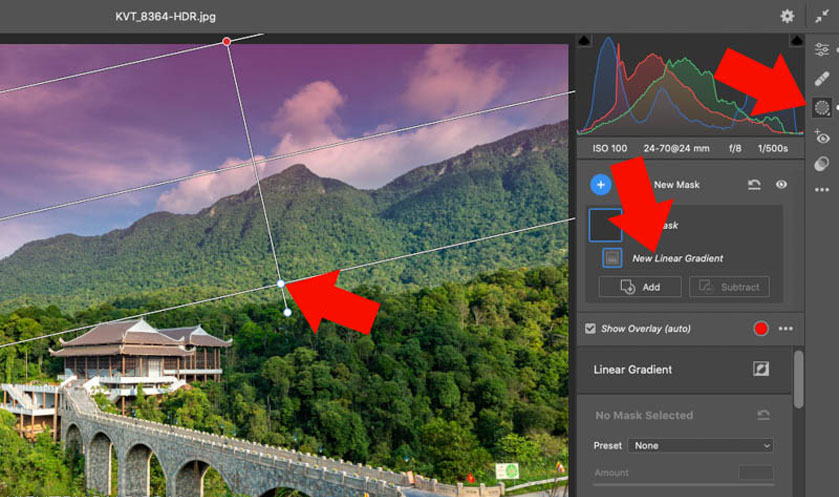
If you want to adjust the blue sky color in Photoshop more effectively, you can click Masking => select Linear Gradient => hold down the mouse to create a Gradient on the sky. Observe that the red area will gradually turn transparent, which means we have controlled the color in this red area.
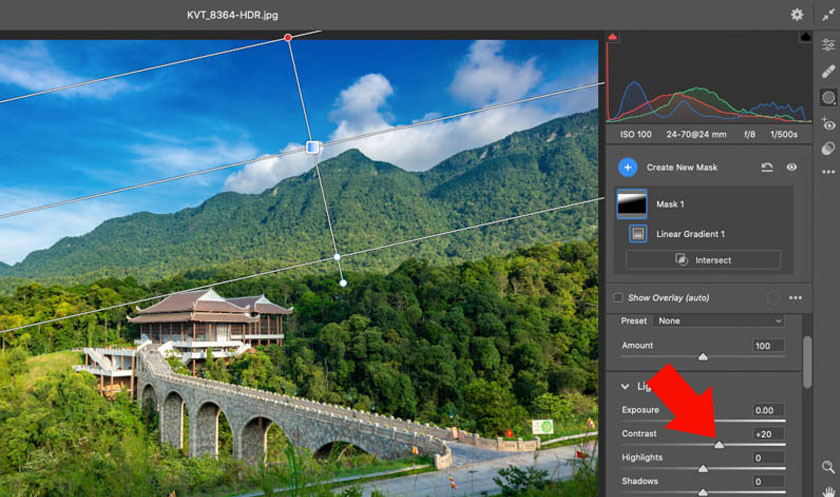
Next, increase the contrast for Contrast, you will see the sky has higher contrast and clearer blue, the clouds are also more prominent. You need to change the Contrast value to find the right result for your photo.
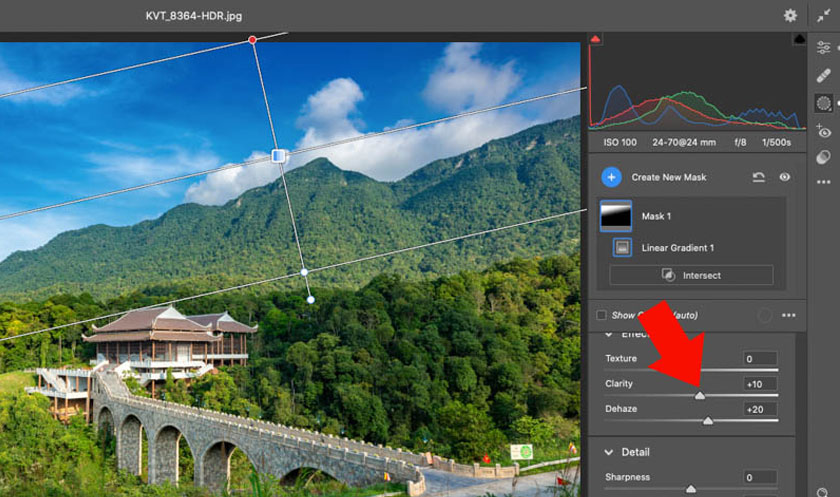
When taking landscape photos, we can see that the sky is often not as clear as expected because in the air there are many different types of light that affect the camera sensor differently than the human eye.
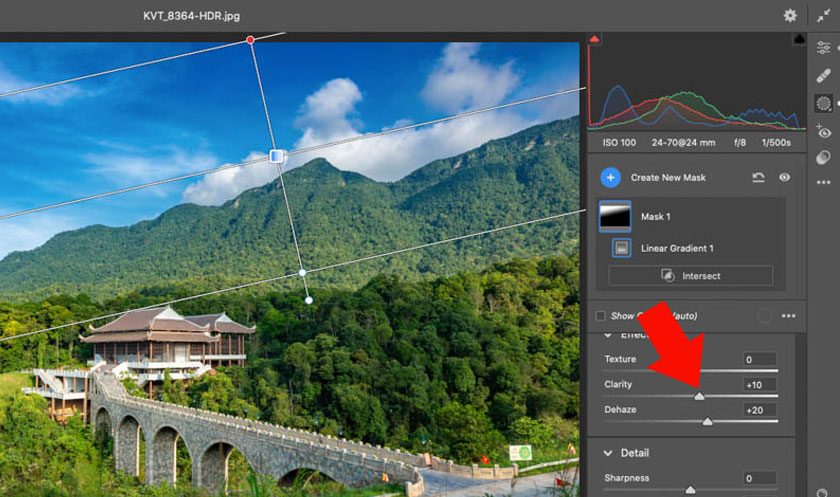
You should use CPL Filter or Hood to help the photo have the best quality. If the cloud photo is not satisfactory, try increasing the Clarity and Dehaze parameters, you will see the fog layer decrease, the blue color is clearer and more transparent.
This is currently the simplest way to adjust the blue sky color in Photoshop. You can do the same in any version of Photoshop or Camera Raw. To have more options, as well as save more time, you can use the Select Sky feature in Camera Raw below.
2. Adjust the blue sky color in Camera Raw using Sky Select
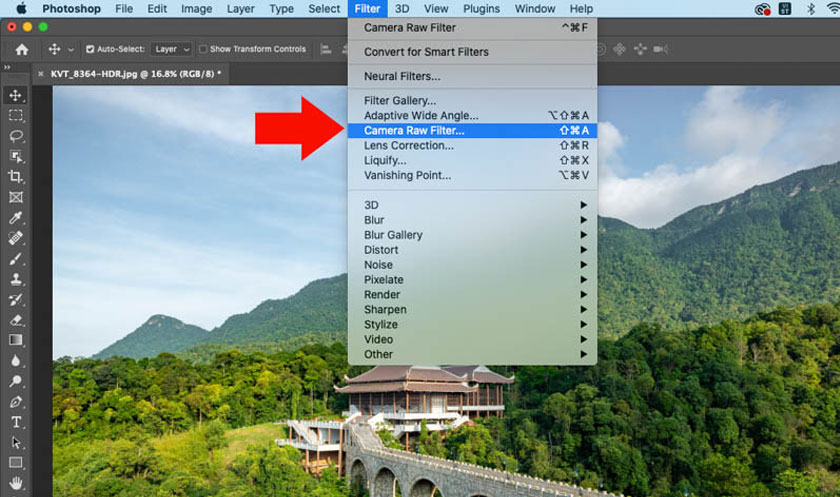
To adjust the blue sky color in Camera Raw 14, click Filter => select Camera Raw Filter or press the shortcut Ctrl + Shift + X. Next, click Masking => select Select Sky, Photoshop will analyze and create a selection in the sky.
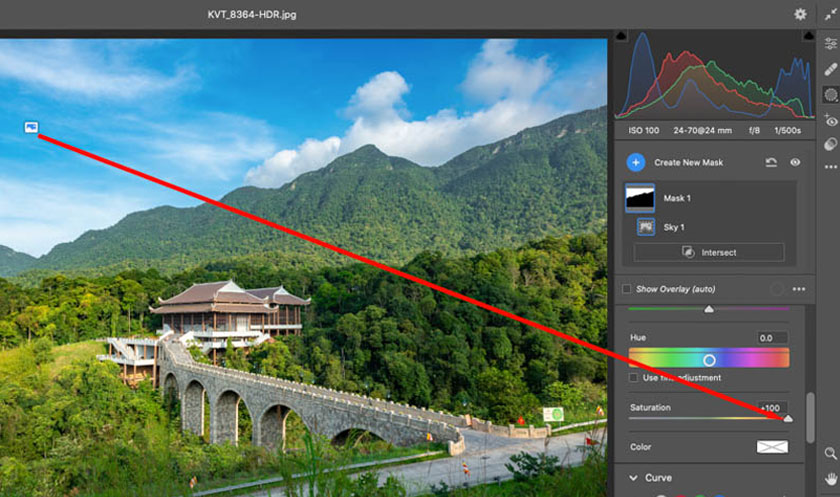
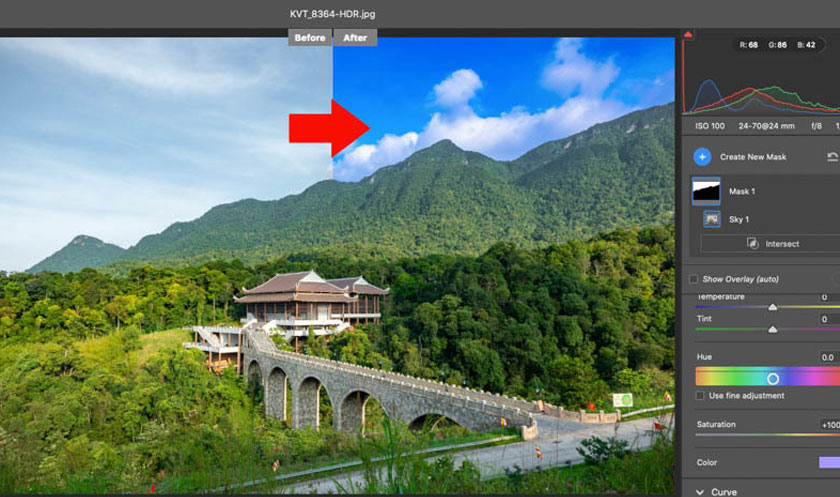
Photoshop will overlay a red layer on the sky with a thumbnail, click on the thumbnail to confirm that you are working on this area. Increase the Saturation value to make the sky bluer by dragging the slider back and forth until the sky reaches the desired shade.
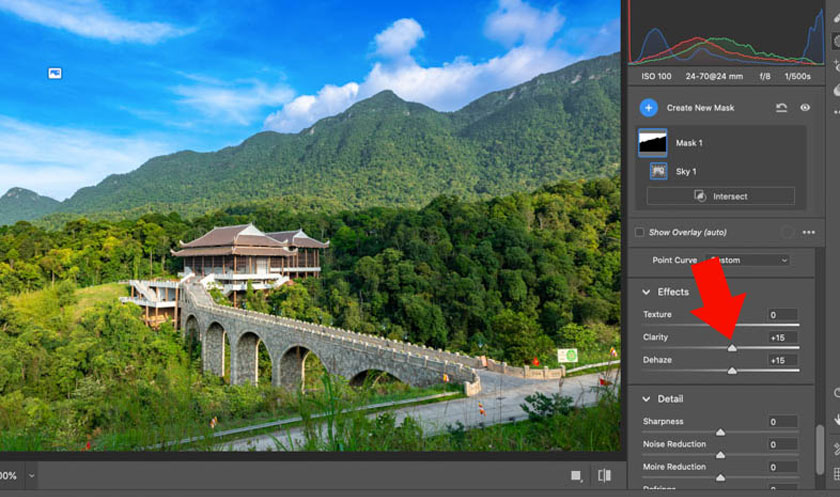
After creating a selection in the sky, simply increase Clarity and Dehaze to make the blue in the sky clearer.
Click on Curve, select the Blue channel => increase the Blue value and you will see the entire sky is bluer, drag back and forth until you find the right parameter.
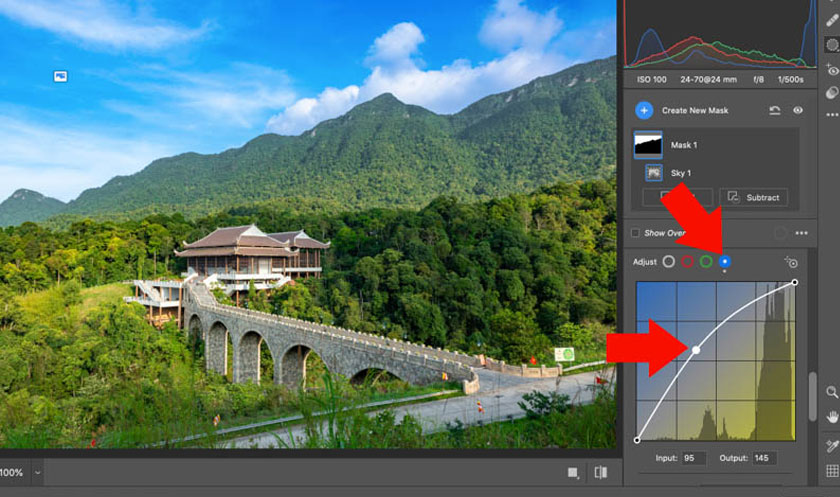
If you feel the sky is not as blue as expected, click on Color => select Blue, Photoshop will cover the entire sky with a blue layer and you will see the sky is much bluer. Reduce Saturation in Color Picker to help the photo look more natural.
3. How to adjust blue sky color in Photoshop using Select Sky
With the Select Sky tool you need to use in photoshop 2022 or 2023. First you need to open the photo, then click Select => select Sky, then Photoshop will analyze and create a selection in the sky.
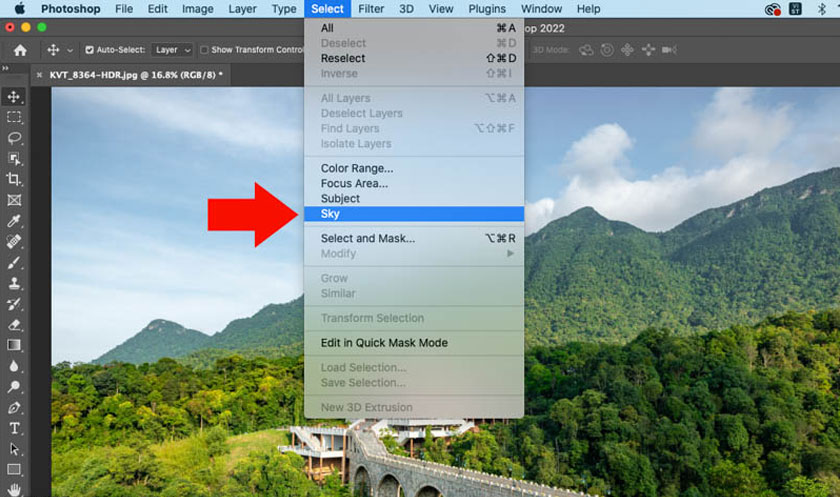
Photoshop makes the sky selection very accurate, you just need to click on the Adjustments icon in the bottom right corner, then select Vibrance. Then increase the Vibrance and Saturation parameters to make the sky bluer.
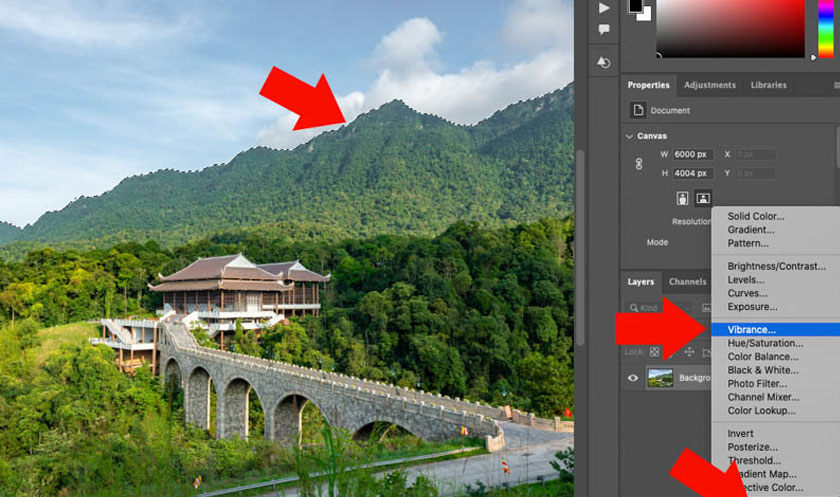
However, Vibrance only increases unsaturated colors, while Saturation will increase all colors including saturated colors. Increasing with the Saturation tool is faster but it is easier to flatten the color. Therefore, it is best to use both to help bring the highest efficiency.

Once you have the sky selected, click on Adjustments => select Hue Saturation => click on the sampler tool then click on the blue color in the sky. Then increase the Saturation and reduce the Luminance to help the sky blue as well as achieve the right brightness. You can create more Adjustments to bring the edited photo as desired.
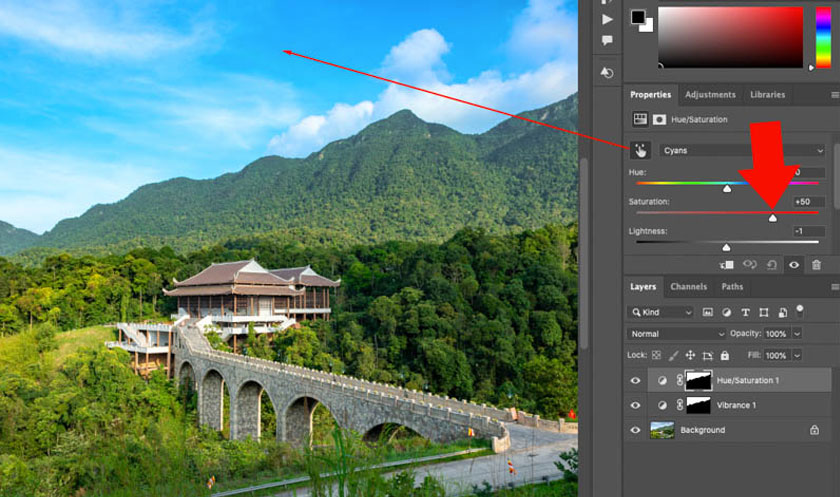
Above, Sadesign has introduced to readers 3 ways to quickly and simply adjust the color of the blue sky in Photoshop. Try and apply it to your photos!
---------------------------
Installation and support contact information:
🏡 SADESIGN Software Company Limited
📨 Email: phamvansa@gmail.com
🌍 Website: https://sadesign.ai


