Best Selling Products

Capcut Pro 1 Year
39 USD

MidJourney Account
29 USD

Upgrade Genuine Office 365
49 USD

Freepik Premium Account
59 USD

Autodesk All App Account Copyright
120 USD

Plugin Retouch4me
69 USD

Windows 10 & 11 Pro Key
36 USD

Copyright Adobe Lightroom Account
59 USD

Upgrade genuine Capture One account
120 USD

Genuine Cheap Canva Pro
39 USD

Upgrade Duolingo Super
29 USD

Genuine Adobe Illustrator account
99 USD

ChatGPT Plus Account (GPT-4)
16 USD

Adobe Premiere Pro Account
99 USD

Adobe Photoshop Copyright - Full App
120 USD
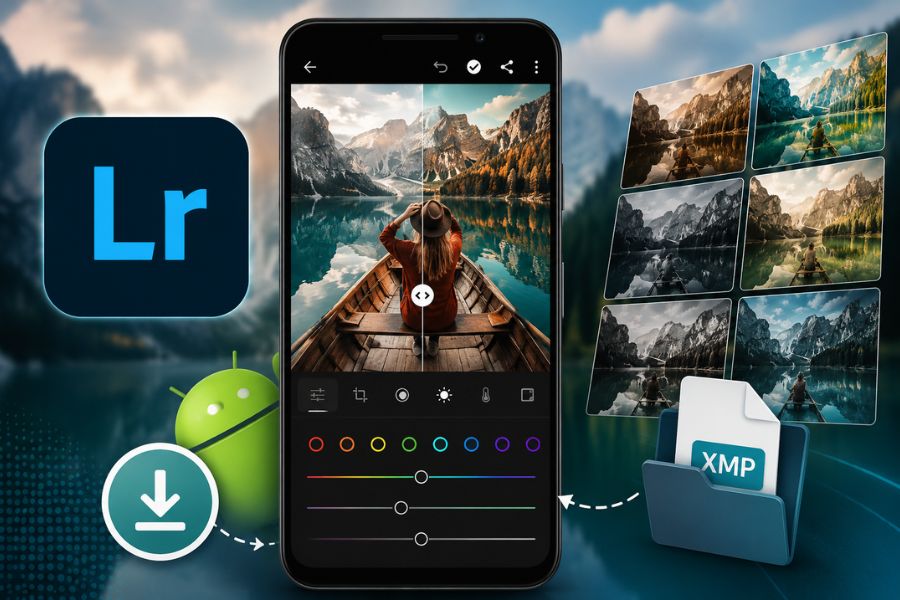
What Are Lightroom Presets for Android? A Guide on How to Install Them
Nội dung
- 1. What are Lightroom presets for Android?
- 2. Things to note when using Lightroom presets for Android
- 3. A guide to adding presets to Lightroom Mobile
- Step 1: Download presets from photography communities
- Step 2: Go to the downloaded file and open it with Lightroom
- Step 3: Open Lightroom and go to the Library section
- Step 4: Select the preset image you just downloaded
- Step 5: Select the three-dot menu in the top-right corner of the screen
- Step 6: Select “Create Preset”
- Step 7: Name your preset
- Step 8: Choose where to save the preset
- Step 9: Finish saving the preset
- Step 10: Select the photo you want to edit
- Step 11: Select the Preset tool and find your saved preset
- Step 12: Fine-tune lighting and colors as needed
- 4. Should you buy the licensed Lightroom version to use presets?
- 5. Conclusion
Lightroom Mobile presets are pre-configured image settings widely shared within the designer and photography community to transform a photo’s style through color tones, clarity, or the creator’s unique color grading style.
1. What are Lightroom presets for Android?
Lightroom presets for Android are simply pre-made color adjustment settings designed for the Lightroom Mobile app on Android devices. Instead of manually adjusting every detail such as lighting, contrast, color balance, or image effects, users only need to apply a preset to automatically transform the image into a complete tone matching the desired style. Today, Lightroom presets for Android are widely shared among designers, photographers, and photo-editing enthusiasts because they can create professional-looking photos in just seconds.
Not only do Lightroom presets for Android save time, but they also provide color consistency across entire photo albums on Facebook, Instagram, or TikTok. From soft vintage tones and clear Korean-style aesthetics to bold cinematic looks, users can easily apply them directly on their phones without needing extensive editing knowledge. This convenience, ease of use, and ability to quickly “transform” images are what make Lightroom presets for Android so popular among young users today.

2. Things to note when using Lightroom presets for Android
Although Lightroom presets for Android provide fast and beautiful color grading, they still need to be used properly to achieve the best results. Many people think applying a preset automatically makes a photo look great, but in reality, each image has different lighting conditions, skin tones, and compositions, so results will vary. Therefore, to make photos look more natural and professional, users should understand Lightroom Mobile basics and know how to fine-tune settings after applying presets.
Lightroom presets for Android are ideal when editing multiple photos at once, saving significant editing time.
A beautiful preset does not always suit every image, especially when the original lighting or colors differ greatly from the sample photo.
When using someone else’s preset, you are applying their personal editing style, so additional adjustments are often needed to fit your own photos.
You should learn basic Lightroom Mobile controls such as Exposure, Contrast, Highlights, and Color to use Lightroom presets for Android more effectively.
Do not rely entirely on presets, as combining them with manual adjustments will give photos more depth and a more personal touch.
(1).jpg)
3. A guide to adding presets to Lightroom Mobile
Step 1: Download presets from photography communities
First, download Lightroom presets for Android from trusted sharing communities on Facebook, Telegram, Pinterest, or photo-editing websites. There are many free presets available in styles such as vintage, Korean tones, cinematic looks, or film-inspired color grading. Presets usually come in DNG or XMP format, so save the files in an easy-to-find folder on your phone for convenience.
Step 2: Go to the downloaded file and open it with Lightroom
After downloading successfully, open the “Download” folder or the location where the file is saved on your Android phone and choose to open it with Lightroom Mobile. If multiple app options appear, simply select Lightroom so the system automatically imports the preset image into the app. This is an important step to directly add Lightroom presets for Android into your editing library.
Step 3: Open Lightroom and go to the Library section
Next, open Lightroom Mobile and go to the “Library” section to check the newly added preset image. Usually, the preset file appears like a normal image but contains all the color, lighting, and effect settings inside. Checking this ensures the preset has been successfully imported before saving it.
.jpg)
Step 4: Select the preset image you just downloaded
In the Lightroom library, tap the preset image you just imported. This file contains the tone and all the preset’s editing settings. Once opened, you will see the image already edited in a unique color style. For Lightroom presets for Android, this step allows users to extract the full color formula for other photos.
Step 5: Select the three-dot menu in the top-right corner of the screen
After opening the preset image, find the vertical three-dot icon in the upper-right corner of your phone screen. This area contains Lightroom Mobile’s advanced options. Tapping it will show editing, copying settings, and preset creation features. Many new users miss this step and cannot save presets correctly.
.jpg)
Step 6: Select “Create Preset”
In the opened menu, choose “Create Preset” to start saving the preset into Lightroom Mobile. Lightroom will automatically capture all color, lighting, effect, and filter settings from the current preset image. This is the most important step to successfully save Lightroom presets for Android for long-term use.
Step 7: Name your preset
After selecting Create Preset, Lightroom will ask you to enter a preset name. Use memorable names based on tone or style such as “Vintage Warm,” “Korean Tone,” “Film Brown,” or anything you prefer. Clear naming helps you easily find and manage multiple Lightroom presets for Android.
.jpg)
Step 8: Choose where to save the preset
At this step, you can select a folder or group for saving the preset in Lightroom Mobile. If you frequently use different tones, create separate folders for easier management. For example, portrait presets, travel presets, or dark-tone presets. Organizing presets properly makes using Lightroom presets for Android faster and more professional.
Step 9: Finish saving the preset
Once all settings are complete, simply tap the checkmark in the upper-right corner to save the preset. Lightroom Mobile will automatically add the new preset to your personal preset library. At this point, your Lightroom presets for Android are ready to be applied to any photo on your phone without repeating the import process.
.jpg)
Step 10: Select the photo you want to edit
Next, return to the Lightroom library and choose the photo you want to color-grade using the saved preset. You can apply it to selfies, travel photos, landscapes, or any image matching the preset tone. Choosing photos with similar lighting and colors helps Lightroom presets for Android deliver the best results.
Step 11: Select the Preset tool and find your saved preset
After opening the photo, select the “Preset” tool in Lightroom Mobile’s toolbar. There, you will see the preset you saved in your personal preset list. Simply tap it, and Lightroom will automatically apply all color settings within seconds. This speed and convenience are why Lightroom presets for Android are so popular.
Step 12: Fine-tune lighting and colors as needed
No matter how beautiful a preset is, every image still needs extra adjustment for the best results. After applying the preset, you should fine-tune brightness, contrast, color temperature, or sharpness to match the original image. This makes the photo look more natural rather than too dark or overly saturated. Knowing how to combine presets with manual editing allows you to maximize Lightroom presets for Android to create professional and highly personal images.
4. Should you buy the licensed Lightroom version to use presets?
If you frequently edit photos using Lightroom presets for Android, purchasing the licensed Lightroom version is worth considering. The Premium version unlocks all professional editing tools, supports fast preset syncing across multiple devices, provides secure cloud storage, and includes modern AI features such as object removal, selective color editing, and smart masking. In addition, using the licensed version reduces common issues like preset errors, color mismatches, or app crashes often found in unofficial versions. Adobe currently offers multiple Lightroom Premium mobile plans with advanced editing tools and cloud sync support.
Especially for users who collect Lightroom presets for Android or want to create a professional-looking feed for Facebook, Instagram, or TikTok, Lightroom Premium offers a much smoother and more stable experience. You can save unlimited presets, apply them to multiple photos quickly, and manage your personal tone collections easily. If you want to purchase Lightroom at a more accessible price, you can check Appvip.ai. This is a trusted platform in the creative tools and AI field, supporting both mobile and desktop use. In addition, it provides tutorials, technical support, and various service packages suitable for both beginners and regular users.
5. Conclusion
It is clear that Lightroom presets for Android are a convenient photo-editing solution for both beginners and users who enjoy creative image editing on their phones. Using presets not only saves editing time but also creates professional and consistent color tones suitable for many styles. However, to achieve the most natural-looking results, users should still flexibly adjust brightness, colors, or contrast depending on each real image. Hopefully, through this article, you now better understand Lightroom presets for Android and know how to install them on Android simply and effectively.


VIP Products


Best Selling Products
Capcut Pro 1 Year
39 USD
MidJourney Account
29 USD
Upgrade Genuine Office 365
49 USD
Freepik Premium Account
59 USD
Autodesk All App Account Copyright
120 USD
Plugin Retouch4me
69 USD
Windows 10 & 11 Pro Key
36 USD
Copyright Adobe Lightroom Account
59 USD
Upgrade genuine Capture One account
120 USD
Genuine Cheap Canva Pro
39 USD
Upgrade Duolingo Super
29 USD
Genuine Adobe Illustrator account
99 USD
ChatGPT Plus Account (GPT-4)
16 USD
Adobe Premiere Pro Account
99 USD
Adobe Photoshop Copyright - Full App
120 USD