Best Selling Products

Genuine Adobe Illustrator account
99 USD

MidJourney Account
29 USD

Adobe Premiere Pro Account
99 USD

Upgrade genuine Capture One account
120 USD

Freepik Premium Account
59 USD

Genuine Cheap Canva Pro
39 USD

ChatGPT Plus Account (GPT-4)
16 USD

Windows 10 & 11 Pro Key
36 USD

Upgrade Genuine Office 365
49 USD

Upgrade Duolingo Super
29 USD

Autodesk All App Account Copyright
120 USD

Plugin Retouch4me
69 USD

Copyright Adobe Lightroom Account
59 USD

Adobe Photoshop Copyright - Full App
120 USD

Capcut Pro 1 Year
39 USD
What Is Dynamic Range? Understanding Dynamic Range in Photography
Nội dung
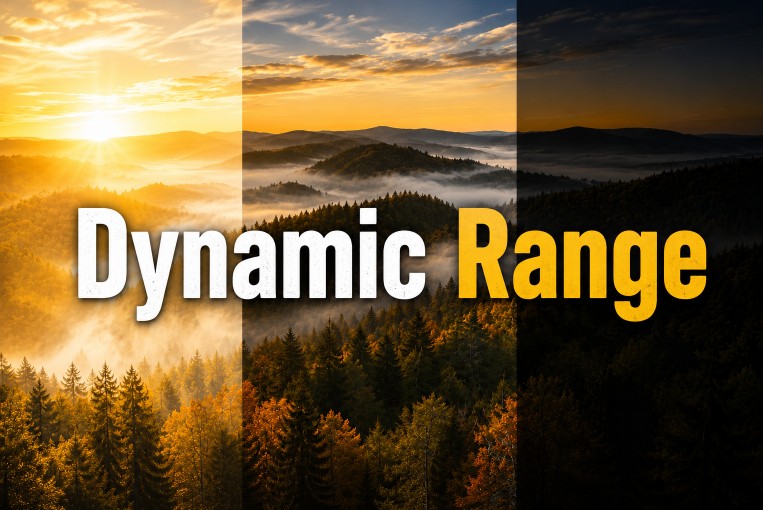
Understanding Dynamic Range helps you handle high-contrast scenes effectively, minimizing overexposure or loss of detail in dark areas.
1. What is the frequency range of light?
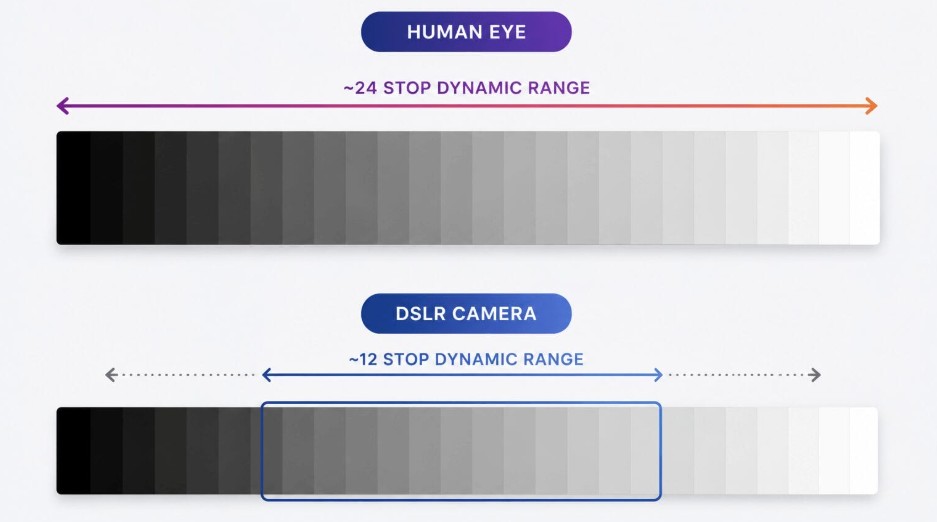
Dynamic range is the distance between the darkest and brightest areas that a recording device can capture while still retaining image information.
At one end of the light spectrum is complete black, where almost no detail remains. At the other end is complete white, where the light has reached saturation and is also incapable of revealing any further detail.
Between these two extremes lies the entire range of light levels captured by the sensor. A camera with a wider dynamic range is better able to retain detail in both dark and bright areas within the same frame.
To put it simply: when the human eye sees a scene with both light and dark areas, we can perceive relatively clearly many details in both areas. But cameras have certain limitations. In many cases, the range of light that a camera can record is only a fraction of what the human eye can perceive.
2. Problems with high-contrast images
A high-contrast image is one that simultaneously contains areas of deep shadows and areas of strong light.
A typical example is photographing a person standing in front of a window with light shining in. The area outside the window may be very bright, while the person's face is in shadow.
If you set the exposure to preserve facial detail, the light from outside the window can turn into a bright white blur, losing almost all the information.
Conversely, if the exposure relies on a window to capture the scenery outside, the person's face may become too dark and their features difficult to discern.
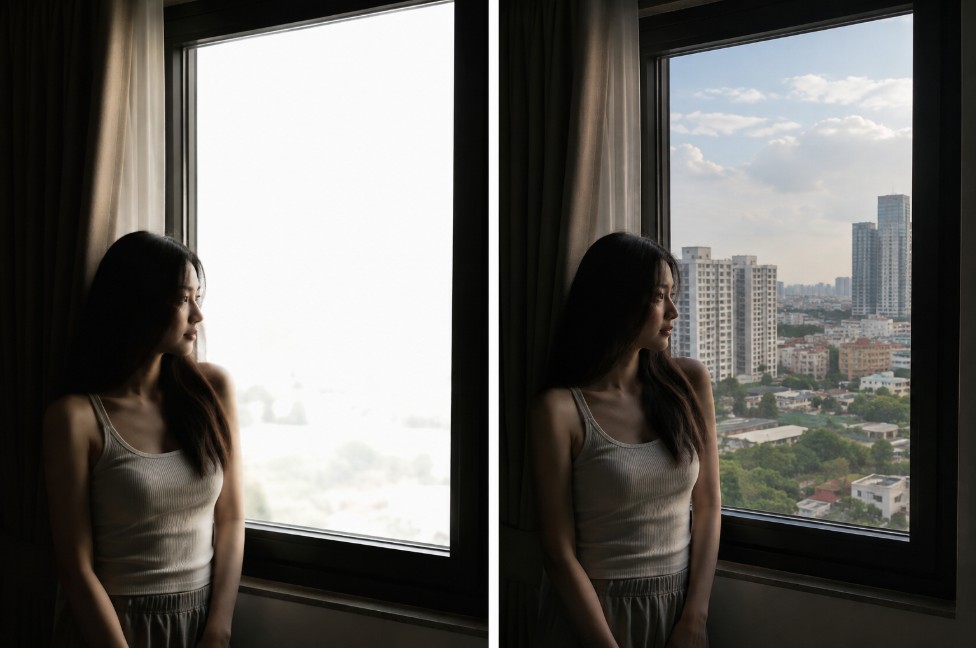
In this case, the overall light spectrum of the scene is larger than the dynamic range the camera can capture in a single exposure . The camera is forced to prioritize one side: either the dark or the bright areas.
This is one of the most common challenges when shooting in challenging lighting conditions. Situations such as shooting landscapes in bright sunlight, backlit portraits, interiors with large windows, or architecture in strong light can all present similar problems.
3. Check the camera's dynamic range.
Each camera has a different dynamic range limit. Therefore, instead of relying solely on specifications, photographers should test their own equipment's ability to handle bright and dark areas.
One simple way is to try photographing the same subject under different lighting conditions. Observe how much detail the camera can retain in the bright areas and the shadows.
During this process, the Luminosity Histogram is a very useful tool.
A histogram is a graph that shows the distribution of pixels according to brightness levels in an image. The left side of the histogram represents dark areas, while the right side represents bright areas. The areas in the middle represent intermediate brightness levels.
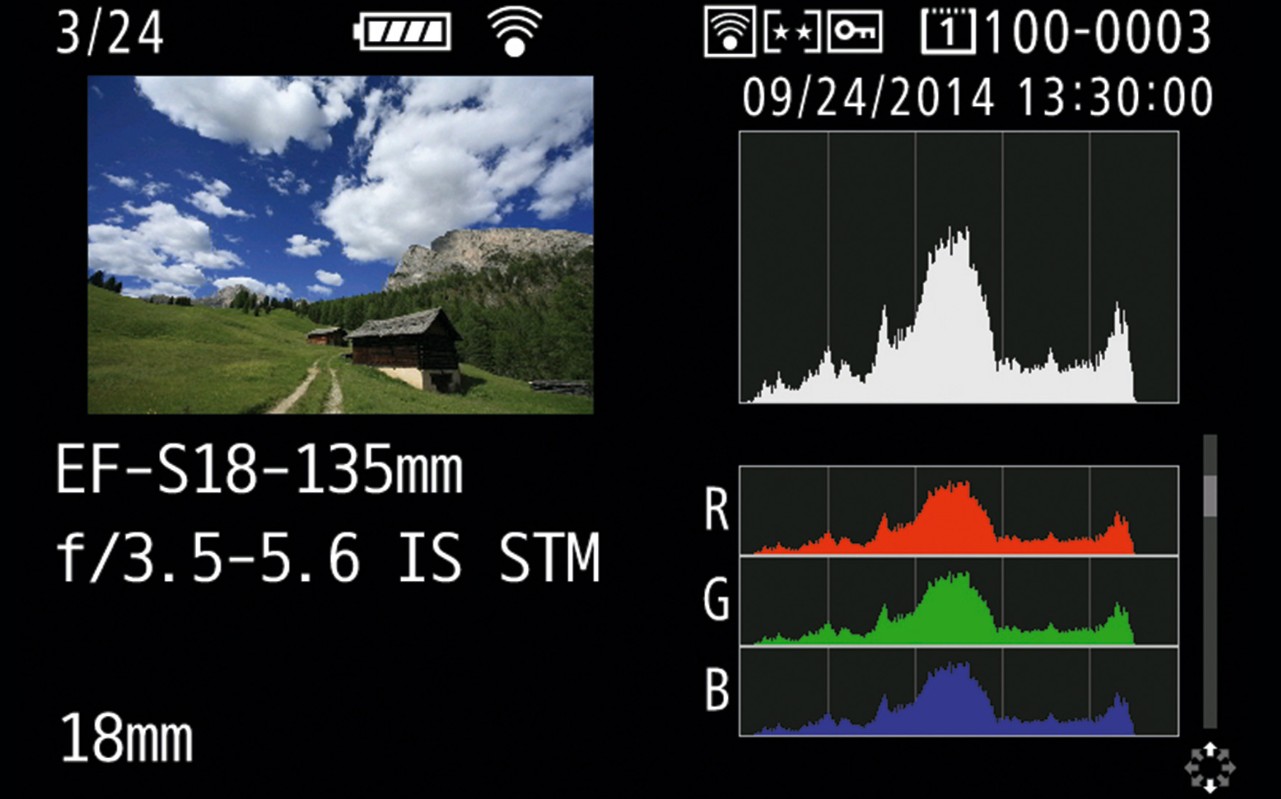
When checking the histogram on the camera's LCD screen, pay attention to the histogram's shape. If the histogram has large peaks strongly pushed to the left or right, and there is significant empty space in the middle of the histogram, it may indicate that the scene is exceeding the camera's dynamic range.
In reality, a histogram isn't a tool for creating a fixed, "beautiful" shape for every image. Its purpose is to help you identify areas of light and shadow in an image and whether there's a risk of losing detail.
4. Use an ND filter.
One way to control the amount of light entering the camera is to use a Neutral Density filter, or ND filter .
ND filters are typically made from specialized glass or optical materials and are mounted in front of the lens. Their purpose is to reduce the amount of light transmitted through the lens without significantly altering the color of the scene.
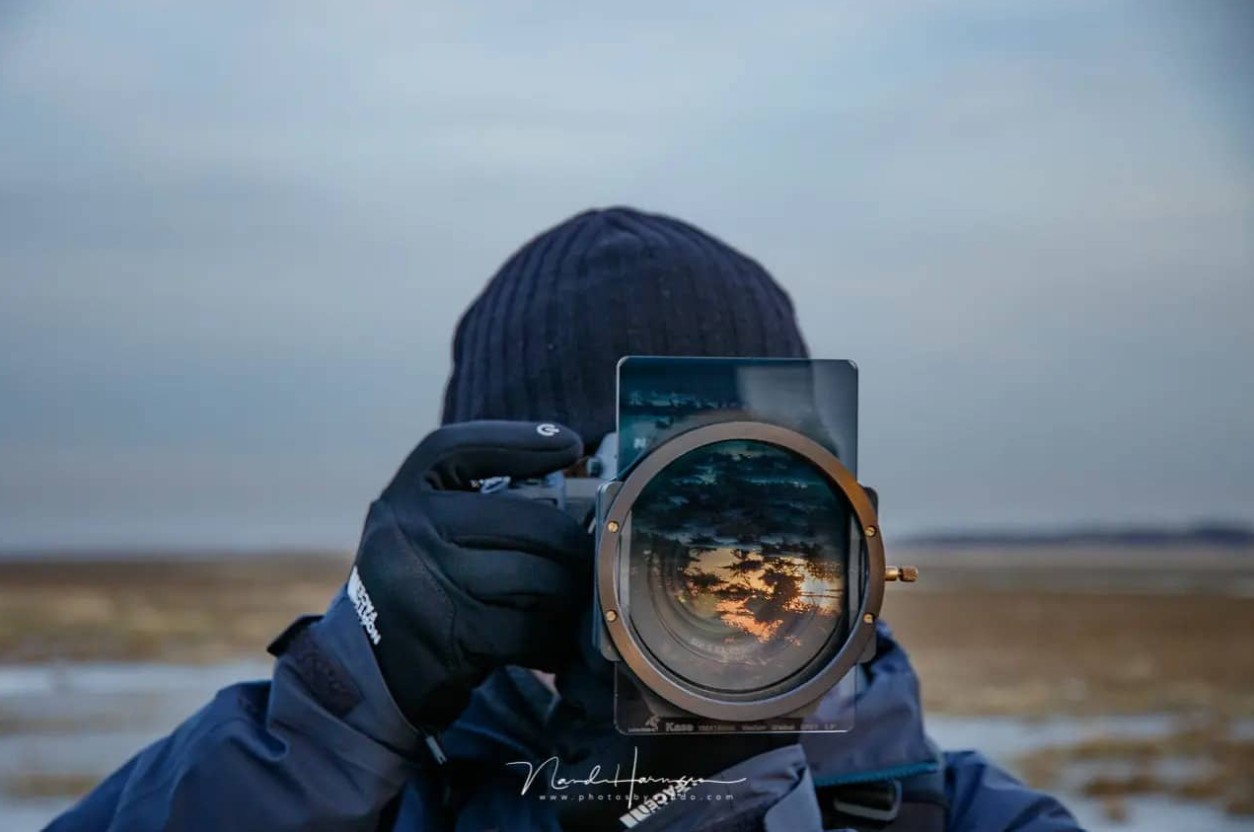
As the amount of light entering the sensor decreases, the photographer has more room to adjust exposure parameters.
For example, when shooting landscapes in bright light, the sky can be too bright and easily overexposed. Attaching an ND filter helps reduce the overall amount of light, allowing the photographer to use a slower shutter speed or adjust the aperture while reducing the risk of overexposure.
One of the obvious benefits is that the sky can retain more detail, while the shadow areas don't necessarily become completely black.
ND filters also offer other creative benefits. In bright light conditions, they allow the use of slow shutter speeds to create smooth motion effects on water, clouds, or moving subjects.
Additionally, ND filters help photographers use large apertures in bright environments to create a shallow depth of field , highlighting the subject and blurring the background.
5. Expand Dynamic Range with HDR
HDR works by capturing multiple versions of the same scene at different exposure levels, then combining them to create an image with a wider dynamic range. For effective HDR, it's advisable to first stabilize the camera using a tripod. This ensures the composition of the photos is nearly identical.
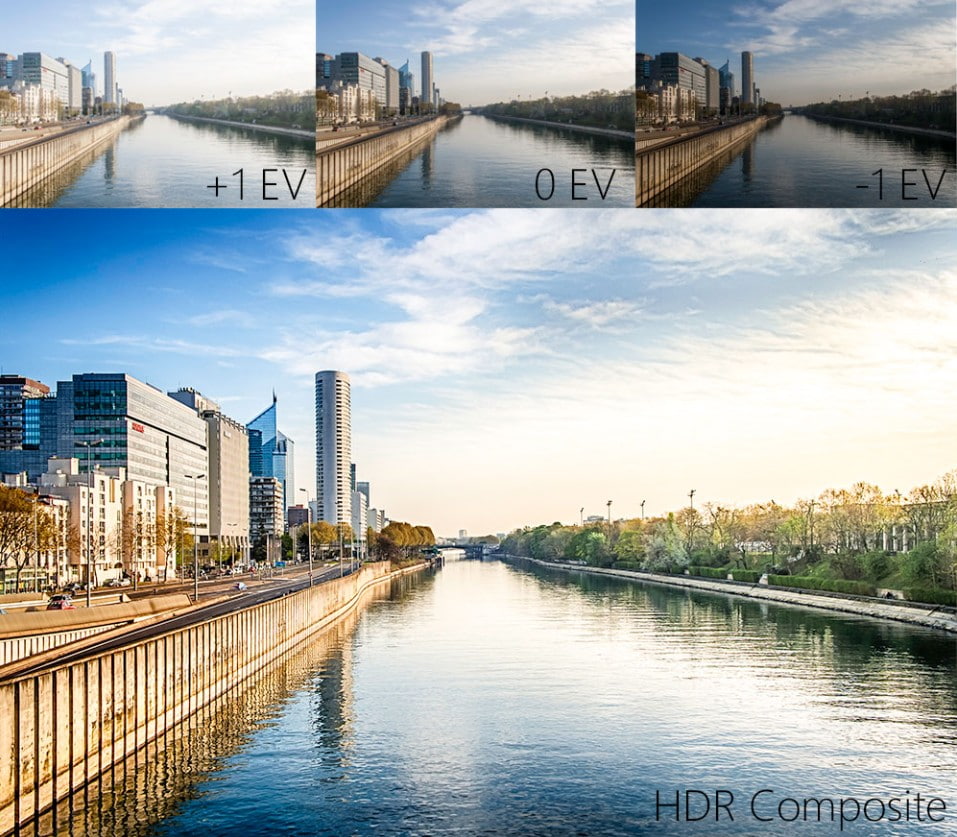
After stabilizing the camera, take a picture with the aperture set to normal. Next, take an underexposed picture from one or more stops to retain information in the bright areas. Finally, take another overexposed picture from one or more stops to capture more detail in the dark areas.
The basic process can be carried out as follows:
Step 1: Place the camera on a tripod and stabilize the composition.
Step 2: Set the aperture to the normal exposure setting.
Step 3: Take the first photo with standard exposure.
Step 4: Reduce the exposure by one or more stops and take a second photo to preserve detail in the bright areas.
Step 5: Increase the exposure by one or more stops and take a third photo to capture more information in the dark areas.
Step 6: Import the images into post-processing software that supports HDR and combine them into a single image.
6. Dynamic Range in Video Recording
Filming a high-contrast scene can be even more challenging than taking a still photograph, because the light and subject can constantly change during the recording process.
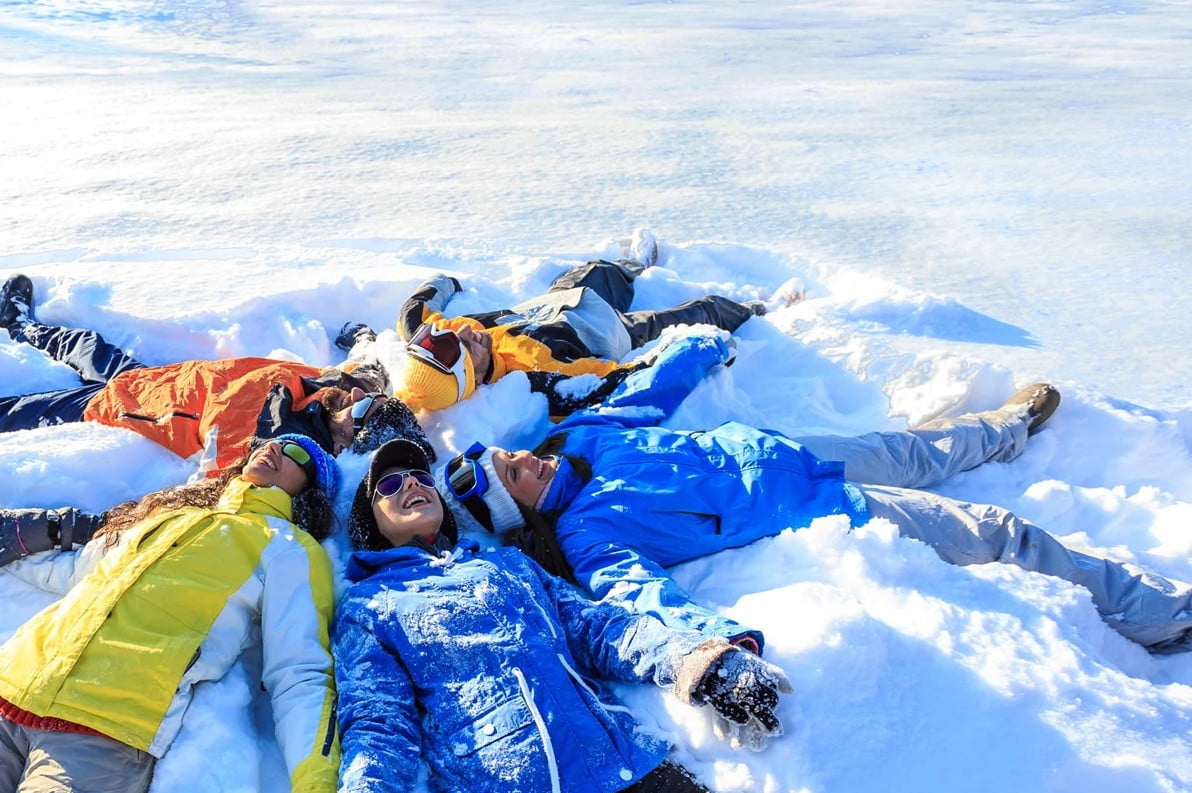
When filming, the cinematographer needs to pay attention to how the light changes as the subject moves or as the camera changes position. A character might step from a shaded area into bright light, causing a significant change in exposure.
Composition also plays a crucial role in handling scenes with a wide dynamic range. A good frame typically creates multiple layers of space for the viewer's eye to move through the foreground, the main subject, and the background.
When the subject or camera changes position, the cinematographer may need to change the focus point and adjust the exposure to adapt to the new light intensity.
7. Shoot photos in RAW format.
Modern camera sensors can capture a fairly wide range of light. However, when images are saved in highly compressed formats, some image information may be lost.
RAW retains more data from the sensor, providing more room for post-processing. This is a significant advantage when shooting scenes with strong contrasts between bright and dark areas.
For example, a RAW image with slightly underexposed shadow areas can still allow users to enhance the shadows in post-processing. Similarly, well-controlled highlights can be further adjusted to create overall balance.
This doesn't mean RAW can recover every lost detail. If the highlights are completely overexposed or the shadows no longer contain any data, post-processing cannot recreate the original information. Therefore, RAW should be seen as a tool to expand processing capabilities, not a replacement for precise exposure techniques.
8. Leverage post-production.
After taking a photo, photo editing software allows users to adjust many factors related to highlights and shadows. You can balance highlights and shadows, adjust exposure, contrast, whites, and blacks to create a more harmonious image.
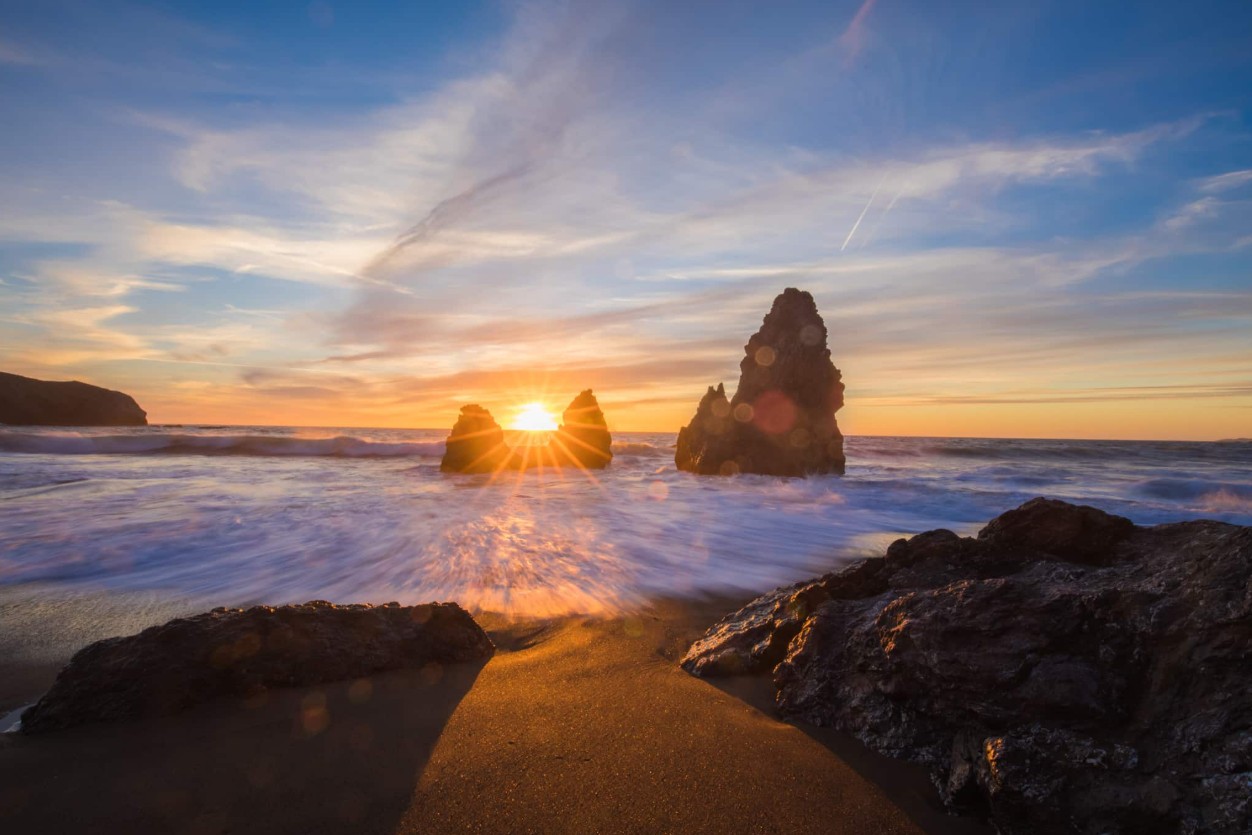
With RAW images, this process has even more room to maneuver. The editor can restore some detail in dark areas, reduce the brightness of bright areas, and balance the overall image before proceeding with color correction.
For video, users can learn how to perform color correction and color balancing in post-production. This process requires practice through various types of scenes to understand how light, color, and contrast affect the image.
However, the goal of post-processing isn't always to make all the highlights and shadows look the same. A good photograph still needs contrast to create depth and direct the viewer's attention.
9. How to Master Dynamic Range
To better control the dynamic range of light, photographers need to combine shooting techniques and post-processing instead of relying on a single solution.
First, observe the scene and determine which areas are most important. If the sky contains beautiful clouds, you can prioritize preserving detail in the bright areas. If the subject is in shadow and is the main element of the photograph, preserving subject detail may be more important.
Next, check the histogram to assess the range of light and dark. If the scene exceeds the camera's capabilities, consider changing the shooting angle, using an ND filter, or performing multiple exposures for HDR.
When possible, shoot in RAW to retain as much data as you can. Then, use post-processing to balance the image instead of trying to fix every problem right on the camera.
Most importantly, experiment with your own equipment. Each sensor has different limitations, and understanding those limitations will help you make quicker decisions in complex lighting situations.
With SaDesign, understanding dynamic range is not only a technical term in photography but also a crucial step in mastering light. By knowing the camera's limitations and choosing the right processing methods, you'll be more likely to create images that are rich in detail, balanced, and true to your creative vision.





















VIP Products








Best Selling Products
Genuine Adobe Illustrator account
99 USD
MidJourney Account
29 USD
Adobe Premiere Pro Account
99 USD
Upgrade genuine Capture One account
120 USD
Freepik Premium Account
59 USD
Genuine Cheap Canva Pro
39 USD
ChatGPT Plus Account (GPT-4)
16 USD
Windows 10 & 11 Pro Key
36 USD
Upgrade Genuine Office 365
49 USD
Upgrade Duolingo Super
29 USD
Autodesk All App Account Copyright
120 USD
Plugin Retouch4me
69 USD
Copyright Adobe Lightroom Account
59 USD
Adobe Photoshop Copyright - Full App
120 USD
Capcut Pro 1 Year
39 USD