Best Selling Products
What is Preset Lightroom? How to Use Presets in Lightroom
If you're studying and interested in professional photo editing, you've probably heard the concept of Presets. In which Preset is used most in Lightroom software. So what is the lightroom preset? How to install and use presets in Lightroom? The following article, SaDesign will guide you in detail for these concepts.
What is the Preset Lightroom concept?
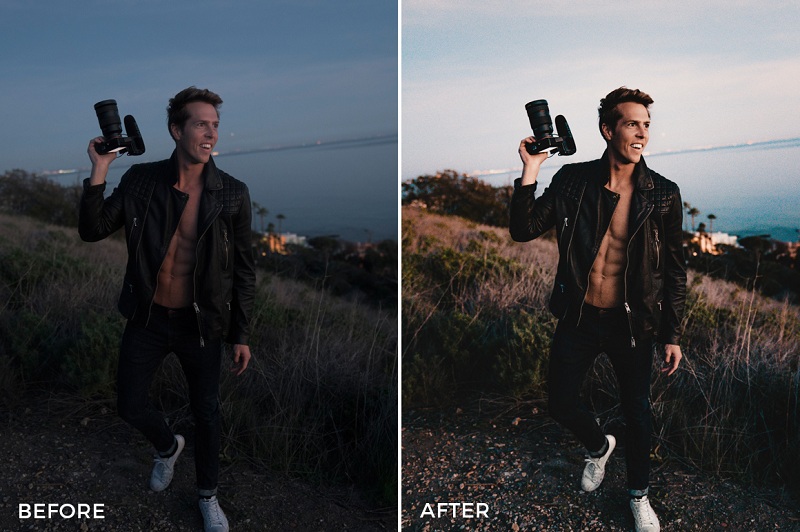
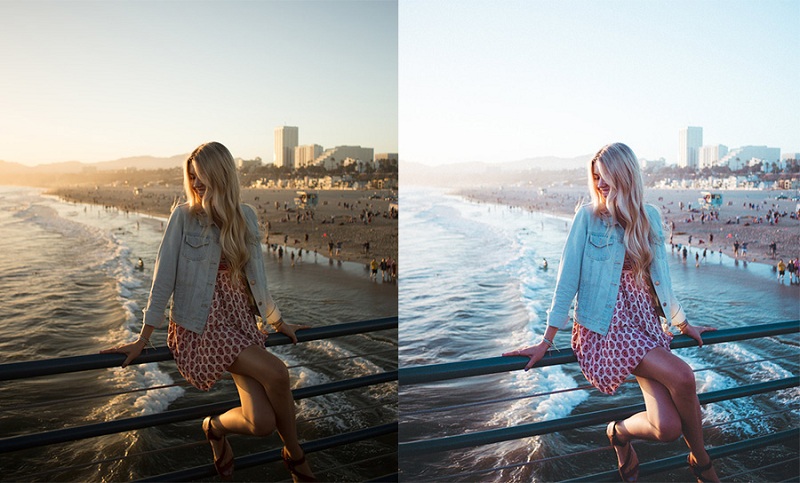
Lightroom Preset can be understood similarly to Action in Photoshop, allow users to save the entire image adjustment process. You can take it as basic parameters of color, light, ... and apply it to other images. Or you can also use Preset Lightroom for faster video editing.

What is Preset Lightroom?
However, the displayed presets will not be of the same quality and specifications. Especially with Presets created by professional photographers will give very impressive results, which can include some details such as clear color, smooth skin, changing brightness, ...
When displaying, the image ending of The Lightroom preset will be lrtemplate. For Photoshop Presets, the extension will be .xmp or .xml.
Instructions for installing Preset into the software Lightroom
Preset Lightroom is able to retrieve all previously set information, edit such as lighting, color, ... of an image, then being aggregated and saved as a template file, called a Preset. For new users, the process of installing Presets into Lightroom will be difficult.
Therefore, you can apply the following Preset settings to create beautiful pictures with impressive Preset effects.
Install Preset on Develop in App
Step 1: Open Lightroom and select Develop tab. Note that you must select an image to import before you can open the Import Presets feature in Lightroom.
Step 2: Look to the left part of Lightroom, you will see Presets. Then right-click and choose Import.
Step 3: Select the folder containing the Presets that you downloaded, then click Import. At this point, you can choose one or more to import according to various types of Presets.
Step 4: After completing the import process, it will appear in the Presets section in the left corner of the screen. At this point, you just need to click on the selected Presets to apply the corresponding color on the desired image.
Installing Preset Lightroom with 2 easy ways.
Install Preset Manually
Step 1: First, you also need to download Preset Lightroom to your computer and extract the file.
Step 2: Next, you need to load folders into the Develop Presets section of Lightroom software.
After that: you can continue as above steps in way 1.
With the two above installation methods, you can choose the appropriate options depending on the respective advantages. In case you do not understand each step of the installation, you should consult the previous users for more details.
Steps to use presets in detailed lightroom
After finishing the installation, using is the next step for you to create images that you like with Preset. You can apply the steps suggested below to get started using Lightroom presets effectively.
Step 1: On the Library tab of Lightroom, choose any image and import. If no images have been previously taken, the Panel Presets will not be activated for using.
Step 2: Use Panel Presets to switch to Develop tab. If not, go to Menu Window, then open Panels and choose Presets.
Step 3: Next, click the "+" sign in the right corner of the Presets Panel, then click "Import Presets ..." if you want to add a Preset from available sources. If you want to create a Preset with your own settings, choose "Creat Preset ...".
Step 4: When you start adding and editing photos, just click to select the desired preset, the photo will be automatically customized according to the parameters that the Preset you have installed.
If you want to return to the original image, before selecting the preset, select Reset.

Use the Preset in Lightroom expertly in some easy steps.
* Note: These are the steps to use Lightroom Classic CC 2019, with other versions, you can also do the same. However, there are some minor differences to note:
- With older versions, you need to click on the Presets panel to add more options for users to use.
- Meanwhile, with the new version, the processing tasks will be performed mainly through the "+" sign in the right corner.
Some advantages and disadvantages of using Preset Lightroom
Understanding the advantages and disadvantages of Preset Lightroom will help a lot for future using. Here are some of the pros of editing photos through the Preset Lightroom compiled by SaDesign.
1. Advantages of Preset Lightroom
- If the image parameters are similar, you can use Preset Lightroom to correct the image, giving very high efficiency. Photos through fine tuning will be counted in seconds, processed quickly, neatly and accurately.
- Preset Lightroom is the optimal solution to save time and optimize steps.
- Support users to create better by referring to examples of other people, from which you can learn from experience and create more great ideas for yourself.
- You have to really understand the specifications of the software in order to be able to apply and gain experience from its predecessors, to avoid abuse. Therefore, your level will be improved more and more because you can use fancy colors.
Preset Lightroom also has its advantages and disadvantages.
2. Some disadvantages of Preset Lightroom
- Use preset is a way to edit photos better. However, if you do not understand and master the parameters, the returned photos will not be as beautiful as expected.
- Because the specifications are different, we should be able to apply the Preset with one good image but not another image. Therefore, these images should not be applied mechanically with the preset.
- If you use the Preset Lightroom without understanding the parameters, you will be dependent on and always looking for new effect presets. This will take you a lot of time but the work efficiency is not high.
Above are detailed information about Preset Lightroom as well as how to use Preset for Lightroom. When grasping the basic professional knowledge as well as understanding the meaning of parameters on Present, you will be able to proactively create the most attractive and satisfying photos. Good luck.
Sadesign Co., Ltd. provides the world's No. 1 warehouse of cheap copyrighted software with quality: Panel Retouch, Adobe Photoshop Full App, Premiere, Illustrator, CorelDraw, Chat GPT, Capcut Pro, Canva Pro, Windows Copyright Key, Office 365 , Spotify, Duolingo, Udemy, Zoom Pro...
Contact information
SADESIGN software Company Limited


