Best Selling Products

Genuine Adobe Illustrator account
99 USD

Freepik Premium Account
59 USD

Upgrade Genuine Office 365
49 USD

MidJourney Account
29 USD

Plugin Retouch4me
69 USD

Copyright Adobe Lightroom Account
59 USD

Upgrade Duolingo Super
29 USD

ChatGPT Plus Account (GPT-4)
16 USD

Capcut Pro 1 Year
39 USD

Adobe Photoshop Copyright - Full App
120 USD

Upgrade genuine Capture One account
120 USD

Genuine Cheap Canva Pro
39 USD

Adobe Premiere Pro Account
99 USD

Autodesk All App Account Copyright
120 USD

Windows 10 & 11 Pro Key
36 USD
What is Resolution in Photoshop? How to set the standard resolution when designing?
Nội dung
- 1. What is Resolution in Photoshop?
- 2. What is the difference between PPI and DPI in Photoshop?
- 2.1 What is PPI?
- 2.2 What is DPI?
- 3. What resolution is appropriate for each need?
- 3.1 Website and Social Media Design
- 3.2 Design for printing
- 3.3 Posters and large-format publications
- 3.4 Photo editing and graphic design
- 4. How to check and change Resolution in Photoshop
- 5. How to increase resolution and process low-resolution images
- 5.1 Increase the size using Image Size
- 5.2 Using Super Resolution
- 5.3 Using Generative Upscale
- 5.4 When should you not try to increase your Resolution?
- 5.5 Some notes on maintaining image quality
- 6. Conclusion
When designing with Photoshop, besides image size, color, and file format, Resolution is also a parameter that directly determines how the image will be used after completion. Designs for websites, social media posts, or posters all have different resolution requirements. If the settings are inappropriate, the image may be blurry, lack detail, or create an excessively large file, making editing and publishing difficult. Therefore, understanding what Resolution in Photoshop means will help you be more proactive from the moment you create your file.
1. What is Resolution in Photoshop?
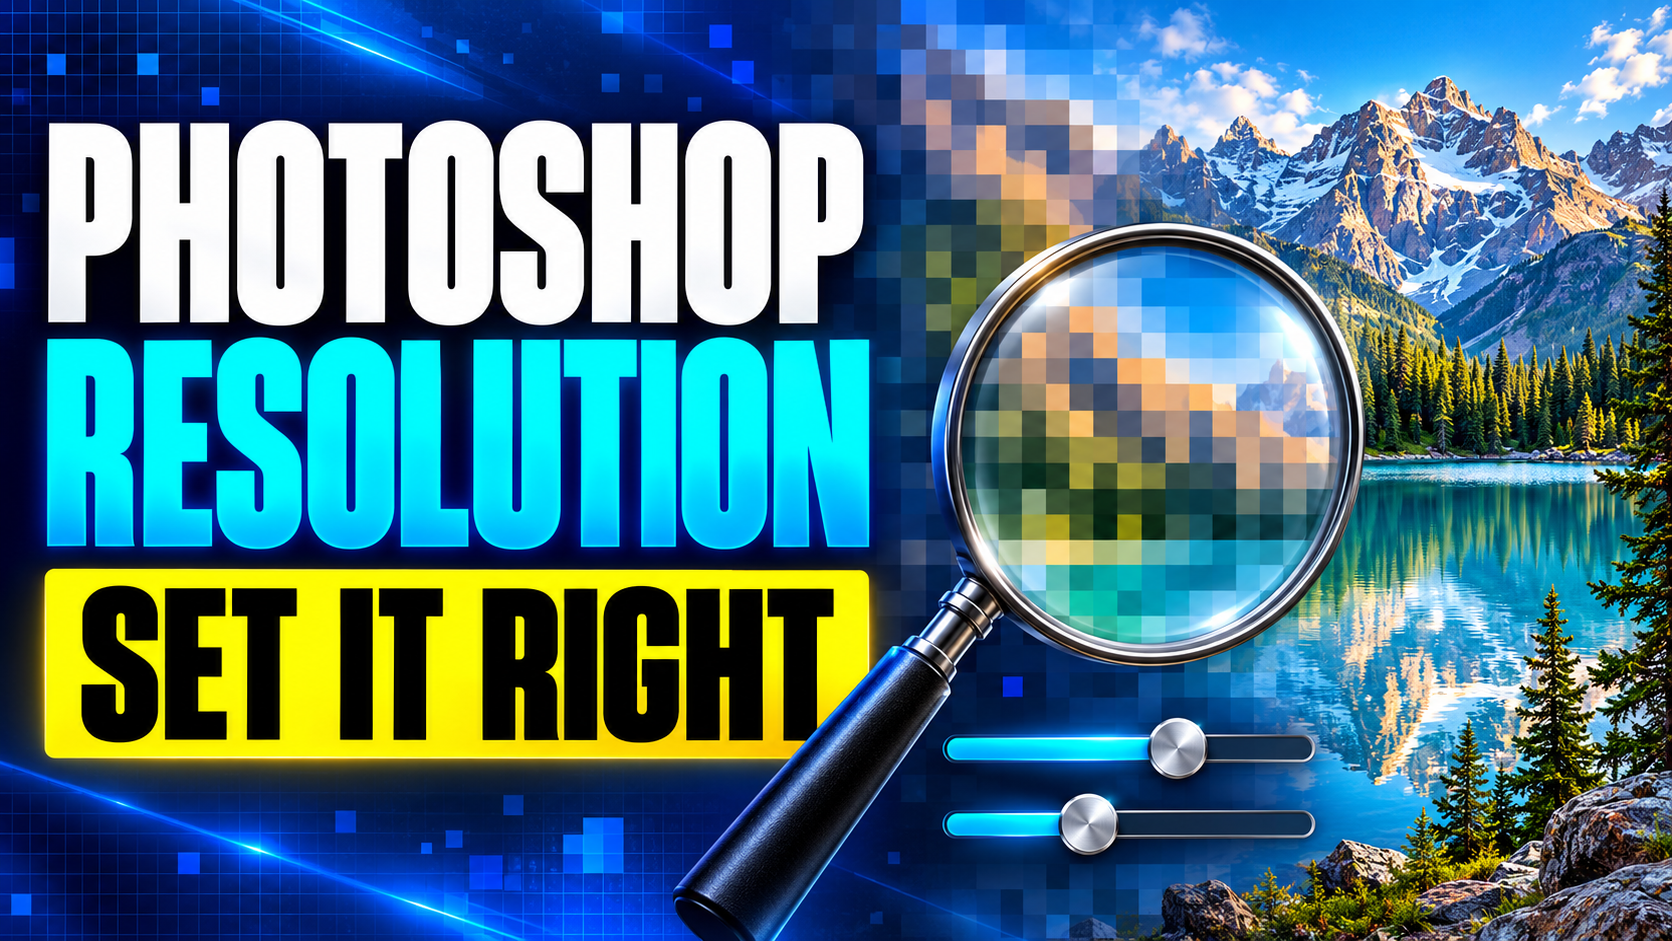
Resolution in Photoshop refers to the image resolution , reflecting the amount of image information displayed through pixels. However, to accurately understand this parameter, users need to distinguish between pixel size and pixel density. An image with more pixels generally displays more detail, especially when enlarging, cropping, or using it for printing. Conversely, images with excessively small pixels are prone to jagged edges, blurring, or loss of detail when enlarged. In Photoshop, Resolution is usually expressed in PPI (pixels per inch) , especially when setting image sizes for printing. However, simply changing the Resolution number does not automatically make the image sharper. The actual quality also depends on the number of pixels in the original file.
-
Pixel Dimensions: This refers to the number of pixels in the width and height of an image, for example, 1920 × 1080 px.
-
Resolution: Usually expresses the density of pixels per inch, most commonly in PPI.
-
PPI: An abbreviation for Pixels Per Inch, indicating how many pixels are distributed per inch.
-
Physical size: Refers to the size of the image when printed on paper or other physical material.
-
The higher the pixel count: The more data the image has to show detail when editing or enlarging.
-
Resolution cannot automatically create more original detail: Simply increasing PPI cannot transform a low-quality image into one as sharp as the original high-resolution image.
For example, a 3000 × 2000 px image will still contain the same number of pixels even if you change the resolution from 72 PPI to 300 PPI if interpolation is not enabled. This change primarily affects the physical size when printed and does not add any additional image data.
2. What is the difference between PPI and DPI in Photoshop?
PPI and DPI are two terms that frequently appear in design but are often confused. PPI directly relates to the pixel density of a digital image, while DPI is usually used to refer to the density of ink dots that a printing device creates on a material. Understanding this difference helps you choose the appropriate parameter instead of just looking at a single Resolution number and assuming it determines the entire image quality.
2.1 What is PPI?
PPI, short for Pixels Per Inch , describes the number of pixels distributed per inch. This parameter often appears in Photoshop's Image Size dialog box and is especially important when preparing images for printing.
-
High PPI is typically suitable for products that require many intricate details.
-
300 PPI is commonly used as a reference level for many popular printing products.
-
Low PPI may be suitable for designs used only on screens.
-
PPI is not synonymous with the total number of pixels in an image.
-
Increasing PPI does not automatically add detail to the original image without performing pixel interpolation.
2.2 What is DPI?
DPI, short for Dots Per Inch , is commonly used to describe the number of ink dots a printer produces per unit length. Because pixels are digital image data while dots relate to physical ink dots, the two concepts are not entirely the same.
In design practice, many people still commonly refer to print resolution as DPI. However, when working directly in Photoshop, you will often encounter PPI in the Resolution section of Image Size. The most important thing is not to look solely at PPI or DPI. When preparing a file, consider both pixel size, final product size, and intended use to choose the appropriate parameter.
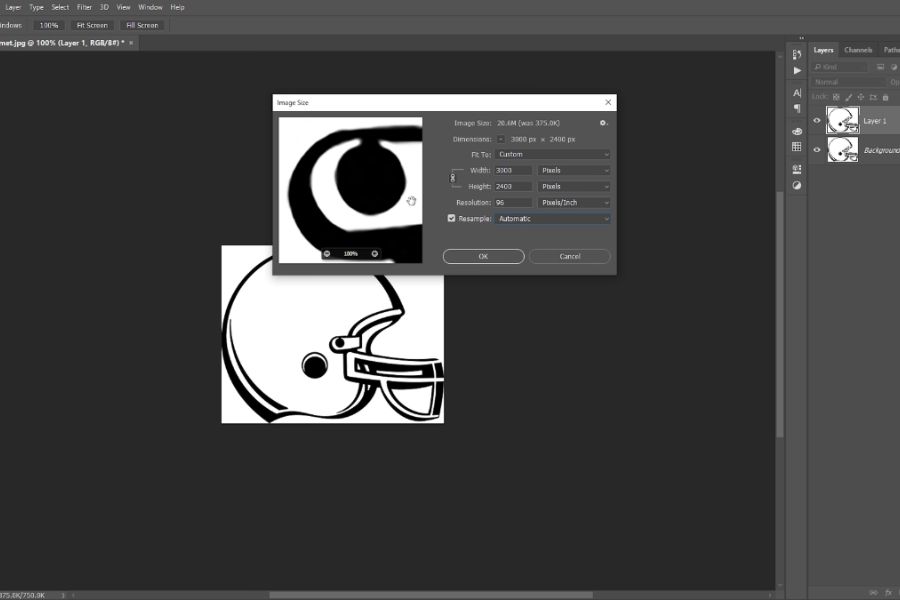
3. What resolution is appropriate for each need?
3.1 Website and Social Media Design
For images that are only displayed on a screen, the actual pixel size is more important than PPI . You should prioritize creating images that are the correct size required by the website or platform, then optimize the format and file size when exporting.
-
Website banners: prioritize the correct pixel size for the display area.
-
Social media post images: set to the size supported by the platform.
-
Thumbnails: There should be a balance between sharpness and file size.
-
Website images: avoid exporting excessively large files unless necessary.
-
PPI of 72 or 96 is commonly found in monitor setups, but this should not be considered a mandatory standard for all web images.
3.2 Design for printing
For printed materials such as business cards, brochures, flyers, catalogs, or high-quality photos, 300 PPI is often a common reference level. When set correctly from the start, images, text, and fine details will be more clearly visible in print.
-
Business cards: typically 300 PPI can be used.
-
Leaflets and brochures: prioritize around 300 PPI if the printing process requires it.
-
Catalogue: It's important to maintain a sufficiently large image library to ensure detail.
-
High-quality printed photos: 300 PPI is often the popular choice.
-
Always check the technical specifications from the printing company before exporting the file.
3.3 Posters and large-format publications
With large posters, standees, backdrops, or billboards, viewers usually stand a certain distance from the product. Therefore, it's not always necessary to push the resolution to 300 PPI. An excessively large file can significantly increase processing time without a corresponding improvement in quality.
-
Large posters: a resolution lower than 300 PPI may be used depending on the size.
-
Backdrops and large banners: should be chosen based on the finished product size and viewing distance.
-
Billboard: prioritize a balance between size, viewing distance, and device processing capabilities.
-
The larger the file, the more attention you need to pay to RAM and storage space.
-
If the printing company provides its own specifications, prioritize theirs.
3.4 Photo editing and graphic design
If you haven't determined the exact final output, you can keep the source file with a relatively large pixel size to have more editing space. This is especially useful when you need to crop, retouch, change the layout, or use the image for multiple purposes.
-
Keep the original file at the correct size.
-
Avoid zooming in on images multiple times during the editing process.
-
Use Smart Objects when working with images that need to be resized.
-
Save the PSD file to preserve layers and editability.
-
Publish a separate version as needed instead of constantly modifying the original file.
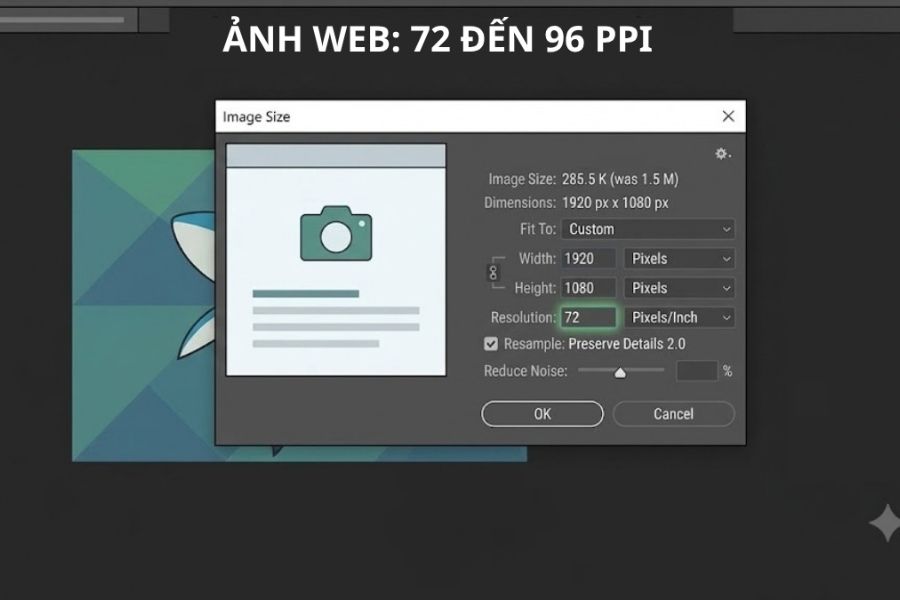
4. How to check and change Resolution in Photoshop
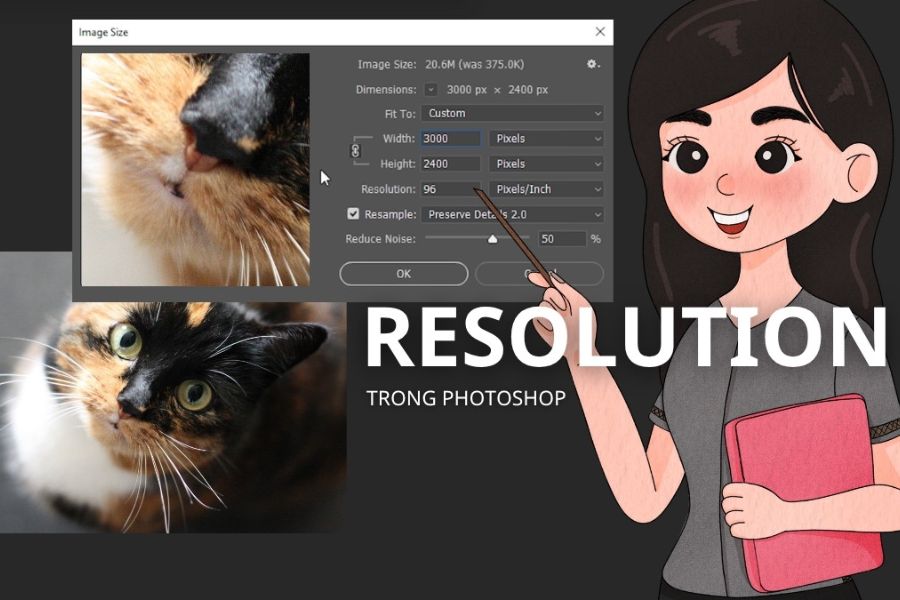
Photoshop allows users to check pixel size, resolution, and physical dimensions directly in the Image Size panel . This is the area you should check before sending files for printing or exporting images to clients. When changing parameters, pay special attention to the Resample option as it determines whether Photoshop changes the total number of pixels in the image.
The steps are relatively simple:
-
Step 1: Open the image you want to check in Photoshop.
-
Step 2: Select Image from the menu bar.
-
Step 3: Click Image Size to open the resizing panel.
-
Step 4: Check the Width, Height, and Resolution parameters .
-
Step 5: In the Resolution section, enter your desired PPI level.
-
Step 6: Check the unit being used, usually Pixels/Inch.
-
Step 7: Review the Pixel Dimensions before clicking OK .
Upgrade your licensed version of Photoshop.
5. How to increase resolution and process low-resolution images
5.1 Increase the size using Image Size
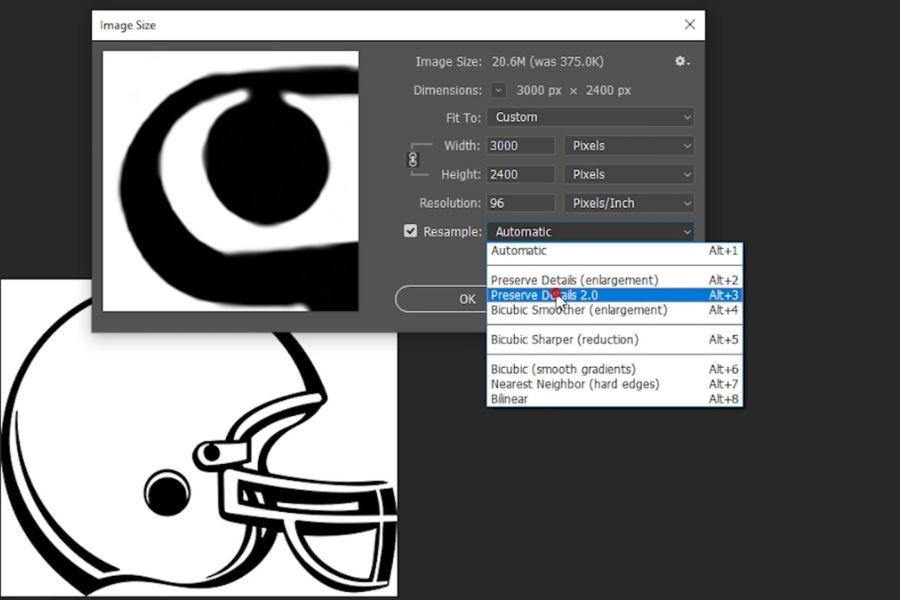
This is the most basic and easiest method. Open Image > Image Size , enable Resample, and then increase the Width or Height as needed. Photoshop will interpolate additional pixels based on the data already available in the image.
-
Suitable for moderate size changes.
-
Different Resample methods can be selected.
-
If the source image is too small, you should enlarge it in stages.
-
After enlargement, carefully check the hair, face, text, and outlines.
-
You shouldn't expect low-quality images to become perfectly sharp simply by increasing their size.
5.2 Using Super Resolution
For images requiring enhanced detail, Super Resolution in Camera Raw can be a useful option. This tool uses advanced processing to create a larger version of the original image.
-
Open the image in Photoshop and access the Camera Raw interface when appropriate.
-
Right-click on the image.
-
Select Enhance .
-
Activate Super Resolution .
-
Select Enhance to have Photoshop process the image.
-
Double-check the details after completion.
5.3 Using Generative Upscale
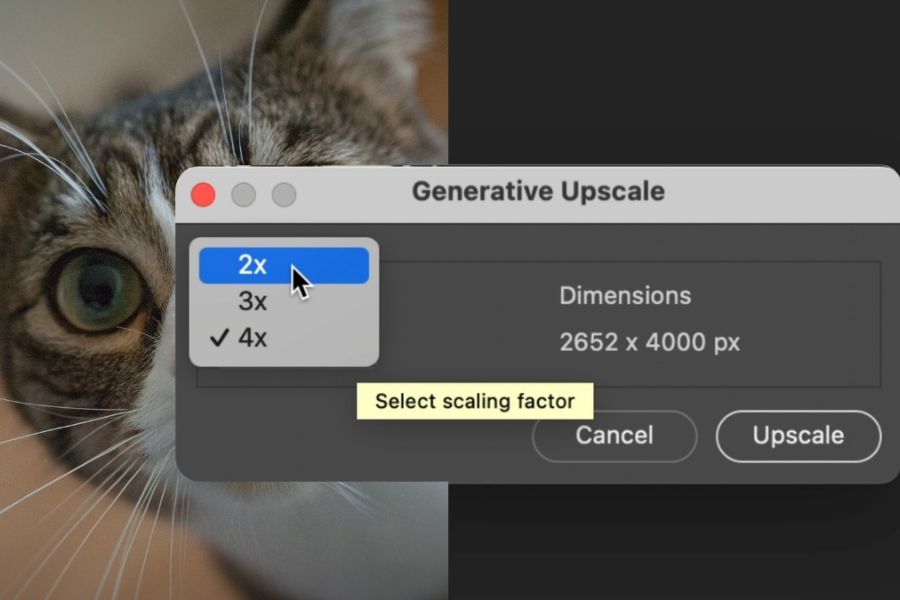
In supported versions of Photoshop, Generative Upscale offers an additional option to increase image size using AI technology. This tool is suitable when you need to increase the size of an image but still want to maintain a natural feel in areas with a lot of detail.
-
Open the image that needs upgrading.
-
Chọn Image > Generative Upscale.
-
Choose the appropriate magnification ratio.
-
Execute the Upscale command.
-
Check the face, text, outline, and fine details after processing.
-
Compare it to the original file before deciding to use the upgrade.
5.4 When should you not try to increase your Resolution?
Not all photos should be enlarged. If the original image is already blurry, heavily compressed, out of focus, or contains a lot of noise, increasing the size may make these flaws more noticeable.
-
The JPEG image is compressed too heavily.
-
The image is extremely small in its original size.
-
The image is severely out of focus.
-
The text in the image is broken.
-
The face or main object no longer has enough detailed data.
In these cases, finding a higher-quality source file is often more effective than trying to increase the Resolution many times over.
5.5 Some notes on maintaining image quality
To avoid image distortion or excessively large Photoshop file sizes, you should make it a habit to check the settings before you start designing.
-
Determine the intended use before creating the file.
-
Do not set the Resolution too high if the product is only used on a screen.
-
For print design, you should ask for specifications from the printing company.
-
Always check the pixel dimensions instead of just looking at the PPI.
-
Avoid enlarging small images to excessively large sizes.
-
Use Smart Objects when you frequently change the size of layers.
-
Keep the original PSD file so you can edit it later.
-
Publish separate files for the web, social media, and print instead of using a single file for all purposes.
6. Conclusion
Understanding what Resolution in Photoshop means will help you avoid many common design errors, from blurry images to excessively large files. The key isn't always setting the Resolution to the highest level, but rather choosing the right setting for your needs. Always consider pixel size, PPI, final product size, and output requirements before you begin designing. For those who frequently work with Photoshop, using a suitable and fully featured version also makes the creative process more convenient. You can check out Photoshop upgrades at Sadesign for more options to support your design and image editing work.





















VIP Products








Best Selling Products
Genuine Adobe Illustrator account
99 USD
Freepik Premium Account
59 USD
Upgrade Genuine Office 365
49 USD
MidJourney Account
29 USD
Plugin Retouch4me
69 USD
Copyright Adobe Lightroom Account
59 USD
Upgrade Duolingo Super
29 USD
ChatGPT Plus Account (GPT-4)
16 USD
Capcut Pro 1 Year
39 USD
Adobe Photoshop Copyright - Full App
120 USD
Upgrade genuine Capture One account
120 USD
Genuine Cheap Canva Pro
39 USD
Adobe Premiere Pro Account
99 USD
Autodesk All App Account Copyright
120 USD
Windows 10 & 11 Pro Key
36 USD