Best Selling Products

Capcut Pro 1 Year
39 USD

Genuine Adobe Illustrator account
99 USD

ChatGPT Plus Account (GPT-4)
16 USD

Adobe Premiere Pro Account
99 USD

Windows 10 & 11 Pro Key
36 USD

Plugin Retouch4me
69 USD

Upgrade genuine Capture One account
120 USD

Upgrade Genuine Office 365
49 USD

Genuine Cheap Canva Pro
39 USD

Upgrade Duolingo Super
29 USD

Copyright Adobe Lightroom Account
59 USD

Autodesk All App Account Copyright
120 USD

MidJourney Account
29 USD

Adobe Photoshop Copyright - Full App
120 USD

Freepik Premium Account
59 USD
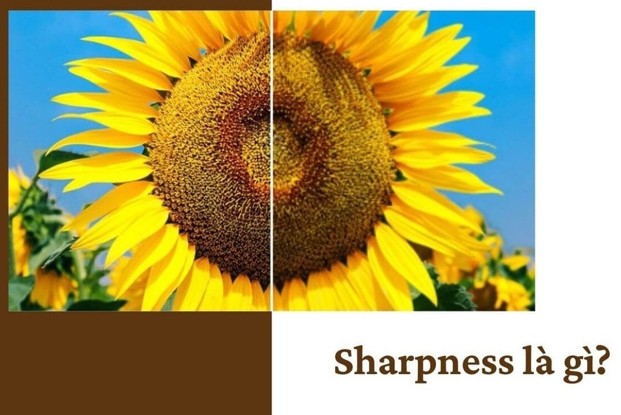
What is Sharpness? Everything a Photographer Needs to Know About Sharpness
Nội dung
Sharpness is one of the most important factors to create an impressive photo, conveying enough message, emotion and visual value to the viewer.
In the colorful and creative world of photography, there are countless factors that contribute to creating a beautiful photo that leaves an impression on the viewer. From composition, light, color to visual storytelling, all are important. However, among all these techniques, Sharpness is always considered the “vital” factor, determining most of the visual and emotional value that a photo brings.
Even if a photo is delicately composed and perfectly lit, if it lacks sharpness, every detail can easily become pale and lifeless. Sharpness is not simply a technical concept, but also reflects the ability to control the equipment, the photographic mindset and the post-production skills of the photographer.
So what is Sharpness really? How to control and optimize the sharpness of your photos? What factors determine Sharpness? And what are the useful editing tools to help "save the sharpness" of your work to make it more perfect? Let's explore all the interesting knowledge about Sharpness in photography through the article below so that every photo you take is "sharp" to attract the eyes and fully convey the story you want to tell!
1. What is Sharpness?
In photography, Sharpness is one of the most important factors to create an impressive photo, conveying enough message, emotion and image value to the viewer. Sharpness is understood as the ability to reproduce and express clear, sharp details of the subject, from lines to textures, giving the photo special depth and appeal.
Simply put, Sharpness is the level at which important lines and details in a photo appear clearly, without blurring, blurring, or losing focus. A photo with ideal sharpness will easily attract attention, while demonstrating the photographer's technique and aesthetic sense.
.jpg)
The sharpness of a photo does not depend on just one factor. To get a “sharp” photo, the photographer needs to understand and control many related factors such as camera resolution, lens quality, shooting technique, lighting conditions, post-processing... All of these factors blend and complement each other to create perfect Sharpness.
In the world of photography, knowledge of Sharpness is always considered an important “weapon” for any photographer, from beginners to professional photographers. Understanding Sharpness and knowing how to apply and control it is the foundation for you to be able to create beautiful, detailed and highly artistic photos.
2. Factors that determine Sharpness
After understanding what Sharpness is and its role, the question arises: What factors will directly affect the sharpness of a photo?. Below are the most important factors that any photographer needs to master.
2.1. Resolution
First of all, we cannot help but mention resolution. This is a familiar “measure” to determine the image quality that an optical device or imaging system can reproduce. Basically, resolution is calculated by the number of pixels or lines displayed in a certain image size.
With digital cameras, higher resolution means more detailed and sharper images. A high resolution photo contains more information, so when printed or enlarged, the details are preserved without being grainy or blurry.
(1).png)
For example, when taking portrait or landscape photos, if you use a camera with a high-resolution sensor (24MP or higher), the photo will retain small details such as hair, fabric fibers, surface textures, etc. Thereby bringing a more impressive visual experience to the viewer.
However, high megapixel count is not the only factor. Resolution only really works when combined with good lens quality, precise focusing techniques, and optimal post-processing. Otherwise, the image may still be out of focus, blurry, or not as sharp as desired.
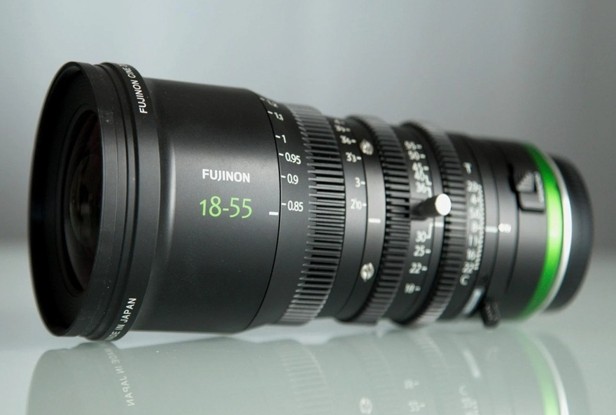
2.2. Sharpness
Next we need to distinguish clearly the sharpness, an aspect of Sharpness. Sharpness is the level of detail transition between parts of the image, especially the edges of subjects.
A photo with good sharpness will have a clear transition edge, not "crawl" out, not blurred. The edges of the subject such as faces, tree branches, buildings... are all cut clearly and sharply. This makes the photo look more professional and pleasant.
.png)
Sharpness is largely determined by the camera lens. High-end lenses often have complex optical designs, high-quality lenses, nano-coating or multi-coating to limit aberrations and enhance image sharpness.
However, if the photo still does not achieve the desired sharpness, the photographer can intervene in post-processing with the Sharpness or Clarity adjustment tools. Note that overusing the sharpening feature in post-processing can make the photo "harsh", fake and unnatural.
2.3. Magnification and distance
Magnification and distance from the viewer's eye to the image also have a significant impact on the perception of Sharpness.
When a photo is printed or displayed at a large size, the need for sharpness becomes even greater. If the photo lacks detail, magnification will reveal weaknesses such as graininess, blurriness, or blurred areas.
.png)
Conversely, viewing distance is also important. If the viewer is too close, they will easily notice blurry details or technical errors. Meanwhile, if viewed from a further distance, the limitations of sharpness will be less obvious.
Therefore, when taking photos for large-format printing such as posters, banners or exhibitions, you should consider the shooting equipment, sensor resolution, lens quality, as well as display distance to achieve the best results.
2.4. Grain noise
Another interesting factor that affects Sharpness is noise. Noise often arises when you shoot in low light conditions and have to push the ISO up.
Too much grain will make the image look less sharp, the details will be grainy and blurry. However, in some cases, a little bit of grain can create a “fake sharp” effect, making the photo look more textured. Many photographers even add grain to their photos intentionally to create a nostalgic style or to increase visual depth.
.png)
It is important to keep noise at a reasonable level to avoid losing important details. Post-production software such as Lightroom, Photoshop or specialized plugins also support noise reduction to help retain maximum sharpness.
2.5. Light intensity
Light is the indispensable “companion” of every photographer. And of course, light intensity has a direct impact on Sharpness.
If the light is too strong, it can easily cause overexposure in the highlights. Details in the burned areas will disappear and cannot be recovered. Conversely, if the light is too weak, the photo may be dark, lose details in the shadows, or force you to push the ISO up, increasing noise.
.png)
Not only intensity, but also uniformity of light is important. Off-center lighting, harsh lighting or flare can reduce the sharpness of the subject. Therefore, controlling the light from the capture stage to the post-production stage is the key to maintaining the ideal sharpness.
Some basic techniques for controlling light include: using auxiliary lights, reflectors, diffusers, or choosing the right time to shoot (the best natural light is usually at dawn and dusk).
2.6. Photography techniques
The last but extremely important factor is photography technique.
Even if you own an expensive camera with a good lens, if you don't know how to hold the camera firmly, focus properly or set the shutter speed properly, the photo can still be shaky, blurry, or out of focus.
To avoid camera shake, you can use a tripod when shooting landscapes, night shots or long exposures. When shooting handheld, hold the camera in the right position, hold it close to your body, control your breathing and gently squeeze the trigger. Also, choose a shutter speed higher than the minimum to ensure that the subject does not appear blurred due to movement.
For situations of fast shooting or capturing moving objects, flexibly combine shutter speed, aperture, ISO to achieve clear images. Finally, professional post-processing will be the final step to upgrade Sharpness, increasing details without losing naturalness.
3. Sharp photo editing software
As mentioned above, Sharpness is not only decided when taking the picture, but also carefully taken care of in the post-production process. Thanks to editing software, you can fix the shortcomings, improve the level of detail and create a photo that meets the "sharp" standard. Below are some outstanding tools that photographers often use.
3.1. Color Efex Pro
Color Efex Pro is a popular plugin in the Nik Collection, often installed as an add-on for Adobe Photoshop or Adobe Lightroom. This software provides a powerful collection of filters, helping to fine-tune color, light and especially enhance the sharpness of images.
.png)
The strengths of Color Efex Pro are its intuitive, easy-to-use interface and the ability to create professional color effects in just a few clicks. In addition to optimizing Sharpness, users can also add editing layers such as increasing Local Contrast, highlighting details or softening bright areas, giving the image more depth.
3.2. VirtualPhotographer
Another tool that many photographers love is VirtualPhotographer. This is a free photo editing software that works as a plugin for Photoshop. VirtualPhotographer offers a series of presets and creative filters for users to easily transform photos into their own style.
.png)
With VirtualPhotographer, you can adjust sharpness, add layers of artistic effects, and increase detail in necessary areas. Although the interface is quite simple, the software still meets basic post-production needs, suitable for even beginners in photo editing.
3.3. Lightroom
When it comes to post-production software, we definitely cannot ignore Adobe Lightroom - the "national" tool for photographers, from professional to semi-professional.
.png)
Lightroom is known for its powerful RAW image processing capabilities, preserving details without reducing image quality. The Sharpening feature in Lightroom allows users to adjust parameters such as Amount, Radius, Detail and Masking to optimize Sharpness without creating noise or creating artificial edges.
In addition, Lightroom also acts as an effective photo management library, helping you organize, tag, and export photos quickly. Whether it's color correction, brightness adjustment, or sharpness optimization, Lightroom always delivers stable and professional output quality.
3.4. Reminiscence
Finally, we cannot fail to mention Remini – an extremely famous photo restoration application on mobile phones. If you own old, blurry, broken or low-resolution photos, Remini can “magically” transform them into clearer, more detailed images with just a few steps.
.png)
Remini's Enhance feature uses AI technology to analyze and recreate lost details and highlight lines. In addition, Remini also supports restoring old videos, helping users easily "relive" old memories with much better image quality.
Hopefully, through this article, you have gained more comprehensive knowledge about the concept, the factors that determine Sharpness as well as useful software to enhance the sharpness of your photos. Take the time to practice, experiment with different lighting conditions, equipment and techniques. I am sure that when you control Sharpness, you will be closer to creating artistic and aesthetic photos, capturing the most valuable moments in the most complete way!


VIP Products


Best Selling Products
Capcut Pro 1 Year
39 USD
Genuine Adobe Illustrator account
99 USD
ChatGPT Plus Account (GPT-4)
16 USD
Adobe Premiere Pro Account
99 USD
Windows 10 & 11 Pro Key
36 USD
Plugin Retouch4me
69 USD
Upgrade genuine Capture One account
120 USD
Upgrade Genuine Office 365
49 USD
Genuine Cheap Canva Pro
39 USD
Upgrade Duolingo Super
29 USD
Copyright Adobe Lightroom Account
59 USD
Autodesk All App Account Copyright
120 USD
MidJourney Account
29 USD
Adobe Photoshop Copyright - Full App
120 USD
Freepik Premium Account
59 USD