Best Selling Products

Copyright Adobe Lightroom Account
59 USD

MidJourney Account
29 USD

Capcut Pro 1 Year
39 USD

Upgrade Genuine Office 365
49 USD

Adobe Photoshop Copyright - Full App
120 USD

ChatGPT Plus Account (GPT-4)
16 USD

Upgrade genuine Capture One account
120 USD

Upgrade Duolingo Super
29 USD

Genuine Adobe Illustrator account
99 USD

Adobe Premiere Pro Account
99 USD

Plugin Retouch4me
69 USD

Autodesk All App Account Copyright
120 USD

Genuine Cheap Canva Pro
39 USD

Windows 10 & 11 Pro Key
36 USD

Freepik Premium Account
59 USD
What is Side Lighting? Tips for Mastering Side Lighting for 'Soulful' Photos
Nội dung
Side Lighting is a lighting technique in which light is placed on the side of the subject.
Lighting is the core element that makes up the soul of a photo. Among the countless lighting techniques, Side Lighting, also known as side lighting, is considered one of the "effective" secrets that help photographers tell stories through images, creating depth and unique emotional nuances for the frame. In today's article, let's learn in detail about Side Lighting with Sadesign, from basic concepts, outstanding benefits, to how to set up artificial lighting properly, along with practical tips that anyone can apply to enhance their photography works.
1. What is Side Lighting in photography?
First, to be able to understand and apply it proficiently, you need to clearly understand what Side Lighting is and why it is so popular among photographers and filmmakers.
Side Lighting is a lighting technique where light is placed on the side of the subject. Simply put, if you place a person in front of the lens and arrange a light source (natural or artificial) to shine on them from the left or right, you have created a basic side lighting setup.
.png)
The special thing about this technique is that it creates a sharp contrast: half of the subject will be illuminated, while the other half fades into darkness. This contrast helps to outline lines, shapes and textures in an impressive way, bringing depth to an image that is essentially just a two-dimensional plane.
The interesting thing is that the angle of Side Lighting is not fixed. Depending on the position of the light source and the subject, you can flexibly adjust the angle from soft side light with a narrow angle to extremely harsh side light when placing the light source at the hip at the 3 o'clock or 9 o'clock position (if you imagine the subject as a clock face).
Thanks to its ability to portray depth and strong contrast, this technique is often favored for dramatic portraits, or landscape scenes where the photographer wants to emphasize surface texture, contours and shadows.
2. What are the benefits of Side Lighting?
Understanding the concept is not enough, what makes Side Lighting a “right-hand man” of the photographer is the benefits it brings. From movies, portraits, landscapes to commercial projects, side lighting can maximize its strengths if the photographer understands and controls it well.
Let's take a look at the outstanding benefits that Side Lighting brings, from which you will understand why it deserves to be in the "lighting skill set" of anyone who loves photography.
Enhance depth
The greatest strength of side lighting is its ability to create depth in an image. A photograph, a film frame – by itself, is just a two-dimensional plane. However, the viewer’s brain always “translates” those images into imaginary three-dimensional objects. So how to create a three-dimensional feeling on a flat surface? The answer lies in the difference in tones, shadows and highlights.
.png)
When using front lighting, the subject is evenly illuminated, the lines will be “flatter” because of the lack of shadows. On the contrary, side lighting creates a clear division between light and dark areas, highlighting rough lines, dents, surface textures… From there, the subject becomes much more vivid and realistic.
In portraiture, side lighting can emphasize strong features like the bridge of the nose, cheekbones, or shoulders. In landscapes, it can highlight the contours of mountains, treetops, and grass – things that can easily “bleed” into the background if the lighting is too flat.
Create a dramatic atmosphere
A photo that lacks depth isn’t necessarily “bad,” but if it lacks drama, it’s likely to be flat and less impactful. Side lighting is favored by videographers and photographers for its ability to stir emotion through bold contrast.
When one side of the subject is brightly lit while the other is in shadow, the frame instantly creates a sense of mystery, suspense, or even a bit of gloom, depending on how the intensity of light and darkness is controlled. In cinema, this is the “spice” for storytelling that dialogue sometimes cannot fully convey.
For example, if you want to take a “mood” portrait – Side Lighting is an almost indispensable choice. Half of the face is lit, the other half is lost in the dark, the eyes look far away, all creating an emotional visual effect, drawing the viewer into the story behind the photo.
Highlight the subject's features
Aside from adding depth and drama, Side Lighting is also extremely useful if you want to emphasize texture and surface features.
.png)
The horizontal light will glide over details from small wrinkles, ridges, grooves… to hair strands, fabric folds. As a result, the smallest features can be clearly highlighted without the need for complex post-processing.
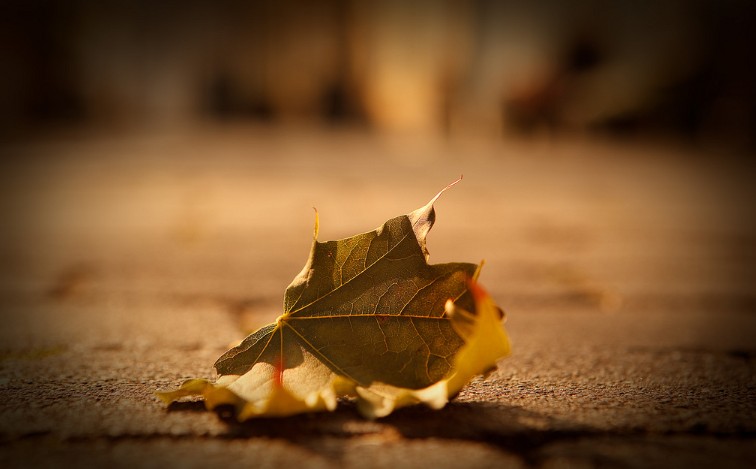
For this reason, landscape photographers love side lighting, especially during the “golden hour” when the sun rises or sets. At this time, the sunlight is at a low angle, creating long, soft shadows, making landscapes such as forests and hills appear much more dynamic and textured than midday light.
3. How to use artificial light as secondary lighting
After understanding what Side Lighting is and the benefits it brings, the next step is to practice setting up the lighting, this is the key factor that determines whether your photos will be as effective as desired or not.
In case you can't take advantage of natural light (or want to control the light absolutely), using artificial light will help you actively arrange the lighting layout.
Place the light at the 4 o'clock or 8 o'clock position.
A common rule of thumb that many photographers recommend is to imagine your subject as the center of the clock face. Accordingly, the ideal position for side lighting is usually around 4 or 8 o’clock, depending on whether you want to light the left or right side.
When the light is in this position, the light will shine diagonally from the side, creating natural shadows and beautiful contrast. Try rotating the light source slightly or moving the subject to observe the direction of the shadow, this is when you can fine-tune the light to achieve the desired effect.
.png)
Place the light at 3 or 9 o'clock position.
If you want to use extreme side lighting, try placing your side light at 3 or 9 o’clock. This will cause the light to shine straight across the side, splitting the subject into two distinct light and dark areas.
This setting is often used to emphasize indentations, ridges, or complex textures on a subject’s surface. For example, with portraits, facial features become more distinct; with objects, surface details such as wood grain, fabric folds, metal scratches, etc. appear much more vivid.
Of course, the level of “harshness” or “softness” also depends on the distance of the lights, the light intensity and whether or not a diffuser is used – this we will discuss in more detail in the photography tips section below.
4. Tips for taking photos with side lighting
Knowing how to set up your lights isn’t enough, using practical tips will give you more control over the final result. Here are some extremely useful tips that any photographer, professional or amateur, should keep in mind.
Use a 45 degree angle for best side lighting
In portrait photography, a “classic” tip is to place the side light at a 45-degree angle to the subject. Imagine the line from the light to the subject’s face forming a 45-degree angle – this is considered the golden angle to create a nice contrast without being too harsh.
.png)
Also, turn your subject slightly towards the light source. This will not only illuminate half of the face evenly, but will also highlight key features like the bridge of the nose, jawline, or wrinkles – which are important if you want to add realism to your photo.
If you want a strong shadow effect, avoid using a diffuser. Instead, use a small light source and place it far away so that the light is more focused and harsh. This is the trick to creating maximum contrast for richly toned frames.
Create soft light on the side of the subject to reduce contrast
However, Side Lighting doesn’t always have to be “harsh”. In many cases, you just want to create a slight separation between the light and dark areas so that the image still retains a soft look.
The trick here is to add an additional light source, such as a reflector or a reflector. Placing it on the opposite side of your main light source will help to reduce harsh shadows without losing the character of the sidelight.
Additionally, if you use a main light, add a softbox or diffuser to make the light “softer”. Softboxes help to spread the light evenly, reduce hard shadows and create a softer atmosphere, especially suitable for natural-style portraits.
When working outdoors, instead of moving the light, you can rotate the subject. By avoiding direct side lighting and bringing the subject closer to the lens axis, the natural light will be more even and softer


VIP Products


Best Selling Products
Copyright Adobe Lightroom Account
59 USD
MidJourney Account
29 USD
Capcut Pro 1 Year
39 USD
Upgrade Genuine Office 365
49 USD
Adobe Photoshop Copyright - Full App
120 USD
ChatGPT Plus Account (GPT-4)
16 USD
Upgrade genuine Capture One account
120 USD
Upgrade Duolingo Super
29 USD
Genuine Adobe Illustrator account
99 USD
Adobe Premiere Pro Account
99 USD
Plugin Retouch4me
69 USD
Autodesk All App Account Copyright
120 USD
Genuine Cheap Canva Pro
39 USD
Windows 10 & 11 Pro Key
36 USD
Freepik Premium Account
59 USD