Best Selling Products

Capcut Pro 1 Year
39 USD
Autodesk All App Account Copyright
120 USD
Adobe Premiere Pro Account
99 USD
Genuine Adobe Illustrator account
99 USD
Genuine Cheap Canva Pro
39 USD
Upgrade genuine Capture One account
120 USD

MidJourney Account
29 USD
Plugin Retouch4me
69 USD

ChatGPT Plus Account (GPT-4)
16 USD

Freepik Premium Account
59 USD
Upgrade Duolingo Super
29 USD
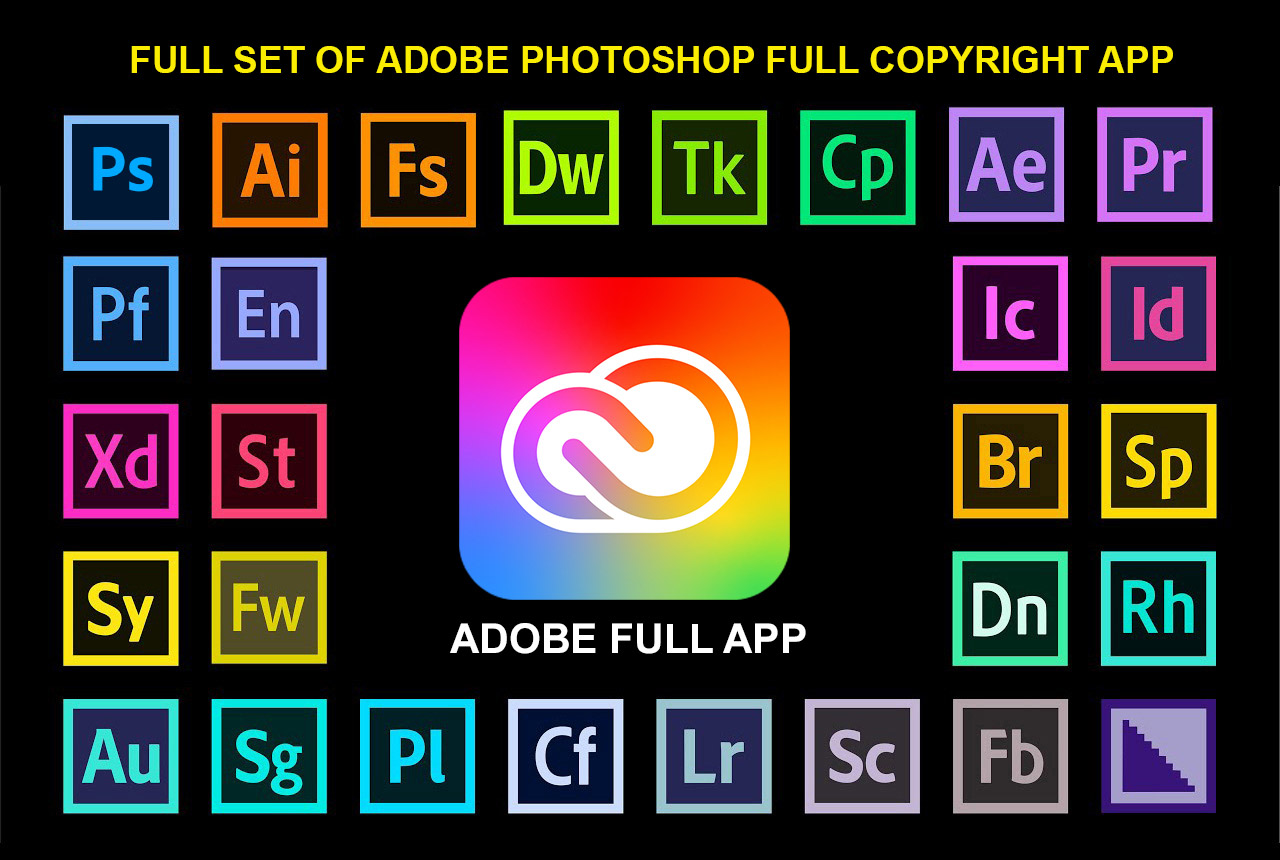
Adobe Photoshop Copyright - Full App
120 USD
Upgrade Genuine Office 365
49 USD

Copyright Adobe Lightroom Account
59 USD
Windows 10 & 11 Pro Key
36 USD
7 Notion tips to help you organize your work and life more effectively.
Nội dung
- 1. Automate repetitive tasks with the push of a button.
- 2. Personalize your workspace with your own icons and emojis.
- 3. Tag everything with the @ symbol.
- 4. Get started quickly with pre-made templates.
- 5. Master keyboard shortcuts to save time.
- 6. Add the formula to your own database.
- 7. Keep content consistent across multiple pages with the synchronization block.
- Conclusion
Notion has long been considered one of the most versatile note-taking and information management applications available today. Available on the web, Android, iOS, Windows, and macOS, it lets you keep track of almost anything, from weekly grocery lists to complex project plans. Notion''s appeal lies in its versatility. It''s like a combination of Google Docs, Trello, Wikipedia, and Apple Notes in one workspace, enhanced with AI capabilities. Individual users can utilize most basic features for free, while paid group plans expand collaboration and automation capabilities. Whether you''ve been using Notion for years, just installed it, or somewhere in between, the seven tips below will help you get the most out of the application. The instructions are based on the web interface, where you can get the most out of Notion, however, most features are also available on the mobile app.
1. Automate repetitive tasks with the push of a button.
If there's an action you need to repeat many times, such as inserting a familiar header, filling out a form, or editing a page's status, assign that task to a button. Creating one is simple. Hover your mouse over the desired button location, click the plus icon, and then select Button. Notion will prompt you to name and choose an icon for the button, then guide you to the section for setting up the sequence of actions that will run each time the button is clicked.
The power of a button lies in the number of actions you can combine. You can insert blocks of content such as text, lists, or summary items above or below the button, or at the top or bottom of the page. You can also open a specific page or link, send notifications to workspace members, and add the option to display a confirmation box to prevent accidental clicks when the button makes important changes.
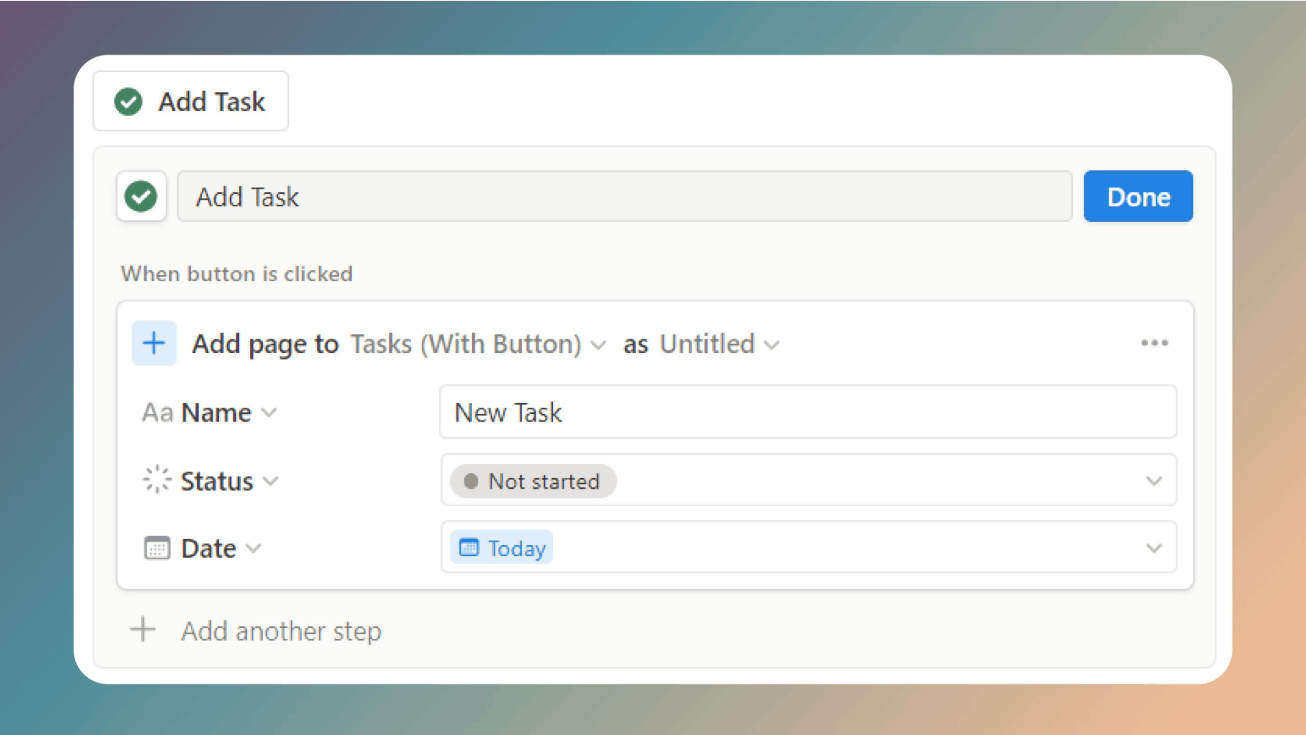
In addition to its database, Notion also offers attribute-based buttons. These buttons can edit the properties of the current page, create new pages in a different database, update multiple pages in bulk, or send emails via a linked Gmail account. For example, you can create a "Complete" button to change the task status, assign a completion date, and notify the person in charge with just one click. Note that buttons are available on all service plans, but some advanced actions are only available on paid plans. Only users with edit permissions can create and edit buttons; users with lower permissions can still click the button if granted appropriate permissions.
The advice is to start with small tasks and repeat them as often as possible throughout the week. Once you get used to it, you'll realize that most of the manual operations in your process can be simplified to a single click.
2. Personalize your workspace with your own icons and emojis.
Icons and emojis are everywhere in Notion, from small tasks to entire pages. The default icon library is already quite extensive, but if you want a more personalized workspace, you can upload your own images. Wherever you can select an icon or emoji, open the Upload tab and choose a file from your device. You can place a thumbnail of your pet next to tasks related to them, use a client's logo for each project page, or design a color-coordinated icon set for the entire note system.
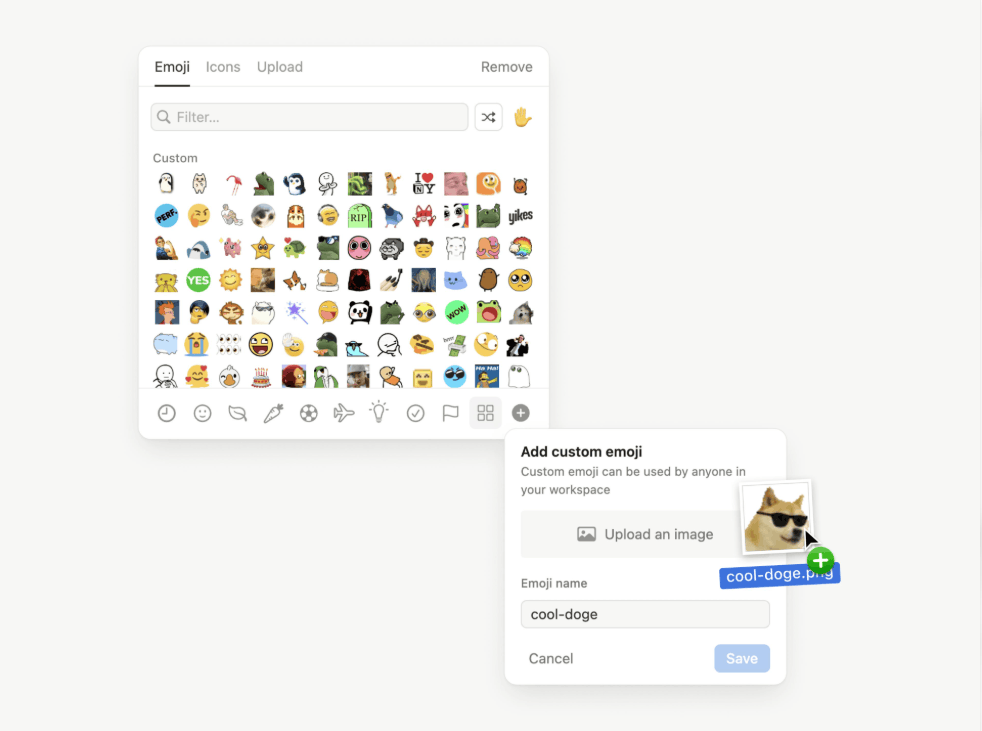
When you upload a new image, Notion lets you name it and add it to a shared list across your entire workspace. This is especially useful when multiple people use the same set of icons, helping teams quickly identify different page types or work statuses. To manage uploaded icons, go to Settings in the left sidebar, then select Emoji, where you can view, rename, or delete icons you no longer use.
For a visually appealing result, prioritize simple images with transparent backgrounds and good contrast, as icons are often displayed at very small sizes. Complex details become difficult to see when scaled down. A consistent set of icons not only makes the workspace easier to look at but also helps you navigate more quickly when moving between dozens of pages each day.
3. Tag everything with the @ symbol.
Anywhere in Notion, simply typing the @ symbol opens a menu with many useful options. Similar to tagging friends on social media, you can mention pages, members, and dates directly within your writing. When you mention a page, Notion creates a two-way link, meaning the mentioned page also acknowledges where it was linked. This allows your notes network to gradually form a more easily navigable structure, rather than a collection of disjointed pages.
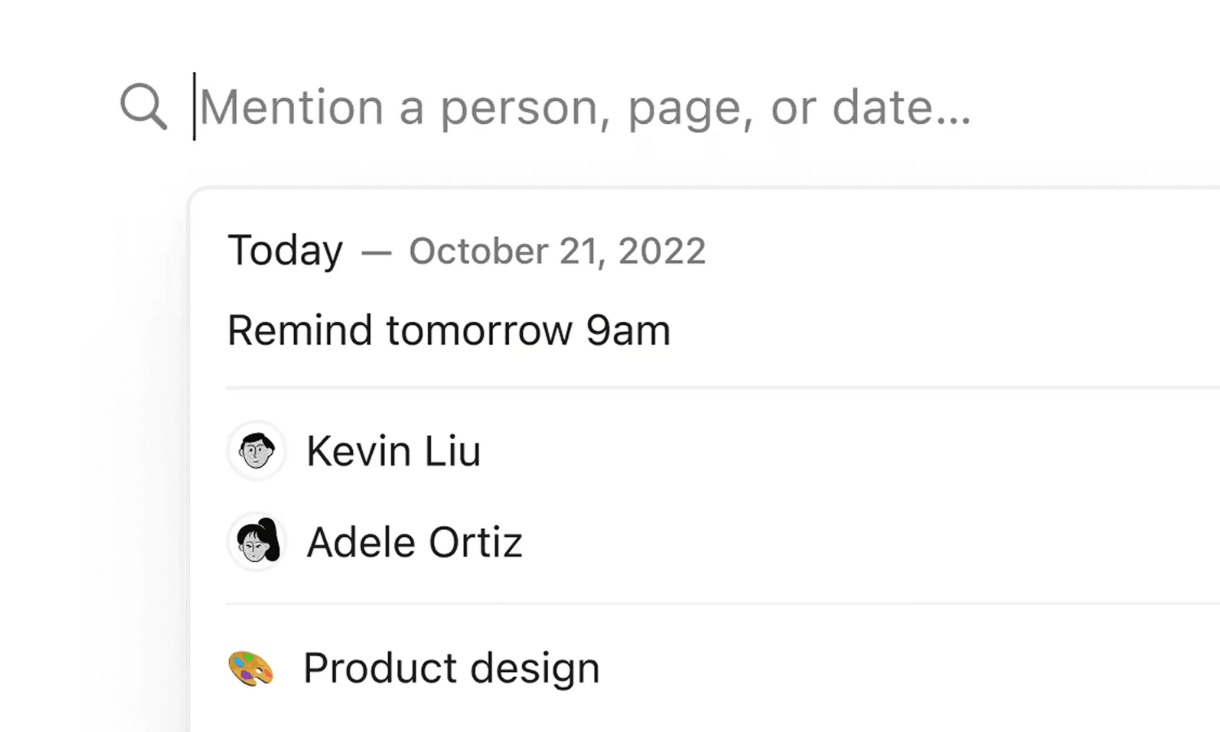
Mentioning members also offers practical benefits. Those tagged will receive notifications, allowing work-related communication to take place directly within the page instead of switching to a separate messaging tool. For dates, you can type @ and select today, tomorrow, or a specific date to mark deadlines or meetings directly in the text.
Perhaps the most valuable feature is the reminder function. Simply type @remind, followed by a timestamp like January 3rd or tomorrow, and Notion will send an alert at the exact time you choose. This is a very quick way to turn a note into a reminder without opening a separate reminder app. Additionally, you can type two square brackets to quickly link to a page, or a plus sign to create a new page on the spot – all ways to connect pieces of information without interrupting the flow of writing.
4. Get started quickly with pre-made templates.
For beginners, starting from a blank slate can sometimes be challenging. Notion's templates address this by providing a complete structure and showing you what the application can do. Selecting Templates from the left-hand navigation panel reveals diverse categories, from website building to proposal and presentation creation, or you can use the search bar to find exactly what you need. The template library currently boasts over ten thousand options, including project management, habit tracking, financial planning, study notes, and many more.
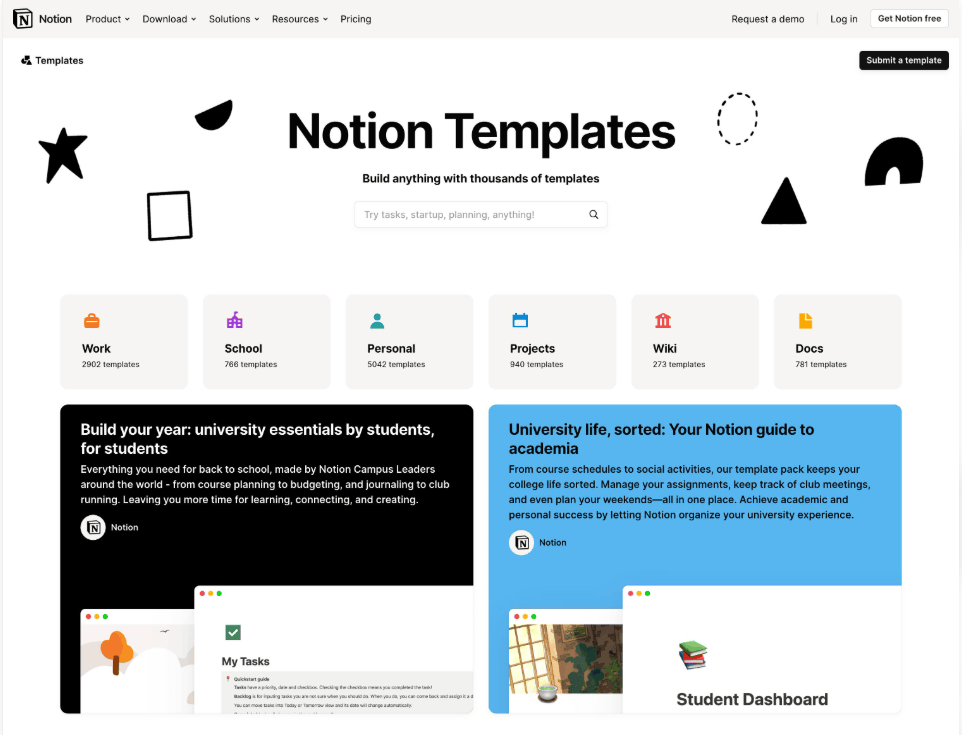
Some templates include pricing, but you'll find many free ones. Click on each template to see a detailed description and reviews from users, helping you determine if it's a good fit before making a decision. Once you've chosen a template, click Add to import it into your account. Because it's a template, you're free to customize it to your liking, rename columns, delete unnecessary sections, and add attributes to suit your workflow.
Once you've mastered it, you can create your own templates for repetitive tasks. In the database, you can set up templates for each new page type, such as meeting minutes, weekly reports, or customer profiles. Combined with the button mentioned earlier, you can create a fully structured new page with just one click.
5. Master keyboard shortcuts to save time.
Keyboard shortcuts are the most effective productivity trick because they help you accomplish more in less time. Notion provides a complete list of shortcuts in its help center, and you can also quickly access the lookup panel directly within the application. On Windows, use the Ctrl key, and on a Mac, use the Cmd key.
Some key combinations to remember first include Ctrl or Cmd plus N to create a new page, Ctrl or Cmd plus F to search within the current page, Ctrl or Cmd plus Shift plus L to switch between light and dark mode, and Ctrl or Cmd plus P to quickly jump to any page. If you need to create a new block of text, you can use Ctrl or Cmd plus Shift or Option plus 0. The Esc key selects the entire block you are currently working on, allowing you to conveniently move, duplicate, or delete it.
Besides traditional keyboard shortcuts, there's also the slash command. Typing a slash on any line will bring up a menu containing all sorts of blocks, from headings and to-do lists to tables, tables of contents, and mathematical formulas. For example, typing /image will open the image insertion tool right on the page. Notion also supports Markdown syntax, so you can simply place two asterisks around a word to bold it or one asterisk to italicize it without leaving the keyboard.
Don't try to memorize everything at once. Choose five to ten tasks you use most often, practice them for a week, and then gradually add more. After a while, you'll see a noticeable increase in your work speed without much effort.
6. Add the formula to your own database.
If you're not a fan of math or spreadsheets, the thought of formulas in Notion might seem daunting. In reality, formulas aren't difficult to use, they're very helpful, and Notion provides plenty of in-app guidance when you're stuck. Just get familiar with them, and you'll find your pages can do so much more.
To create a formula, you add a Formula property to your database and then enter the expression in the text editor. Formulas help you calculate deadlines, display progress percentages, or format based on other data, for example, tasks due in the next seven days will be highlighted in red and labeled as high priority. Try these two basic examples, one to track reading progress and one to alert you to overdue tasks.
round(prop("Số trang đã đọc") / prop("Tổng số trang") * 100) if(prop("Hạn chót") < now(), "Quá hạn", "Đúng tiến độ") The new version of Notion's formula editor brings several significant improvements. The editor allows for multi-line writing, includes comments, and highlights errors as you type, making syntax correction easier. Formulas can now return a wider variety of data types such as dates, users, pages, and lists, instead of just text, numbers, or cell markers. You can also create local variables using the `let` function, avoiding repeated calculations and making formulas cleaner. If you still find it difficult, Notion AI can assist in writing, editing, and explaining formulas; simply describe what you want to achieve in plain language.
7. Keep content consistent across multiple pages with the synchronization block.
There are times when the same information needs to appear on multiple pages, such as the team mission in a manual and meeting minutes, contact information in project pages, or the shared footer of an entire workspace. Manual copying requires updating each place every time there's a change, and it's easy to miss things. Synchronization blocks are designed to solve this very problem.
The process is quite simple. You select the original content blocks, press Ctrl or Cmd plus C to copy them, then move to another location and press Ctrl or Cmd plus V. In the small window that appears, select Paste and sync so that the copies always match the original. Alternatively, you can select the block, open the side menu and change it to Synced block, or type /syncedblock to create a synchronized block from scratch. Any edits in one place will instantly appear everywhere else in real time.
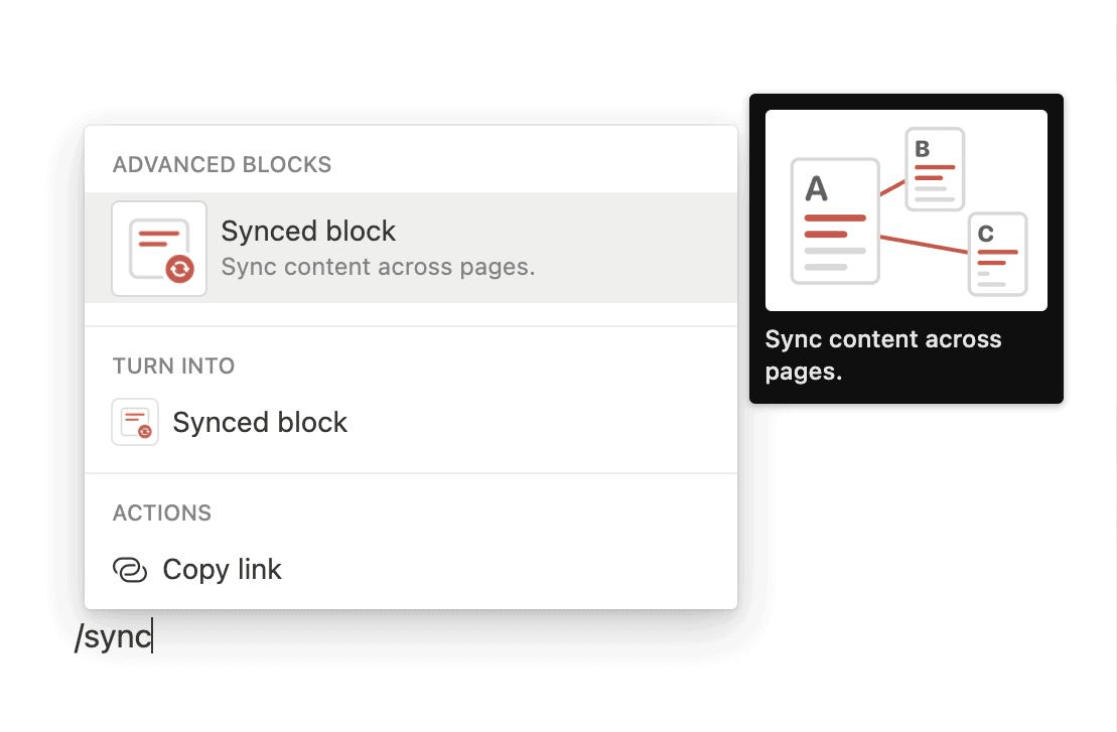
When the block is synchronized, you'll see a red border around it for easy identification, along with a message indicating how many pages are being edited. From there, you can navigate to each relevant page, and the page containing the original copy will always be marked ORIGINAL. If you want a copy to be independent, select Unsync. If you want to separate all copies, go to the original and select Unsync all.
There are two important points to note. First, viewers who want to see the content of a synchronized block need access to the page containing the original, and those who want to edit the duplicate must have permission to edit the original, so grant the appropriate permissions from the start. Second, if a block has more than ten duplicates, deleting the original or using Unsync All will delete all duplicates, and this cannot be undone. In that case, separate each duplicate instead of deleting the original.
Conclusion
These seven tips don't require advanced technical skills, but when combined, they can completely change how you use Notion. Buttons and formulas help you automate tasks, templates and synchronized blocks allow you to reuse content, @ tags and shortcuts make operations quick and seamless, and personalized icons bring a sense of familiarity to your workspace. Start with one or two tips that best suit your current habits, apply them consistently for a week, and then gradually expand. In a short time, Notion will no longer be just a place to store notes but a true assistant in your work and daily life.












VIP Products



Best Selling Products
Capcut Pro 1 Year
39 USD
Autodesk All App Account Copyright
120 USD
Adobe Premiere Pro Account
99 USD
Genuine Adobe Illustrator account
99 USD
Genuine Cheap Canva Pro
39 USD
Upgrade genuine Capture One account
120 USD
MidJourney Account
29 USD
Plugin Retouch4me
69 USD
ChatGPT Plus Account (GPT-4)
16 USD
Freepik Premium Account
59 USD
Upgrade Duolingo Super
29 USD
Adobe Photoshop Copyright - Full App
120 USD
Upgrade Genuine Office 365
49 USD
Copyright Adobe Lightroom Account
59 USD
Windows 10 & 11 Pro Key
36 USD