Best Selling Products
Genuine Cheap Canva Pro
39 USD

Freepik Premium Account
59 USD

Upgrade Duolingo Super
29 USD
Copyright Adobe Lightroom Account
59 USD
Adobe Premiere Pro Account
99 USD
Upgrade genuine Capture One account
120 USD

ChatGPT Plus Account (GPT-4)
16 USD

MidJourney Account
29 USD
Adobe Photoshop Copyright - Full App
120 USD
Genuine Adobe Illustrator account
99 USD
Windows 10 & 11 Pro Key
36 USD
Capcut Pro 1 Year
39 USD
Plugin Retouch4me
69 USD
Autodesk All App Account Copyright
120 USD
Upgrade Genuine Office 365
49 USD
A beginner''s guide to using the CapCut app to create beautiful, professional videos.
Nội dung
- 1. Introducing the CapCut application and its outstanding features.
- 2. How to download and install the CapCut application on your phone or computer.
- 3. Detailed instructions on using the CapCut app to create videos.
- 3.1. Create a new project and add videos to CapCut
- 3.2. Cutting, splicing, and arranging video clips
- 3.3. Add background music and adjust the sound.
- 3.4. Inserting text and creating subtitles for videos
- 3.5. Adding effects, filters, and transitions
- 3.6. Adjusting the frame rate and speed
- 3.7. Export and save the video after editing.
- 4. Some tips to help you edit videos using CapCut more beautifully and professionally.
- 5. Should I upgrade to CapCut Pro to use the advanced features?
- 6. Upgrade to CapCut Pro at Sadesign at a reasonable cost.
- 7. Conclusion
CapCut is a video editing application chosen by many content creators, online sellers, and social media users. With its user-friendly interface and a range of convenient editing tools, the application helps you transform ordinary videos into lively content with just a few taps. Even without video editing experience, you can easily cut, splice, add music, insert text, create effects, and export high-quality videos. In this article, let''s explore how to use CapCut to create videos, from basic to advanced levels, helping you proactively create beautiful and engaging films.
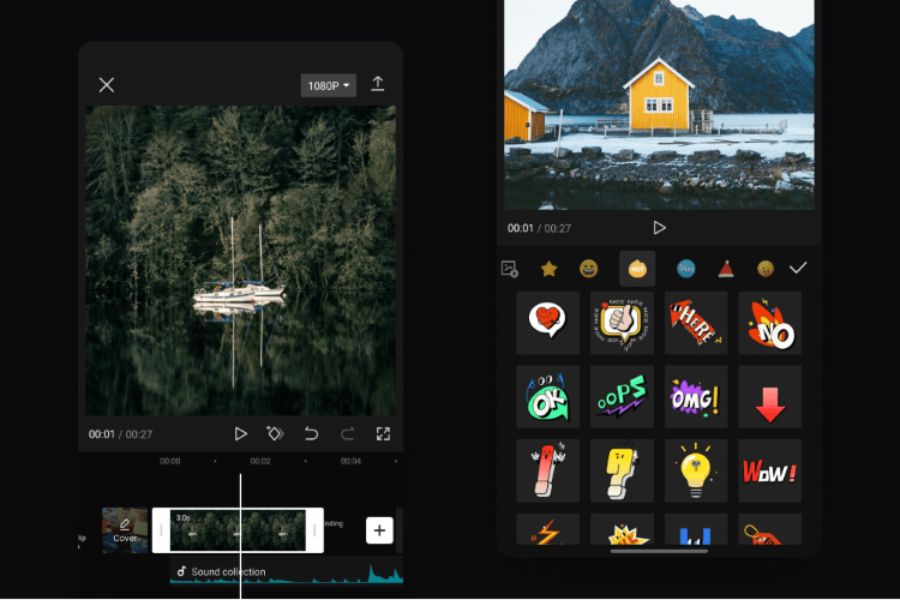
1. Introducing the CapCut application and its outstanding features.
CapCut is a video editing application developed to help users create content quickly and conveniently. The application has versions for phones, computers, and web browsers, suitable for various needs. CapCut's highlight lies in its integration of many tools within a single interface, allowing you to easily perform editing operations without needing complex professional software.
Some of CapCut's notable features include:
-
Video editing: Allows you to cut out unnecessary segments, separate scenes, arrange and combine multiple videos into a complete piece of content.
-
Audio editing: Supports adding background music, sound effects, voice recording, and volume adjustment.
-
Insert text: Provides a variety of fonts, colors, effects, and animations to highlight information.
-
Effects and filters: These help change the color, lighting, and create a unique style for each video.
-
Speed adjustment: Allows you to increase, decrease, or change speed in segments.
-
Automatic subtitle creation: Supports speech recognition and converts speech to text.
-
AI tools: Offer a number of intelligent features to assist in editing, creating content, and processing images, depending on the version.
Thanks to these tools, CapCut can serve many purposes such as creating TikTok videos, product introduction clips, travel videos, educational content, or commemorative videos.
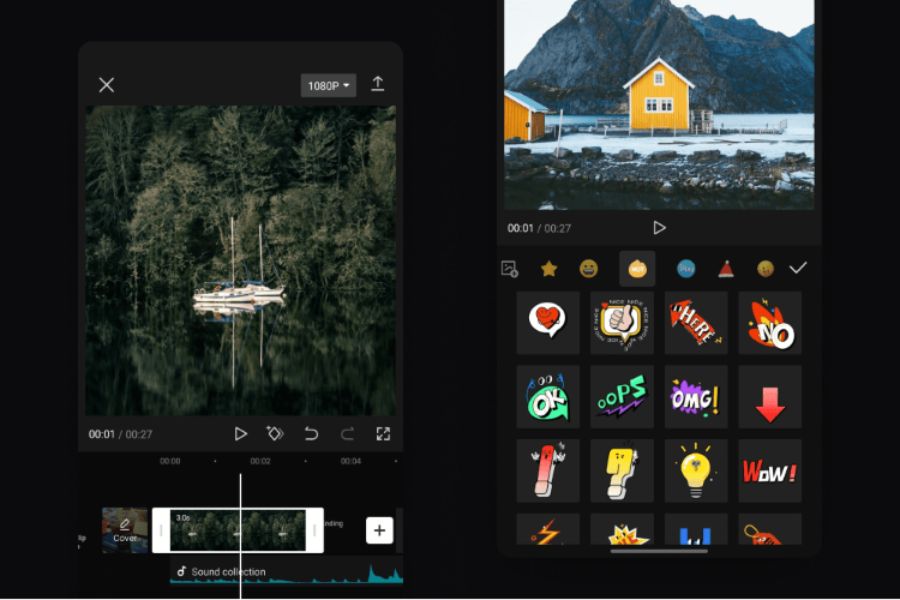
2. How to download and install the CapCut application on your phone or computer.
Before you begin editing, you need to download and install CapCut on your device. The app supports multiple platforms, so you can choose to use your phone for quick editing or your computer if you want a larger workspace.
Install CapCut on your phone:
-
Open Google Play Store for Android phones or the App Store for iPhones.
-
Enter the keyword "CapCut" into the search bar.
-
Select the official app and tap Install or Get.
-
Wait for the download to complete before opening the app.
-
Grant access to images, videos, and audio as needed.
-
Log in to your account if you want to use the online synchronization or storage features.
Install CapCut on your computer:
-
Open your browser and go to the CapCut app download page.
-
Choose the version compatible with your Windows or macOS operating system.
-
Download the installer to your computer.
-
Open the downloaded file and follow the on-screen instructions.
-
Launch the application, log in to your account, and start creating a new project.
Alternatively, if you don't want to install software, you can use the online version of CapCut. However, make sure your device has a stable internet connection for the editing process to run smoothly.
3. Detailed instructions on using the CapCut app to create videos.
After successful installation, you can start creating videos directly within the app. To ensure your final product has a beautiful layout and coherent content, follow the steps below in order.
3.1. Create a new project and add videos to CapCut
This is the first step when starting to edit. You should prepare the videos, images, or content you need beforehand to save time during the editing process.
-
Open the CapCut app on your phone.
-
On the main interface, select New Project.
-
Choose the videos or images you want to include in the clip.
-
Click Add to bring the document into the editing area.
-
Arrange the video clips in the order of your desired content.
Once completed, the footage will appear on the timeline. This is a crucial area that allows you to control the entire video, from duration and appearance to how scenes transition.
3.2. Cutting, splicing, and arranging video clips
A compelling video doesn't necessarily need a lot of shots. The key is choosing the right moments and removing unnecessary parts. CapCut provides intuitive editing tools, making it easy for beginners to get started.
-
Trim: Drag the ends of the video to shorten its duration.
-
Split: Move the timeline marker to the desired splitting position and select Split.
-
Delete: Select the unnecessary section and press Delete.
-
Arrangement: Press and hold the video clip, then drag it to the desired position.
-
Crop: Adjust the frame to focus on the main subject.
After editing, you should review the entire content to ensure that the scenes connect naturally. If making a product introduction video, prioritize camera angles that clearly showcase the style, color, and key details.
3.3. Add background music and adjust the sound.
Sound is a key element in creating emotion and making videos more engaging. Suitable music can make simple scenes captivating, while clear voiceovers help viewers easily grasp the information.
The steps involved include:
-
Select the Audio option from the toolbar.
-
Press Sounds to search for available music.
-
Choose music that matches the video's theme.
-
Tap Add to add audio to the Timeline.
-
Adjust the background music volume to your liking.
-
Use Voiceover if you want to record your voice directly.
You can also extract audio from another video if you need to use appropriate dialogue or music. However, be mindful of audio usage rights, especially when uploading videos for commercial purposes.
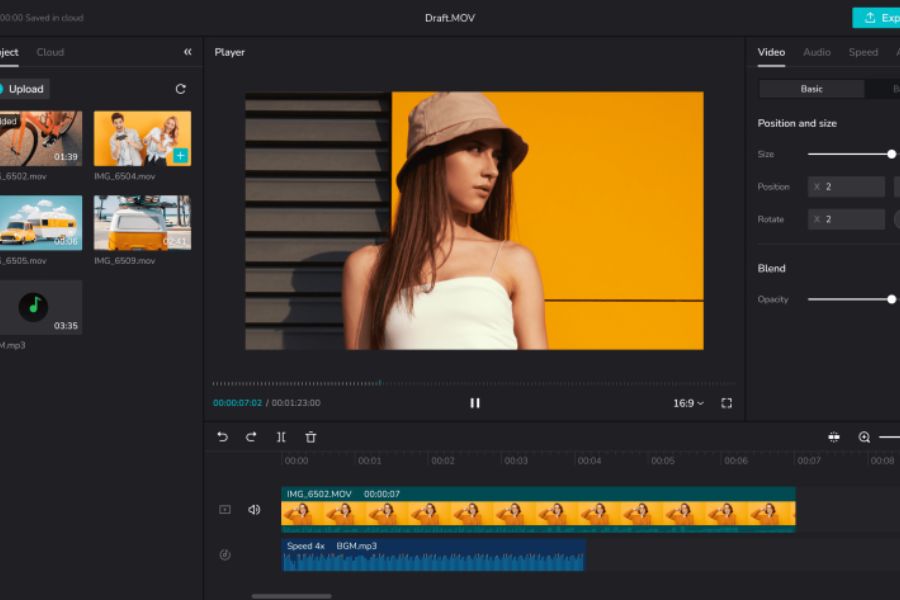
3.4. Inserting text and creating subtitles for videos
Text allows viewers to quickly grasp important information without having to listen to the entire dialogue. This is a very useful feature when creating tutorial videos, reviews, or product introductions.
-
Select Text from the toolbar.
-
Click Add Text and enter the content.
-
Choose the appropriate font, color, and size.
-
Adjust the display position so that the text does not obscure the subject.
-
Drag the duration slider to control when it appears.
-
Use animation to create motion effects for text.
Besides manual input, you can use the Auto Captions feature. CapCut will recognize the dialogue in the video and convert it into text. After creating the subtitles, review the content to correct any misidentified words, add punctuation, and adjust the display timing.
3.5. Adding effects, filters, and transitions
If you want your video to look more appealing, you can take advantage of the built-in effects and filters in CapCut. These tools help change the visual style, create highlights, and connect scenes more smoothly.
Some tools worth trying:
-
Effects: Create lighting effects, motion, or image transformations.
-
Filters: Adjust the color tone to create a soft, vintage, or cinematic style.
-
Transitions: Create transition effects between two video segments.
-
Stickers: Add stickers to illustrate or emphasize content.
-
Adjust: Customize brightness, contrast, saturation, and color parameters.
You shouldn't use too many effects in a single video. Choose only the necessary effects to highlight the content while maintaining a natural feel. For sales videos, realistic colors and sharp images are often more important than elaborate animations.
3.6. Adjusting the frame rate and speed
CapCut allows you to change the video playback speed to highlight specific segments. You can slow down a key moment or speed up long shots to make the content more concise.
Here's how to do it:
-
Select the video segment you want to adjust on the Timeline.
-
Press Speed.
-
Select Normal to increase or decrease speed evenly.
-
Select Curve to adjust the speed flexibly at any given time, if the feature is supported.
-
Review the video to ensure the movement isn't too fast or too slow.
In addition, you should choose an aspect ratio that is suitable for the uploading platform:
-
9:16: Compatible with TikTok, Instagram Reels, and YouTube Shorts.
-
16:9: Commonly used for YouTube videos and horizontal slideshow content.
-
1:1: Suitable for square-shaped posts.
-
4:5: Commonly used for Facebook and Instagram content.
If you're making TikTok videos, a 9:16 aspect ratio is a popular choice. You should check the layout before exporting to avoid text, images, or subjects being obscured.
3.7. Export and save the video after editing.
Once you've completed all the steps, you need to export the video to save it to your device or share it on social media. Choosing the right settings will help the final product maintain good image quality.
-
Press the Export button in the upper right corner of the screen.
-
Choose a resolution such as 720p, 1080p, or higher if your device and version support it.
-
Adjust the frame rate (FPS) to match the content.
-
Check the video quality and output settings.
-
Press Export and wait for the application to process.
-
Open the device library to check the finished product.
For typical social media videos, 1080p resolution usually meets most needs. You should prioritize the original video quality and avoid zooming in too much to prevent blurry or pixelated videos.
4. Some tips to help you edit videos using CapCut more beautifully and professionally.
Mastering the basics isn't enough to create a truly engaging video. You need to pay attention to content arrangement, image selection, and rhythm to keep viewers hooked.
Here are some helpful tips you can apply:
-
Create a strong impact right at the beginning of the video: Use a question, an interesting situation, or a striking image to capture attention.
-
Avoid overusing effects: Only use effects that are appropriate for the theme and overall style.
-
Prioritize easy-to-read subtitles: Choose a font color that contrasts well with the background and a suitable size.
-
Match the music to the beat: Arrange the camera shots to match the rhythm of the music to make the video more dynamic.
-
Maintain color consistency: Avoid changing filters frequently between scenes.
-
Pre-export review: Review audio, spelling, transitions, and duration to avoid unexpected errors.
In particular, if you frequently create TikTok videos for selling products, you should prepare a script and a list of shots beforehand. This will speed up the editing process and create consistency between the visuals and the message you want to convey.
5. Should I upgrade to CapCut Pro to use the advanced features?
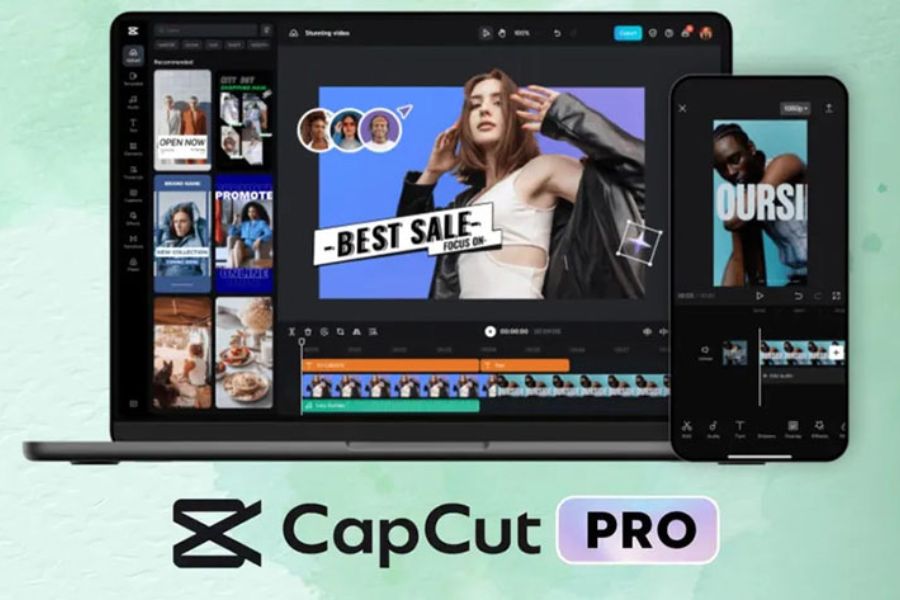
The free version of CapCut adequately meets basic video editing needs. However, if you frequently create content, make promotional videos, or produce clips for work, you might consider upgrading to CapCut Pro. The paid version offers more advanced resources and tools, giving users more options when editing.
Some benefits of using CapCut Pro:
-
Access a library of premium effects, filters, design templates, and resources with your subscription plan.
-
Utilize additional advanced editing tools and AI features included in the support package.
-
Expand your creative possibilities with a variety of video styles.
-
Save time when you need to produce content regularly.
-
It helps create videos with more consistent and professional visuals.
However, not everyone needs to upgrade right away. If you only do simple video editing, you can absolutely start with the free version. When your needs increase and you frequently need to use paid features, investing in CapCut Pro will be more reasonable.
6. Upgrade to CapCut Pro at Sadesign at a reasonable cost.
If you're looking for a place to upgrade CapCut Pro to support your content creation work, you can check out Sadesign's services. They offer software upgrades and licensed account solutions, helping users access design and video editing tools at an affordable price.
When choosing services at Sadesign, you can consider some of the following advantages:
-
Affordable pricing: There are more upgrade options to suit different budgets and needs.
-
Dedicated support: Receive guidance during the upgrade process and answers to any questions you may have while using the product.
-
Easy payment: Convenient ordering and payment process.
-
Clear consultation: Assistance in choosing the service package that best suits your needs.
Choosing a reputable upgrade provider will make using video editing tools more convenient for you. Before subscribing, carefully review the package duration, included benefits, and support conditions to choose the most suitable option.
7. Conclusion
Using CapCut to create videos isn't too complicated if you understand the basics like adding content, cutting and splicing, adding music, creating subtitles, and exporting videos. With a little practice, you can easily create beautiful clips for your studies, work, or social media channel. As your editing needs grow, consider upgrading to CapCut Pro to access more advanced tools and resources. Don't forget to check out Sadesign's services for more convenient and cost-effective upgrade options and dedicated support.











VIP Products

Best Selling Products
Genuine Cheap Canva Pro
39 USD
Freepik Premium Account
59 USD
Upgrade Duolingo Super
29 USD
Copyright Adobe Lightroom Account
59 USD
Adobe Premiere Pro Account
99 USD
Upgrade genuine Capture One account
120 USD
ChatGPT Plus Account (GPT-4)
16 USD
MidJourney Account
29 USD
Adobe Photoshop Copyright - Full App
120 USD
Genuine Adobe Illustrator account
99 USD
Windows 10 & 11 Pro Key
36 USD
Capcut Pro 1 Year
39 USD
Plugin Retouch4me
69 USD
Autodesk All App Account Copyright
120 USD
Upgrade Genuine Office 365
49 USD
Articles on the same topic