
Best Selling Products

Copyright Adobe Lightroom Account
59 USD
Genuine Cheap Canva Pro
39 USD

Freepik Premium Account
59 USD

MidJourney Account
29 USD

Capcut Pro 1 Year
39 USD

Upgrade Genuine Office 365
49 USD

Upgrade Duolingo Super
29 USD

Windows 10 & 11 Pro Key
36 USD

ChatGPT Plus Account (GPT-4)
16 USD
Adobe Premiere Pro Account
99 USD
Autodesk All App Account Copyright
120 USD
Genuine Adobe Illustrator account
99 USD

Plugin Retouch4me
69 USD
Upgrade genuine Capture One account
120 USD
Adobe Photoshop Copyright - Full App
120 USD
A guide to creating beautiful, professional, and simple CapCut transition effects.
Nội dung
- 1. What is the CapCut transition effect?
- 2. Benefits of using transition effects in CapCut
- 2.1. Makes videos more seamless and natural.
- 2.2. Enhancing aesthetics and professionalism
- 2.3. Keep viewers engaged for longer.
- 3. The visually appealing CapCut transition effects are a favorite.
- 3.1. Zoom Effect
- 3.2. Blur Effect
- 3.3. Slide Effects
- 3.4. Spin Effect
- 3.5. Fade Effect
- 4. Guide to creating beautiful CapCut transition effects on your phone.
- Step 1: Open CapCut and create a new project.
- Step 2: Arrange and edit the video clips.
- Step 3: Select the location where you want to add the transition effect.
- Step 4: Choose a suitable transition effect.
- Step 5: Adjust the transition duration.
- Step 6: Apply the effect to other video segments.
- Step 7: Preview and export the video
- 5. Tips for incorporating CapCut transition effects to make your videos look better.
- 5.1. Synchronizing scene transitions with the music rhythm
- 5.2. Avoid using too many effects in a video.
- 5.3. Choosing effects based on video content
- 5.4. Pay attention to consistency between frames.
- 6. Conclusion
In video editing, transition effects are crucial for naturally connecting frames, creating a seamless and engaging experience. Instead of abruptly switching scenes, you can use appropriate effects to enhance aesthetics, emphasize content, and highlight specific moments. With CapCut, creating transition effects is simpler thanks to its diverse effects library, easy operation, and flexible customization options. If you''re looking to refresh your TikTok, Reels, or other creative content, let Sadesign guide you through creating beautiful CapCut transition effects in detail below.

1. What is the CapCut transition effect?
CapCut transition effects are visual effects used to connect two video segments or two consecutive frames. Instead of a direct transition, editors can add blurring, zooming in, zooming out, rotating, flipping, or sliding effects to create a more dynamic transition. This makes the video smoother, more rhythmic, and provides a more engaging viewing experience.
CapCut offers a variety of transition styles, from gentle and minimalist to modern and creative. Users can choose from available effects, adjust the duration, and combine them with music to create videos with their own unique touch. This is also one of the simplest ways to make videos look more professional without needing extensive video editing experience.
2. Benefits of using transition effects in CapCut
2.1. Makes videos more seamless and natural.
When combining multiple video clips, abrupt changes between frames can sometimes be jarring to viewers. Transition effects help connect segments harmoniously, reducing disjointedness and creating a continuous narrative. Especially for compilation videos, travel videos, or vlogs, appropriate transitions help connect moments more naturally.
2.2. Enhancing aesthetics and professionalism
A beautiful video depends not only on image quality but also on the arrangement and transitions between shots. Effects like Zoom, Blur, Slide, or Spin can create interesting highlights, making the content more dynamic. When used correctly, transition effects also contribute to showcasing a unique style, making the video well-structured and visually appealing.
2.3. Keep viewers engaged for longer.
Well-executed visual transitions can pique curiosity and keep viewers engaged. For example, a quick zoom effect can create a sense of surprise, while a blur effect is suitable for gentle moments. Combining transitions with music also helps create an engaging rhythm in videos, especially when producing short content for TikTok, Facebook Reels, or YouTube Shorts.
3. The visually appealing CapCut transition effects are a favorite.
3.1. Zoom Effect
Zoom is an effect that enlarges or reduces the frame, often used to highlight a key character, object, or detail. This effect is suitable for product introduction videos, transformation videos, and fast-paced content. When combined with music, Zoom creates a sense of powerful movement and immediately captures attention.
3.2. Blur Effect
Blur creates an image blurring effect during the transition between two shots. This is a suitable option for videos with a gentle, subtle, or cinematic style. You can use Blur to soften the transitions between frames, especially when combining video clips with different camera angles or lighting.
3.3. Slide Effects
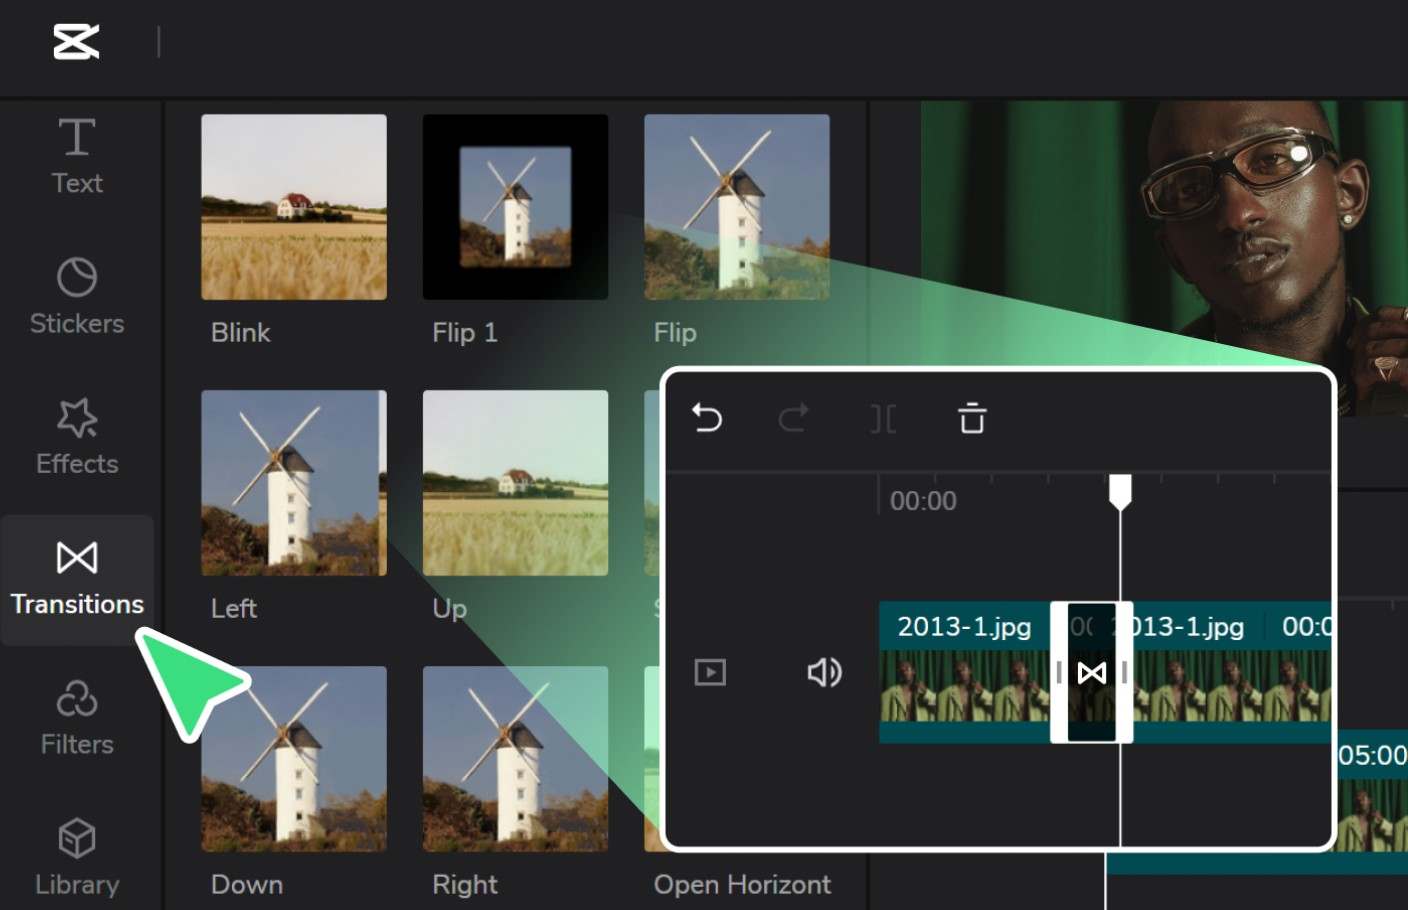
Slides allow images to move in directions such as left, right, up, or down. Thanks to their clear movement, this effect is often used in tutorial videos, photo slideshows, and travel vlogs. Slides are also suitable when you want to show a change between locations, activities, or content in sequence.
3.4. Spin Effect
Spin creates a rotating motion within the frame, giving it a dynamic and novel feel. This effect is often seen in transformation videos, fashion videos, or entertainment content. However, you should use Spin in appropriate places rather than applying it continuously, to avoid making viewers feel dizzy or distracted.
3.5. Fade Effect
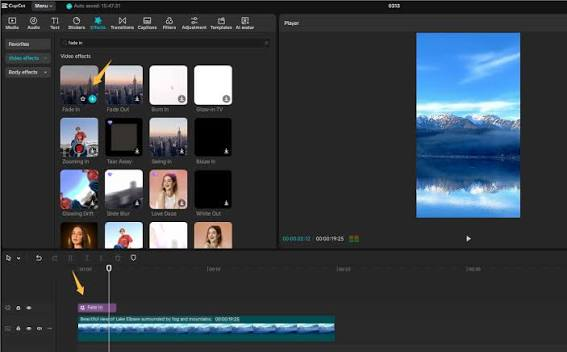
Fade is a type of transition where scenes appear or disappear gradually, often combined with screen dimming or brightening effects. It's an ideal choice for storytelling videos, commemorative videos, vlogs, and content with a slow pace. Fade helps segments connect smoothly, creating a pleasant feeling and enhancing the emotional impact of the video.
4. Guide to creating beautiful CapCut transition effects on your phone.
CapCut has an intuitive interface, allowing users to easily add transition effects directly on their phones. You don't need complex editing software to create lively videos. Below are the detailed steps.
Step 1: Open CapCut and create a new project.
First, open the CapCut app on your Android or iPhone. On the main interface, select "New project," then grant access to your photo and video library if requested. Next, select the videos or images you want to use to create your final content and tap "Add." You should arrange the materials in the correct order of appearance for easier editing.
Step 2: Arrange and edit the video clips.
After adding footage, CapCut will display the video clips on the timeline. Here, you can drag and drop to change their position, cut out unnecessary parts, or adjust the length of each segment. Pay attention to the content of adjacent scenes to choose appropriate transition points. For example, when editing a travel video, you can arrange the moving scenes first, then the landscape scenes, and finally the experiential moments.
Step 3: Select the location where you want to add the transition effect.
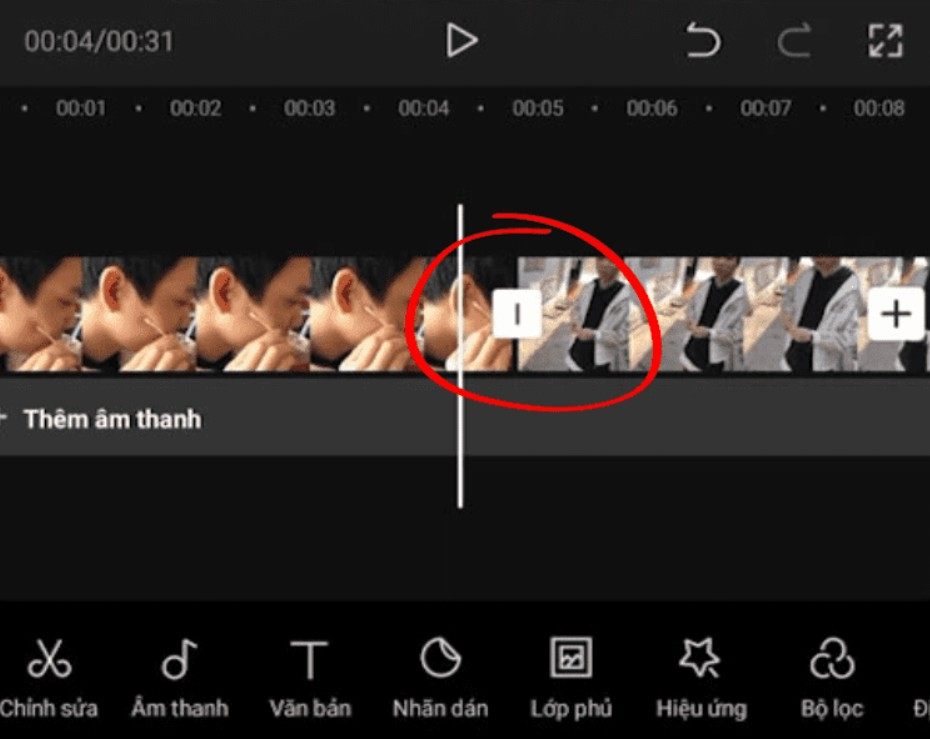
Once you've finished arranging the clips, observe the transition area between the two video segments on your Timeline. A small square icon or transition symbol will usually appear at this location. Click on the icon to open the effects library provided by CapCut. If your project has multiple video segments, you can select each transition point to set up a separate effect, allowing for dynamic content transitions instead of repeating the same transition from beginning to end.
Step 4: Choose a suitable transition effect.
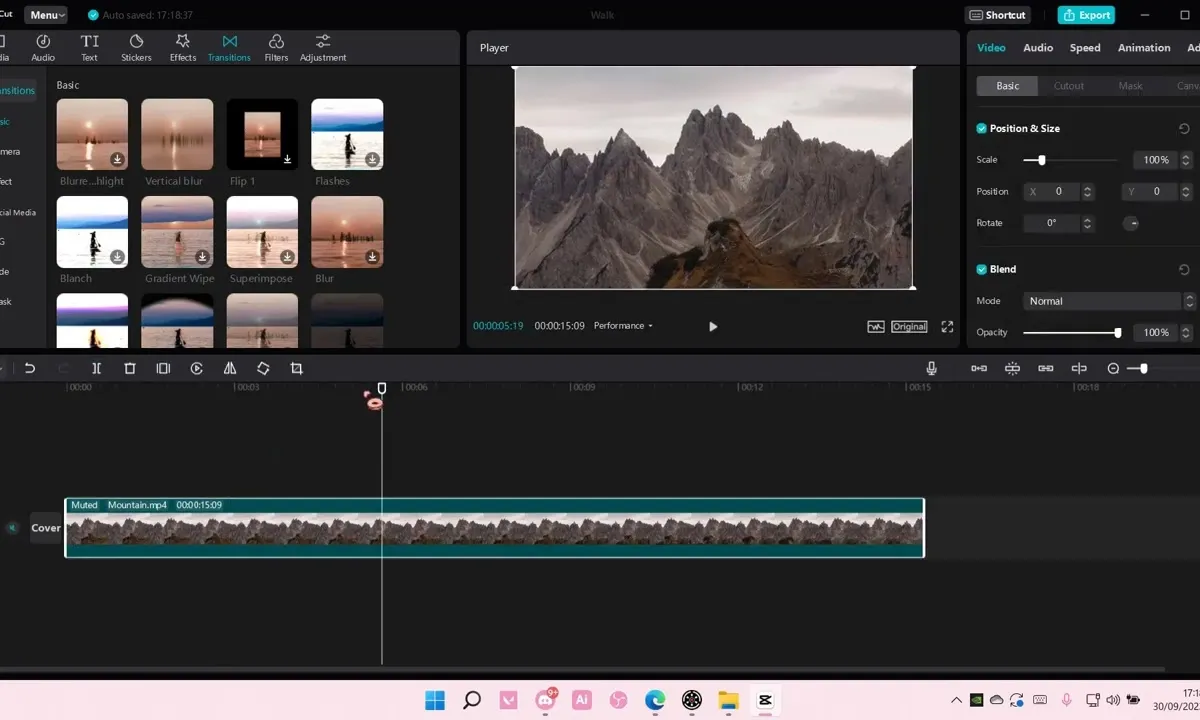
In its transition library, CapCut typically divides effects into different groups such as Basic, Camera, Effects, Slide, or groups with names depending on the application version. You can try each effect to preview how the image changes. If you want a gentle video, prioritize Fade or Blur. Conversely, Zoom, Spin, or Slide effects are suitable for youthful, fast-paced content. After finding an effect you like, simply select it to apply.
Step 5: Adjust the transition duration.
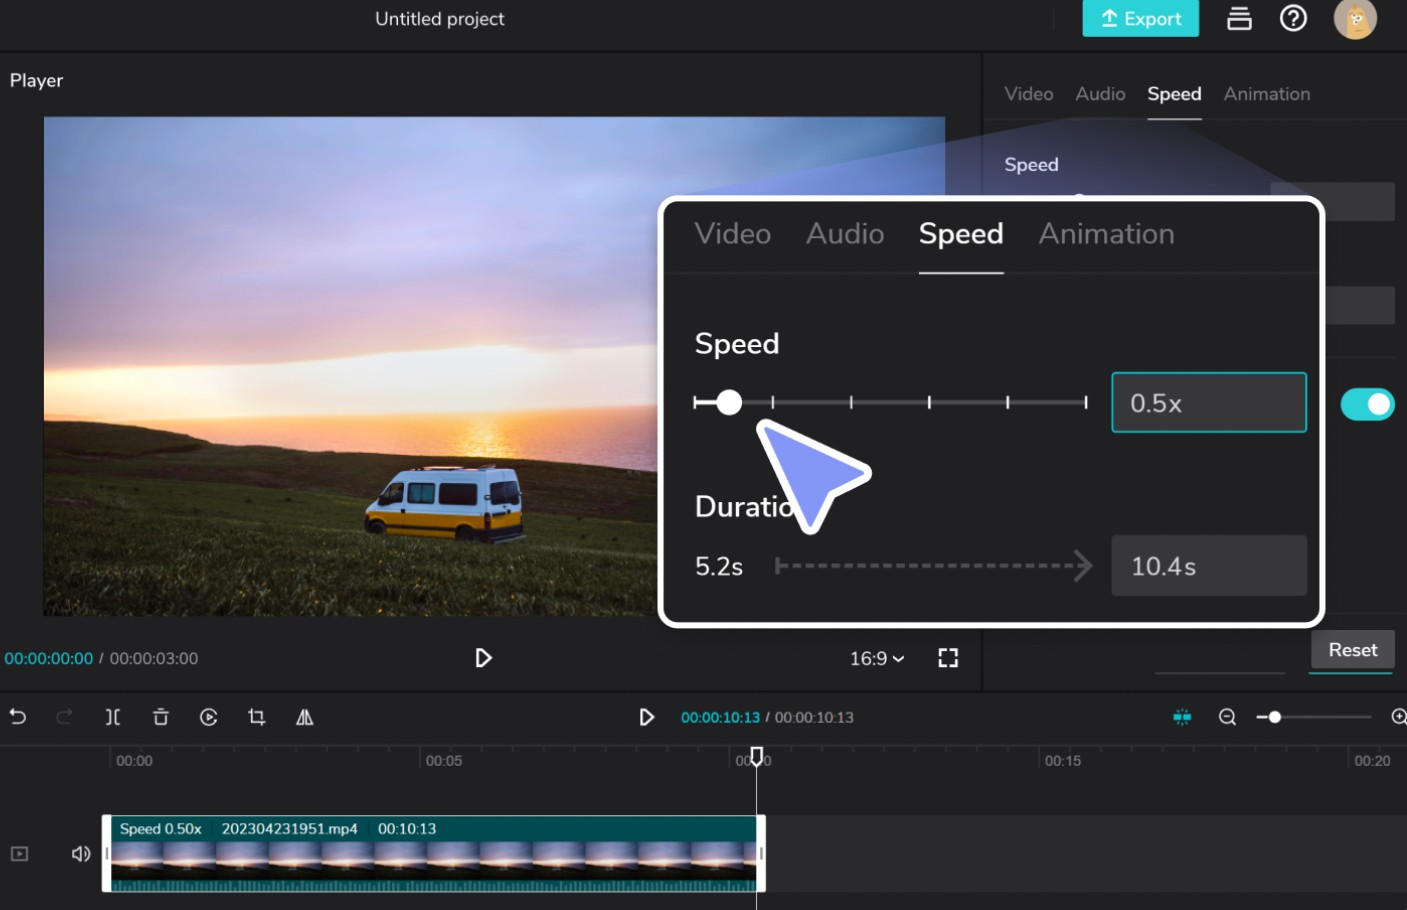
Video duration directly impacts the sense of movement in a video. After selecting an effect, you can drag the time slider to adjust the transition speed as desired. Short durations generally create a fast, decisive feel, while longer durations offer a smoother, slower pace. For short videos on TikTok or Reels, you can try a duration of around 0.3 to 0.8 seconds and preview it to choose the appropriate length for your editing pace.
Step 6: Apply the effect to other video segments.
If you want a consistent video style, you can use the same transition effect in multiple locations. Some versions of CapCut have an "Apply to all" option, saving editing time. However, it's not necessary to use the same effect throughout the entire video. You can combine different transition effects, but you need to ensure harmony in speed, color, and content so that the overall effect isn't visually cluttered.
Step 7: Preview and export the video
After completing the steps, press the play button to review the entire video. Check if the effects are too fast, too slow, or interrupt the flow of the content. If you find any transitions that aren't right, you can go back to the Timeline to adjust them. Once you're satisfied, press Export in the upper right corner of the screen, select the appropriate resolution and frame rate, and save the video to your device.
5. Tips for incorporating CapCut transition effects to make your videos look better.
5.1. Synchronizing scene transitions with the music rhythm
Music plays a crucial role in creating emotion in a video. When using fast-paced background music, you should place transitions during drum beats or sections with prominent sounds. This helps the visuals and sound blend together, creating a more professional feel. For softer music, prioritize fade or blur effects to maintain a smooth feel.
5.2. Avoid using too many effects in a video.
A common mistake when editing videos is applying too many transition effects in an attempt to make the video stand out. However, this can make the content look cluttered and distract viewers. Instead of constantly using many different effects, you should choose about two to three transition styles that suit the video's style and use them purposefully.
5.3. Choosing effects based on video content
Each type of content will suit a different transition style. Fashion videos can use Zoom or Spin to create a dynamic feel. Travel videos are well-suited to Slide and Fade to connect scenes. Meanwhile, product introduction videos can incorporate subtle Zoom to highlight details. Choosing the right effects will help the content convey its message more clearly.
5.4. Pay attention to consistency between frames.
To create visually appealing transitions, pay attention to the lighting, color, and composition of the adjacent video segments. If one scene is too bright while the next is too dark, the change can make the video look unnatural. Adjust the color and brightness before adding effects to ensure better cohesion between the frames.
6. Conclusion
Creating beautiful CapCut transition effects is a simple way to make your videos more dynamic, seamless, and professional. With just a few steps—adding video, selecting transition points, choosing effects, and adjusting duration—you can create impressive videos right on your phone. Try combining Zoom, Blur, Slide, or Fade with suitable music and content style to create your own unique look. Remember to use effects sparingly, focus on naturalness, and regularly experiment with new editing techniques to improve your CapCut video editing skills.
















VIP Products



Best Selling Products
Copyright Adobe Lightroom Account
59 USD
Genuine Cheap Canva Pro
39 USD
Freepik Premium Account
59 USD
MidJourney Account
29 USD
Capcut Pro 1 Year
39 USD
Upgrade Genuine Office 365
49 USD
Upgrade Duolingo Super
29 USD
Windows 10 & 11 Pro Key
36 USD
ChatGPT Plus Account (GPT-4)
16 USD
Adobe Premiere Pro Account
99 USD
Autodesk All App Account Copyright
120 USD
Genuine Adobe Illustrator account
99 USD
Plugin Retouch4me
69 USD
Upgrade genuine Capture One account
120 USD
Adobe Photoshop Copyright - Full App
120 USD