Best Selling Products

Upgrade genuine Capture One account
120 USD

ChatGPT Plus Account (GPT-4)
16 USD

Upgrade Duolingo Super
29 USD

Genuine Cheap Canva Pro
39 USD

Genuine Adobe Illustrator account
99 USD

Plugin Retouch4me
69 USD

Adobe Photoshop Copyright - Full App
120 USD

Copyright Adobe Lightroom Account
59 USD

Upgrade Genuine Office 365
49 USD

MidJourney Account
29 USD

Autodesk All App Account Copyright
120 USD

Windows 10 & 11 Pro Key
36 USD

Adobe Premiere Pro Account
99 USD

Freepik Premium Account
59 USD

Capcut Pro 1 Year
39 USD
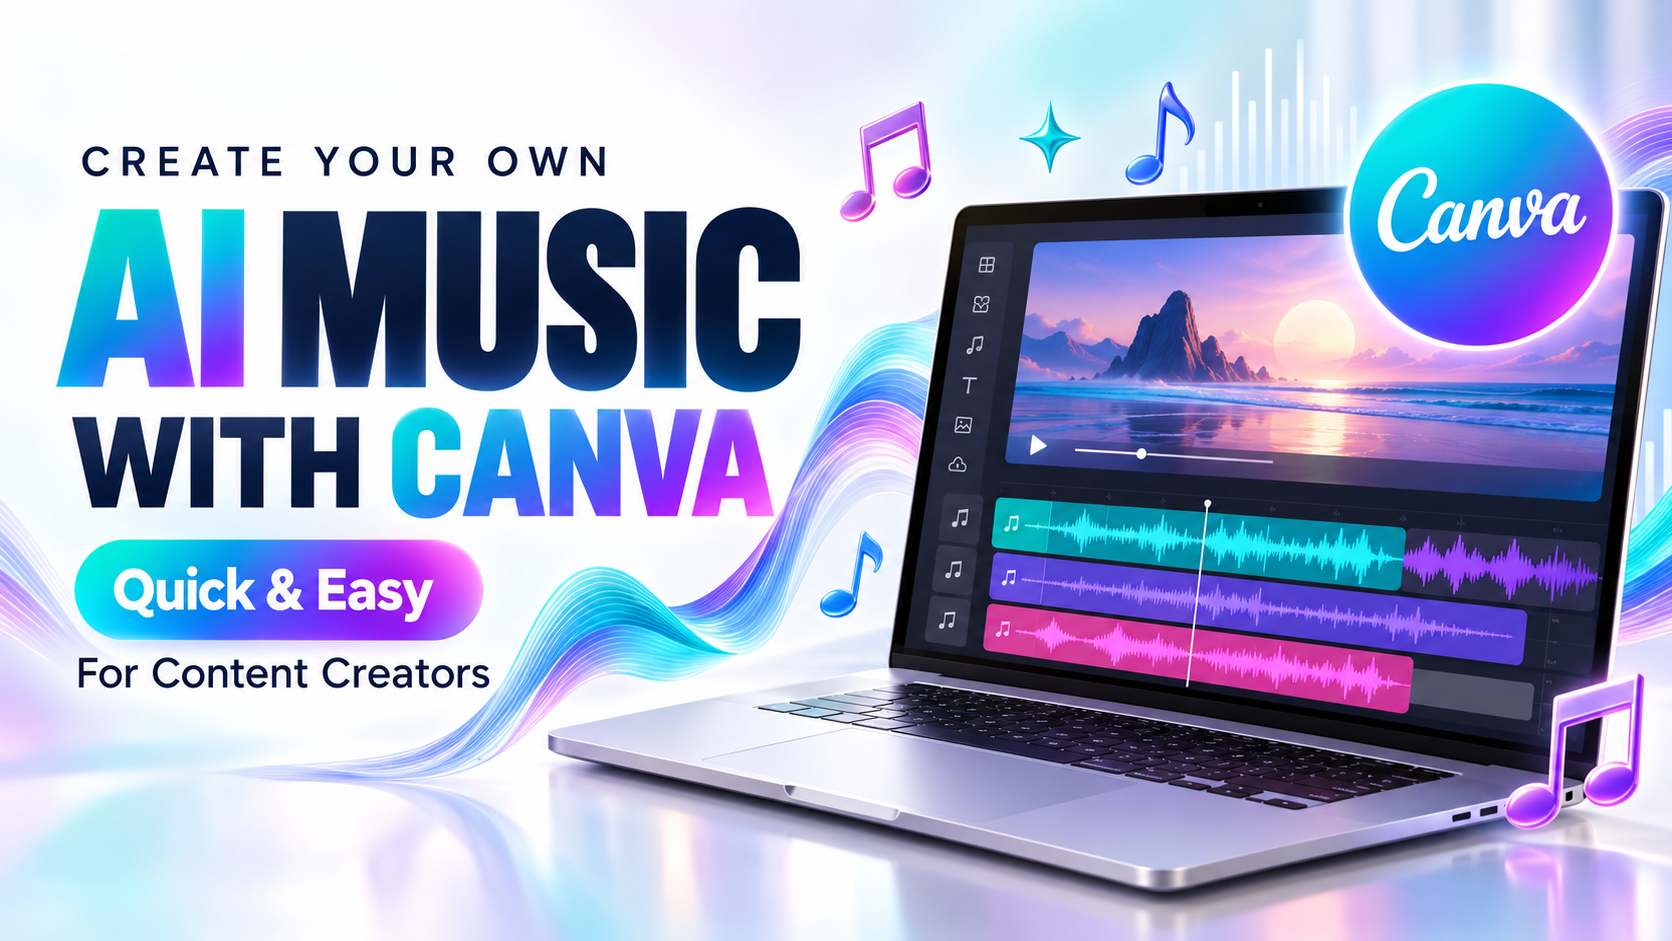
A quick and easy guide to creating music using AI tools on Canva for content creators.
Nội dung
- 1. When should you use AI music in Canva?
- 2. Why do many people choose to create music using AI on Canva?
- 3. How to create music using AI on Canva step-by-step
- 3.1. Create a new design in Canva
- 3.2. Open the Applications section in the editor.
- 3.3. Find and open the AI Music tool.
- 3.4. Choose the style and mood for the music.
- 3.5. Set the duration and start creating music.
- 3.6. Wait for the AI to complete the music.
- 3.7. Save, refine, or add music to your design.
- 3.8. Recreate or extend the music track
- 3.9. Fine-tune speed, intensity, and tone.
- 3.10. Incorporating music into the design
- 3.11. Download the design with music to your computer.
- 4. Some tips for creating AI music for videos.
- 5. Conclusion
Music is one of the elements that can completely change the mood of a video. The right music can make a travel video more relaxing, an advertisement more engaging, or a presentation less dry. However, finding the right music in the right style, rhythm, and length can sometimes be quite time-consuming. Instead of searching through numerous audio libraries or using professional editing software, you can create music using AI right on Canva. With just a few choices of style, mood, and length, the AI tool can generate the perfect melody for your videos, presentations, or creative projects. Let''s explore how to do it with Sadesign below.
1. When should you use AI music in Canva?
Not all content requires background music, but in many cases, a suitable melody can add depth and evoke better emotions. This is especially true for those who frequently create TikTok, YouTube, Reels, or advertising videos; creating your own music to match the desired atmosphere is far more convenient than manually searching for it. Canva's AI music is ideal when you need a quick, easily customizable track that can be directly integrated into your design.
Some situations where you might consider using AI music include:
-
Social media videos: Background music helps TikTok, Instagram Reels, or YouTube Shorts have a more engaging rhythm and evoke emotions more easily.
-
Video marketing and advertising: You can choose a cheerful, energetic, or professional tone to support the campaign's message.
-
Product introduction video: Appropriate music helps the product stand out and creates a unique atmosphere for each scene.
-
Vlogs and travel videos: Gentle, relaxing or upbeat melodies can liven up the journey in the video.
-
Presentation: A moderate amount of background music can help make a presentation less monotonous, especially during opening slides or transitions.
-
Educational content: Soft music can be used to create a relaxed atmosphere without distracting the viewer.
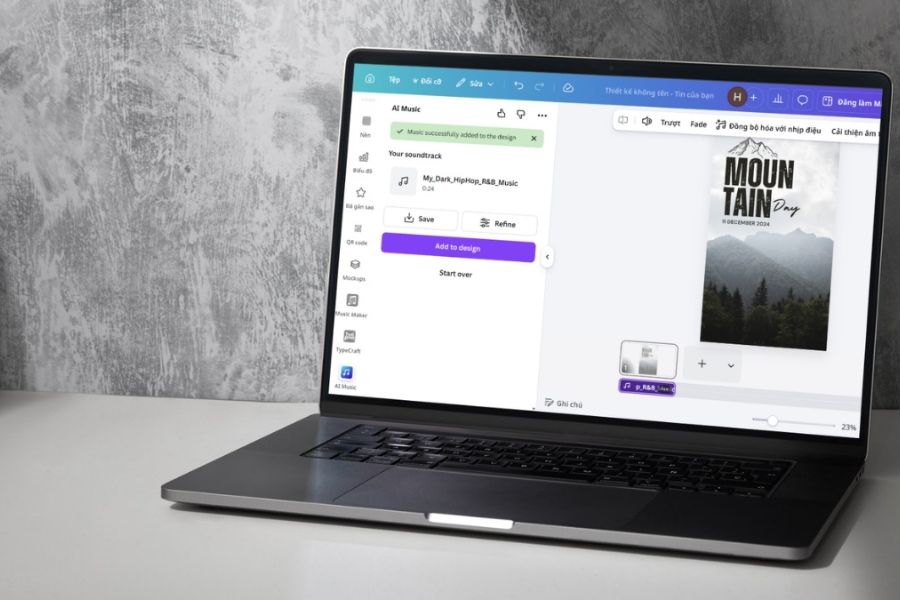
2. Why do many people choose to create music using AI on Canva?
The appeal of AI Music on Canva lies in its simplicity. Content creators don't need to know how to play a musical instrument, arrange music, or use professional audio production software to create a piece of music according to their desired direction. More importantly, the entire process from creating music, editing, to adding sound to the video can be done within a single design, saving considerable time.
Some notable advantages include:
-
Save time: No need to spend a lot of time scrolling through a list of songs to find one you like.
-
Easy to experiment: You can change the style, speed, emotions, or recreate a different version if the result isn't right.
-
Multiple music styles: Depending on the tool and version of Canva you are using, you can choose from styles such as Pop, Rock, Jazz, Hip Hop, Electronic, Acoustic, Cinematic, or Ambient.
-
Integrated directly into Canva: Music created can be directly incorporated into videos, slides, or designs without needing to transfer it to another software.
-
Suitable for a wide range of content types: From short social media videos to advertisements, vlogs, presentations, or educational content, it can be utilized for everything.
-
Easy to edit: If the initial track isn't quite right, you can fine-tune or recreate it instead of starting the entire process from scratch.
3. How to create music using AI on Canva step-by-step
If you're looking for a quick way to create background music for your videos, AI Music on Canva is a worthwhile option. The process is generally quite intuitive: create a design, open the AI Music app, choose a style and mood, set the duration, and then add the music to your design. Below are the specific steps to make it easy for you to follow.
3.1. Create a new design in Canva
First, log into Canva and create a design that suits the content you're working on. If you want to create background music for a TikTok or YouTube Shorts video, you can start with a vertical video design. For a presentation, choose the corresponding slideshow template.
On the Canva homepage, select Create Design and then choose your desired design type. You can also open an existing design if you have prepared a video or slideshow beforehand.
Defining the type of design from the outset will help you easily visualize the rhythm and duration of the music you need to create.
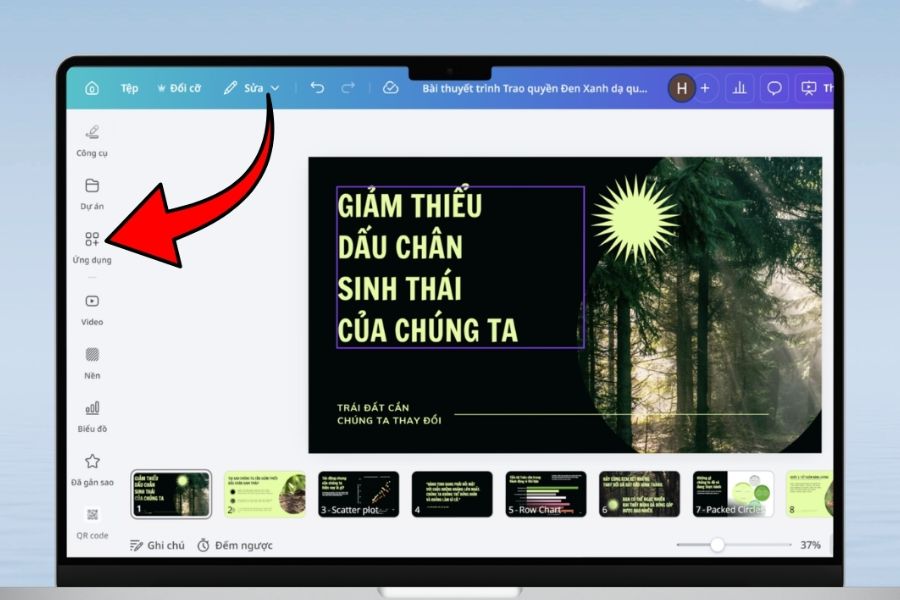
3.2. Open the Applications section in the editor.
After entering the design interface, observe the toolbar on the left side of the screen. Here, find and select Applications .
This section brings together many tools integrated into Canva. Instead of having to leave the editor to use a separate music creation service, you can find the AI Music tool right here.
If you can't see the tool you need, use the search bar in the Applications section for a quicker search.
3.3. Find and open the AI Music tool.
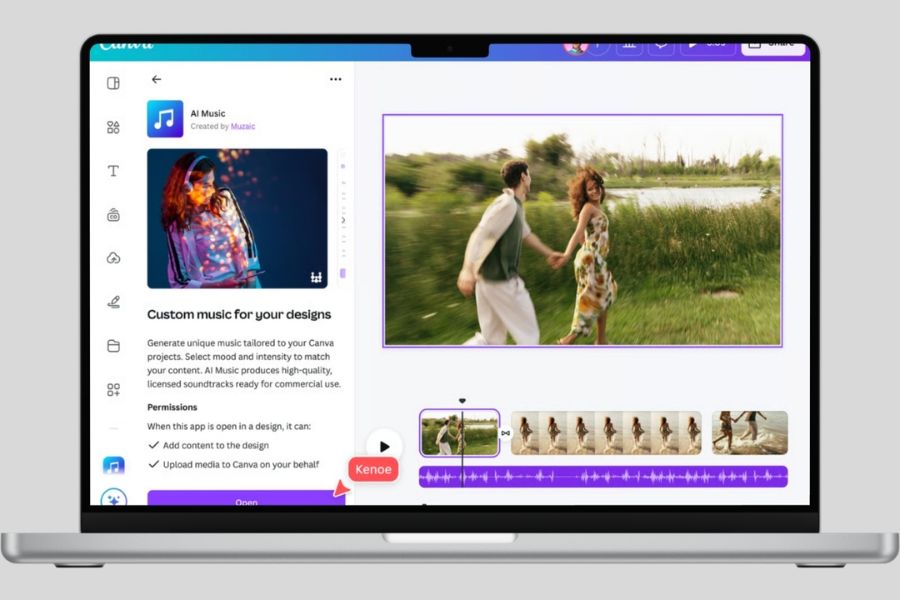
In the search box under Apps, type the keyword AI Music . Canva will display AI-powered music creation tools if this feature is available for your account and region.
Select AI Music to open the music creation interface. From here, you can start setting up the basic elements of your music instead of having to manually adjust each note or instrument.
If Canva displays multiple related options, be sure to check that it's the correct AI Music tool before you begin.
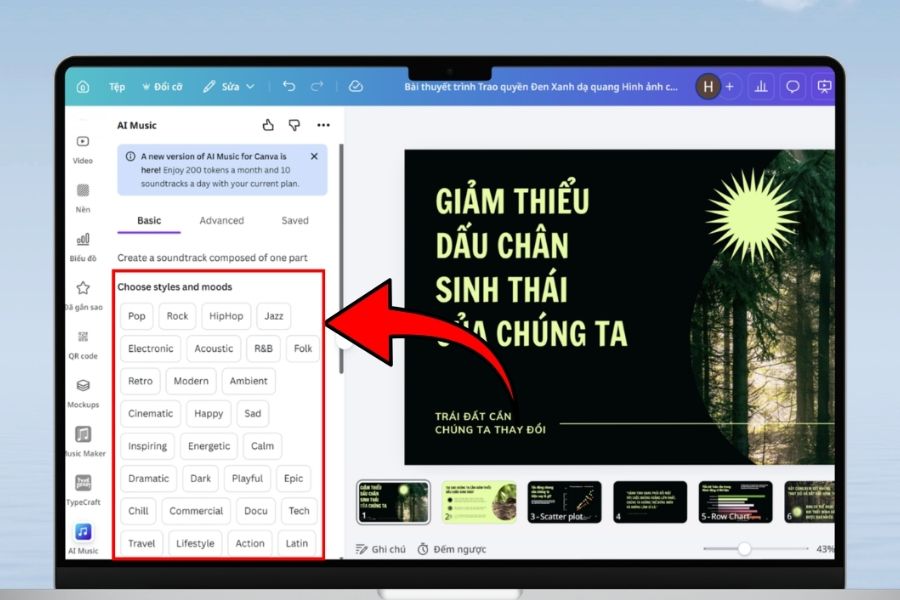
3.4. Choose the style and mood for the music.
This is one of the most important steps because the musical style greatly influences the feeling the video conveys. A fashion video might need a modern melody, while a travel vlog is better suited to a gentle, relaxing sound.
Depending on the options Canva offers, you can try styles such as:
-
Pop: Bright, easy to listen to, and suitable for a wide range of social media content.
-
Electronic: Has a modern rhythm, suitable for technology videos or dynamic content.
-
Cinematic: Creates a sense of vastness and grandeur, suitable for storytelling or introductory videos.
-
Acoustic: Gentle, intimate, suitable for vlogs and lifestyle content.
-
Ambient: Gentle, minimalist, suitable for relaxing videos or content requiring concentration.
-
Hip Hop: Has a clear rhythm, suitable for youthful and individualistic content.
Besides genre, pay attention to the mood, such as Happy, Calm, Energetic, Inspiring , or Dramatic . Choosing the right mood will help the music better align with the video's message.
3.5. Set the duration and start creating music.
After choosing a style, set the duration for the music track. The length should be considered based on the content you want to use it for. For a short transition, there's no need to create a very long track. Conversely, a video with many segments will need a track of sufficient length to avoid abrupt interruptions.
Once the parameters are aligned, select Compose to begin processing in Canva. The AI will use your choices to generate the corresponding melody.
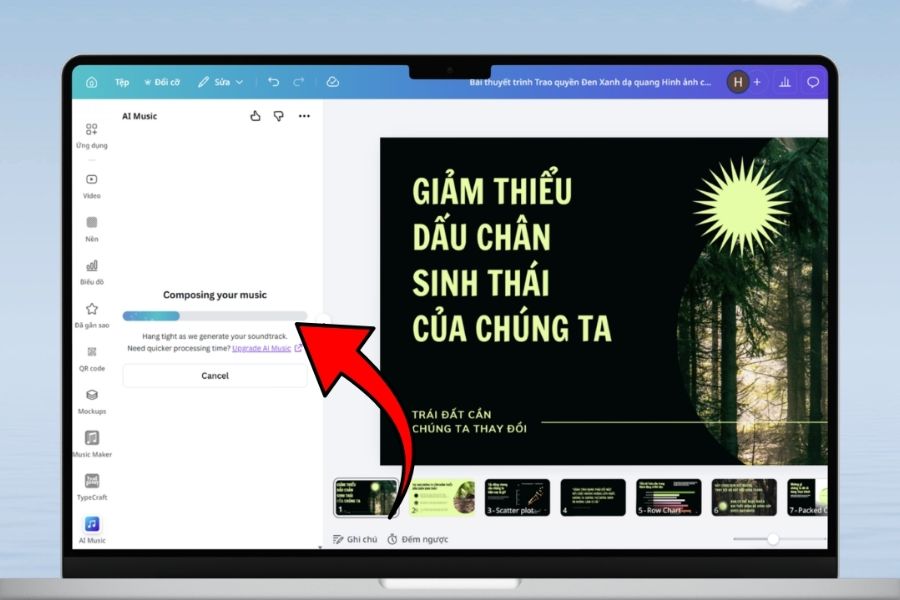
3.6. Wait for the AI to complete the music.
After you click Compose, Canva will begin creating the music. Processing time may vary depending on system conditions and account features.
The advantage is that you don't need to manually perform tasks like selecting instruments, arranging melodies, or mixing. AI will handle creating the audio content based on your chosen settings.
Once the music is finished, listen to it from beginning to end before deciding to use it. Sometimes a piece of music sounds good in the first few seconds but doesn't really fit the rest of the video.
3.7. Save, refine, or add music to your design.
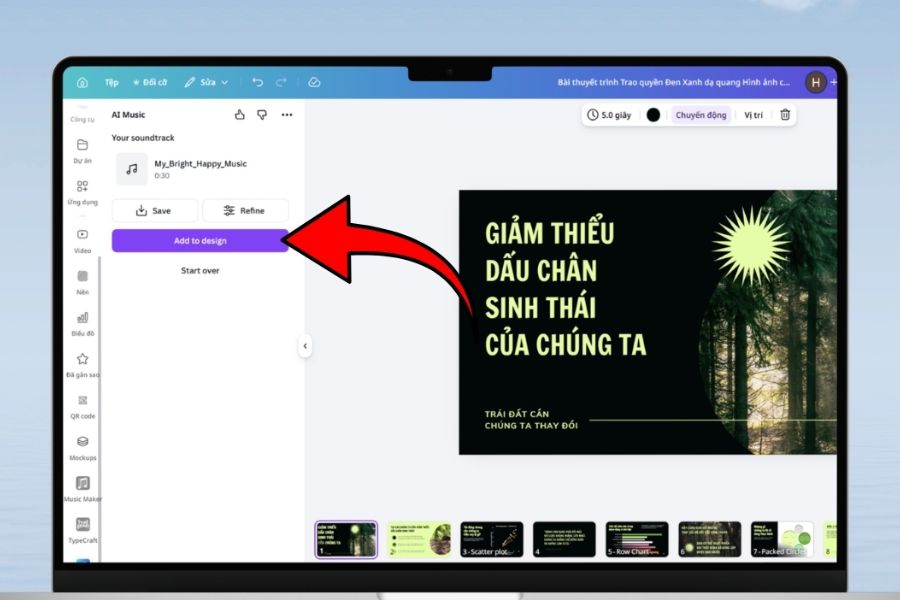
After listening to a preview, Canva usually provides options for you to further process the music. If you're satisfied, you can save it or import it directly into your design. If it's not quite right, use the fine-tuning option to make further changes.
Some common options include:
-
Save: Save the music track for later use or viewing.
-
Refine: Continue adjusting the music.
-
Add to design: Directly integrate the music track into the existing design.
If the melody is close to what you want but not quite perfect, Refine will be more useful than creating a completely new piece of music.
3.8. Recreate or extend the music track
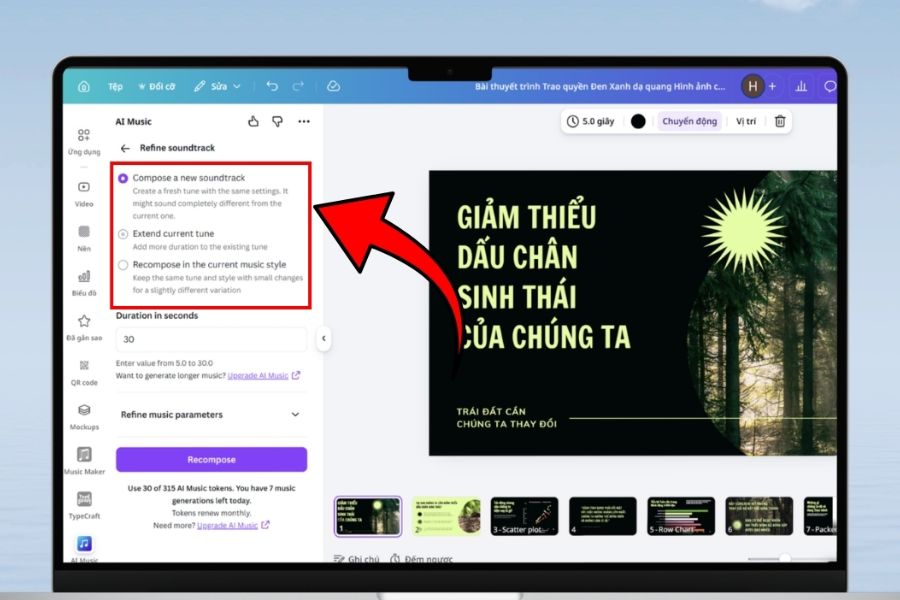
In the editing section, Canva offers options that allow you to modify your existing music in various ways. For example, you can create a new track, extend the melody, or keep the old style but create a different variation.
Some options may include:
-
Compose a new soundtrack: Create a new piece of music.
-
Extend current tune: Extend the current track.
-
Recompose in the current music style: Create a new version while maintaining the original musical style.
This feature is especially useful when you've found the right music but want to change the melody to better suit the video.
3.9. Fine-tune speed, intensity, and tone.
If you want more control over the music, use the sliders in the fine-tuning section. Instead of just choosing a general style, you can change many characteristics to make the melody closer to your actual needs.
Some parameters are often displayed as sliders, including:
-
Relaxed - Intense: Transitioning from gentle to intense.
-
Slow - Fast: Adjust the speed of the music.
-
Loose - Rhythmic: Changes the clarity of the rhythm.
-
Dark - Bright: Adjust the color tone from dark and somber to bright and vibrant.
-
Stable - Varied: Controls the degree of variation in the melody.
Once complete, select Recompose to have the AI recreate the music with the new settings. You should intentionally change each element one by one instead of dragging all the sliders at once, as this makes it easier to identify which elements actually make the music sound better.
3.10. Incorporating music into the design
Once you've found a suitable version, select Add to design to incorporate the audio into your design. The music will appear on the timeline of the video or design that supports audio.
Here, you can drag the audio segment to your desired location, adjust the start time, and arrange it to fit the scenes in your video. If there is dialogue, pay special attention to the volume so that the background music doesn't drown out the speech.
This is also the time to review the entire video from beginning to end. A great piece of music, but placed at the wrong time, can still disrupt the video's flow.
3.11. Download the design with music to your computer.
After you've finished the video, select Share in the upper right corner, then select Download . Next, choose a format that suits your design.
If the video has background music, MP4 is often the best choice to keep both the image and sound in the same file.
Finally, select Download and wait for Canva to process it. Once complete, you will have a version of your video with the AI-powered music added, ready to upload or edit in a later step.
4. Some tips for creating AI music for videos.
Creating music with AI is relatively fast, but to have a track that truly suits the content, you still need to spend time choosing a style and testing the results. AI can generate melodies on demand, but the creator is still the one who decides whether that music truly serves the video well. The following tips will help make the process more efficient.
-
Choose music based on the emotional tone of the content: Travel videos might prioritize relaxing or upbeat melodies, while product advertisements require sounds with a clear rhythm and high energy.
-
Don't let the music drown out the dialogue: If the video has voiceovers, lower the background music volume so viewers can easily hear the main content.
-
Try different versions: Don't rush to choose the first one. Two songs in the same style can still create completely different feelings.
-
Choose music according to the video's tempo: Fast-paced scenes should be paired with music that matches the tempo, while slow, emotional videos are usually best suited to gentle melodies.
-
Utilize the Refine feature: When your music is nearly perfect, fine-tune it instead of starting from scratch. This helps you maintain the style you're currently using.
-
Pay attention to the length: Music that is too short may loop or cut off abruptly, while music that is too long is unnecessary for a short video.
-
Listen with the video: Don't judge a piece of music in isolation. Listen to it with the video to check the synchronization between the melody, the visuals, and the dialogue.
5. Conclusion
Creating music using AI tools on Canva is a convenient solution for those who want their own background music without spending too much time searching for or manually editing audio. From choosing style, mood, and duration to fine-tuning speed and adding music to the video, the entire process is relatively intuitive. Simply select the right sound for your content and know how to adjust it at the right time, and you can create vibrant background music for social media videos, commercials, vlogs, presentations, or personal creative projects. Experiment with different styles and let AI be your assistant to make the content creation process faster and more flexible.





















VIP Products








Best Selling Products
Upgrade genuine Capture One account
120 USD
ChatGPT Plus Account (GPT-4)
16 USD
Upgrade Duolingo Super
29 USD
Genuine Cheap Canva Pro
39 USD
Genuine Adobe Illustrator account
99 USD
Plugin Retouch4me
69 USD
Adobe Photoshop Copyright - Full App
120 USD
Copyright Adobe Lightroom Account
59 USD
Upgrade Genuine Office 365
49 USD
MidJourney Account
29 USD
Autodesk All App Account Copyright
120 USD
Windows 10 & 11 Pro Key
36 USD
Adobe Premiere Pro Account
99 USD
Freepik Premium Account
59 USD
Capcut Pro 1 Year
39 USD