Best Selling Products
What are Photoshop Actions? How to use Action Photoshop
Nội dung
- 1. What is Photoshop action?
- 2. The meaning of Action in Photoshop
- 3. How to create Photoshop Actions
- 3.1. Add Photoshop Action directly
- 3.2. Add Action to Photoshop through the Action panel
- 3.3. Add Action to Photoshop by copying the Action file
- 4. Instructions for using Action Photoshop
- 5. Points to note in Action Photoshop
- 5.1. Quick Links in Photoshop Actions
- 5.2. Action Compatibility
- 5.3. Actions panel and controls
- 5.4. Menu in Actions box
When you have to edit multiple photos with identical repetitive operations, Action Photoshop is the most optimal solution. This feature allows you to edit similar photos with just one click very quickly. So what is the Photoshop Action that is so optimal? Let's find out with Sadesign right away through the following shares.
When you have to edit multiple photos with identical repetitive operations, Action Photoshop is the most optimal solution. This feature allows you to edit similar photos with just one click very quickly. So what is the Photoshop Action that is so optimal? Let's find out with Sadesign right away through the following shares.
1. What is Photoshop action?
Action is a feature in Photoshop. It helps you remember the operations you just did in Photoshop and then synthesize them into one file. Photoshop will help you complete all the operations in that file with just one click or the shortcut you have pre-installed.
The purpose of creating the Action feature in Photoshop is to help you batch edit photos with similar operations without having to edit each one individually.
2. The meaning of Action in Photoshop
Action Photoshop has great meaning for Photoshop users, especially those who work with a large number of photos and need to apply the same effects or edits to many photos.
For example, you want to change the size, format, resolution or apply a filter to a hundred images. If you edit each photo in the usual way, it will take a lot of time and even cause errors due to differences in the level and parameters of the operations.
However, if you use Action Photoshop, you just need to edit an image, record the actions and commands you want to apply. You can then run that Action automatically on many other images. Specifically, you can use the Batch feature (File => Automate => Batch) to run Action on a folder containing many images. This way, we will save a lot of time and effort in photo editing and ensure consistency for the images.
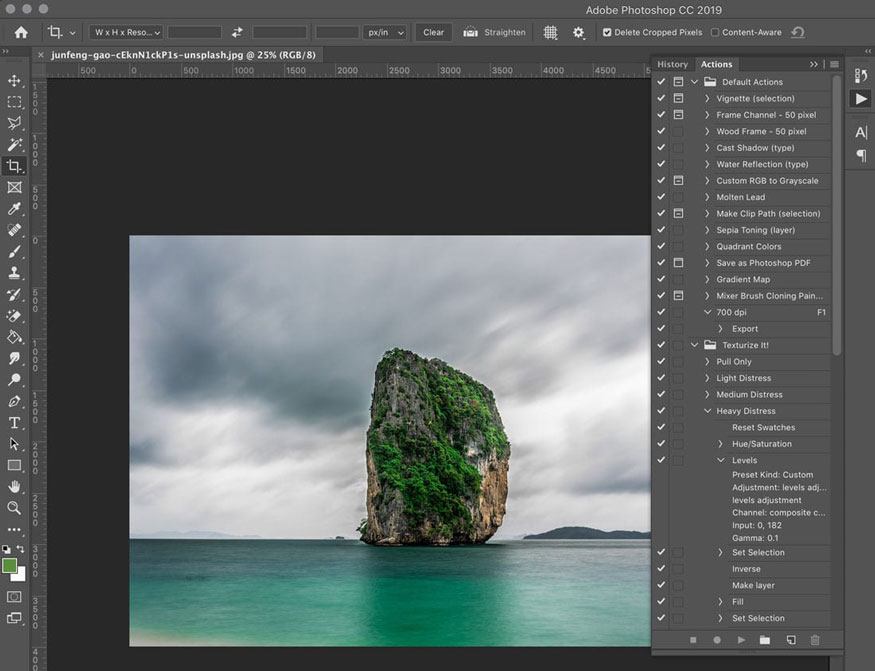
In addition, Action Photoshop also creates beautiful effects for your images. You can create your own Actions or use Actions already created by others. There are many Actions available online, you can download them to use as you like.
3. How to create Photoshop Actions
There are many ways to create Photoshop Actions. Below are some popular ways, used by many people.
3.1. Add Photoshop Action directly
Step 1: First, we need to download the Action file to the computer. There are both paid and free versions of Photoshop Actions available online. Depending on your needs, choose the appropriate version.
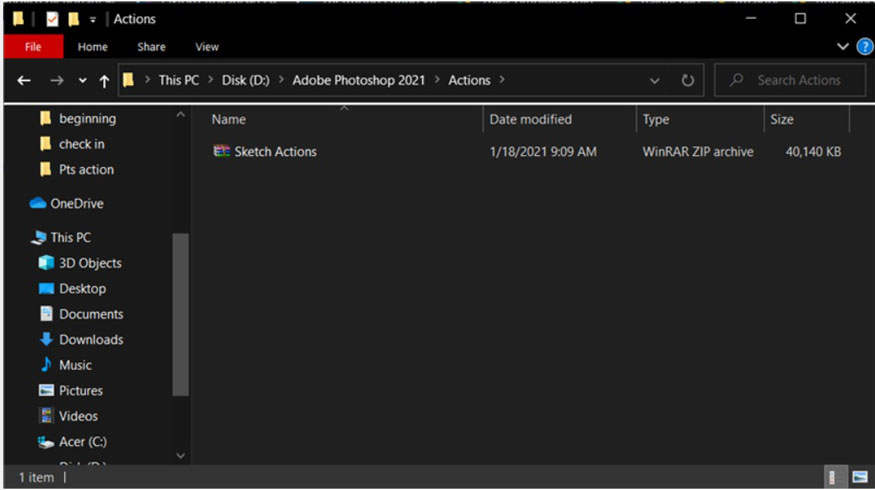
Step 2: After downloading, we need to decompress the downloaded action file. And the “.atn” file appears.
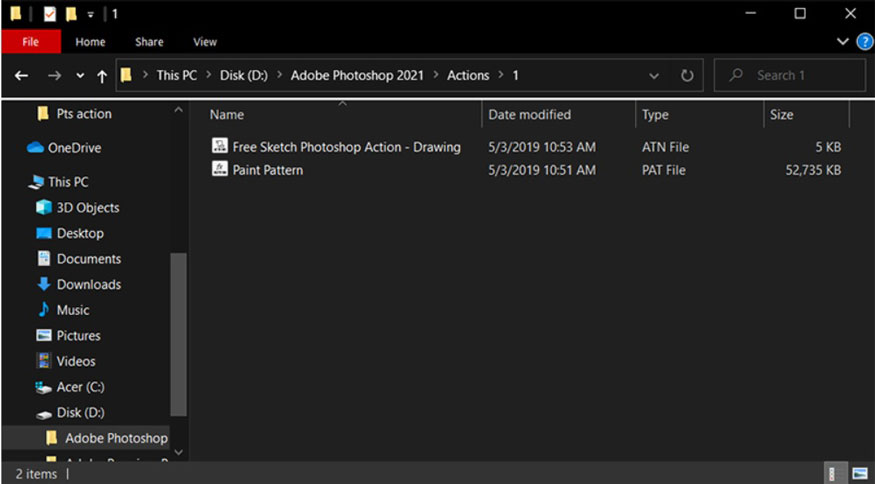
Step 3: Open file “.atn”
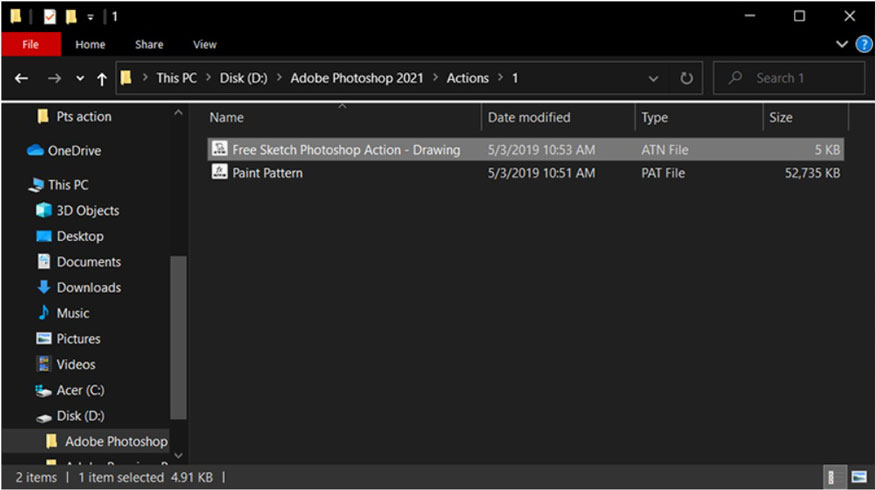
Step 4: Go to Photoshop software and open the Action panel, you will see the action effect just downloaded to your computer.
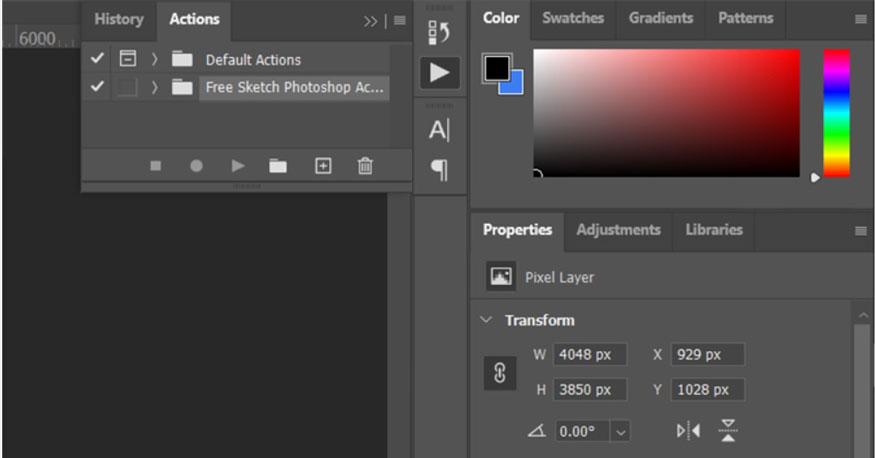
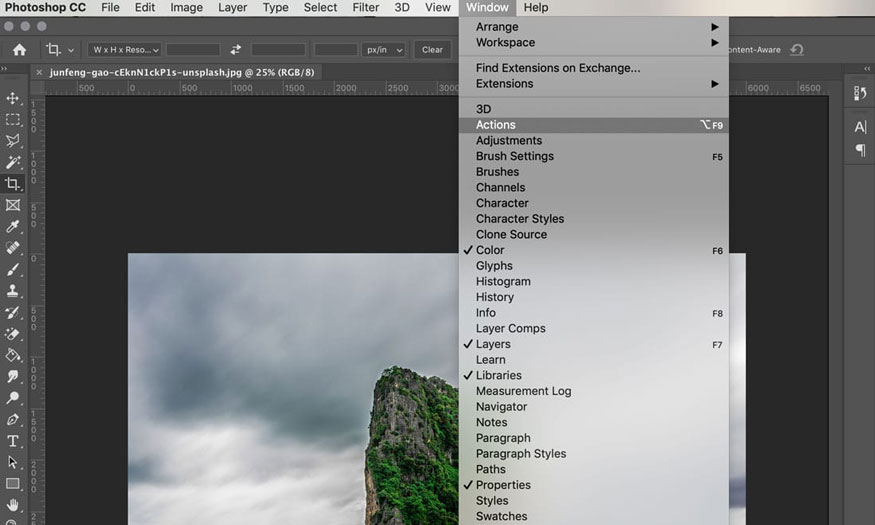
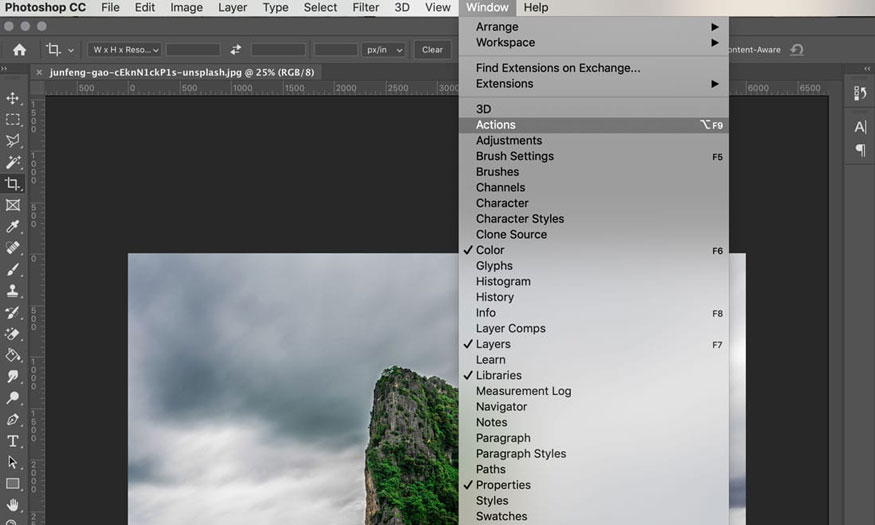
If you don't see the action panel appear, then on the menu bar go to Windows => Actions or you can press the keyboard shortcut Alt + F9.
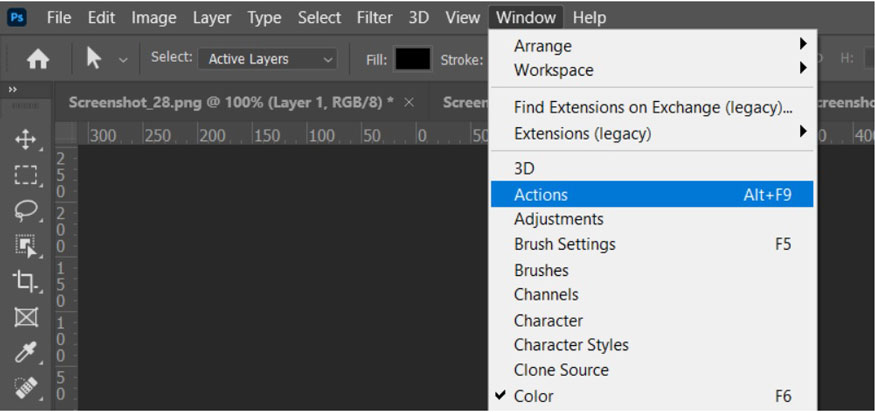
3.2. Add Action to Photoshop through the Action panel
Step 1: We also need to download the Action file you want to use from the internet. Action files will usually have the extension “.atn” or “.zip”. If the Action file is “.zip”, you need to decompress that file to get the “.atn” file.
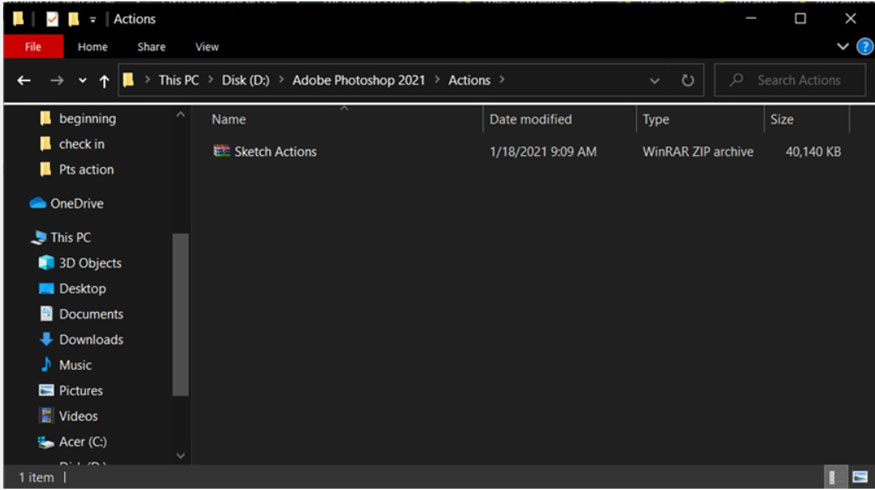
Step 2: Unzip the newly downloaded Action file => The “.atn” file appears.
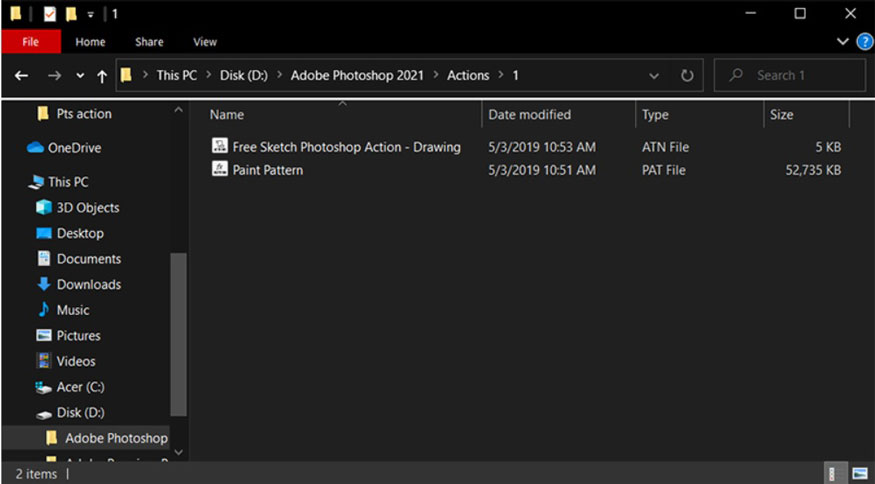
Step 3: Open Photoshop software. On the menu bar, select Window => Actions to open the Actions panel.
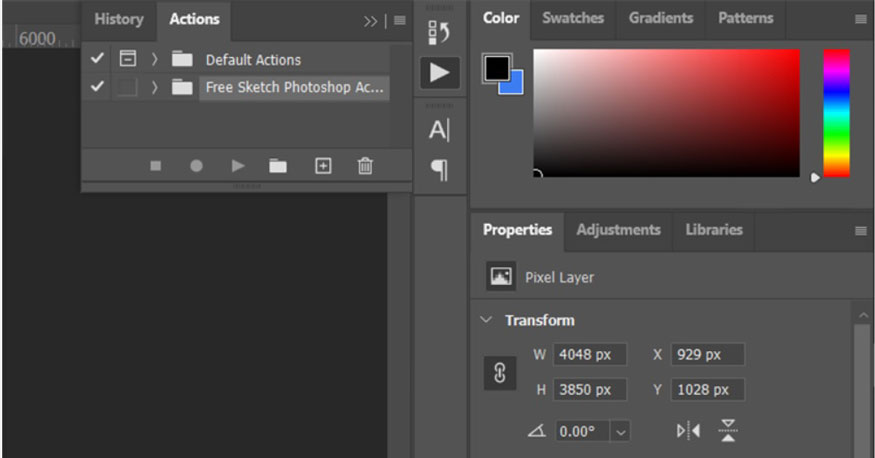
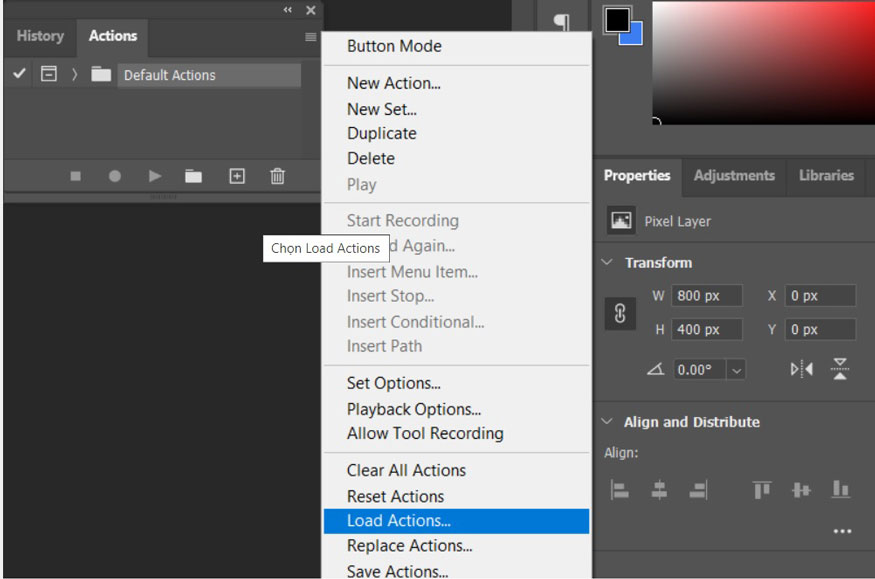
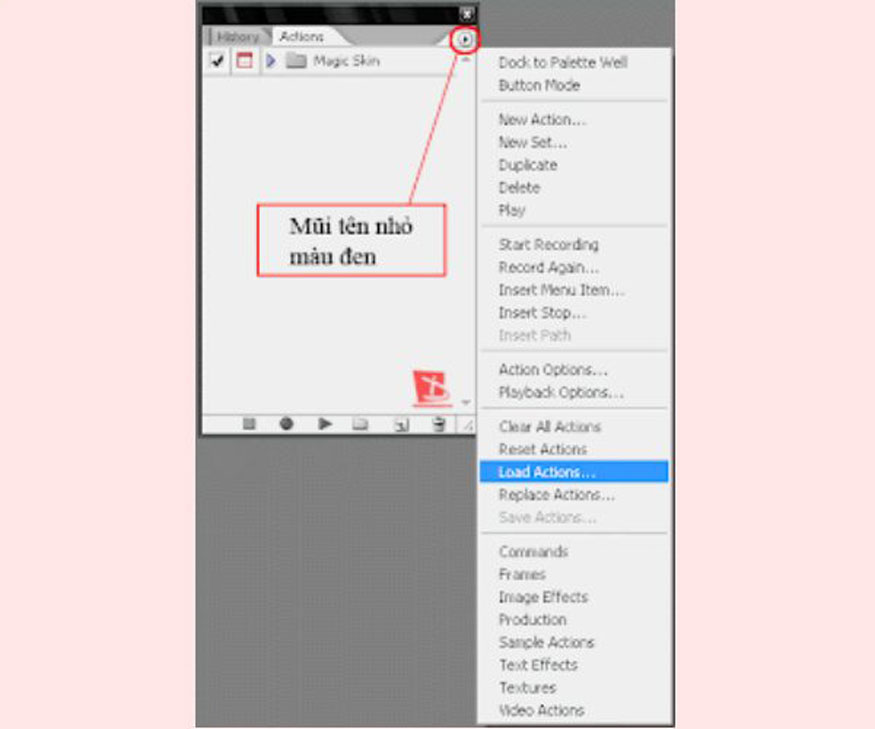
Step 4: Click the down arrow in the Action panel and select Load Action.
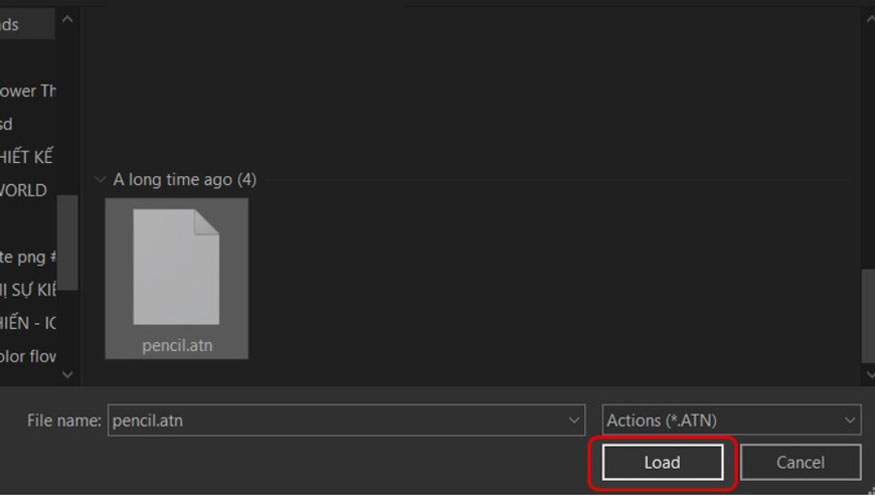
Step 5: Open the newly downloaded Action folder in Step 1. Select the “.atn” file and then select Load to install.
3.3. Add Action to Photoshop by copying the Action file
Step 1: We also need to download the Action file you want to use from the internet. Action files will usually have the extension “.atn” or “.zip”.
If the Action file is “.zip”, you need to decompress that file to get the “.atn” file.
Step 2: Copy the Action file you just downloaded into the folder containing Photoshop Actions.
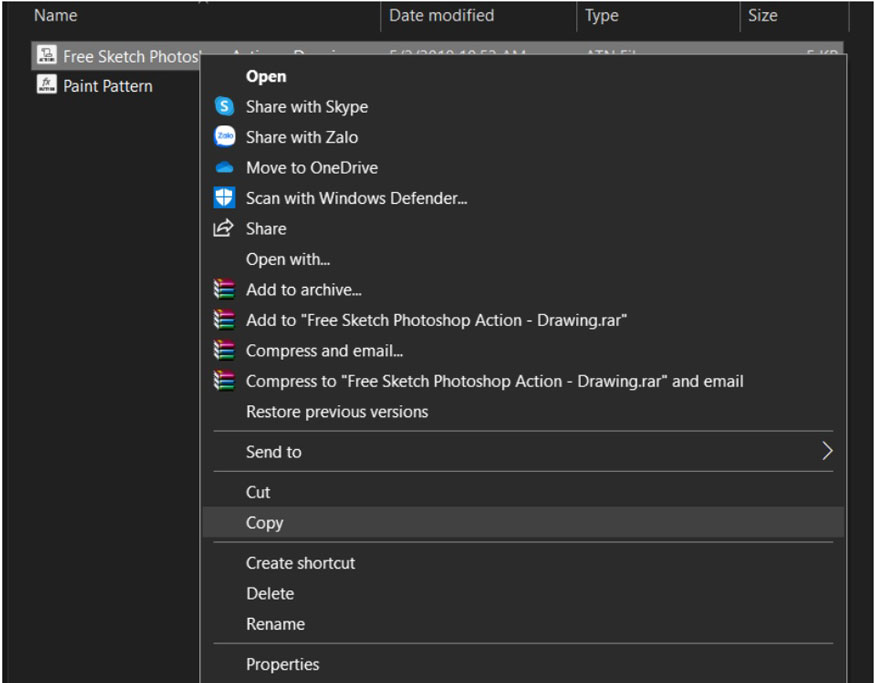
Step 3: Copy the Actions file “.atn” to the Photoshop folder according to the path:
C:\Program Files\Adobe Photoshop CS6\ Preset\ Actions
In which, [version] is the version of Photoshop you are using. applications, such as CS6, CC, etc.
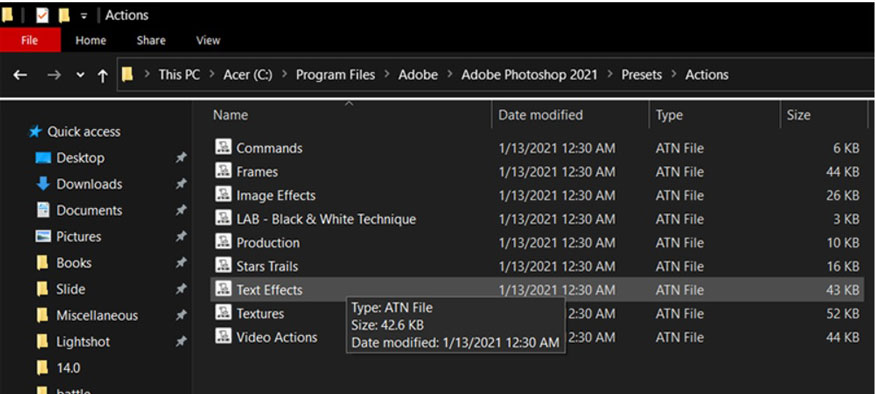
Step 4: Open Photoshop, on the menu bar, select Window => Actions to open the Actions panel.
Step 5: In the Actions panel, click on the menu icon (4 dashes with a drop-down arrow) in the upper right corner of the Actions panel and then select Reset Actions.
Step 6: A confirmation window will appear, asking you to confirm deleting all existing Actions in Photoshop and restoring the default Actions. Click OK to agree.
Step 7: You will see the default Actions of Photoshop displayed in the Actions panel, along with the new Actions you copied to the Presets\Actions folder. You can use these new Actions as you wish.
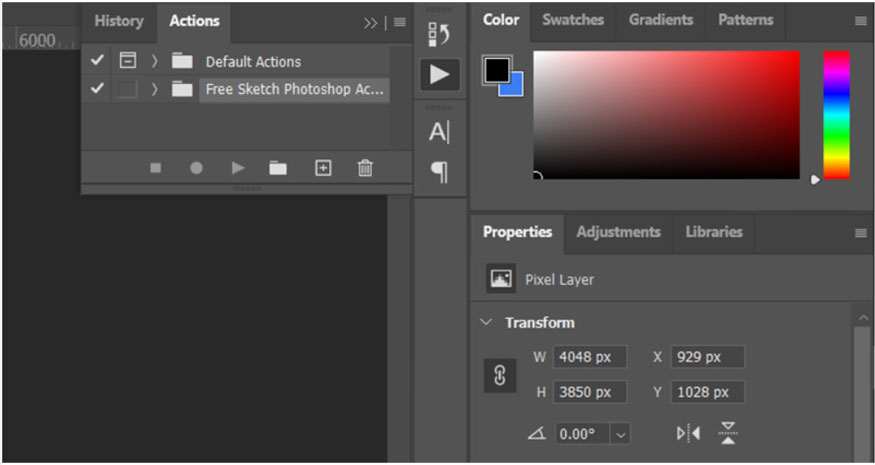
So, we have completed 3 ways to add Photoshop Actions.
4. Instructions for using Action Photoshop
After adding Action to Photoshop, let's learn how to use Action Photoshop. To launch Action Photoshop, we can do it through 5 steps as follows:
Step 1: Open the image you want to apply Action Photoshop on.
Step 2: On the menu bar, select Window => Actions to open the Actions panel. Step 3: In the Actions panel, select the Photoshop Action you want to use. To preview the results of the Photoshop Action on the image, click on the eye icon (eye shape) on the left of the Photoshop Action.
Step 4: After selecting the Photoshop Action, click the Play icon (triangle) in the lower right corner of the Actions panel to launch the Photoshop Action on your image. Now you will see the image changed according to the operations and commands of Action Photoshop.
Ảnh Action-Photoshop-16.jpg
Step 5: If you are satisfied with the result, you can save the image by selecting File => Save or File => Save As. If you are not satisfied, you can undo the changes by selecting Edit => Undo or pressing Ctrl + Z.
5. Points to note in Action Photoshop
When using the Action Photoshop feature, users need to pay attention to some points like quick links, compatible actions or action panels. Please refer specifically to the following:
5.1. Quick Links in Photoshop Actions
The Quick Links feature allows you to run Photoshop Actions on images quickly and conveniently. You can assign a mouse button or a shortcut to a shortcut or , then you simply press that shortcut to run that shortcut or on the image. To set keyboard shortcuts for Photoshop Actions, you can follow these steps:
- Step 1: In the Actions panel, select the Photoshop Action you want to assign a keyboard shortcut to.
- Step 2: Click on the menu icon of the Actions panel and select Action Options.
- Step 3: The Action Options window appears asking you to enter a name, select a group, and choose a color for the Photoshop Action. You also see a Function Key box, allowing you to choose a shortcut from F1 to F12 for the Photoshop Action. You can combine shortcuts with Shift, Ctrl or Alt keys to create different shortcuts. After selecting, click OK to save.
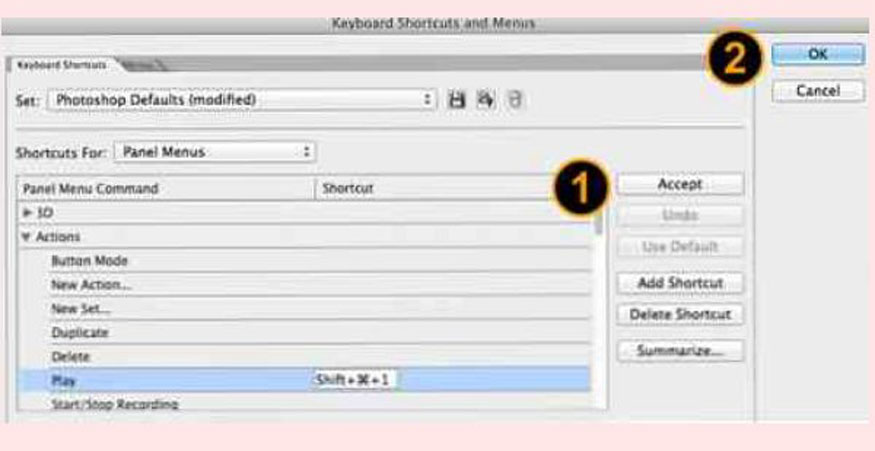
5.2. Action Compatibility
Not all Photoshop Actions are compatible with all versions and images of Photoshop. Some Photoshop Actions may only work on a certain version of Photoshop or for a certain type of image (eg RGB, CMYK, Grayscale images, etc.).
Therefore, when using Action Photoshop, you need to check whether it is suitable for your version and type of photo.
If the Photoshop Action is not compatible with Photoshop or your image type, you may encounter errors such as:
- Photoshop action does not run or stops midway.
- The photoshop action runs but the results are not as expected,...
To fix these errors, we can do the following:
- Step 1: Update Photoshop to the latest version.
- Step 2: Convert your photo type to a photo type suitable for Photoshop Action. Use Image => Mode to convert image type.
- Step 3: Download another Photoshop Action compatible with your version and photo type.
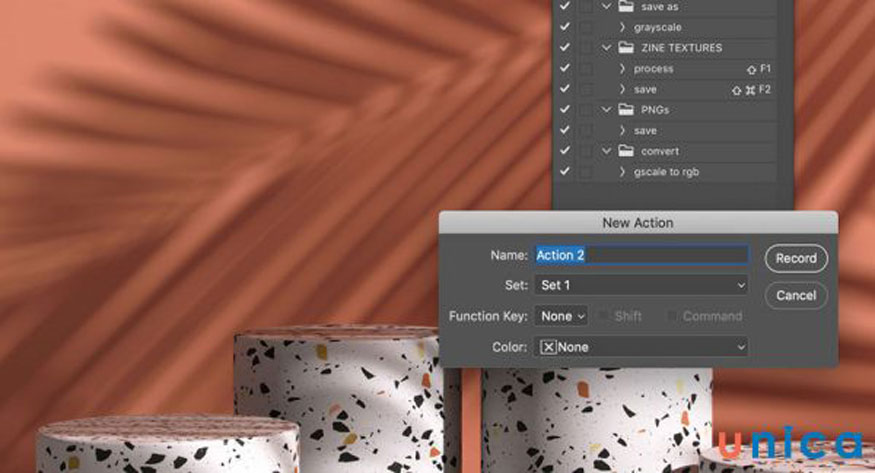
5.3. Actions panel and controls
This is where you manage and use Actions in Photoshop. Open the Actions panel by selecting Window => Actions. In the Actions panel, there are buttons that allow you to perform different functions including:
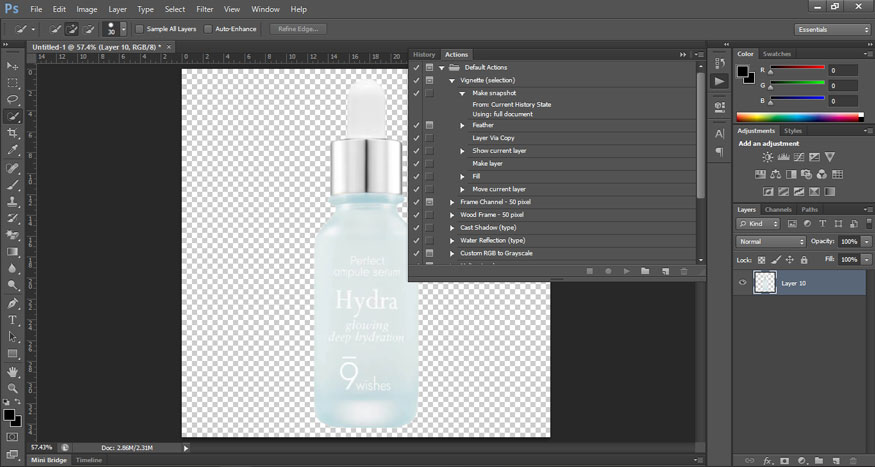
- Menu icon: Allow to access to menu with many expansion options such as Load Actions, Save Actions, Button Mode,...
- Folder icon: Allow to create a new Action group.
- Create new action icon (circle): Allow to create a new Action.
- Delete icon (trash can): Allow to delete an Action group or step.
- Play icon (triangle): Allow to run a new Action on your image.
- Record icon (red image): Allow to start recording operations and commands to create a new Action.
- Stop icon (square): Allow to finish recording a new Action.
5.4. Menu in Actions box
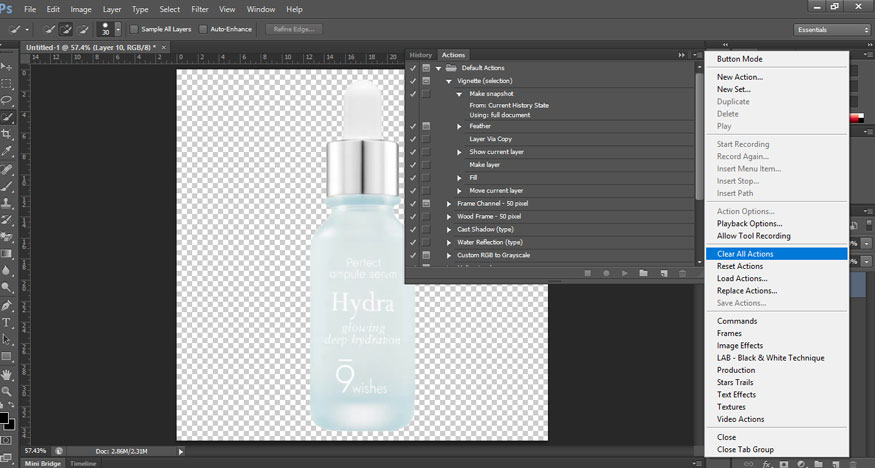
The menu in the Actions dialog box gives you access to various options of the Actions panel. You can open this menu by clicking the four dashes icon in the upper right corner of the Actions panel. In the menu there are the following options:
- Load Actions: Upload to Photoshop an Action file saved as .atn from your computer or from the internet.
- Save Actions: Save existing Actions in Photoshop into an “.atn” file.
- Reset Actions: Delete all existing Actions in Photoshop and restore Photoshop's default Actions.
- Replace Actions: Replace all existing Actions in Photoshop with Actions from another “.atn” file.
- Button Mode: Converts the Action panel's interface to button mode, so you can run Actions with just one click.
- Playback Options: Adjust settings related to running Actions.
- New Set: Allow to create a new Action group.
- New Action: Allow to create a new Action.
- Duplicate: Copy an Action group, a new Action and step.
- Delete: Delete an Action group, a new Action and step.
- Insert Menu Item: Insert a command from the Photoshop menu into the new Action being recorded.
- Insert Stop: Inserts a stop into the new Action being recorded, so you can perform some manual operations before running the Action.
- Insert Path: Insert a path from the Paths panel into a new Action being recorded.
- Insert Conditional: Insert a condition into the new Action you are recording, so you can run different steps depending on the result of the condition.
- Allow Tool Recording: Record operations using Photoshop tools into the new Action being recorded.
Above is a summary of general information about Action Photoshop. Hopefully Sadesign's sharing can help you edit multiple photos more quickly and easily.


