Best Selling Products

Windows 10 & 11 Pro Key
36 USD

MidJourney Account
29 USD

Upgrade Duolingo Super
29 USD

Genuine Adobe Illustrator account
99 USD

Plugin Retouch4me
69 USD

Adobe Premiere Pro Account
99 USD

Autodesk All App Account Copyright
120 USD

Upgrade Genuine Office 365
49 USD

Upgrade genuine Capture One account
120 USD

ChatGPT Plus Account (GPT-4)
16 USD

Copyright Adobe Lightroom Account
59 USD

Genuine Cheap Canva Pro
39 USD

Freepik Premium Account
59 USD

Adobe Photoshop Copyright - Full App
120 USD

Capcut Pro 1 Year
39 USD
How to center in Photoshop - SaDesign
Nội dung
- 1. How to center in Photoshop
- 1.1. Using the Move tool
- 1.2. Use the vertical and horizontal alignment tool in Photoshop.
- 1.3. Centering text with Photoshop
- 1.4. Using the Marquee Tool
- 1.5. Centering shortcut key in Photoshop
- 2. Notes you need to know when centering in Photoshop
- 2.1. You should use grids and guides.
- 2.2. Choose the right alignment tool
- 2.3. Use precise alignment features
- 2.4. Check carefully before saving
- 3. Ask and answer
- 3.1. Why is the alignment button grayed in the Move tool?
- 3.2. Is it possible to center multiple layers and layer groups at the same time?
The centering feature in Photoshop is extremely useful, helping to save users time and effort in editing photos. The following article Sadesign will guide users on how to center in Photoshop very simply and quickly without spending too much time on alignment.
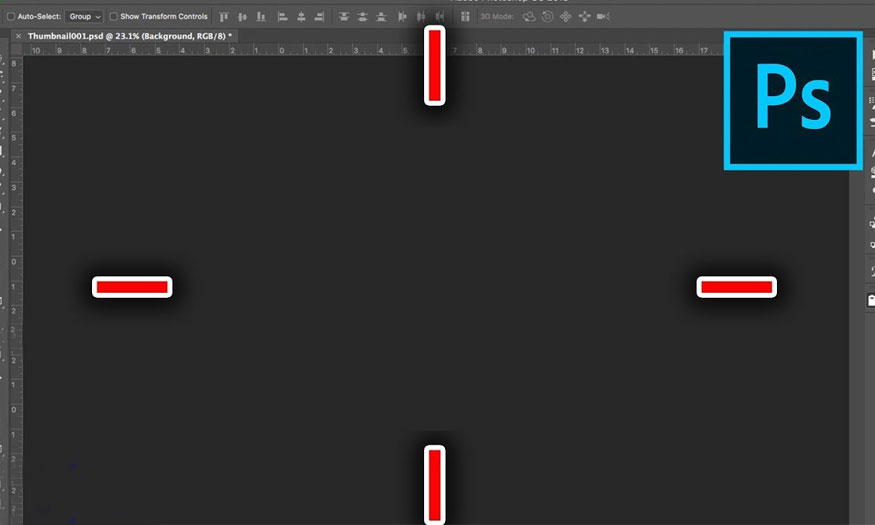
The centering feature in Photoshop is extremely useful, helping to save users time and effort in editing photos. The following article Sadesign will guide users on how to center in Photoshop very simply and quickly without spending too much time on alignment.
.jpg)
1. How to center in Photoshop
To center an image in Photoshop, you can apply one of the following 4 basic ways:
1.1. Using the Move tool
With the Move tool, you can align photos according to the following instructions:
Step 1: Use the Move tool right in the tool frame on the left of the screen to adjust the photo in Photoshop.
.jpg)
Step 2: Click Align Vertical Centers on the left side of the screen. This will help the selected layer stay centered vertically. You can monitor the alignment parameters, if the entire display is 0.00 it will be accurate.
.jpg)
1.2. Use the vertical and horizontal alignment tool in Photoshop.
If your photo has many layers and you want to cut that layer into the center of the background, apply the following method:
- Step 1: Hold down Ctrl to select the layers you want to align.
- Step 2: Use the Align Horizontal Centers operation to align a selected layer horizontally.
.jpg)
1.3. Centering text with Photoshop
If you want to center text with Photoshop, you can do it simply as follows:
.jpg)
- Step 1: Select Layer and write text, press Center Text to align the text, as well as help bring the text to the center of the frame.
- Step 2: Hold down Ctrl to select the text layer and background layer at the same time to create the main frame.
- Step 3: Use the Align Horizontal Centers operation to align a selected layer horizontally in the middle.
1.4. Using the Marquee Tool
The Marquee Tool is a way to perform extremely precise centering in Photoshop. How to do it as follows:
Step 1: In Photoshop, copy the image to a new file by going to File => select New => use Ctrl + C and Ctrl + V to cut and paste the image.
.jpg)
Step 2: To unlock the background layer, click on the closed padlock icon right in the control panel. Convert the background to a smart object so that when working on the background there will be no distortion.
Step 3: Resize the image so that the edited image is smaller or equal to the size of the background. To do this, press the keyboard shortcut CTRL + T (Windows) or CMD + T (MacOS). After changing the size, click the check mark on the options bar to finish the editing process.
.jpg)
Step 4: Select the Marquee Tool function => Hold down the left mouse button and drag the rectangle around the image you want to center.
.jpg)
Step 5: Click on the selected object => "Open" to open the control panel. Then go to "Layer" and select the object you just created.
Step 6: Go to the toolbar to select the moving tool, click Move Tool => select the Align Horizontal Centers feature to align horizontally. Then click Align Vertical Centers to perform vertical alignment.
.jpg)
Step 7: To finish the centering process, press the key combination Ctrl + D (Windows) or CMD + D (Mac) to finish.
1.5. Centering shortcut key in Photoshop
Using shortcut key combinations saves time and ensures accuracy during the centering process. Refer to some shortcut key combinations below:
- Vertically centered for Windows operating system is “Alt + Ctrl + 1”, and for MacOS it is “Alt + Cmd + 1”.
- Horizontal center alignment for Windows operating system is “Alt + Shift + 1", and for MacOS it is “Shift + Cmd + 1".
2. Notes you need to know when centering in Photoshop
To help align smoothly and avoid errors, pay attention to the following basics:
2.1. You should use grids and guides.
Creating grids and guides helps align both sides evenly. Thanks to that, the layout will be more even and beautiful. Operation:
How to create grid lines:
Step 1: Click View => Show => Grid or use the keyboard shortcut Ctrl + ' to operate faster.
.jpg)
Step 2: To make the grid lines easier to see, click “Edit”, select "Preferences" => "General" (Ctrl + K).
Step 3: The Preferences interface displays, click "Guides, Grid & Slices".
.jpg)
Step 4: In the Grid section, adjust the parameters related to the grid lines such as:
- Color: To change the color of the grid border.
- Gridline Every: Is the distance between grid lines.
- Subdivisions: Number of sub-lines of the grid system.
.jpg)
Step 5: Once you have finished customizing the parameters => click "OK" to complete.
How to create a guide line:
To create a guide line with a ruler, do the following:
Step 1: At the toolbar, click View => select Rule (Ctrl + R).
Step 2: Once the ruler is displayed, left click on the horizontal ruler bar to move the mouse down to create a vertical line. To create a horizontal line, go to the vertical ruler to move the mouse from left to right.
.jpg)
Note:
- To delete a guide line, left click on the end of the guide line to drag it back to the ruler bar.
- To move the guide line, use the Selection Tool (shortcut key V) to click on the guide line and move the mouse to the position you want to place.
- Press the key combination Ctrl + H will help to hide all newly created lines.
In addition to the ruler, we can also create accurate guide lines by setting parameters for the guide line as follows:
Step 1: Select View => New Guide to set parameters for the guide line:
- Horizontal: To set the guide line horizontal.
- Vertical: Set a vertical alignment line.
- Position: Position of the guide line.
.jpg)
Step 2: After customizing, click OK to complete. If you want to create multiple guides at the same time in Photoshop, click View and select "New Guide Layout". Next, adjust the parameters in the table and click "OK" to complete.
2.2. Choose the right alignment tool
There are many ways to do center alignment in Photoshop. Each method will have its own advantages and disadvantages, so it will bring different alignment results. To ensure optimal editing results, you should carefully consider choosing the most suitable tools and alignment methods.
2.3. Use precise alignment features
In your photos, if there are details that require high precision, you should apply other editing features. It could be set of rulers, grid system, guideline system,...
.jpg)
2.4. Check carefully before saving
Once you have saved the image, you will have to edit it again from the beginning if you encounter any errors in the design. Especially if that image has been sent to customers, it will affect your reputation. So even if you are extremely meticulous and careful during the process, you should also remember to always carefully check the images before saving them.
3. Ask and answer
3.1. Why is the alignment button grayed in the Move tool?
=> Editing photos in Photoshop helps users fine-tune images with multiple image layers. So before editing, you should select the image layer for the image layer you want to center.
In case the user ignores the selection button for the part of the image that wants to be centered, the alignment buttons will be grayed.
3.2. Is it possible to center multiple layers and layer groups at the same time?
=> Yes, it is.
To center multiple layers and layer groups at the same time, use the multiple layers or groups option in the Layers panel. Then press Move and select the Align Horizontal Centers and Align Vertical Centers features. Press the key combination Ctrl + D (Windows) or CMD + D (Mac) to finish.
Hopefully the detailed sharing on how to center in Photoshop that SaDesign introduces will help you create quality images.


VIP Products


Best Selling Products
Windows 10 & 11 Pro Key
36 USD
MidJourney Account
29 USD
Upgrade Duolingo Super
29 USD
Genuine Adobe Illustrator account
99 USD
Plugin Retouch4me
69 USD
Adobe Premiere Pro Account
99 USD
Autodesk All App Account Copyright
120 USD
Upgrade Genuine Office 365
49 USD
Upgrade genuine Capture One account
120 USD
ChatGPT Plus Account (GPT-4)
16 USD
Copyright Adobe Lightroom Account
59 USD
Genuine Cheap Canva Pro
39 USD
Freepik Premium Account
59 USD
Adobe Photoshop Copyright - Full App
120 USD
Capcut Pro 1 Year
39 USD