Best Selling Products

Copyright Adobe Lightroom Account
59 USD

Windows 10 & 11 Pro Key
36 USD

Autodesk All App Account Copyright
120 USD

ChatGPT Plus Account (GPT-4)
16 USD

Plugin Retouch4me
69 USD

Upgrade Genuine Office 365
49 USD

Adobe Premiere Pro Account
99 USD

Freepik Premium Account
59 USD

Upgrade genuine Capture One account
120 USD

Capcut Pro 1 Year
39 USD

MidJourney Account
29 USD

Genuine Adobe Illustrator account
99 USD

Upgrade Duolingo Super
29 USD

Genuine Cheap Canva Pro
39 USD

Adobe Photoshop Copyright - Full App
120 USD
How to remove jagged lines in Photoshop images
Nội dung
- 1. Reasons why appearing jagged lines in Photoshop
- 1.1. Low resolution
- 1.2. Changing the size of the image.
- 1.3. Unclear when using color space
- 1.4. Applying creative effects
- 2. Extremely simple instructions to remove jagged lines in Photoshop
- 2.1. How to fix jagged lines in text in Photoshop
- 2.2. Using the Unsharp Mask filter
- 2.3. Using the Blur filter in Photoshop
- 2.4. Use Anti-aliasing to handle jagged images in Photoshop.
- 2.5. Use the Pen Tool to remove jagged lines in Photoshop.
- 3. Notes when fixing jagged errors in Photoshop
- 3.1. Working on Copies
- 3.2. Using adjustment layers
- 3.3. Adjusting resolution
- 3.4. Regularly check the results
- 3.5. Save as a PSD file
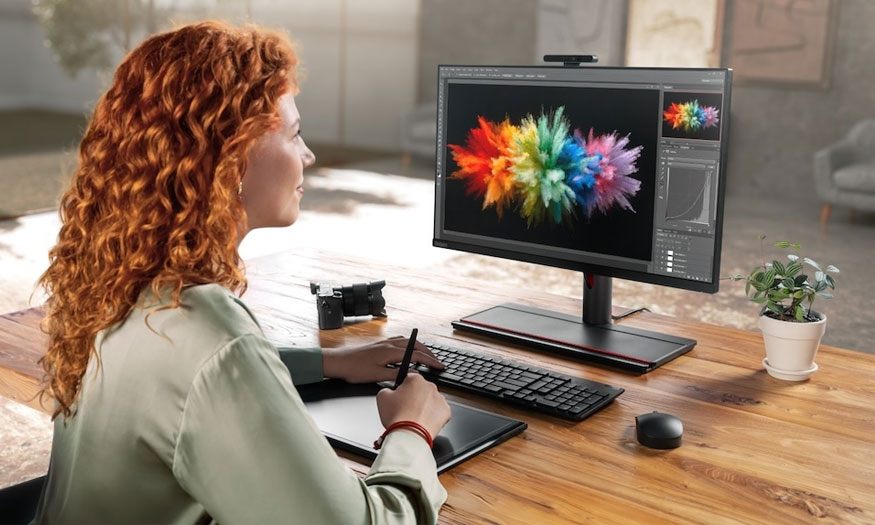
Jagged errors in Photoshop not only cause discomfort during use but also damage the aesthetics and quality of the photo. Let's learn how to perform removing jagged lines in Photoshop images most effectively and quickly.
Jagged errors in Photoshop not only cause discomfort during use but also damage the aesthetics and quality of the photo. Let's learn how to perform removing jagged lines in Photoshop images most effectively and quickly.
.jpg)
1. Reasons why appearing jagged lines in Photoshop
1.1. Low resolution
When the resolution of the image is low or when the image size is enlarged, the image resolution will not be enough to help the image be displayed clearly. Therefore, low-resolution images have jagged errors in text or images, causing discomfort to the viewer, as well as losing the aesthetics of the image.
1.2. Changing the size of the image.
Jagged error in Photoshop can come from the fact that the image is enlarged in size. When we enlarge an image to a larger size than the original size, the pixels will become clear, thereby leading to the appearance of jagged lines.
.jpg)
1.3. Unclear when using color space
Color space is the colors that are represented in digital images. If you do not use the color space correctly or do not clearly understand how to convert colors between color spaces, it will lead to jagged errors in the image.
1.4. Applying creative effects
Applying creative effects such as lighting, shadows, gradients or other effects incorrectly or without care will lead to jagged errors, causing the image to lose its original aesthetic.
2. Extremely simple instructions to remove jagged lines in Photoshop
To remove jagged lines in Photoshop is not too difficult, we can do it in many different ways. Let's learn 5 useful ways to reduce jagged lines in Photoshop below to apply to your photos:
2.1. How to fix jagged lines in text in Photoshop
If you want to fix the problem of jagged lines in text in Photoshop, you only need to do it with 2 simple steps as follows:
Step 1: Enter the content of the text with jagged error immediately on the created Layer layer.
Step 2: Here, select the item “Set the anti - alisasinh Method”, when the folder appears, select options such as “Sharp”, “Crisp”, “Strong”, “Smooth”.
.jpg)
This is one of the simple ways that many people apply to fix jagged errors today. However, you need to pay attention that when the text is still in the "None" option, it will continue to have jagged text problems, so pay special attention. If during the operation you make any mistake, use the Undo command in Photoshop to redo the operation you just performed.
2.2. Using the Unsharp Mask filter
Using the Unsharp Mask filter to fix jagged errors is carried out as follows:
Step 1: Open the image to be edited with Photoshop => go to Filter => select Sharpen => select Unsharp Mask.
.jpg)
Step 2: Set parameters when the working panel appears according to the following information:
- Amount: Adjust depending on image details. For images full of good details, adjust the Amount ratio to be large.
- Radius: The most suitable parameter is from 0.5 - 3 units.
- Threshold: Creates contrast in the image. In this section you should set a high value because a small value will cause image noise.
After installing these settings, select OK to save.
.jpg)
2.3. Using the Blur filter in Photoshop
In addition to the above two ways, you can also use the Blur filter in Photoshop to remove jagged lines with these simple steps:
Step 1: Click => select Layer Background => press Duplicate Layer => select OK to confirm.
.jpg)
Step 2: Filter => Blur => Surface Blur.
.jpg)
Step 3: Set the Radius at 0.5 - 3 to ensure the quality of the image color is not reduced too much. The Threshold parameter should be set to a moderate level, because if you set it too high it will make the image blurry. After completing the installation, click OK to save.
.jpg)
Step 4: Menu => Filter => Blur => Gaussian Blur
.jpg)
Step 5: Set the Radius to a moderately small value to ensure the image is not blurred => select OK to change
.jpg)
Step 6: Use the Eraser Tool to set the Opacity at 45%, and the Flow parameters at 35-37%
.jpg)
Step 7: Next, follow the instructions in the picture.
.jpg)
Click on the image area that needs to be deleted to help other details on the image become clear. Erase foreground image locations or shade objects to help bring out image details.
Step 8: Select Layer => click Blending mode => select Screen or Soft Light to help both layers blend together.
.jpg)
2.4. Use Anti-aliasing to handle jagged images in Photoshop.
Anti-aliasing is a complementary filter for Photoshop that effectively helps reduce image contamination. Use Anti-aliasing to make the image smoother and more natural. Anti-aliasing is considered to have the ability to greatly support design work, so it is highly recommended for use. To remove jagged lines in Photoshop with the Anti-aliasing tool, follow these steps:
Step 1: First, you need to press the key combination Ctrl + O to open the image you want to anti-alias in Photoshop.
Step 2: Choose the appropriate tool to edit jagged areas. Choose the Pen Tool, Shape Tool or any other tool you created to draw or edit in Photoshop.
.jpg)
Step 3: In the Options bar at the top of the Photoshop screen you will see the option "Anti-aliasing" or "Smoothing". You need to make sure this option is enabled or selected.
Step 4: You can now start making edits to the image, including drawing on lines, creating shapes, or editing borders. When drawing or adjusting, the Anti-aliasing tool will automatically smooth the border to avoid aliasing.
Step 5: Once you've finished editing, check the results to make sure the borders and lines are smooth.
It can be seen that Anti-aliasing is a useful tool with the effect of smoothing straight lines and borders to make photos more professional, while effectively avoiding aliasing. However, you should be careful when using it so as not to affect the sharpness of important details in the image.
2.5. Use the Pen Tool to remove jagged lines in Photoshop.
The Pen Tool is also one of the powerful ways to remove jagged lines in Photoshop. The Pen Tool helps make borders and lines look smoother. Specifically, the steps are as follows:
Step 1: Press Ctrl + O to open the image.
Step 2: After inserting the image => select the Pen Tool right on the left side of the screen.
Step 3: Use the Pen Tool to draw the line or border you want to edit to eliminate jaggies. Let's start drawing from the starting point to the ending point of the entire paragraph.
.jpg)
Step 4: After drawing, you will see anchor points and control points on the path. Use the Convert Anchor Point Tool to make adjustments to these points to smooth the line, as well as anti-aliasing.
Step 5: In addition to editing anchor points and control points, you can also perform other edits on the image such as creating shapes, creating borders, and correcting colors.
Step 6: Check the results to make sure the borders and lines are smoother and no longer jagged.
3. Notes when fixing jagged errors in Photoshop
When fixing jagged errors in Photoshop, you need to pay attention to the following basic things:
3.1. Working on Copies
When fixing jagged errors in Photoshop, you need to be especially careful to always create a backup copy of the original image. This job helps you test and adjust the design freely without affecting the original image.
3.2. Using adjustment layers
Using adjustment layers is essential, especially when you need to remove a background or unwanted part of an image. Adjustment layers have the ability to help adjust any modifications without affecting the original data.
3.3. Adjusting resolution
When working on high-quality images or projects, you need to use high resolution. This helps smooth the curves and edges of the image, as well as minimize jaggies for the sharpest, clearest design quality.
3.4. Regularly check the results
After you have finished making modifications, zoom in to a close area to check if jaggedness is still present. This has the effect of making the end result look better at every display scale.
.jpg)
3.5. Save as a PSD file
A PSD is a raw file in Photoshop, including layers, effects, and editing information. Saving as a PSD file will allow you to go back and edit all parts of your agile work. However, PSD files are quite large in size and cannot be opened directly in some other image viewing applications. If you want to share your work or export it to another format, you should use the "Export" feature in Photoshop to create other versions such as JPEG, PNG, or PDF.
Above are the simplest and most effective instructions for anti-aliasing Photoshop images that you should not ignore when working with Photoshop. If you need to install advanced, in-depth editing tools or install copyrighted Photoshop, please contact Sadesign immediately for support.


VIP Products


Best Selling Products
Copyright Adobe Lightroom Account
59 USD
Windows 10 & 11 Pro Key
36 USD
Autodesk All App Account Copyright
120 USD
ChatGPT Plus Account (GPT-4)
16 USD
Plugin Retouch4me
69 USD
Upgrade Genuine Office 365
49 USD
Adobe Premiere Pro Account
99 USD
Freepik Premium Account
59 USD
Upgrade genuine Capture One account
120 USD
Capcut Pro 1 Year
39 USD
MidJourney Account
29 USD
Genuine Adobe Illustrator account
99 USD
Upgrade Duolingo Super
29 USD
Genuine Cheap Canva Pro
39 USD
Adobe Photoshop Copyright - Full App
120 USD