Best Selling Products

Plugin Retouch4me
69 USD

Windows 10 & 11 Pro Key
36 USD

ChatGPT Plus Account (GPT-4)
16 USD

Genuine Adobe Illustrator account
99 USD

Adobe Photoshop Copyright - Full App
120 USD

Copyright Adobe Lightroom Account
59 USD

Freepik Premium Account
59 USD

Capcut Pro 1 Year
39 USD

Upgrade Duolingo Super
29 USD

Upgrade Genuine Office 365
49 USD

Adobe Premiere Pro Account
99 USD

Upgrade genuine Capture One account
120 USD

Genuine Cheap Canva Pro
39 USD

Autodesk All App Account Copyright
120 USD

MidJourney Account
29 USD
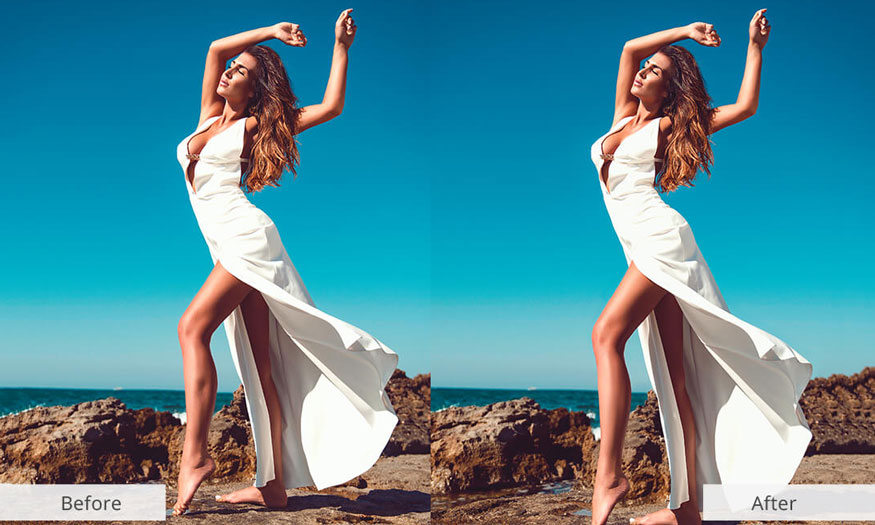
How to lengthen legs in Photoshop
Nội dung
If you take a photo with a high angle and long focal length, it will make the legs much shorter, the model only has "one piece". But don't worry, now you can make your legs as long as you want. Let's learn about how to lengthen legs in Photoshop through the shares below.

If you take a photo with a high angle and long focal length, it will make the legs much shorter, the model only has "one piece". But don't worry, now you can make your legs as long as you want. Let's learn about how to lengthen legs in Photoshop through the shares below.
1. How to lengthen legs in Photoshop using Free Transform
If you want the subject in your photo to have elongated legs, please refer to how to lengthen legs in Photoshop using Free Transform right below.
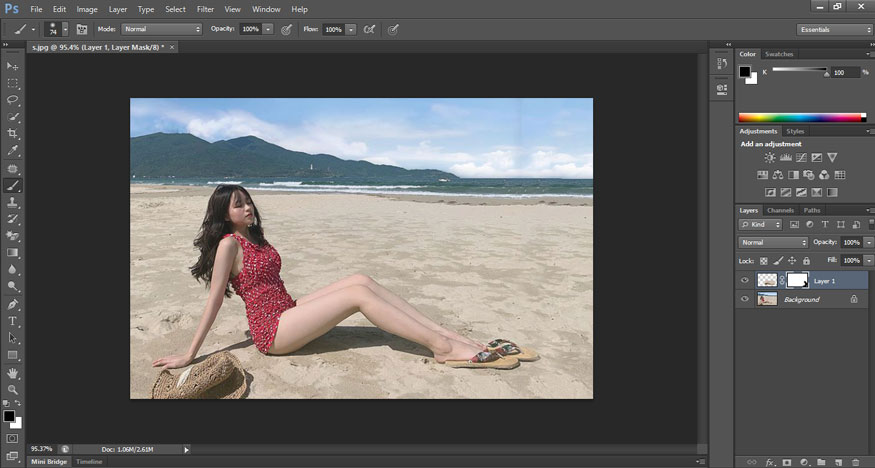
Step 1: Open a photo of the subject who wants to lengthen his legs. You can open a photo by going to File on the menu bar, selecting Open => selecting the photo to open => selecting Open. Or press the shortcut key combination Ctrl+O.

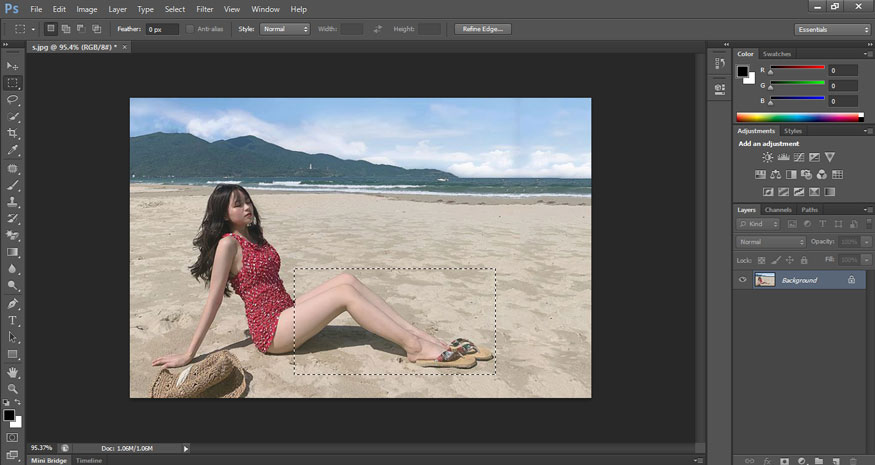
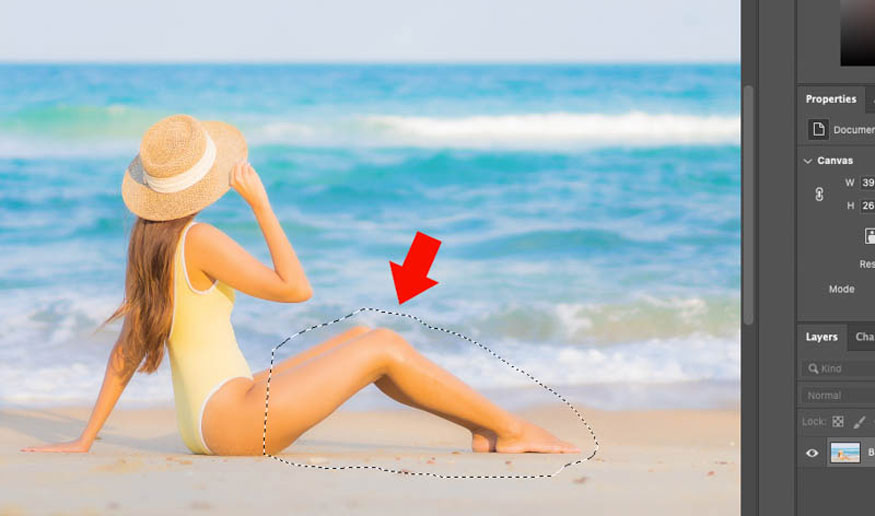
Step 2: Then create a selection with the Marquee Tool, then press Ctrl+J to put the selection on a new Layer. I cut from the thighs of the model so that lengthening the legs in Photoshop would give the most natural results.
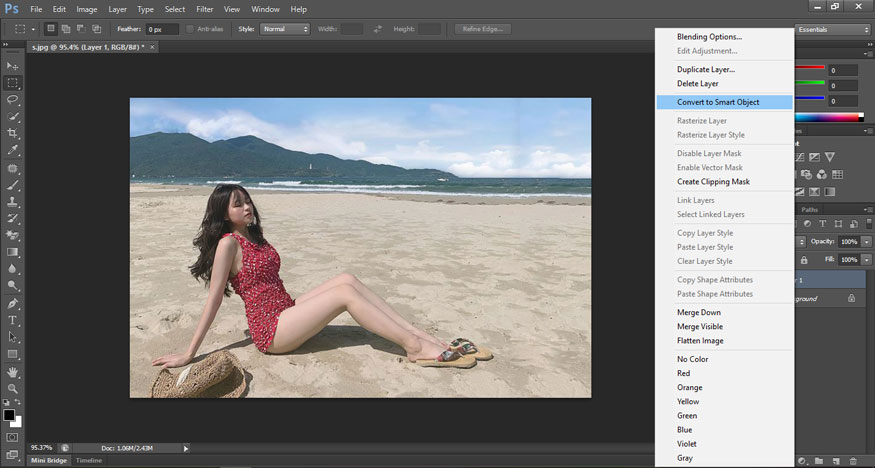
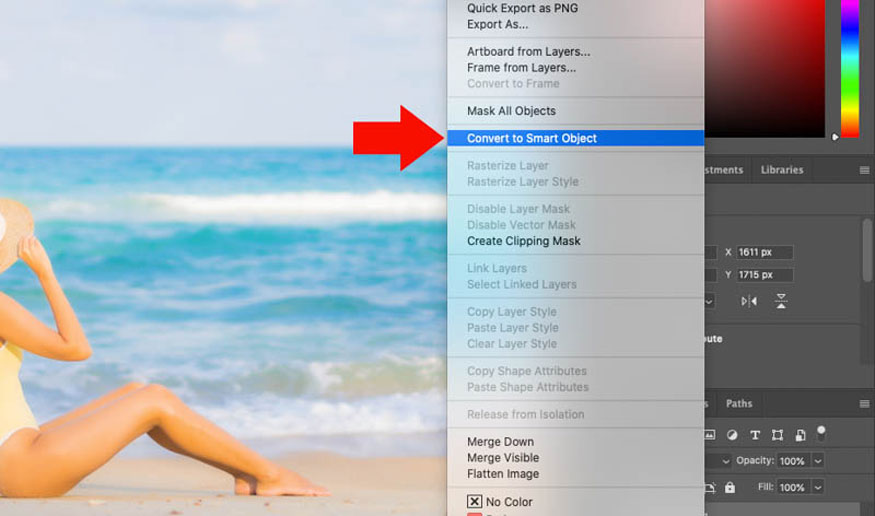
Step 3: To continue, right-click Layer 1, then select Convert to Smart Object. This operation is to prevent the selection from breaking when increasing or decreasing its size. If you use a normal layer, the image will break after shrinking, then enlarging again.
Step 4: On the menu bar, click Edit => select Free Transform or use the keyboard shortcut Ctrl+T.
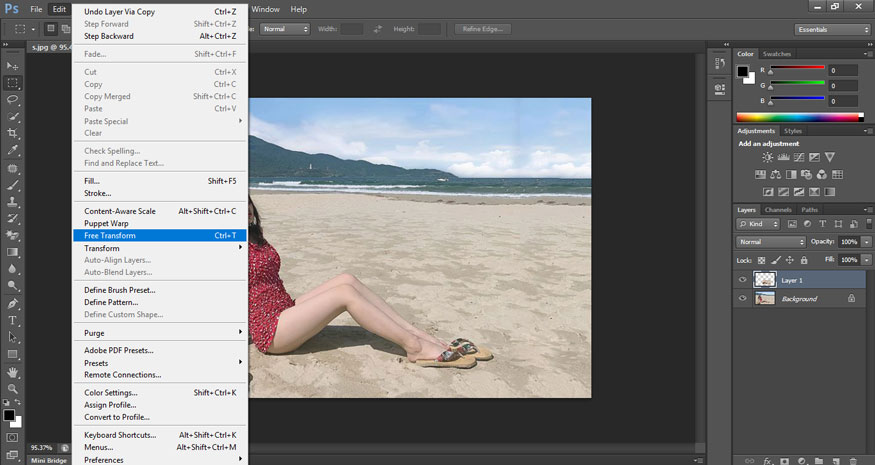
In this case, I want to extend the leg to the left, so I hold down the Shift key, then click and hold the mouse on the white anchor point and drag it to the left. You will see the model's legs are longer, but still natural. Once you have pulled the leg to the desired length, click on the check mark.
Step 5: However, you will see that there are areas that are misaligned and mismatched. We just need to create a Layer Mask for Layer 1. If you see the Layer Mask is white as above, it is correct.
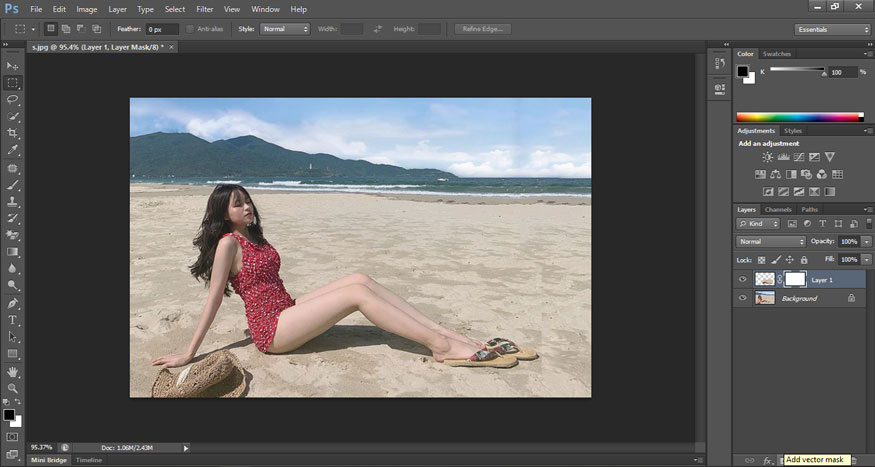
Step 6: Then use a black Brush to paint over the smudged areas. They will be hidden and the details of the original image will be returned.
As you can see, we have just completed a very simple way to lengthen legs in Photoshop
2. How to lengthen legs in Photoshop using Puppet Warp
Besides Free Transform, you can also lengthen legs in Photoshop using Puppet Warp. To perform lengthening legs, please follow these steps:
Step 1: Open the photo of the subject who wants to stretch the legs. You can open a photo by going to File on the menu bar, selecting Open => selecting the photo to open => selecting Open. Or press the shortcut key combination Ctrl+O.
Step 2: Use the Lasso Tool or press the keyboard shortcut (L) to create a selection for the model's legs. You can also use other tools as long as you create a selection of the model's legs. Then press the key combination Ctrl+J to copy the selection to a new layer.
Step 3: We right-click on the new layer and select Convert to Smart Object. The purpose is to resize the selection without breaking it.
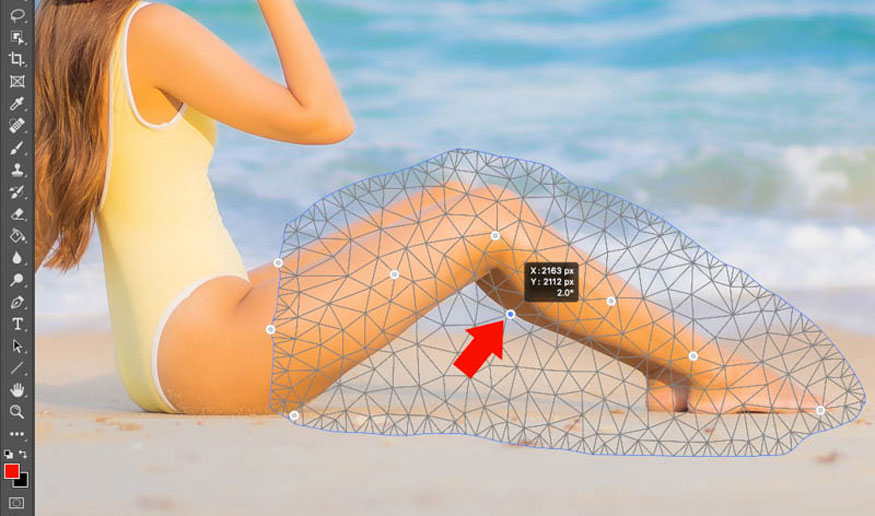
Step 4: On the menu bar, click Edit => select Puppet Warp.
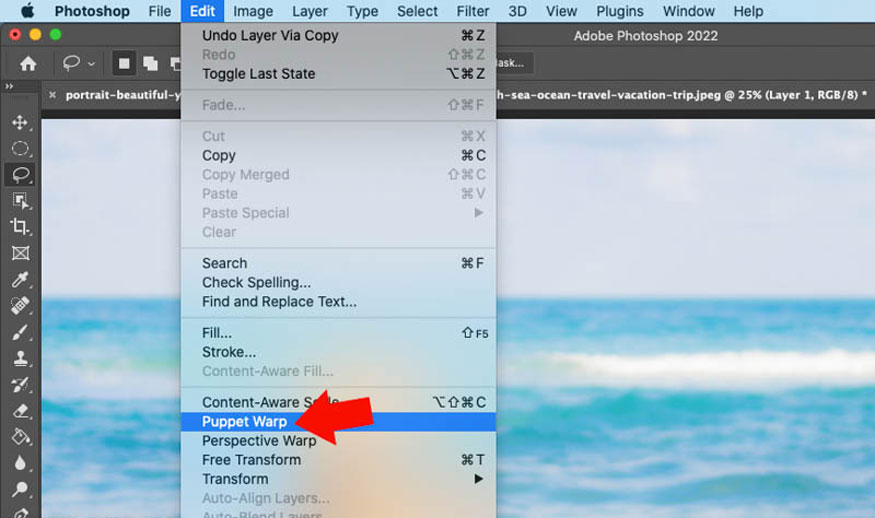
You will see a grid covering the selection, left click to create anchor points. When you drag any anchor point, only that part lengthens, not the whole foot like Free Transform. You can create multiple anchor points for more detailed adjustments. Of course, you can also straighten your legs in any direction.
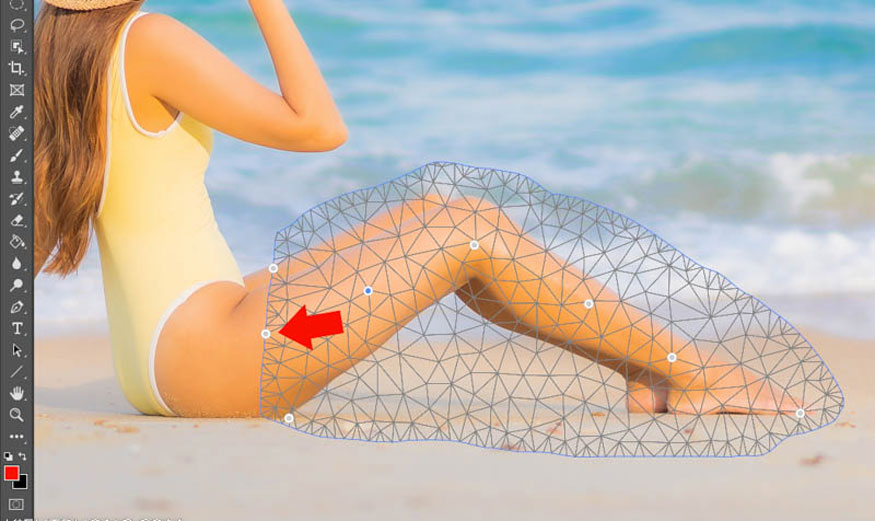
Adjust the anchor points to get the most elongated and satisfying legs.
Step 5: Now let's create a Layer Mask to correct the blurred area.
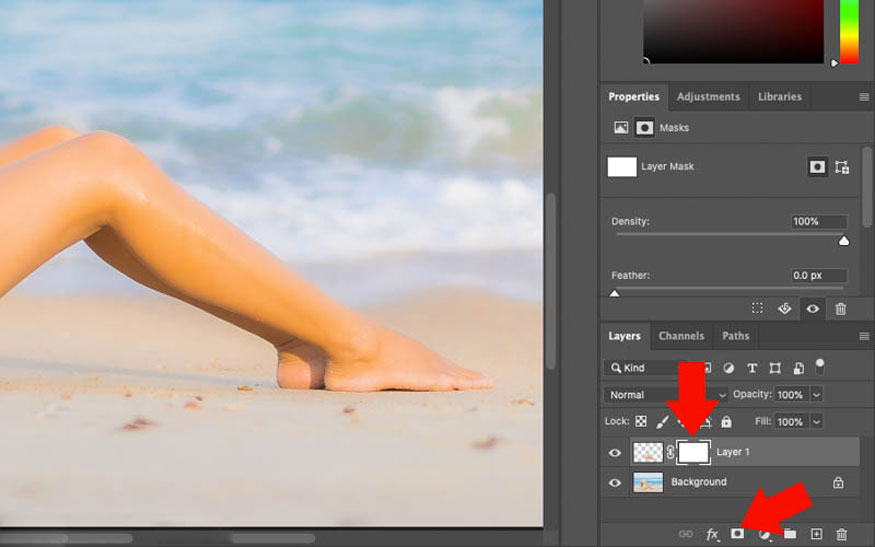
Use a black Brush, then paint over the blurred image area to restore details of the original image.
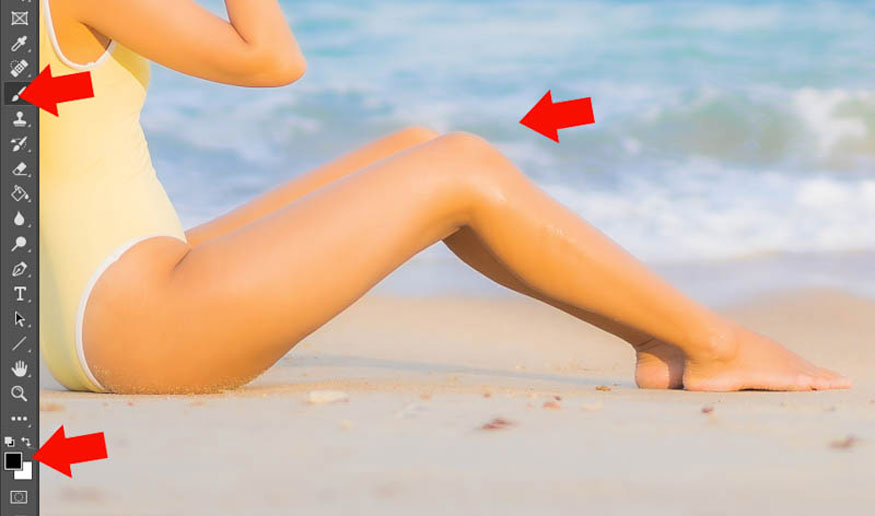
Above are two extremely simple ways to lengthen legs in Photoshop. Hopefully Sadesign can help you edit the most satisfactory photos.


VIP Products


Best Selling Products
Plugin Retouch4me
69 USD
Windows 10 & 11 Pro Key
36 USD
ChatGPT Plus Account (GPT-4)
16 USD
Genuine Adobe Illustrator account
99 USD
Adobe Photoshop Copyright - Full App
120 USD
Copyright Adobe Lightroom Account
59 USD
Freepik Premium Account
59 USD
Capcut Pro 1 Year
39 USD
Upgrade Duolingo Super
29 USD
Upgrade Genuine Office 365
49 USD
Adobe Premiere Pro Account
99 USD
Upgrade genuine Capture One account
120 USD
Genuine Cheap Canva Pro
39 USD
Autodesk All App Account Copyright
120 USD
MidJourney Account
29 USD