Best Selling Products
How to convert photos into paintings in Photoshop
Nội dung
- 1. Three simple ways to convert photos into paintings in Photoshop
- 1.1. How to convert photos into pencil drawings
- 1.2. Convert photos into color paintings with Photoshop
- 1.3. How to convert photos to oil paintings
- 2. Tips to make your painting more beautiful
- 2.1. Inserting a painting into an art easel.
- 2.2. Changing colors
- 2.3. Changing the size or proportion
- 2.5. Creating light and shadow effects
- 2.6. Using unique drawing techniques
- 2.7. Focus on emotions and meanings
If you want to turn your photos into a unique work of art, apply the photo-to-painting feature in Photoshop. Specifically, Sadesign will inform you on how to do this in the following article!
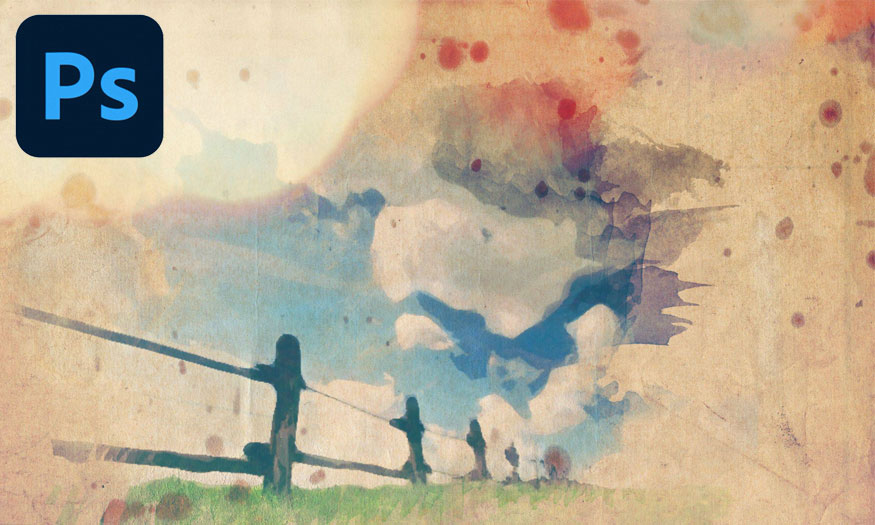
If you want to turn your photos into a unique work of art, apply the photo-to-painting feature in Photoshop. Specifically, Sadesign will inform you on how to do this in the following article!
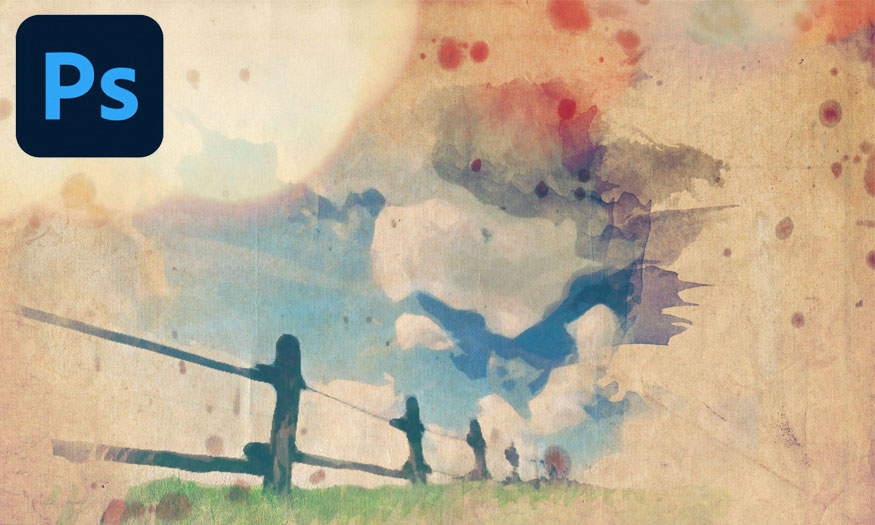
1. Three simple ways to convert photos into paintings in Photoshop
1.1. How to convert photos into pencil drawings
To create black and white or color pencil drawings from digital photos with just a few simple steps in Photoshop, follow the instructions below:
Step 1: Open the photo you want to convert change in photoshop.
Step 2: Press Ctrl+J to create a new layer.

Step 3: Right click on Create new fill or adjustment layer => select Black White…
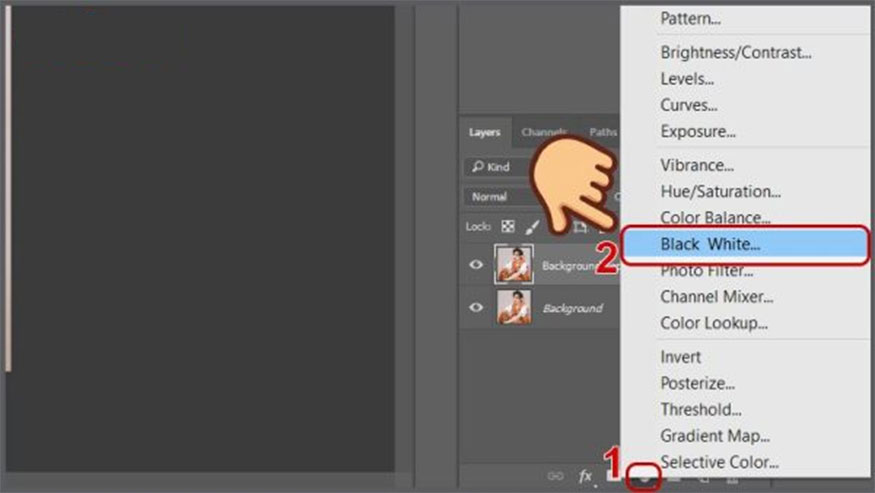
Step 4: Keep the sliders intact and click any point outside to exit the Properties Black & White window, as well as convert the color image to black and white.
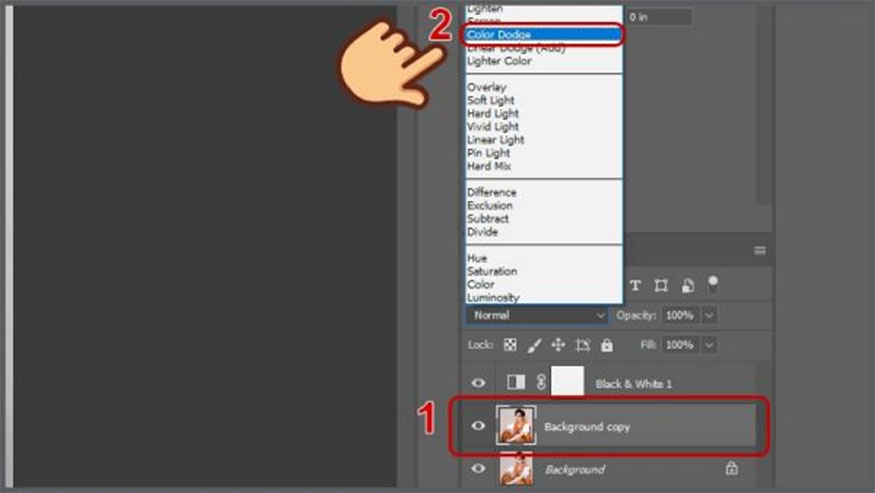
Step 5: Click to select the duplicate layer, choose to create contrast in the Color Dodge section so that the image is black and white.
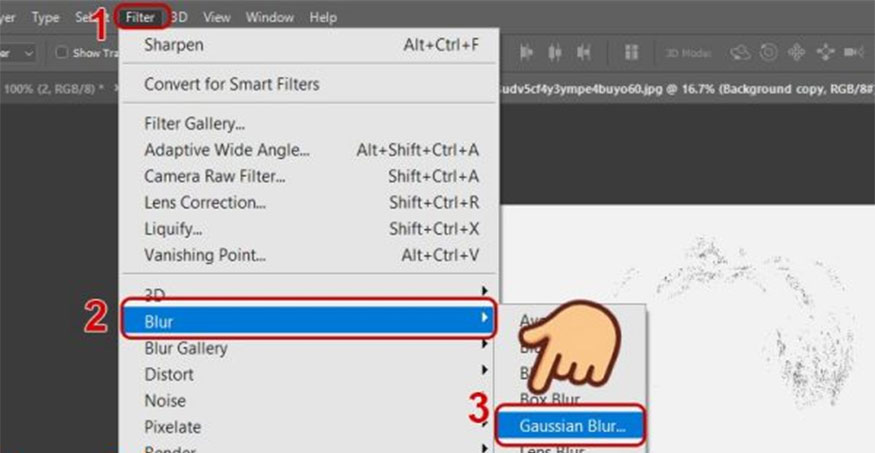
Step 6: Select Image => Adjustments => Invert (or press the keyboard shortcut Ctrl + I). Then click Filter => Blur => Gaussian blur...
Step 7: In the Gaussian Blur window, drag the Radius slider until the image turns into a crayon painting. When you are satisfied, click OK.
Step 8: Before saving the image, you should merge the above 3 layers by holding Ctrl, then click to select the layers, press Ctrl + E to merge.
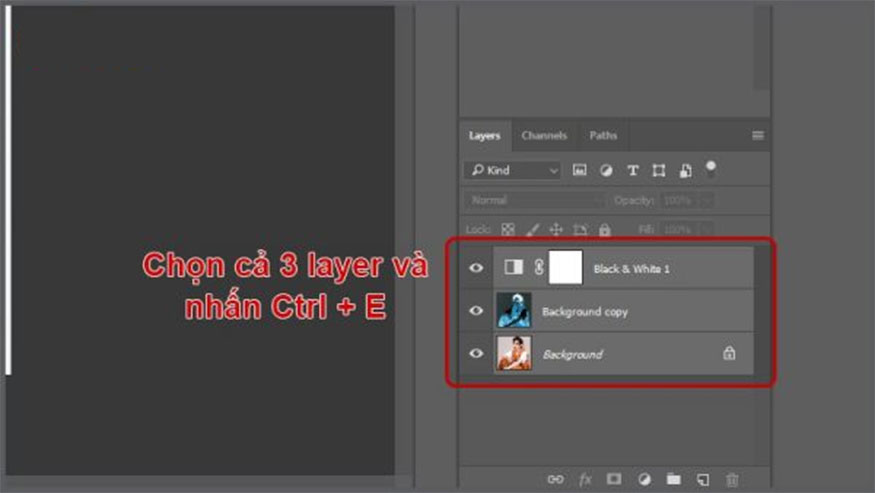
This is the result:
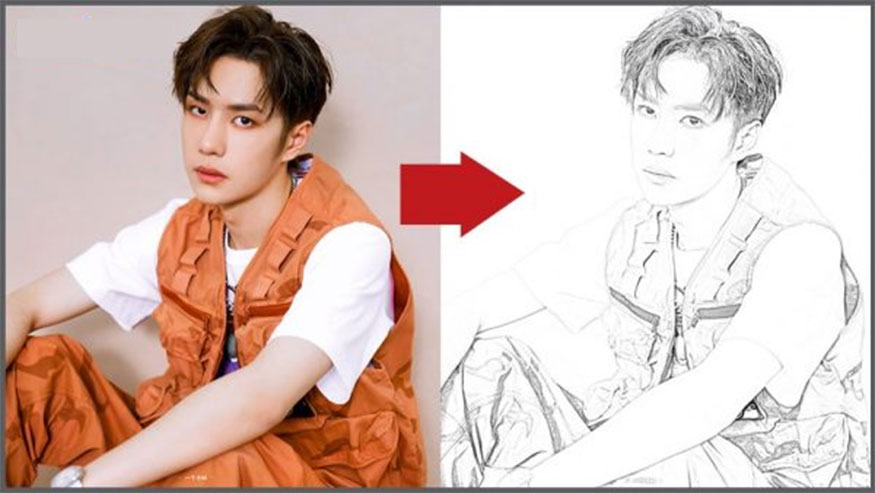
1.2. Convert photos into color paintings with Photoshop
You can create vivid color paintings from digital photos by using the Style Transfer tool in Photoshop. Specifically, the steps are as follows:
Step 1: Open your photo in Photoshop.
Step 2: Next, click Filter => Neural Filters.
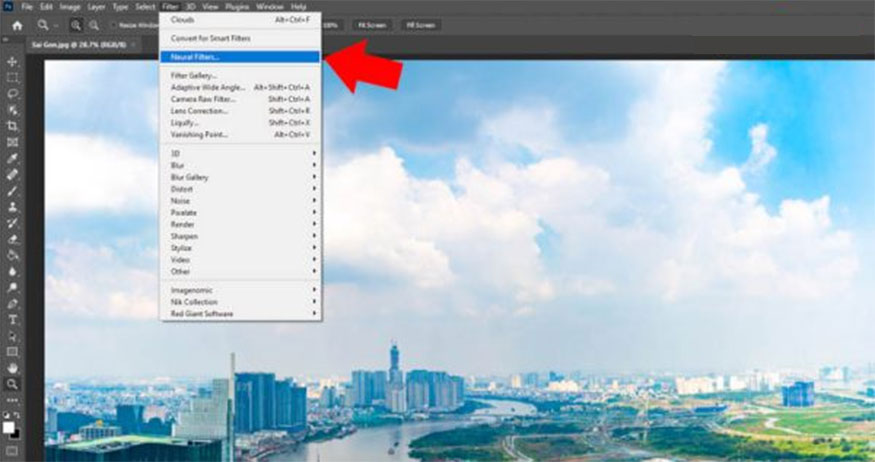
Step 3: Click Creative => Style Transfer, you just need to select the styles displayed in Artist Style and your photo will immediately be converted into a painting similar to that style.
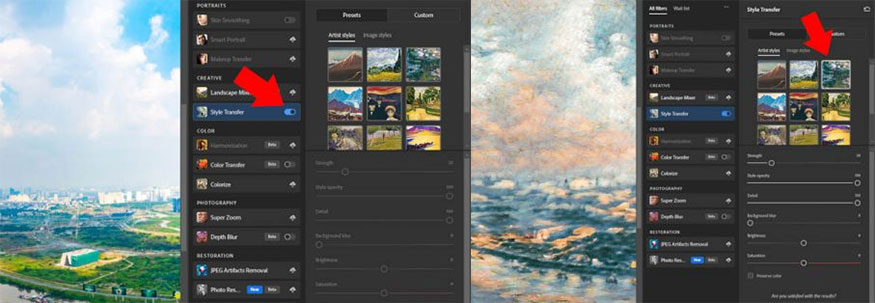
Step 4: If you don't like using Artist Style, click Image Style. Here, photos will be displayed in many different styles. If you want to create a style, click on that style and you're done.

Step 5: You can go to Custom => Select an Image to select a sample image. This feature allows users to select any picture currently on the computer. Photoshop software will analyze and convert the photo according to the style you just selected.
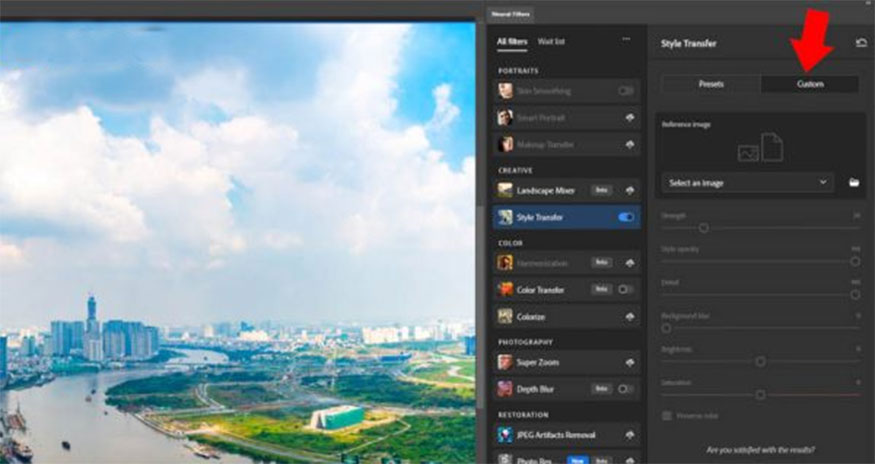
Step 6: Return to Artist Style, drag the Strength slider to control the impact. If you drag it to the right, the impact is greater and vice versa. Thus the photo has been transformed into a painting as a model.
Step 7: You can drag the Style Opacity slider to help control the impact of the Artist Style. By default they will be 100%, reduce them to see the details of the original photo.
Step 8: Control the details of the picture by dragging the Details slider. If you drag it to the right, the picture will have more details and vice versa.
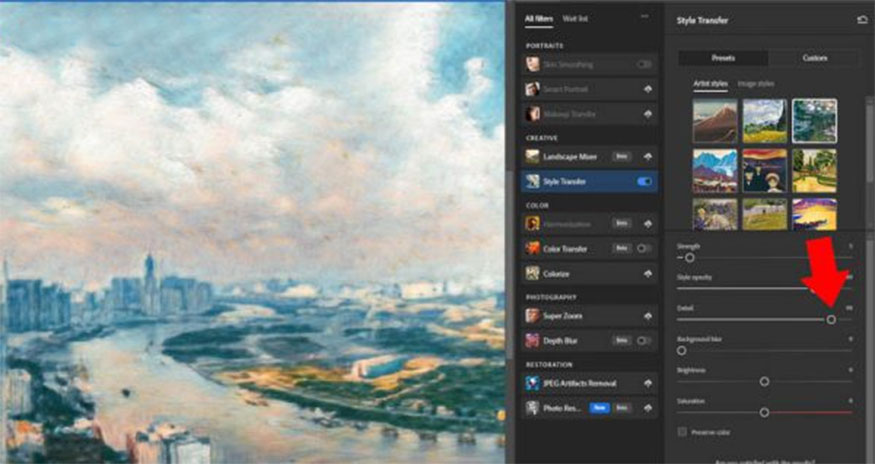
Step 9: Using Style Transfer, the brightness of the photo will change quite a lot. To fix it, drag the Brighness slider to the right to increase brightness or drag it to the left to decrease brightness. Then choose the parameters that suit your purpose.
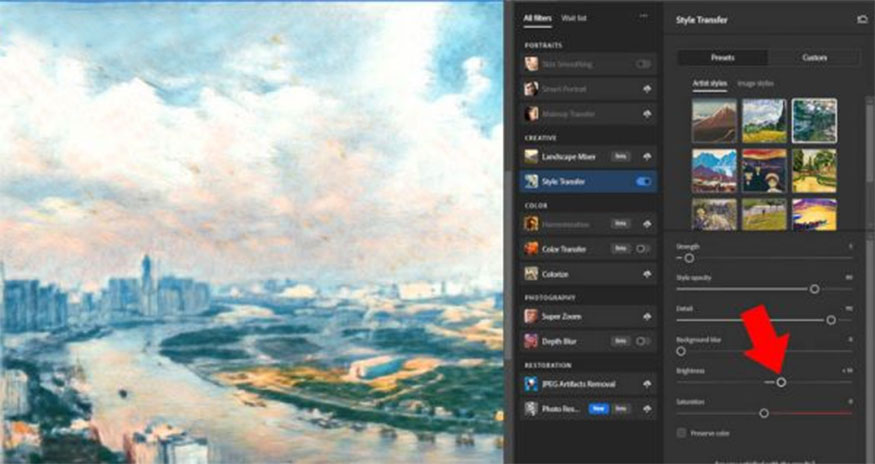
Step 10: To change the color level, drag the Saturation slider to the right to make the color darker or drag it to the left to make the color lighter. If you want to keep the original image color, check Preserve Color.
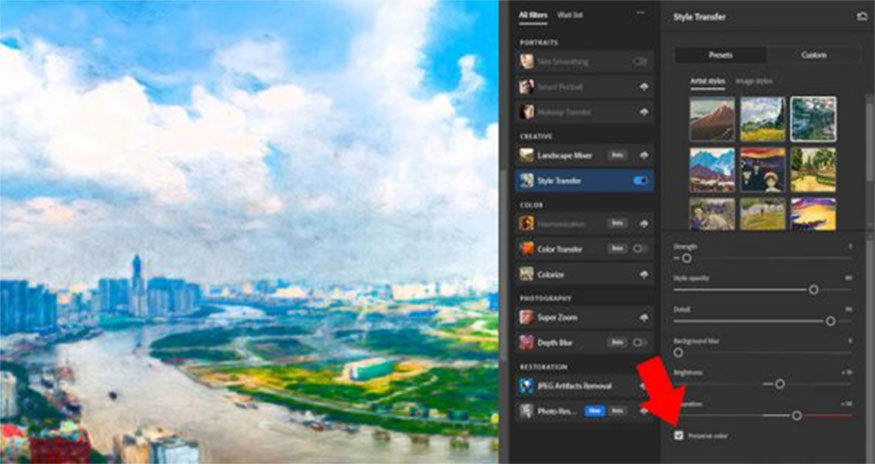
1.3. How to convert photos to oil paintings
You can absolutely create an artistic oil painting from digital photos with these simple steps:
Step 1: Open the photo you want to convert in Photoshop, then drag that image layer down to the Create a new layer section to create a duplicate layer, or you can press the keyboard shortcut Ctrl + J to duplicate.
Step 2: Press the keyboard shortcut Ctrl + U to open the Hue/Saturation dialog box. Increase the color intensity of the photo to help it look more beautiful when converted to an oil painting.
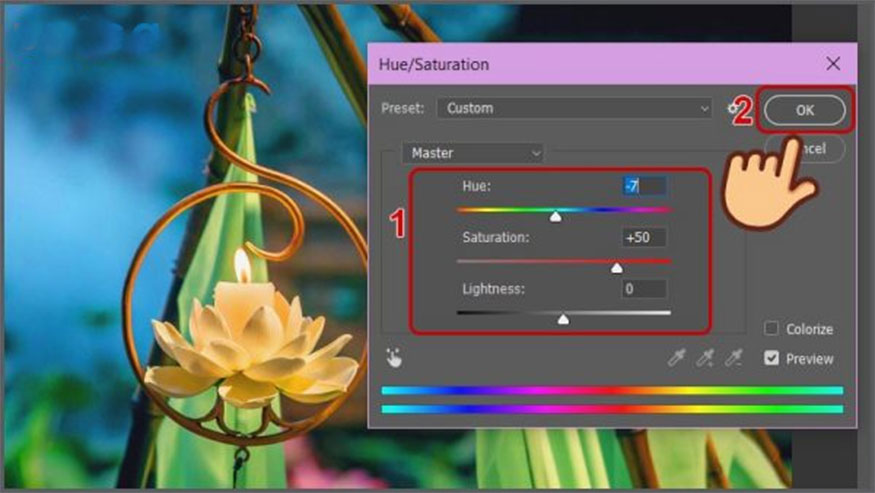
Step 3: Click Filter => Filter Gallery…
Step 4: In the panel that appears, select Artistic => Plastic Wrap.
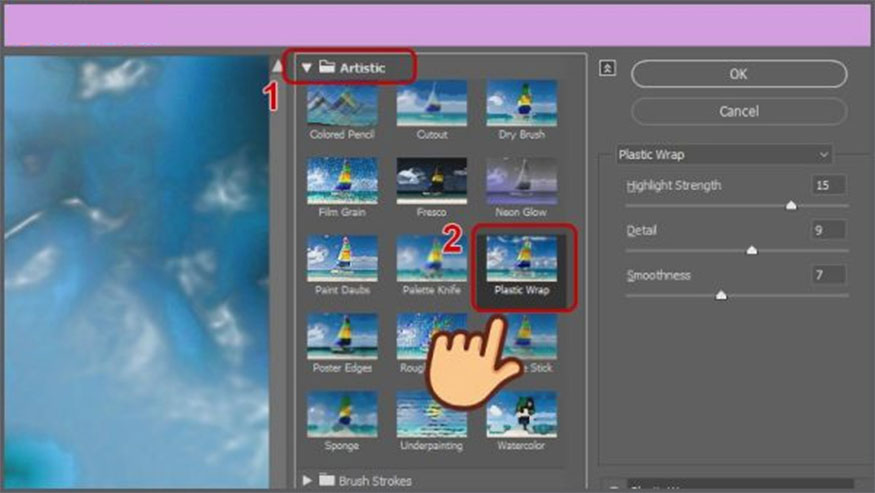
Step 5: Go to New effect layer to create additional effects layers.
Step 6: On the new effect layer, select the Paint Daubs tool and adjust the parameters accordingly.
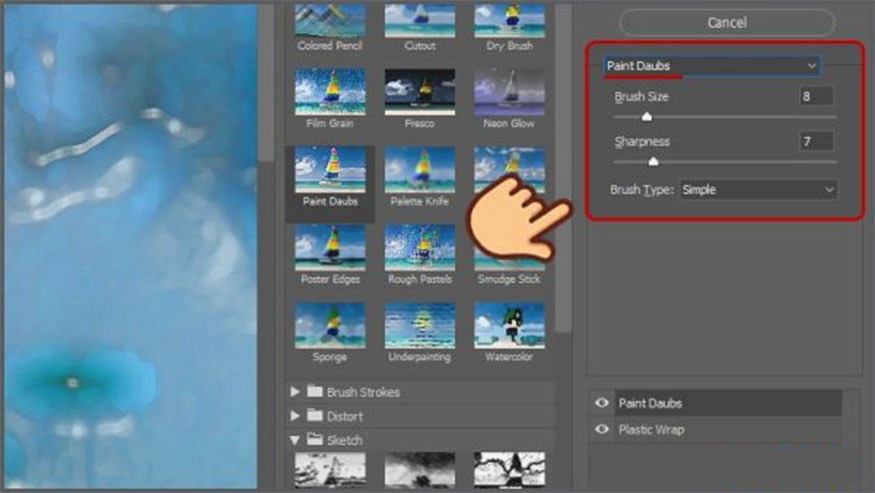
Step 7: Create a new Effect layer and click the Texturizer tool to create the veins of the canvas.
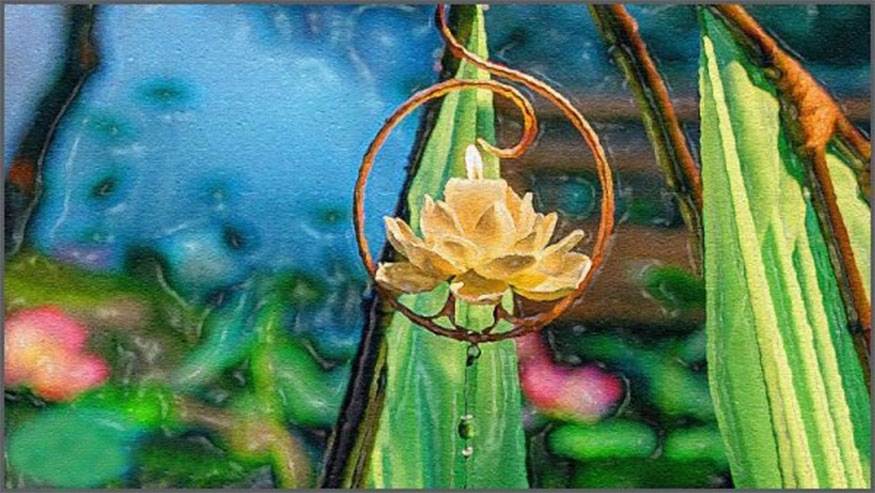
Step 8: Create a new Effect layer, click the Glass tool, then adjust the parameters appropriately to avoid causing distortion or blurry images. Depending on each image, adjust the parameters appropriately. After you finish adjusting the parameters, click on the effect layer you just created => click OK to save.
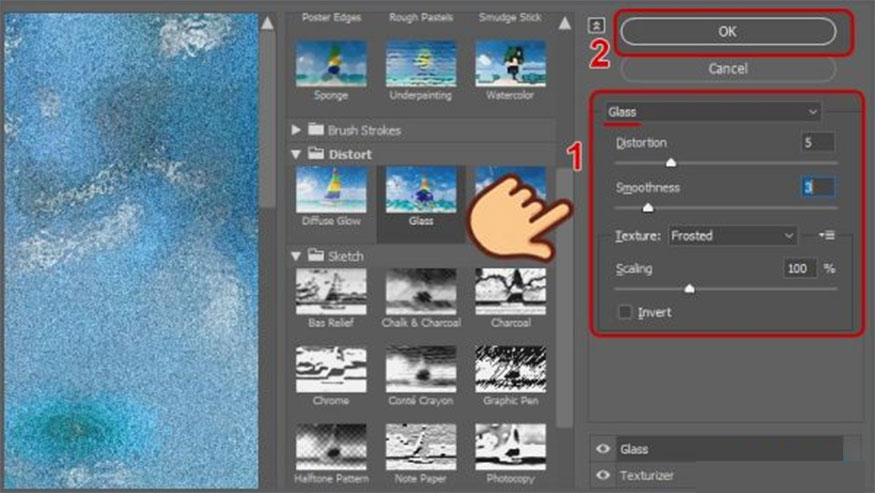
The image after editing is as follows:
Step 9: Create another copy of the original Background layer by pressing the shortcut Ctrl + J (or Cmd + J for MacOS), place them at the top.
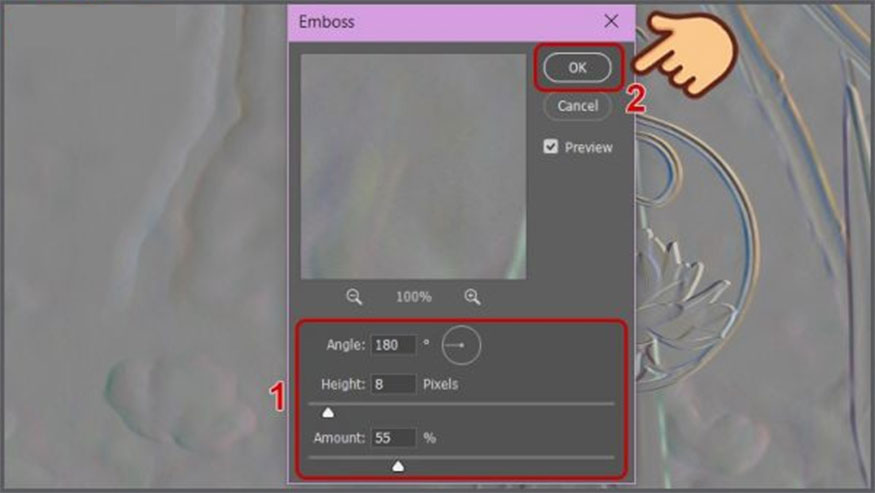
Step 10: Then press Filter => Stylize => Emboss. Adjust the parameters as shown and click OK.
Step 11: Switch the image to Vivid Light blending mode to overlap the layer below.
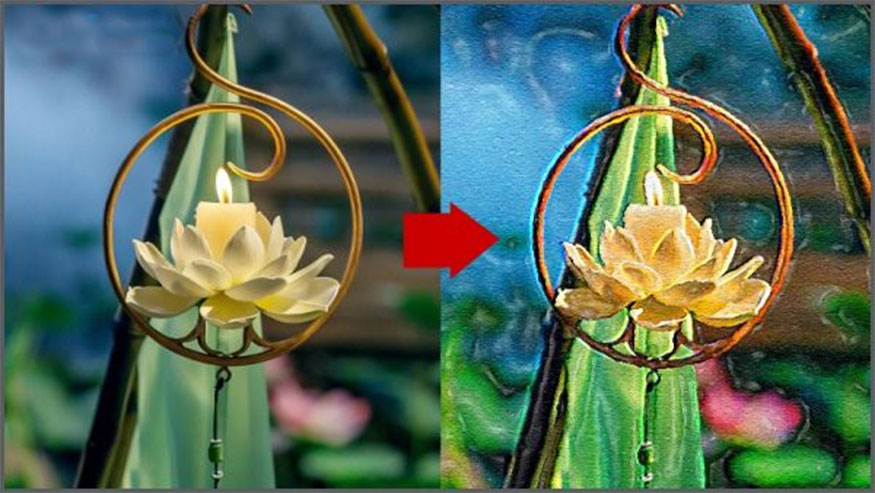
So, we have successfully soldered how to convert photos to oil paintings and here is the result:
2. Tips to make your painting more beautiful
2.1. Inserting a painting into an art easel.
Collating photos into a Photoshop frame will be able to create a work of art that brings a sense of solemnity, while also helping to enhance the value of the work. You should choose a frame that matches the style and color tone of the painting to bring harmony and enhance its aesthetics.
2.2. Changing colors
Changing the colors of paintings helps them become more unique and impressive. But you should consider carefully about changing colors to help ensure this change will truly fit the context, as well as the meaning of the work. Test on a copy or digital drawing to choose which color gives the best effect.

2.3. Changing the size or proportion
Changing the size or proportion of the picture helps create a new look. Sometimes, enlarging or reducing a part of the picture will have the effect of highlighting important details or creating a very unique feeling of movement. 2.4. Adding new details or elements
Adding new details or elements to a painting will make it more interesting. This can be objects, figures to create a balance, as well as accents to the painting.
2.5. Creating light and shadow effects
Using light and shadow techniques helps bring depth and evoke a sense of reality to the painting. Creating light to shine through and create shadows helps bring an extremely attractive and multi-dimensional effect to the work.
2.6. Using unique drawing techniques
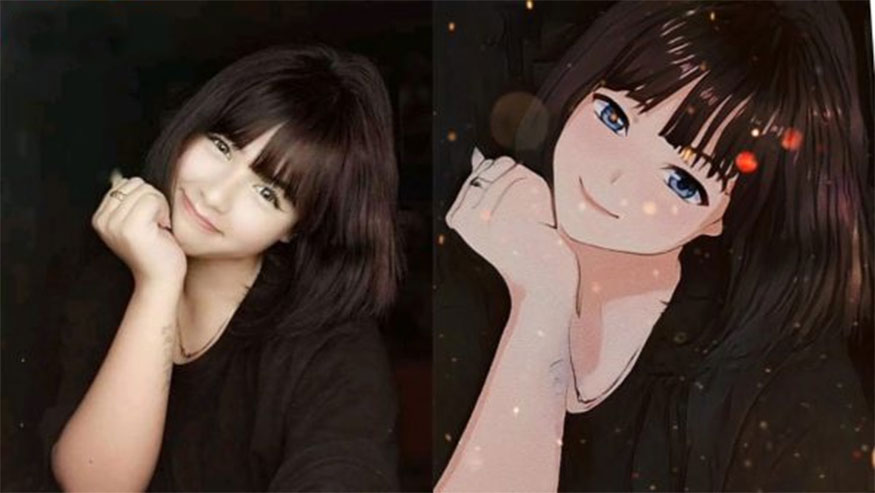
You can experiment with unique drawing techniques such as chiseled strokes, finger painting, drawing on many materials, highlight drawing, etc. to create a surface and feeling. unique to the painting.
2.7. Focus on emotions and meanings
To make the painting more impressive, you should focus on conveying emotions and meanings through each stroke and color. This has the effect of creating a connection with the viewer, making the work more beautiful.
Hopefully the 3 ways to convert photos into paintings in Photoshop that we bring above will help you create for yourself a unique, impressive and creative work of art.
If you want to install copyrighted Photoshop or have more useful editing tools on Photoshop, contact Sadesign immediately for the fastest advice!


