Best Selling Products

Capcut Pro 1 Year
39 USD

Upgrade Duolingo Super
29 USD

Windows 10 & 11 Pro Key
36 USD

Plugin Retouch4me
69 USD

Adobe Premiere Pro Account
99 USD

Autodesk All App Account Copyright
120 USD

Freepik Premium Account
59 USD

Upgrade genuine Capture One account
120 USD

Genuine Cheap Canva Pro
39 USD

Genuine Adobe Illustrator account
99 USD

Upgrade Genuine Office 365
49 USD

Copyright Adobe Lightroom Account
59 USD

Adobe Photoshop Copyright - Full App
120 USD

ChatGPT Plus Account (GPT-4)
16 USD

MidJourney Account
29 USD
How to Create grids in photoshop
Nội dung
- 1. Learn about the Grid and Guides system in Photoshop
- 1.1. What is Grid?
- 1.2. What are guides?
- 1.3. Distinguish Grid and Guides
- 2. How to create a grid in Photoshop using Grid
- 3. How to create Guides in Photoshop
- 3.1. Create Guides using Rulers
- 3.2. Creating Guides by setting positions
- 3.3. Creating multiple Guides
- 3.4. How to fix Guides
- 4. How to change the color of Guides in Photoshop
Creating grid cells in Photoshop helps the photo alignment process be most accurate, creating synchronization for objects in the photo. However, not everyone knows how to create grids in Photoshop, let's explore right here.
Creating grid cells in Photoshop helps the photo alignment process be most accurate, creating synchronization for objects in the photo. However, not everyone knows how to create grids in Photoshop, let's explore right here.

1. Learn about the Grid and Guides system in Photoshop
Nowadays, people often create grids in Photoshop using Grid and Guides. So what do you know about these two tools?
1.1. What is Grid?
Grid is a system of parallel and perpendicular lines to form a "mesh", displayed in Photoshop's canvas. Grid divides Photoshop's working frame into small, equal squares, helping users align objects according to a certain standard. From there, creating synchronization and harmony in the design.
Grid allows you to change the color, spacing and size of the cells in the grid as desired.
1.2. What are guides?
Guides are vertical or horizontal lines, pulled from the Rulers bar on the top and left edges of the canvas. Guides have size divisions to help you determine the position, distance, and size of objects in the design. You can create many different Guides, move them as you like.
1.3. Distinguish Grid and Guides
Grid and Guides are two optimal support tools for designing in Photoshop. They have some similarities and differences as follows:
- Similarities
Both Grid and Guides are straight lines displayed on Photoshop's canvas. They will help you align, arrange and arrange objects in the design easily and accurately.
- Differences
- Grid is a system of parallel and perpendicular lines. Guides are just vertical or horizontal lines.
- Grid displays on the entire canvas, while Guides only displays within the Rulers (ruler bar) on the top and left edges of the canvas.
- Grid has a Snapping feature, which means that when you move an object near the Grid, it will automatically align to the Grid. Guides do not have this feature, you will have to manually align them.
- Grid can be hidden or shown using the keyboard shortcut Ctrl + '. Guides can be hidden or shown using the keyboard shortcut Ctrl + ; .
2. How to create a grid in Photoshop using Grid
With how to create a grid in Photoshop using Grid, you can refer to some basic steps as follows:
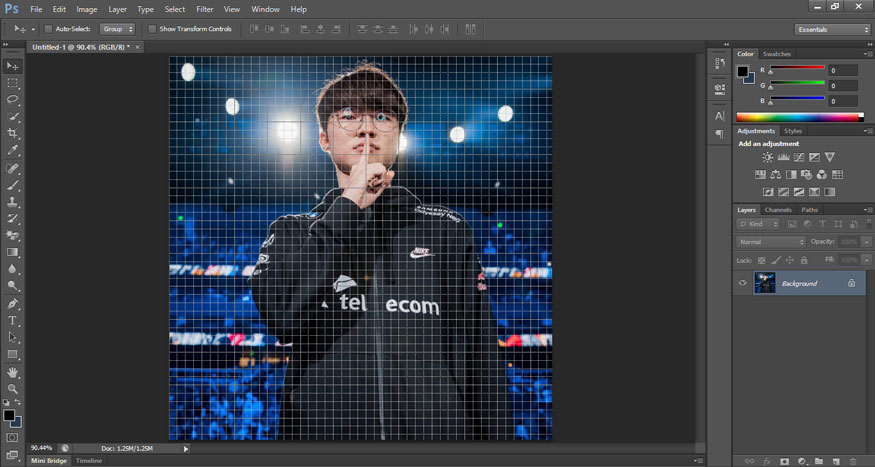
Step 1: On the menu bar, select View => Show => Grid (or press the shortcut Ctrl + ').
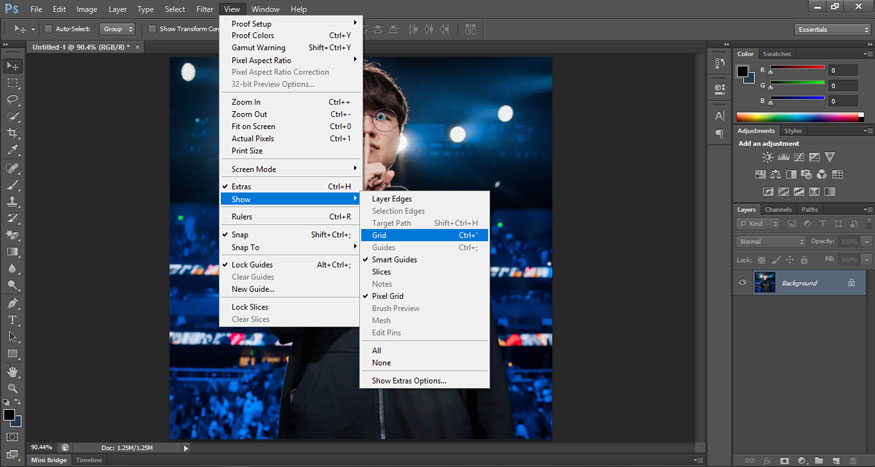
The result will be a grid like this.
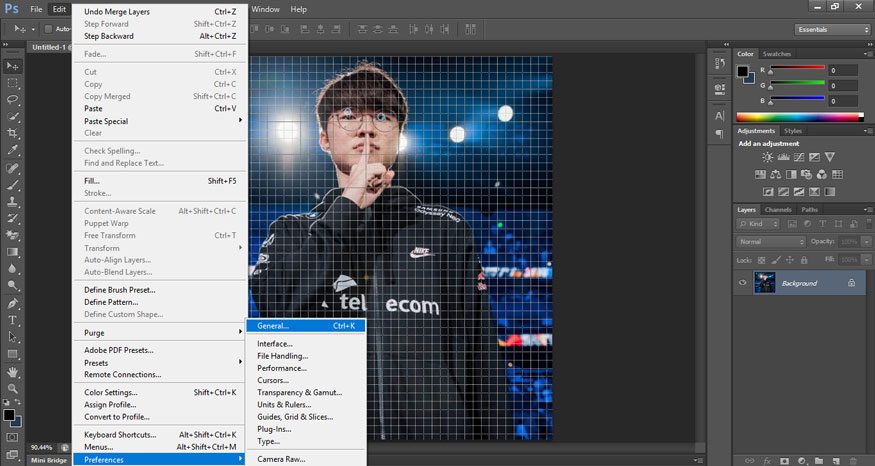
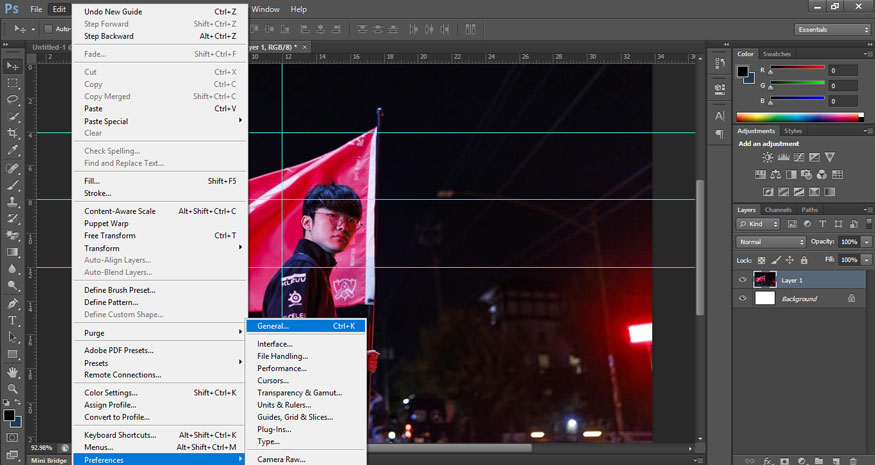
Step 2: If you want to customize the grid interface, click Edit on the toolbar, select Preferences => General (or press the keyboard shortcut Ctrl + K).
Step 3: In the Preferences box, select Guides, Grid & Slices.
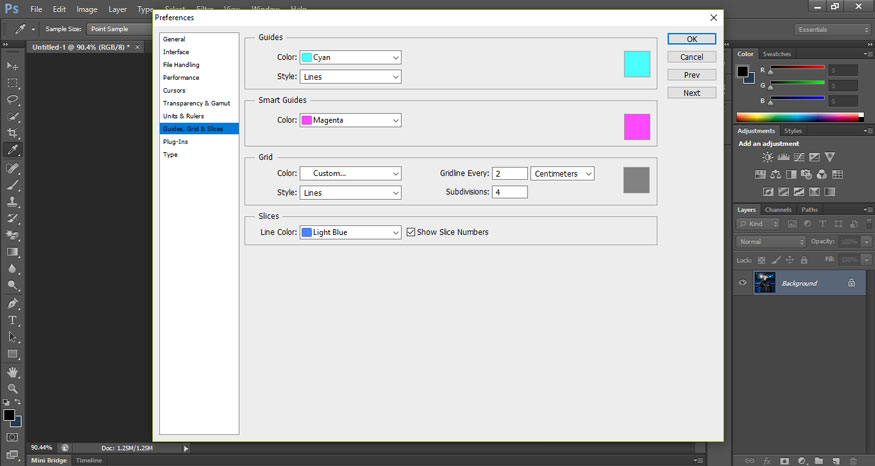
Step 4: In the Preferences box of the Grid, you can proceed to change the settings. Specifically as follows:
- Gridline Every: Set the distance between straight lines in the Grid. You can choose the unit as Pixels, Inches, Millimeters, Centimeters, Points, Picas or Percent.
- Subdivisions: Set the number of subdivisions in each cell of the Grid. You can choose from 1 to 10.
- Color: Set the color for the Grid lines. You can choose colors according to the color chart or enter the HEX color code.
- Style: Set the style of the Grid lines. You can choose Lines, Dashed Lines or Dots.
After setting the parameters, click OK to save.
3. How to create Guides in Photoshop
To create a grid in Photoshop using Guides, you can proceed in a number of ways as follows:
3.1. Create Guides using Rulers
How to create a grid in Photoshop using Rulers includes the following 4 steps:
Step 1: Open Photoshop , on the menu bar, select File => New to create a new file or open a new image.
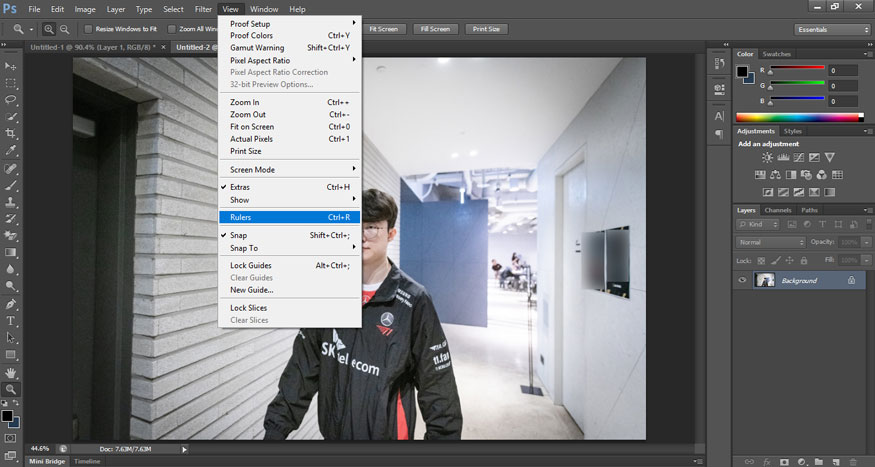
Step 2: On the menu bar, select View => select Rulers to display the Rulers bar at the top and left edges of the working frame. You can also press the keyboard shortcut Ctrl+R.
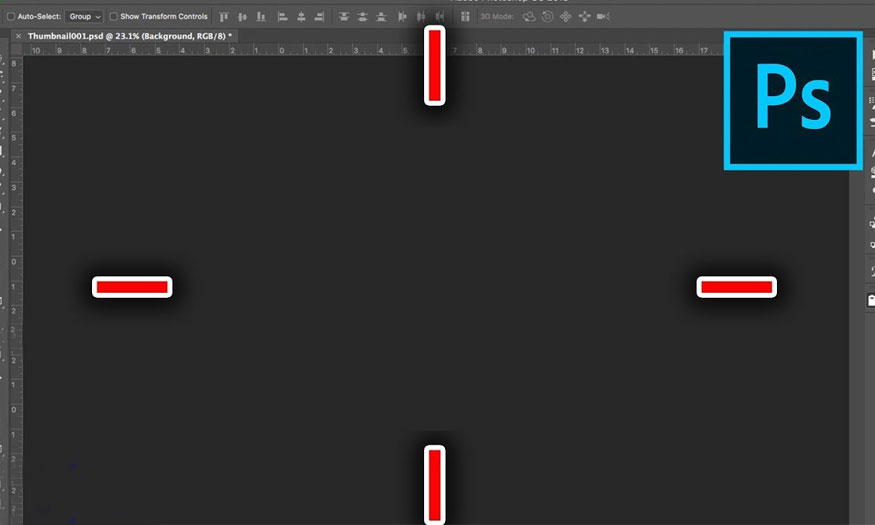
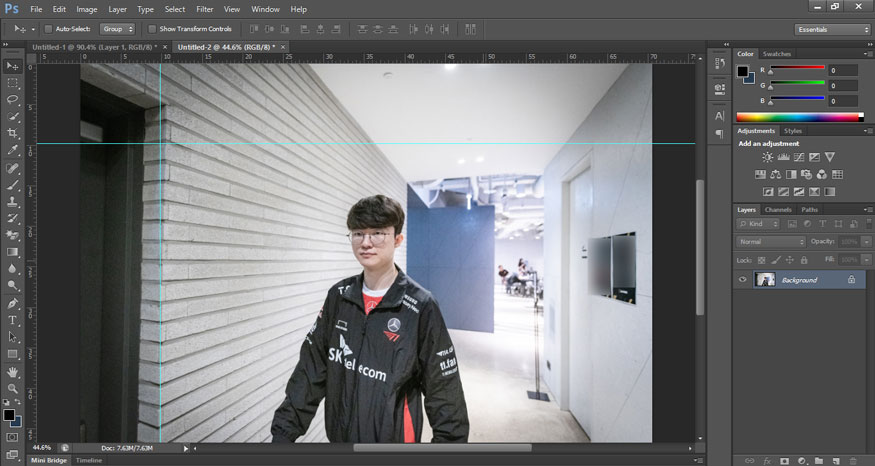
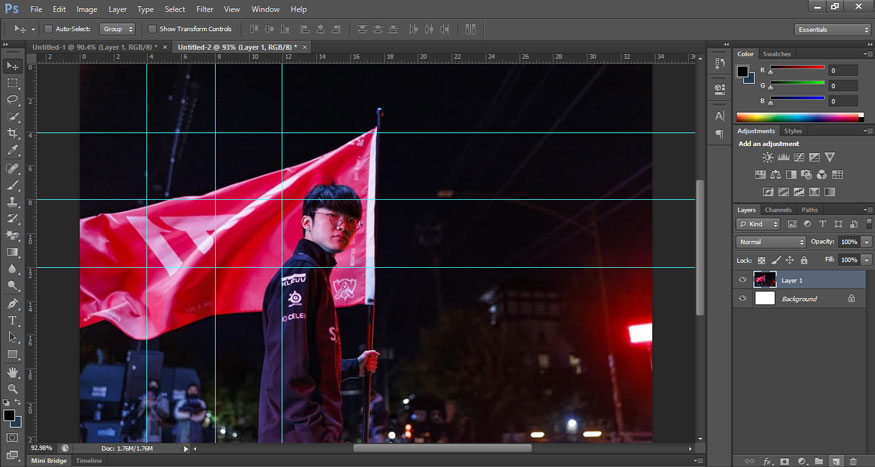
Step 3: Hold down the left mouse button on the Rulers bar and then drag it out to the canvas to create a vertical or horizontal Guide line. You can proceed to create as many different Guides as you want.
Step 4: To move a Guide line, simply hold down the left mouse button on the Guide line and drag it to the desired location. To delete a Guide, left-click on the Guide and drag it outside the frame beyond the Rulers ruler.
3.2. Creating Guides by setting positions
With how to create Guides by setting positions, we can follow the following basic steps:
Step 1: Create a new position.
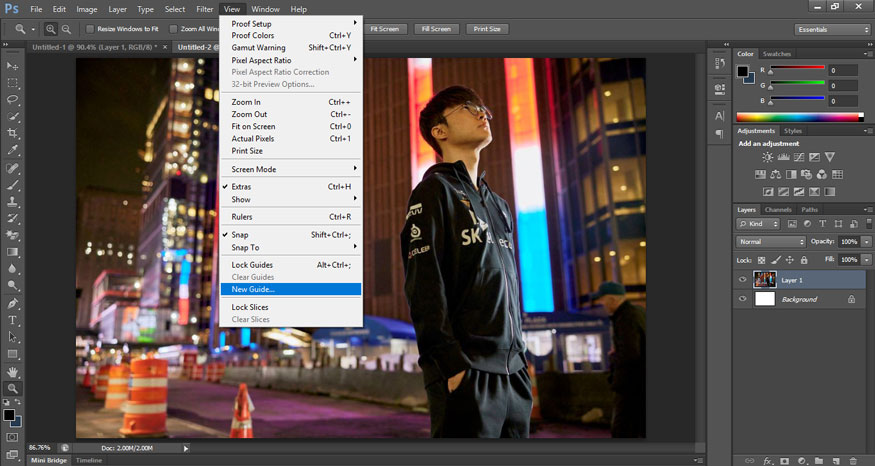
To create a new location, on the menu bar, select View => New Guide…
Step 2: In the New Guides dialog box, set the following parameters:
- Horizontal: Create horizontal Guides.
- Vertical: Create vertical Guides.
- Position: The position of the Guides starting from the edge of the image calculated by the measurement value on the ruler you use.
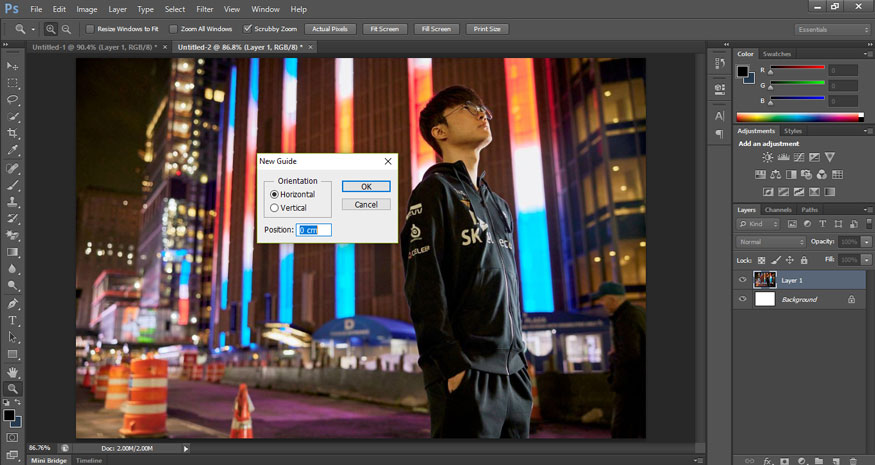
After customizing, click OK to create the alignment line.
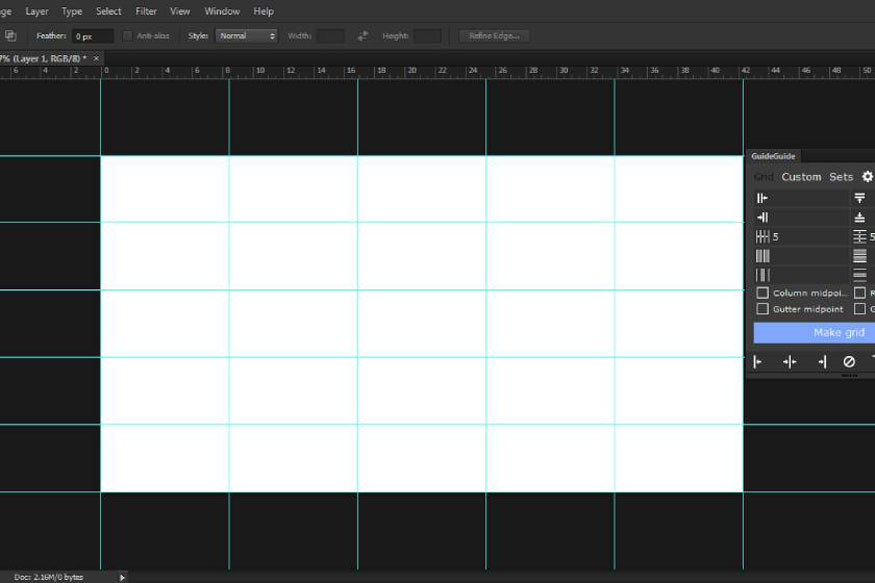
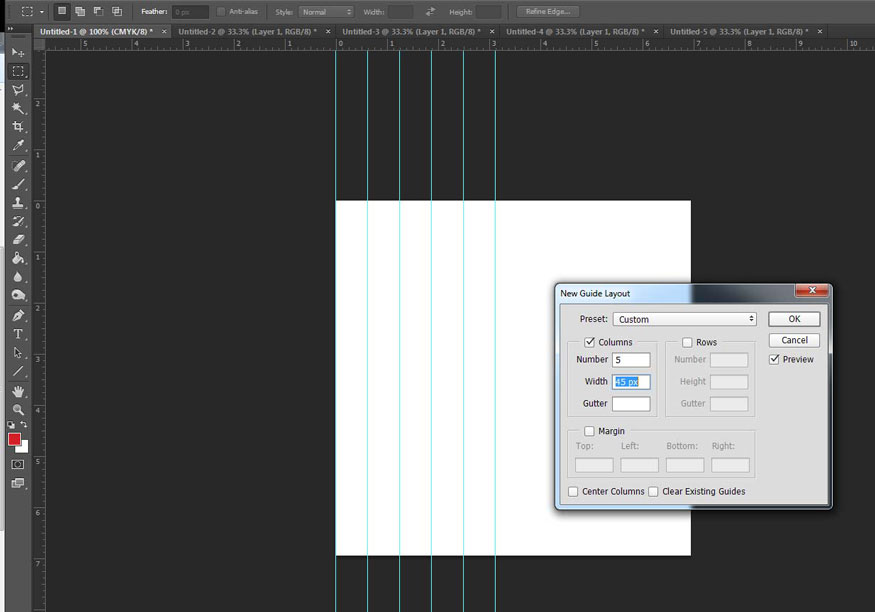
3.3. Creating multiple Guides
To create multiple Guides at the same time, you can refer to the steps on how to create a grid in Photoshop as follows:
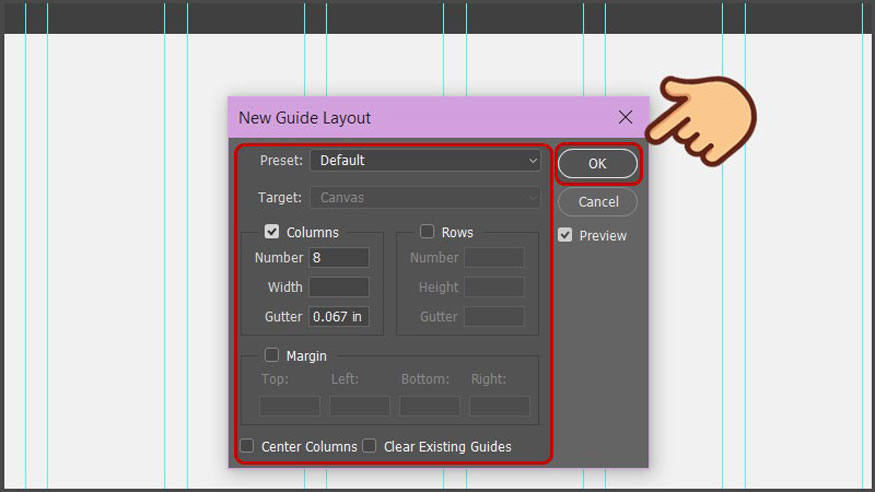
Step 1: On the menu bar, select View and then select New Guides Layout...

Step 2: In the New Guide Layout dialog box, set the following parameters:
- Preset: Set available options for the number of Guides.
- Target: Canvas
- Columns, Row: Check to set the number of Guides to be vertical or horizontal.
- Number: Number of Guides
- Width: Distance between Guides
- Guter: Distance between two parallel lines.
- Margin: Distance from the Guides to the edge of the photo.
Every time you adjust the parameters, the results of the Guides on the image will change. Observe the framework to adjust until you are satisfied. After customizing, click OK to create Guides.
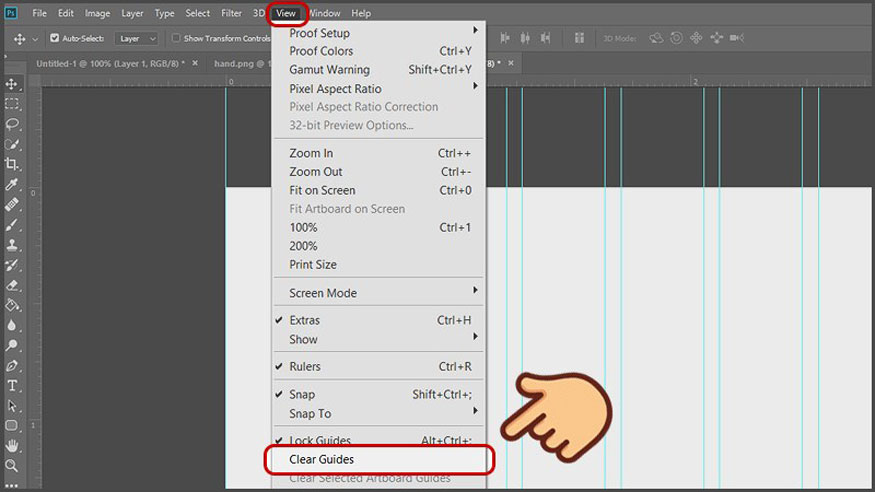
Step 3: When you create too many Guides and want to delete them all, on the menu bar, select View => Clear Guides.
3.4. How to fix Guides
In addition to how to create a grid in Photoshop, users will also be interested in how to fix the grid. To fix Guides in Photoshop, you can follow these instructions:
Step 1: After creating the Guides, on the menu bar, select View => select Lock Guides (or press the keyboard shortcut Alt + Ctrl + ; ). At this point you won’t be able to move or delete Guides.

Step 2: To unfix the Guides, do the same as step 1 by going to View on the menu bar and unchecking Lock Guides.
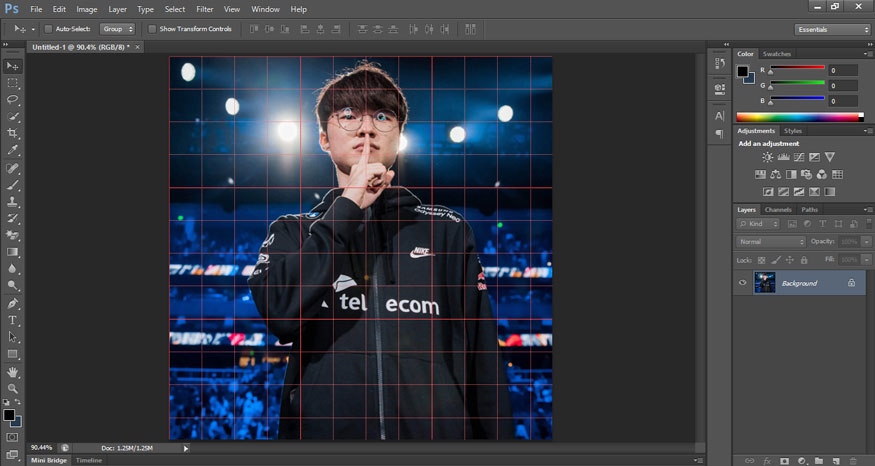
4. How to change the color of Guides in Photoshop
After knowing how to create a grid in Photoshop, you should also know how to change the color of Guides to make the grid easier to see. To change the color of Guides in Photoshop, you can follow these steps:
Step 1: Open Photoshop, on the menu bar select File => New to create a new file or open a new image.
Step 2: Create Guides you like.
Step 3: On the menu bar, select Edit => Preferences => Guides, Grid & Slices to open the Preferences window.
Step 4: In the Preferences window, select the Guides, Grid & Slices tab and change the color of the Guides as desired. You can choose colors from the color chart or enter the HEX color code.

Step 5: After changing the color of the Guides, click OK to save.

Above is a summary of some ways to create grids in Photoshop. SaDesign Hopefully the above sharing can help you create grids to edit designs in Photoshop easily.


VIP Products


Best Selling Products
Capcut Pro 1 Year
39 USD
Upgrade Duolingo Super
29 USD
Windows 10 & 11 Pro Key
36 USD
Plugin Retouch4me
69 USD
Adobe Premiere Pro Account
99 USD
Autodesk All App Account Copyright
120 USD
Freepik Premium Account
59 USD
Upgrade genuine Capture One account
120 USD
Genuine Cheap Canva Pro
39 USD
Genuine Adobe Illustrator account
99 USD
Upgrade Genuine Office 365
49 USD
Copyright Adobe Lightroom Account
59 USD
Adobe Photoshop Copyright - Full App
120 USD
ChatGPT Plus Account (GPT-4)
16 USD
MidJourney Account
29 USD