Best Selling Products

Upgrade Genuine Office 365
49 USD

Freepik Premium Account
59 USD

Windows 10 & 11 Pro Key
36 USD

Copyright Adobe Lightroom Account
59 USD

Autodesk All App Account Copyright
120 USD

ChatGPT Plus Account (GPT-4)
16 USD

Plugin Retouch4me
69 USD

Capcut Pro 1 Year
39 USD

Genuine Cheap Canva Pro
39 USD

Genuine Adobe Illustrator account
99 USD

Upgrade Duolingo Super
29 USD

Upgrade genuine Capture One account
120 USD

Adobe Photoshop Copyright - Full App
120 USD

Adobe Premiere Pro Account
99 USD

MidJourney Account
29 USD
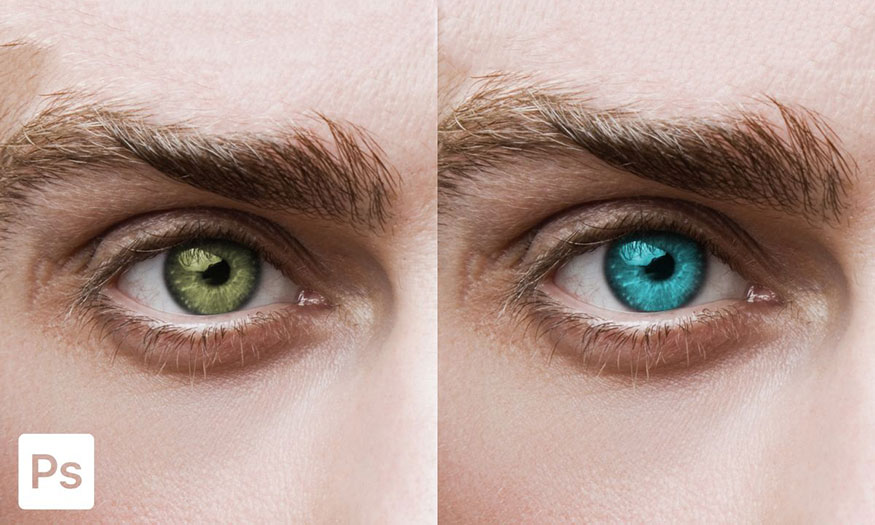
2 simple ways to adjust eye color in Photoshop
Nội dung
Sometimes changing the character's eye color also completely changes the meaning of the photo. If you are looking for a way to change the eye color of a character in a photo, don't miss the following two simple ways to adjust eye color in Photoshop.
Sometimes changing the character's eye color also completely changes the meaning of the photo. If you are looking for a way to change the eye color of a character in a photo, don't miss the following two simple ways to adjust eye color in Photoshop.

1. Adjust eye color in Photoshop with Hue Saturation
Real people can change the color of their eyes very easily by wearing lens, and characters in photos can simply adjust their eye color with Photoshop. With Photoshop software, you can use the Hue Saturation tool to change eye color through some extremely simple steps as follows:
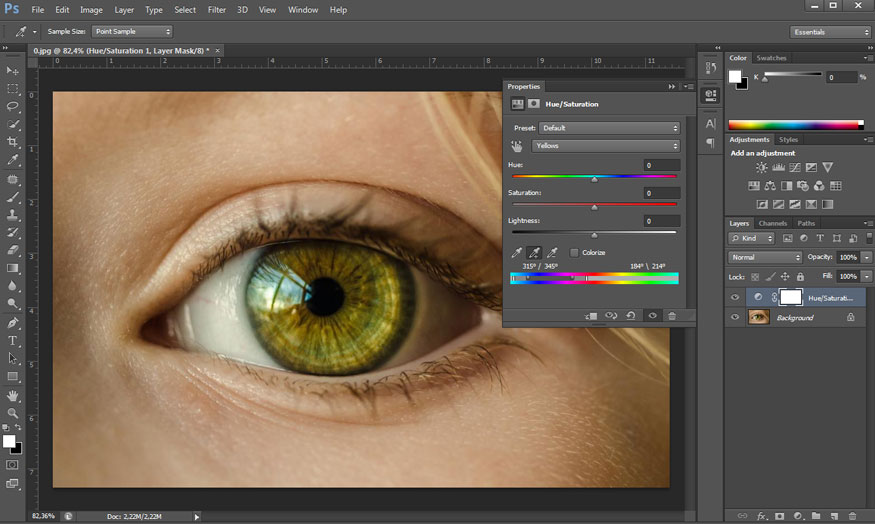
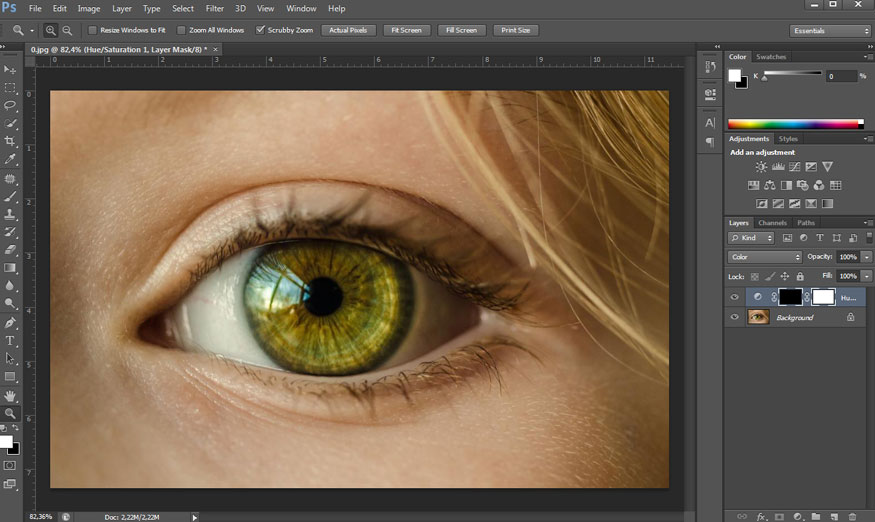
Step 1: Open the photo in Photoshop where you need to adjust eye color. To open an image, you can select File on the toolbar, then select Open, then select the image to adjust eye color. Or you can use the keyboard shortcut Ctrl+O. Look at the right corner of the Photoshop screen, click on the dot icon, then click Hue Saturation.

Step 2: At the Hue Saturation window, click on the hand icon, then click on the eye area to sample. Photoshop software will record the color of the eyes. If the subject's eyes have multiple colors, click the pen icon (+), to expand the sampling area. You can see that Photoshop has limited the sampling area in the slider at the bottom.
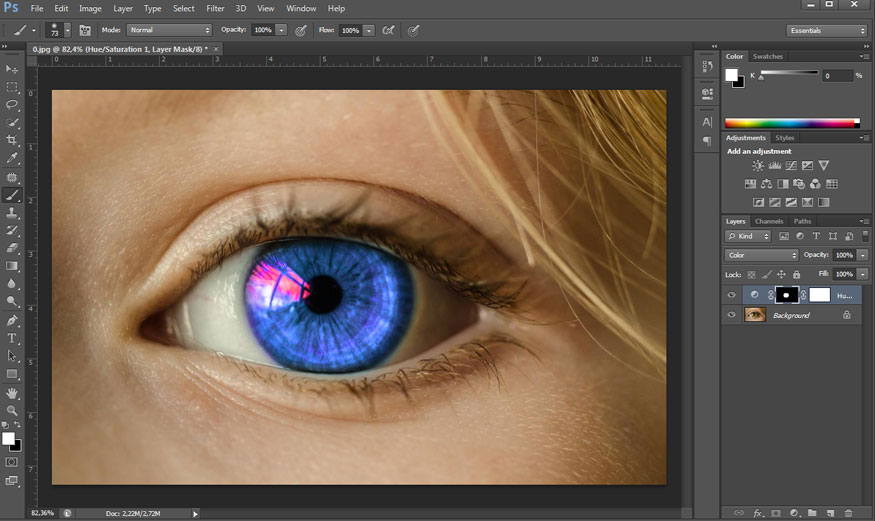
Step 3: Drag the Hue slider and observe on the screen. You will see that the color of the eyes will change through red, orange, blue, etc. You just need to stop when you have found the eye color that suits your needs.
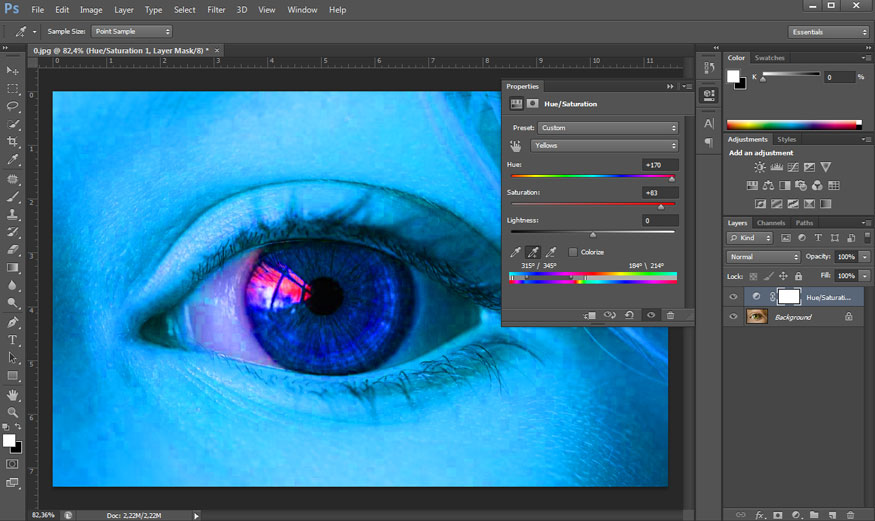
Then continue to drag the Saturation slider to the right to make the eye color darker. In many cases, eye color will be close to skin color, so you will see the impact of Hue Saturation on similar color areas.
Step 4: To continue, click Blending Mode, then select Color.

Select the Hue Saturation Layer, click the Layer Mask, then press Ctrl+I. The Layer Mask will turn black, so you can no longer see the effect of Hue Saturation on the image.
Step 5: To make the eyes appear the color you want to change, use Brush (B). Choose a Brush size suitable for the eye, choose Foreground color as white.
Step 6: Let's proceed to paint a white Brush above the black Layer Mask. The areas that the white Brush passes through will reveal the color you choose. Apply a Brush to the eye area to adjust eye color in Photoshop. If you accidentally make a mistake and smudge your eye color, press Ctrl+Z to go back. In addition, you can also press the shortcut key (X) to change to the black Brush, then paint in the areas with blurred colors to regain the original color.
So you have successfully adjusted eye color in Photoshop with Hue Saturation. The steps are really simple, right? Try it now.
2. Adjust eye color with Solid Color in Photoshop
Besides Hue Saturation, we can also adjust eye color in Photoshop with Solid Color. This tool is currently available in all versions of Photoshop. Let's adjust eye color in Photoshop using Solid Color through some basic steps:
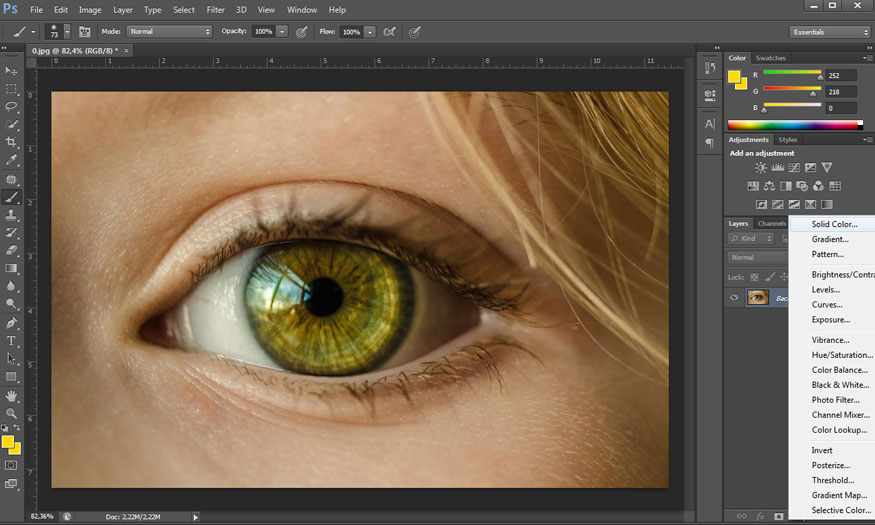
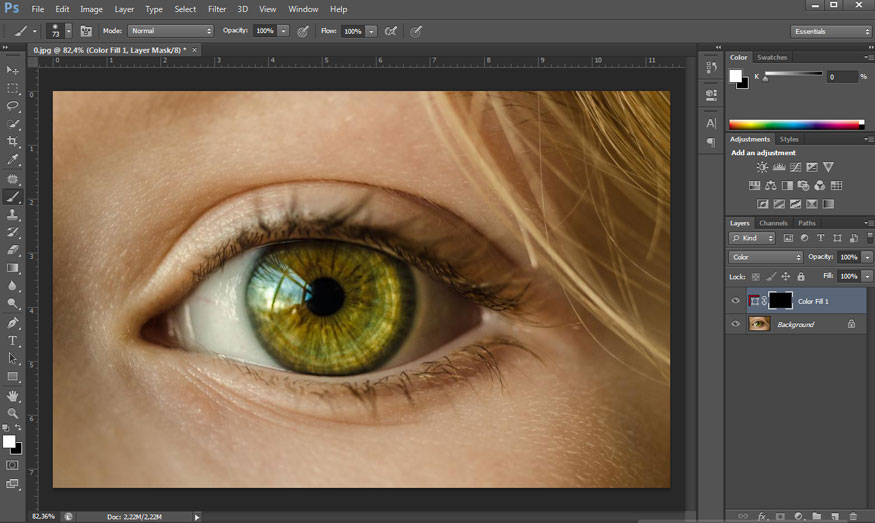
Step 1: Open the photo you need to adjust eye color in Photoshop. On the toolbar, select File => Open => select the image to adjust eye color. Or you can also use the keyboard shortcut Ctrl+O. Then, we also click on the dot icon in the bottom right corner of the screen, then select Solid Color.
Step 2: I want to adjust the eye color in Photoshop to red. In the Color Picker panel, select red and press OK. You can choose any color that suits your needs.
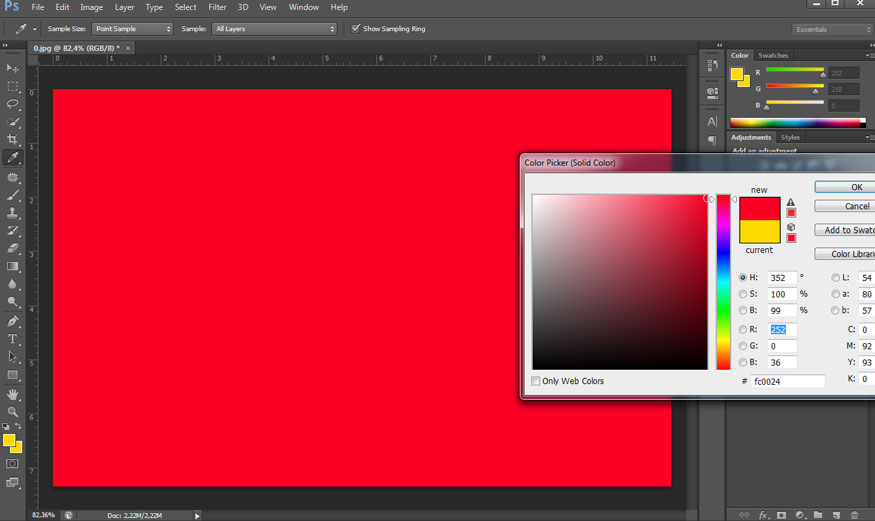
At this point, the entire photo will be covered with a red layer and the model cannot be seen. Click on Layer Solid Color, in Blending Mode select Color so that the red color blends with the model's eye color. We only need Solid Color to affect the eye area, but it is still covering the entire image.
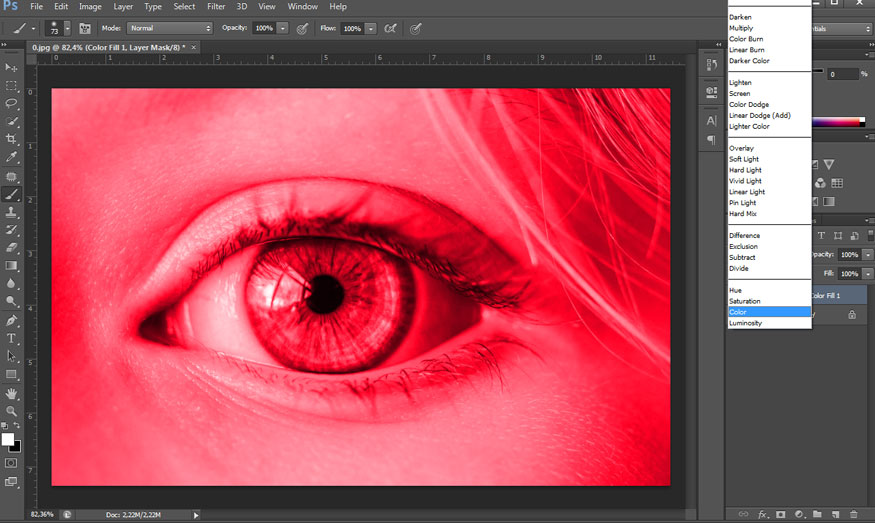
Step 3: On Solid Color, click Layer Mask then press Ctrl+I. Additionally, you can also use Properties => Invert for the same result. At this point, Solid Color no longer has an impact on the image, because the black Layer Mask has covered those effects.
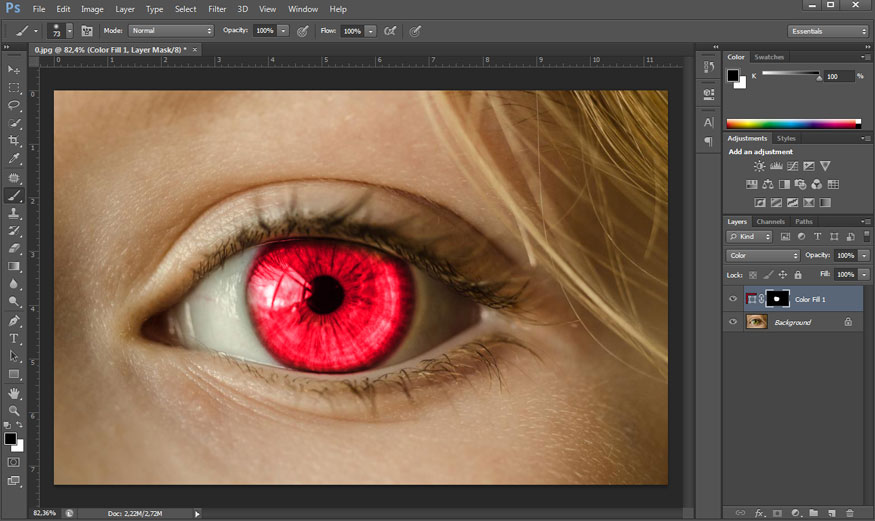
Step 4: To make the eyes appear red, use a Brush (B) of a size suitable for the eyes, choose Foreground as white.
Step 5: Let's paint a white Brush above the black Layer Mask. Wherever the white brush goes, red will appear. Paint in the eye area to show red. If you accidentally make a mistake, you can also use Ctrl + Z to go back. Or press the shortcut key (X) to change to a black Brush and then paint in the smudged areas to regain the original color. Finally, reduce the Opacity of the Solid Color to get the best results.
So you have finished adjusting eye color in Photoshop using Solid Color.
Above are two extremely simple ways to adjust eye color in Photoshop. Hopefully SaDesign is sharing can help you edit photos more easily and professionally.


VIP Products


Best Selling Products
Upgrade Genuine Office 365
49 USD
Freepik Premium Account
59 USD
Windows 10 & 11 Pro Key
36 USD
Copyright Adobe Lightroom Account
59 USD
Autodesk All App Account Copyright
120 USD
ChatGPT Plus Account (GPT-4)
16 USD
Plugin Retouch4me
69 USD
Capcut Pro 1 Year
39 USD
Genuine Cheap Canva Pro
39 USD
Genuine Adobe Illustrator account
99 USD
Upgrade Duolingo Super
29 USD
Upgrade genuine Capture One account
120 USD
Adobe Photoshop Copyright - Full App
120 USD
Adobe Premiere Pro Account
99 USD
MidJourney Account
29 USD