Best Selling Products
5 ways to export photos in Photoshop quickly and conveniently
Nội dung
Are you interested in how to export photos in Photoshop to other formats such as JPG, PNG, GIF and PDF? So the following shares from Sadesign will be extremely interesting and useful information so you can learn Photoshop more easily and effectively!
Are you interested in how to export photos in Photoshop to other formats such as JPG, PNG, GIF and PDF? So the following shares from Sadesign will be extremely interesting and useful information so you can learn Photoshop more easily and effectively!
1. How to export photos in Photoshop with Quick Export
There are actually many different ways to export photos in Photoshop, of which exporting photos with Quick Export is a typical feature. With this tool we can export images according to the fastest presets.
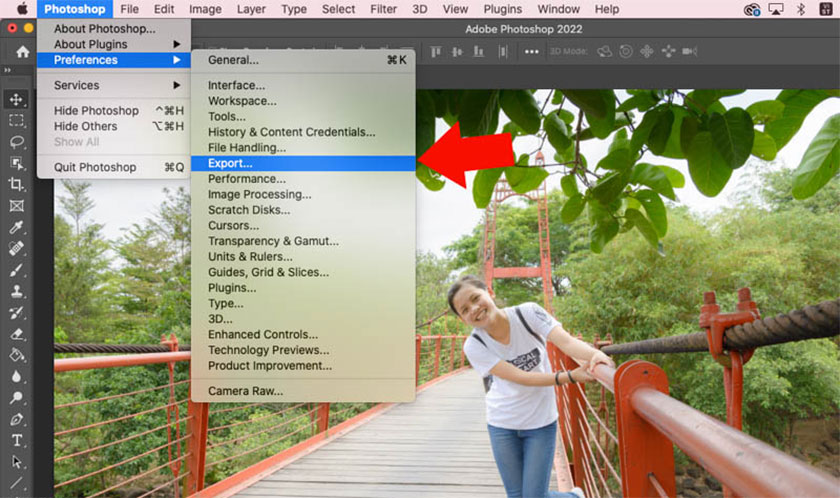
First of all, you need to let Photoshop know which format you need to export by clicking Photoshop => Preferences => Export or you can also click File => Export => Export Preferences.
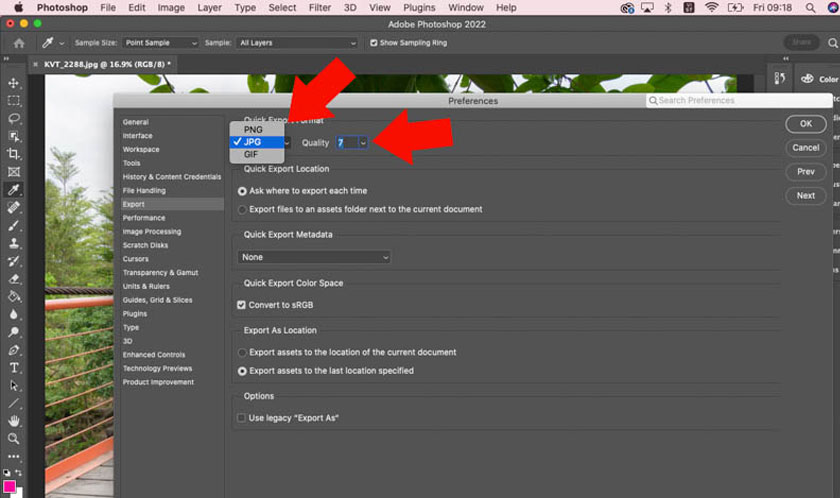
Select the image format you want to export in Quick Export, including JPG, PNG, GIF. For example, to export JPG format, you choose JPG image quality 7. You can choose to export transparent images in PNG format or animated GIF format.
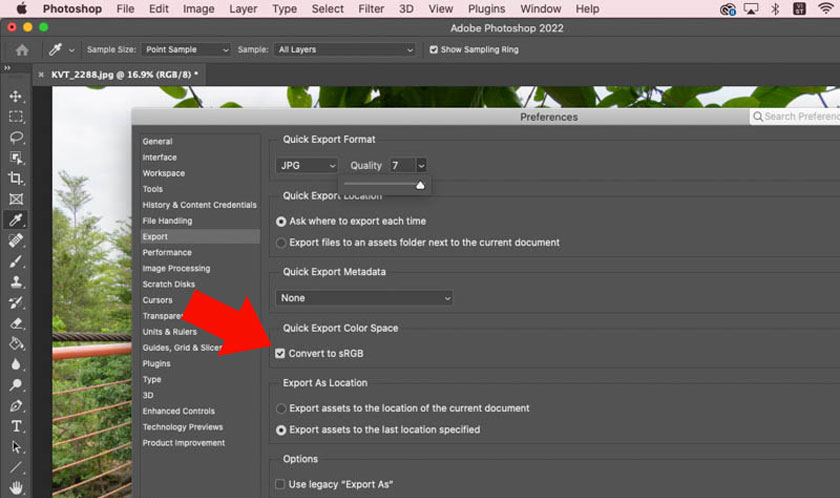
You should choose Convert to sRGB, to avoid color errors, because usually the sRGB color space is able to display colors most accurately. Except if you use a dedicated monitor, it can display Adobe RGB correctly.
By default, Quick Export saves images to the final location, so if you want to save with the original image folder, select Export assets to the location of the current document. So we have completed the first step in installing the JPG image format, quality 7, along with the sRGB color space. Now you just need to make beautiful photo edits, then click File => select Export => Quick Export to export the photo. You will now see Quick Export as JPG, which means exporting images in the JPG format installed in the previous section. You will see Quick Export as PNG or GIF if you select these formats.
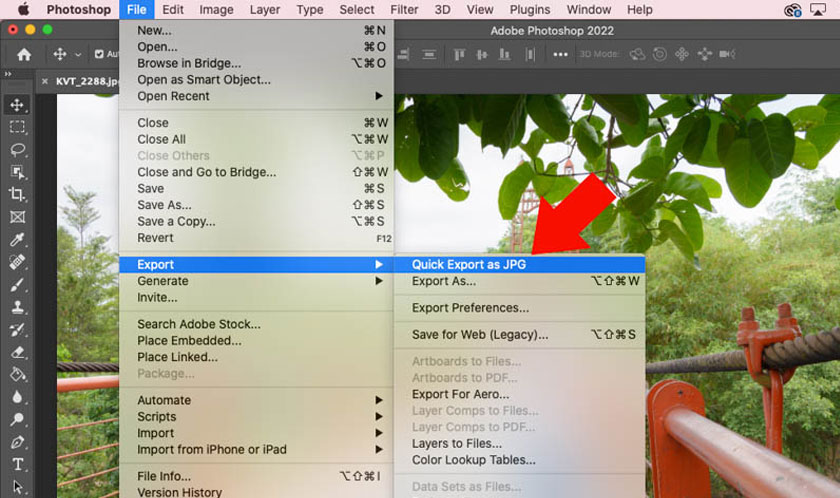
Photoshop will use the last location you saved the image, rename it and click save and you're done. Photoshop does not require size, quality or compression settings to ensure image export is fastest and reduces unnecessary operations.
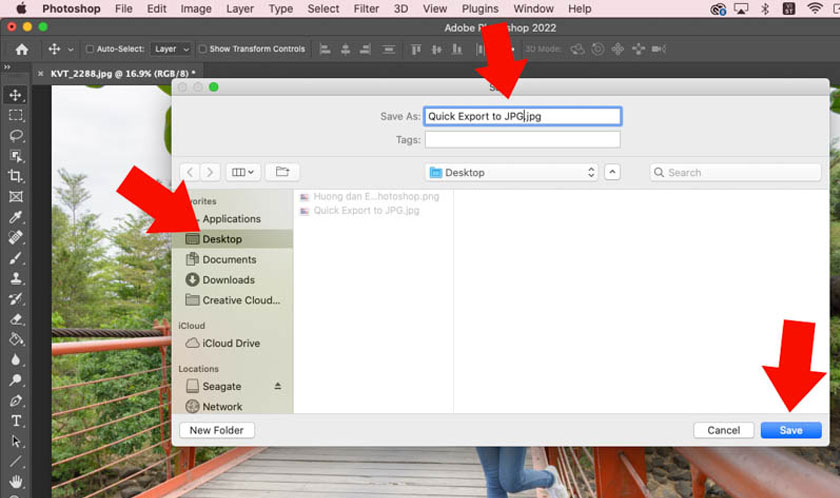
2. How to export photos in Photoshop using Export As
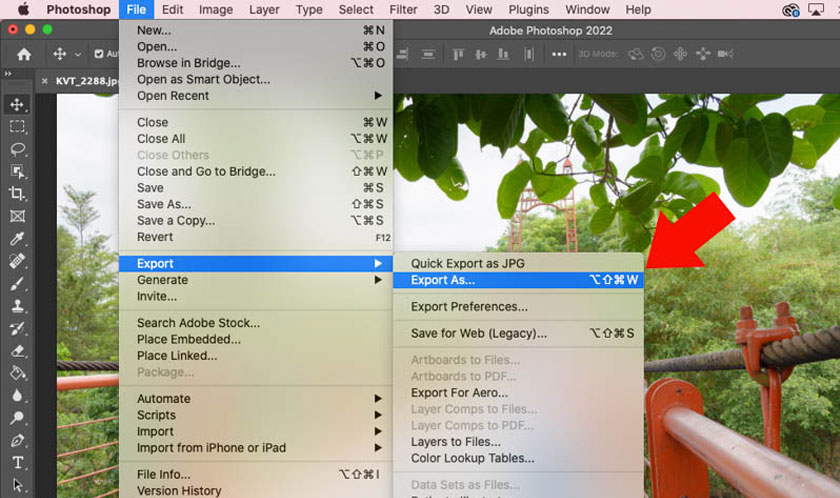
First, you need to open the photo and adjust the color to make it beautiful, then click File => Export => Export As or you can use the keyboard shortcut Option+Shift+Command+W. By default Photoshop will keep the original image size in Export As, you can export multiple sizes at once.
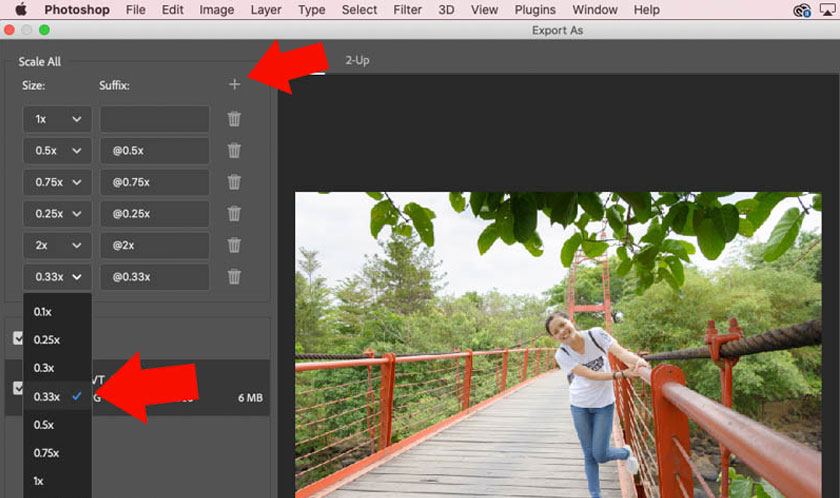
For example, to export archived photos for printing and to write blog posts in different sizes, click on the “+” sign in the right corner => select available settings. For example, to export an image smaller than half, choose 0.5x. You can also choose to enlarge the original image 1.25x in Export As. You can change the name after the letter @ to name it to suit your needs.
You can click the trash can to clear these selections. Next, click Format to choose the JPG, PNG, GIF image format. The JPG format is the best to export photos posted to Facebook and Flickr. If you separate the background and want to keep it transparent, use PNG, and for animation, choose GIF. In this example we choose the JPG image format.
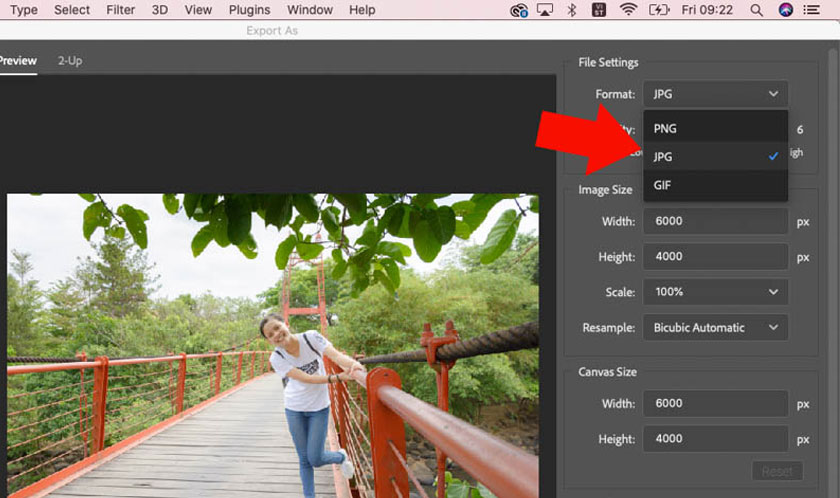
Drag the Quality slider to make JPG image quality settings. You can choose the highest level to retain more details compared to the original image. Next click Image Size to set the width and height size. You can also click Scale to select the magnification level.
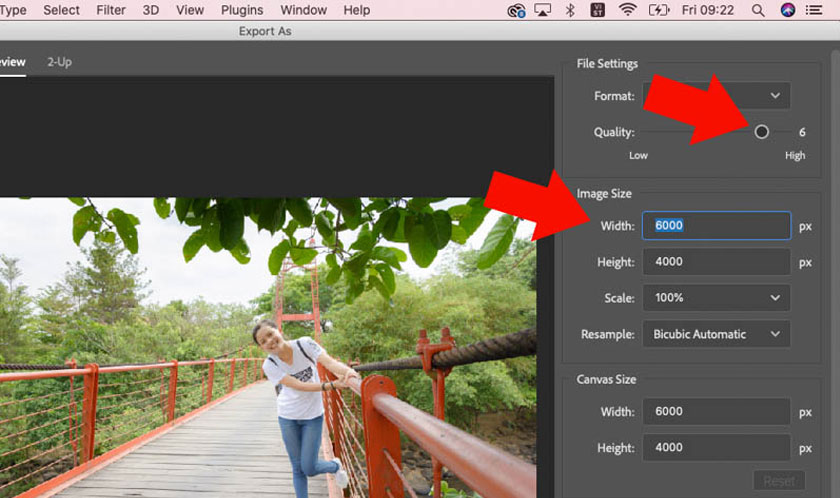
The Export function is combined with layers into one image. This process will lose detail compared to the original image, you can control how Photoshop samples in Resample.
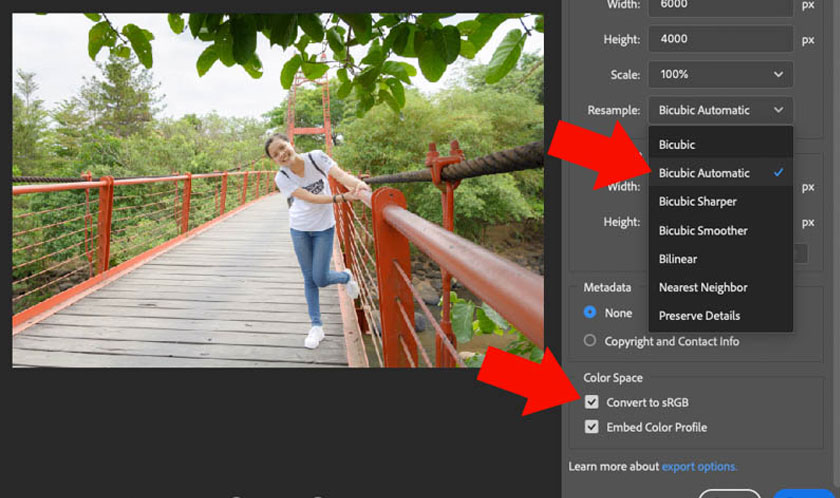
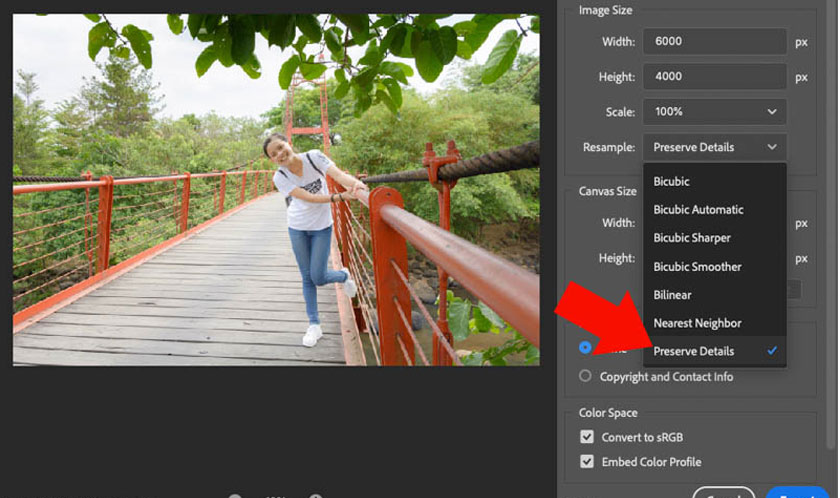
By default, Photoshop will use Bicubic Automatic to reduce export time, as well as help maintain good image quality. If you want to maintain high image quality, you should select Preserve Details => move to color space settings (Color Space) => select Convert to sRGB so that the image displays accurate colors on different devices.
If you use Adobe RGB, the image will have the wrong color if you view it in a browser or post it to Facebook. Finally, click Export to export the image => select the folder to save the image => click Open.
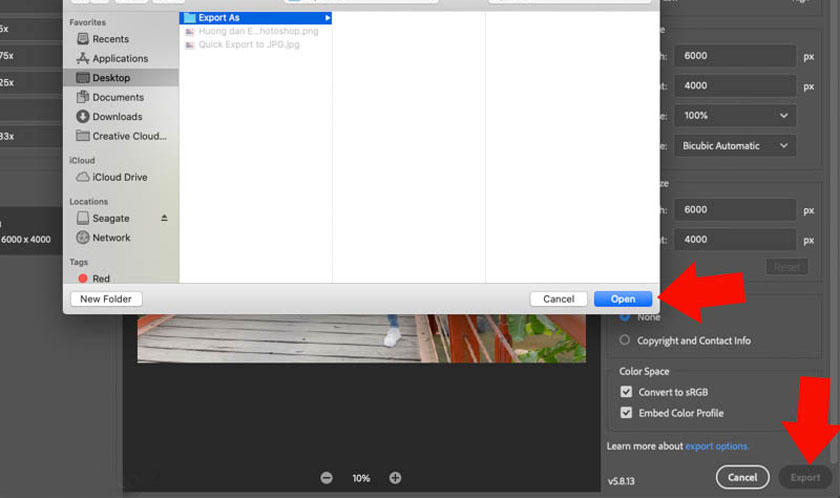
Photoshop will export a series of JPG images of different sizes, you can export PNG, GIF formats. Export As helps save maximum time for exporting images.
3. Export images in Photoshop with Save for Web
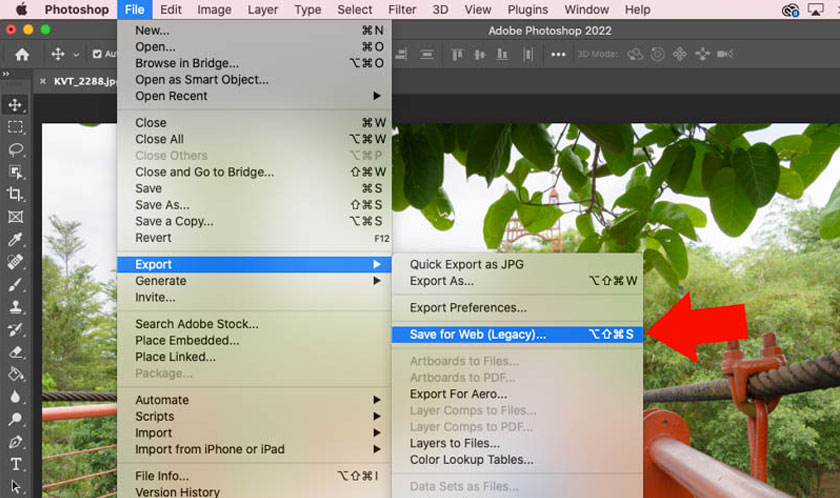
Exporting Save for Web images can be used to post on a Website or Blog. To do this, we first need to click File => Export => Save for Web or you can use the keyboard shortcut Option+Shift+Command+S.
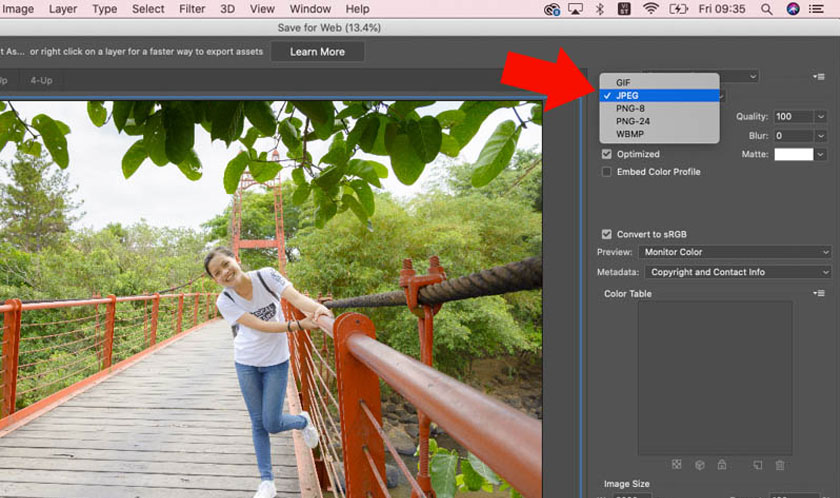
Next, click Format => JPG, PNG, GIF image format. In particular, PNG 8 is a space-saving version of PNG, while WBMP is a black-and-white version of PNG. In this example we will choose a JPG image.
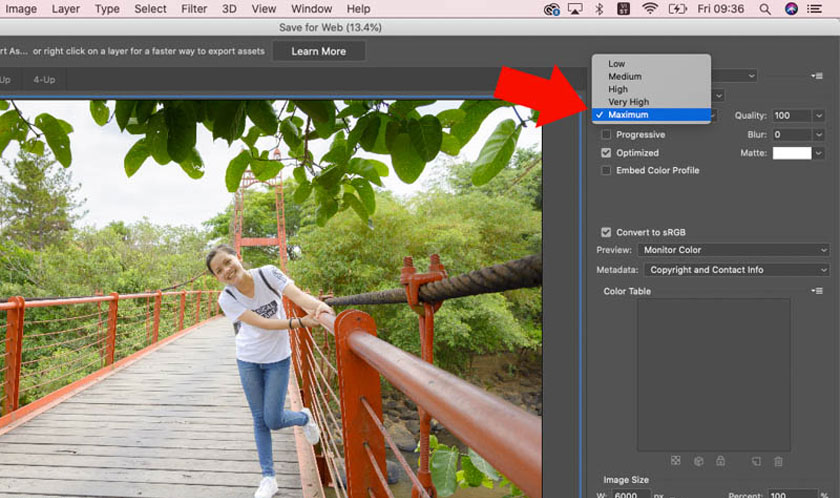
The Save for Web image export function is called Presets. You can choose low, high or very high. If you want to keep the highest image quality, you should choose Maximum, Photoshop will set the image quality to 100% in Quality.
Next, check Convert to sRGB to ensure the image does not have the wrong color on other devices. Move to Image Size to set the width and height dimensions. You can enter a chain link symbol to adjust the width independently of the height.
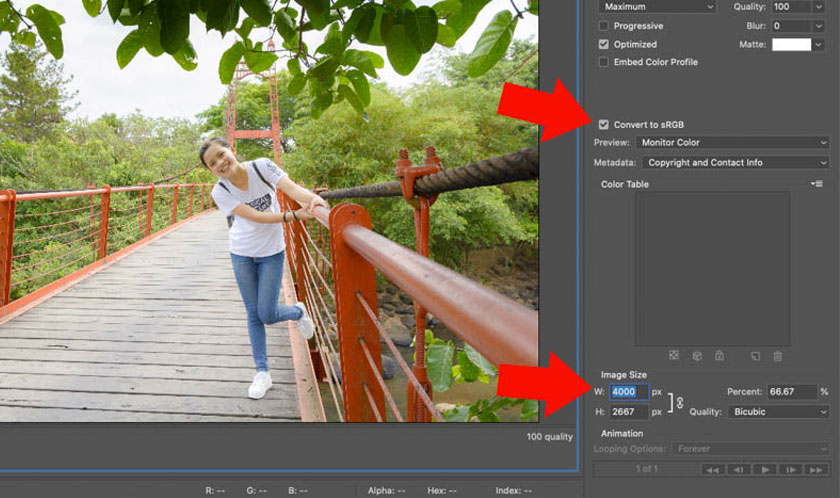
Photoshop uses Bicubic sampling settings, you can use other settings to get the best image quality. Once installed, click Save => choose where to save the image and you're done.
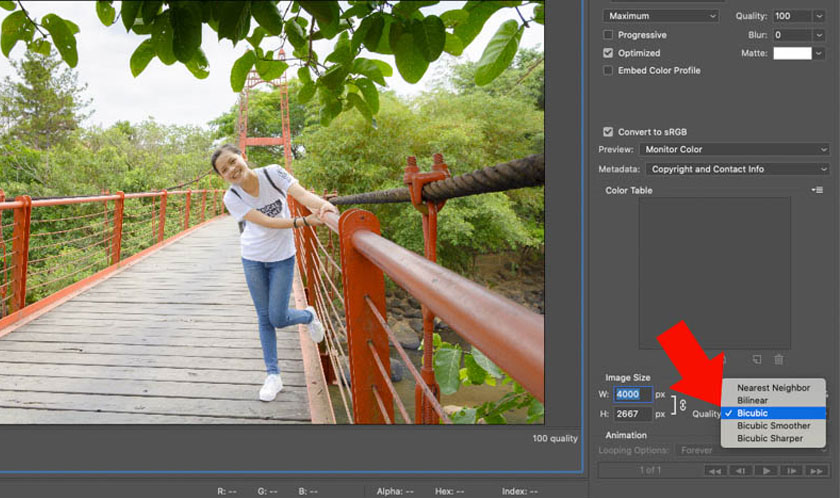
If you don't want to adjust the parameters every time you export an image using Save for Web, click the settings icon on the right corner, then select Save Settings => click Save.
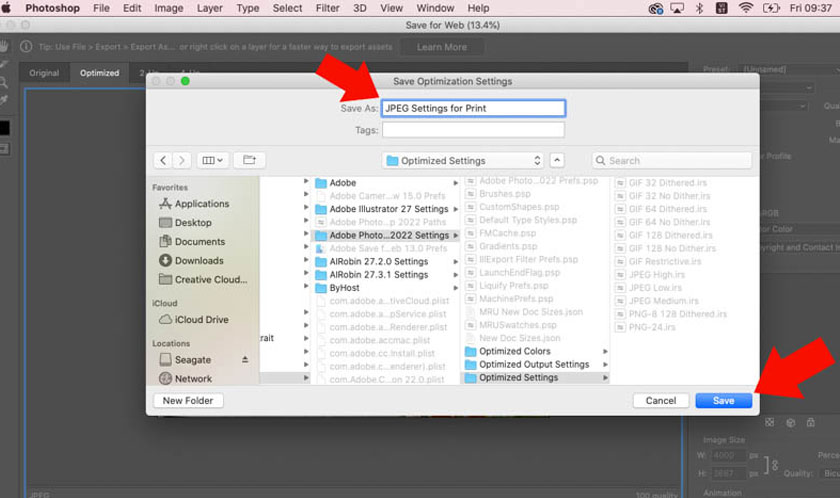
This helps Photoshop save it as a Preset. You just need to click on Preset, select the saved settings to create Presets to export printed photos for Facebook or Flickr. When you need it, just click and you're done.
4. Export PDF in Photoshop
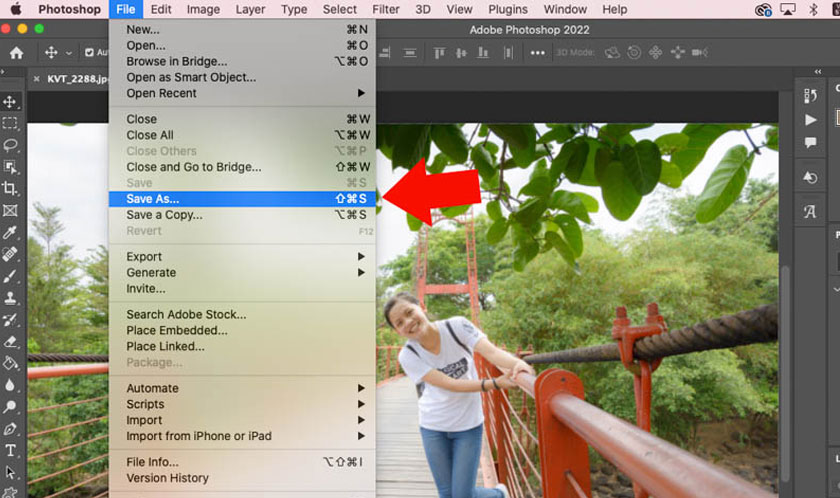
To export PDF format, you can do it simply in the following ways: First, click File => select Save As or press the keyboard shortcut Shift+Command+S.
Select the item to store, name it, then select Photoshop PDF format => click Save.
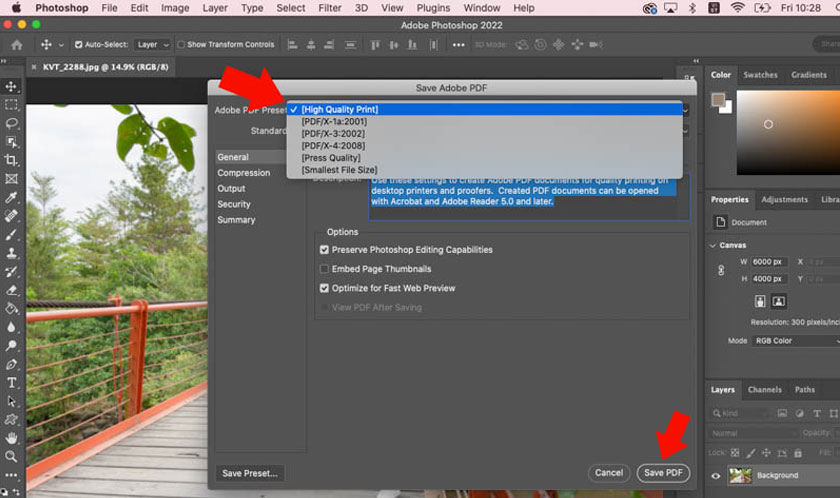
Select the PDF file quality. If you want to keep the highest quality, choose High Quality Print. If you want to add a thumbnail to the document, check Embed Page Thumbnails and you're done.
5. Instructions for mass exporting photos in Photoshop
With mass exporting photos in Photoshop, you can do the following: First click File => Scripts => select Image Processor.
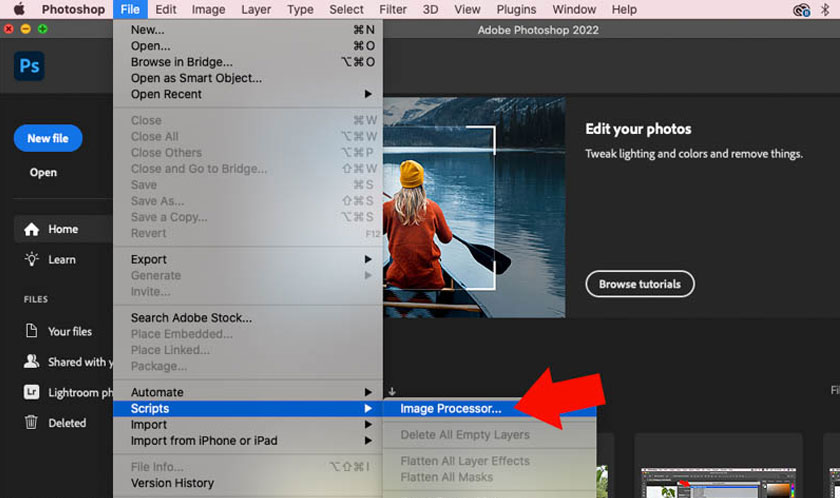
Click Select Folder (1) to select the original image folder, check Include All Subfolders so that Photoshop will find images in the main folder and subfolders. Click Select Folder (2) to select the folder to save the image after exporting.
Click File Type (3) to select JPG image format. Set image quality in the Quality section, image size in Resize to Fit and check Convert Profile to sRGB to ensure the most accurate image color when viewed on other devices. You can also export to other formats such as PSD and TIFF.
Above are 5 ways to export photos in Photoshop to JPG, PNG, GIF, PDF formats. Try all the ways to choose the best and most suitable method of expression for yourself!


