Best Selling Products

Upgrade genuine Capture One account
120 USD

Adobe Premiere Pro Account
99 USD

Genuine Cheap Canva Pro
39 USD

Plugin Retouch4me
69 USD

Upgrade Genuine Office 365
49 USD

Autodesk All App Account Copyright
120 USD

Copyright Adobe Lightroom Account
59 USD

Genuine Adobe Illustrator account
99 USD

ChatGPT Plus Account (GPT-4)
16 USD

MidJourney Account
29 USD

Upgrade Duolingo Super
29 USD

Windows 10 & 11 Pro Key
36 USD

Adobe Photoshop Copyright - Full App
120 USD

Capcut Pro 1 Year
39 USD

Freepik Premium Account
59 USD
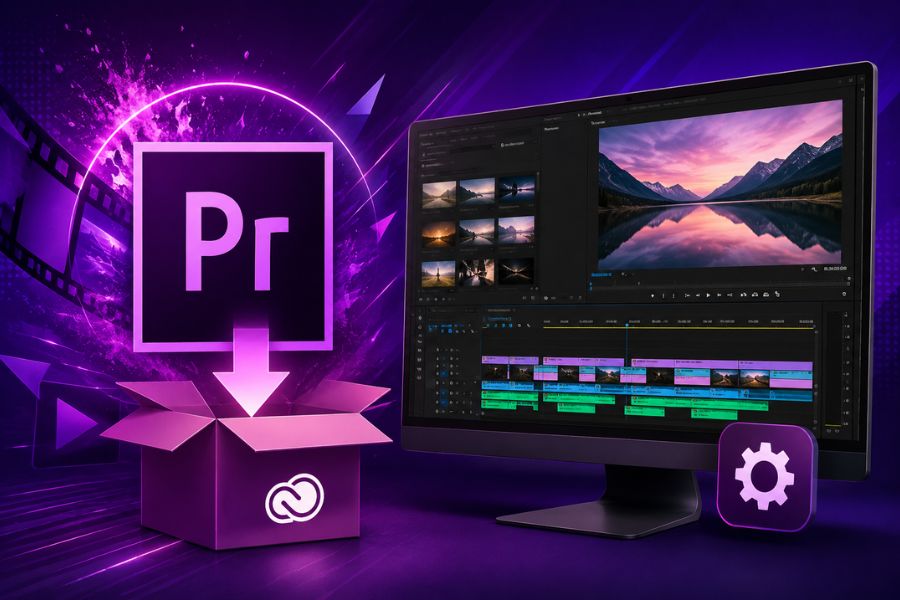
Adobe Premiere Pro CC 2018 Installation Guide
Nội dung
- 1. What is Adobe Premiere Pro CC 2018?
- 2. Outstanding features of Premiere Pro CC 2018
- 2.1 Dynamic Link direct connection with After Effects for maximum convenience
- 2.2 Supports modern 360-degree VR video editing
- 2.3 Professional Lumetri Color correction tools
- 2.4 Supports high-quality audio processing
- 2.5 Smooth high-resolution video editing
- 3. What are the system requirements for Adobe Premiere Pro CC 2018?
- 4. Basic usage guide for Adobe Premiere Pro CC 2018
- 4.1 Create a Project
- 4.2 Create a Sequence
- 4.3 Import Files into Premiere Pro
- 4.4 Cut and Merge Video
- 4.5 Edit Audio
- 4.6 Create Motion with Keyframes
- 4.7 Add Text to Video
- 4.8 Color Correct Video with Lumetri Color
- 5. Adobe Premiere Pro CC 2018 Installation Guide
- 6. Conclusion
Installing Adobe Premiere Pro CC 2018 correctly will help the software run stably and minimize errors during video editing.
1. What is Adobe Premiere Pro CC 2018?
Adobe Premiere Pro CC 2018 is professional video editing software developed by Adobe. It is a tool chosen by many YouTubers, editors, and content creators thanks to its powerful video cutting and merging capabilities, intuitive interface, and support for many modern effects. With the CC 2018 version, users can easily edit high-quality videos, add audio, insert text, and export files quickly all on one single platform.
The outstanding point of Adobe Premiere Pro CC 2018 is its stable performance and compatibility with many different computer configurations. The software supports many popular video formats, making the filmmaking process more flexible. Whether you are just learning video editing or already have professional experience, Adobe Premiere Pro CC 2018 still provides a smooth editing experience and all the necessary tools to create impressive videos.
.jpg)
2. Outstanding features of Premiere Pro CC 2018
2.1 Dynamic Link direct connection with After Effects for maximum convenience
One of the reasons many people choose to install Adobe Premiere Pro CC 2018 is its powerful Dynamic Link feature. This tool allows direct connection with After Effects without needing to render intermediate files, making effects and motion graphics editing faster. Any changes made in After Effects are automatically updated in Premiere Pro, saving time and optimizing professional video production workflows.
2.2 Supports modern 360-degree VR video editing
After installing Adobe Premiere Pro CC 2018, users can easily edit 360-degree VR videos directly within the software. This feature supports previewing, editing, and exporting high-quality VR videos without needing external tools. This is a standout advantage that makes Premiere Pro CC 2018 suitable for modern content creation trends.
2.3 Professional Lumetri Color correction tools
Adobe Premiere Pro CC 2018 is equipped with the Lumetri Color toolset for more professional video color grading. Users can easily balance lighting, adjust skin tones, create cinematic color styles, and apply LUTs with just a few simple steps. Its intuitive interface makes it convenient for both beginners and professional editors.
2.4 Supports high-quality audio processing
Not only strong in video editing, Adobe Premiere Pro CC 2018 also supports highly effective audio processing. The software is compatible with VST audio plugins and supports immersive 5.1 surround sound systems. Users can filter noise, adjust volume, and add professional sound effects directly within the same video project.
2.5 Smooth high-resolution video editing
A standout advantage when installing Adobe Premiere Pro CC 2018 is its ability to process high-resolution videos from Full HD to 4K. The software supports many modern video formats and optimizes performance to reduce lag during editing. This helps editors work more stably with professional video projects.
.jpg)
3. What are the system requirements for Adobe Premiere Pro CC 2018?
Adobe Premiere Pro CC 2018 is professional video editing software, so it requires a relatively stable computer configuration to run smoothly. If you want to install Adobe Premiere Pro CC 2018 and edit videos effectively, refer to the minimum configuration table below before installation.
| Ingredient | Minimum requirements |
| Operating system | Windows 7 / 8 / 8.1 / 10 |
| Compatible architecture | Only supports 64-bit operating systems. |
| Central Processing Unit (CPU) | Intel Core2 or AMD Phenom II or higher |
| RAM | Minimum 4 GB (8 GB recommended for stable operation) |
| Hard drive capacity | At least 5 GB of free space is required to install the software. |
| Screen | Resolution of 1280×800 or higher |
| Support software | QuickTime 7.6.6 |
4. Basic usage guide for Adobe Premiere Pro CC 2018
4.1 Create a Project
After installing Adobe Premiere Pro CC 2018 and starting video editing, the first thing you need to do is create a new Project. This is where all your data, videos, audio, and project-related files are stored. To create a Project, simply open the software, select New Project, then enter the project name in the Name field and choose the save location in Location using the Browse button. Once completed, click OK to start working. If you are already editing and want to create a new Project, go to File → New → Project or use the shortcut Ctrl + Alt + N for faster operation.
4.2 Create a Sequence
A Sequence is the main area where you edit and build videos in Adobe Premiere Pro CC 2018. Each Project can contain multiple Sequences depending on your needs. To create a new Sequence, go to File → New → Sequence or press Ctrl + N. You can also click the New Item icon in the Project and Media panel and select Sequence. When the setup window appears, choose the preset that matches your video, name the Sequence, and click OK.
4.3 Import Files into Premiere Pro
After creating a Project and Sequence, the next step is importing video, image, or audio files into the software to start editing. Adobe Premiere Pro CC 2018 supports many convenient import methods. You can go to File → Import, right-click in the Project and Media panel and select Import, or simply drag and drop files directly into the software. Besides importing individual files, Premiere also allows importing entire folders to make project management easier and more professional.
4.4 Cut and Merge Video
Cutting and merging videos is the most important operation when using Adobe Premiere Pro CC 2018. To do this, you need to become familiar with two main tools: Razor Tool and Selection Tool. The Razor Tool (shortcut C) is used to cut video or audio on the Timeline at the desired position. Meanwhile, the Selection Tool (shortcut V) helps move, extend, or shorten clips easily. Simply select the Razor Tool to cut clips, then use the Selection Tool to drag the clips closer together to complete the basic merging process.
4.5 Edit Audio
Adobe Premiere Pro CC 2018 provides many tools for professional audio editing directly within the software. To add transition sound effects, simply select the clip you want to edit, go to Effect → Audio Transitions, then drag the appropriate effect onto the Timeline. You can also adjust the duration directly on the Timeline or in the Effect Controls panel. Premiere also supports M to mute and S to solo an audio track, making editing faster and more convenient.
4.6 Create Motion with Keyframes
Keyframes are an essential tool for creating motion in videos when using Adobe Premiere Pro CC 2018. You can use Keyframes to create zooming, shrinking, rotating, or object movement over time. To do this, place one Keyframe at the starting point and another at the ending point on the Timeline. When changing parameters such as Position, Scale, or Opacity between these points, Premiere automatically creates smooth motion for your video, making it more professional and dynamic.
4.7 Add Text to Video
Adding text makes videos more attractive and helps convey information clearly. In Adobe Premiere Pro CC 2018, simply select the Type Tool with the T icon next to the Timeline, then drag to create a text input area on the video. After entering content, you can use the Effect Controls panel to change fonts, colors, sizes, or add effects to the text. Premiere also supports Essential Graphics, making it easy to apply built-in professional text templates.
4.8 Color Correct Video with Lumetri Color
Lumetri Color is a standout color grading tool in Adobe Premiere Pro CC 2018 that helps videos look more cinematic and professional. You can open the color grading panel by going to Window → Workspaces → Color. Here, Premiere provides features such as White Balance for color balancing, Tone for brightness adjustment, Saturation for increasing or decreasing color intensity, and Input LUT for quickly applying color presets. Additionally, tools like Curves, Color Wheels, and Vignette help add depth and make videos more visually striking for viewers.
5. Adobe Premiere Pro CC 2018 Installation Guide
Step 1: Open Adobe Creative Cloud
To start installing Adobe Premiere Pro CC 2018, you first need to have Adobe Creative Cloud installed on your computer. After successful installation, the Adobe Creative Cloud icon will appear on your Desktop. Simply click this icon to launch the software and begin downloading Premiere Pro CC 2018.
.jpg)
Step 2: Sign in to your Adobe account
When the Adobe Creative Cloud interface appears, the system will require you to sign in to your Adobe account. You can use an existing Adobe account or quickly sign in with Google, Facebook, or Apple ID to save time. This is an important step for synchronizing data and managing Adobe applications more easily during use.
.jpg)
Step 3: Choose to install Adobe Premiere Pro CC 2018
After successfully signing in, find Premiere Pro in the Adobe Creative Cloud app list. You will see two options: Try for a 7-day free trial or Buy to purchase the official license. To proceed with installing Adobe Premiere Pro CC 2018, simply click the option that matches your needs.
.jpg)
Step 4: Monitor the download and installation process
After clicking install, the software will automatically download data to your computer. You can click the cloud icon in the top-right corner of the screen to monitor download progress. The installation time for Adobe Premiere Pro CC 2018 depends on your internet speed and computer configuration. Once completed, the system will display a successful installation notification.
.jpg)
Step 5: Open and use the software
Once Adobe Premiere Pro CC 2018 installation is complete, simply click Open to launch the software and start experiencing its professional video editing features. The Premiere Pro interface on Windows is designed to be intuitive and easy to use for both beginners and professional editors.
.jpg)
6. Conclusion
Hopefully, this guide will help you successfully install Adobe Premiere Pro CC 2018 and use the software more effectively for video editing work. By following the steps correctly, you can easily experience full filmmaking, color grading, and effect processing features directly on your computer.


VIP Products


Best Selling Products
Upgrade genuine Capture One account
120 USD
Adobe Premiere Pro Account
99 USD
Genuine Cheap Canva Pro
39 USD
Plugin Retouch4me
69 USD
Upgrade Genuine Office 365
49 USD
Autodesk All App Account Copyright
120 USD
Copyright Adobe Lightroom Account
59 USD
Genuine Adobe Illustrator account
99 USD
ChatGPT Plus Account (GPT-4)
16 USD
MidJourney Account
29 USD
Upgrade Duolingo Super
29 USD
Windows 10 & 11 Pro Key
36 USD
Adobe Photoshop Copyright - Full App
120 USD
Capcut Pro 1 Year
39 USD
Freepik Premium Account
59 USD