Best Selling Products

ChatGPT Plus Account (GPT-4)
16 USD

MidJourney Account
29 USD

Adobe Premiere Pro Account
99 USD

Upgrade genuine Capture One account
120 USD

Genuine Adobe Illustrator account
99 USD

Copyright Adobe Lightroom Account
59 USD

Autodesk All App Account Copyright
120 USD

Adobe Photoshop Copyright - Full App
120 USD

Upgrade Genuine Office 365
49 USD

Windows 10 & 11 Pro Key
36 USD

Capcut Pro 1 Year
39 USD

Freepik Premium Account
59 USD

Genuine Cheap Canva Pro
39 USD

Plugin Retouch4me
69 USD

Upgrade Duolingo Super
29 USD
How to create an Airbrush text effect in Photoshop with SaDesign
Nội dung
- 1. How to set up to create an Airbrushing effect
- 2. Instructions for arranging text on a document
- 3. How to create an Airbrush effect in Photoshop
- 4. Discover 5 interesting Airbrush effects
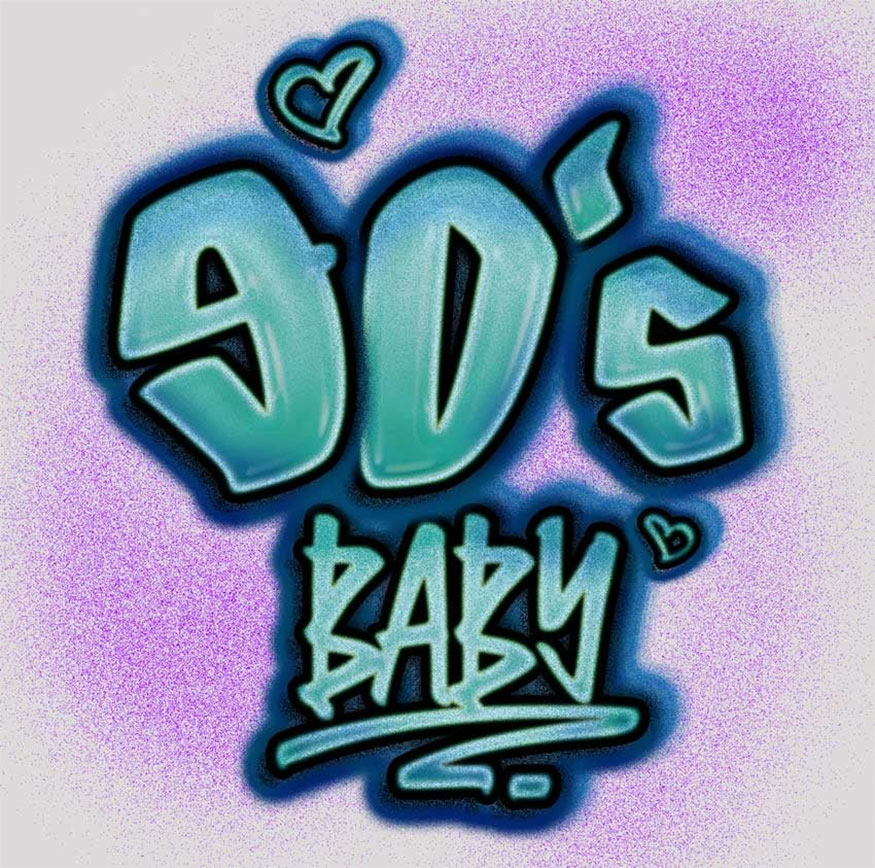
- 4.1. 90s Airbrush text effect
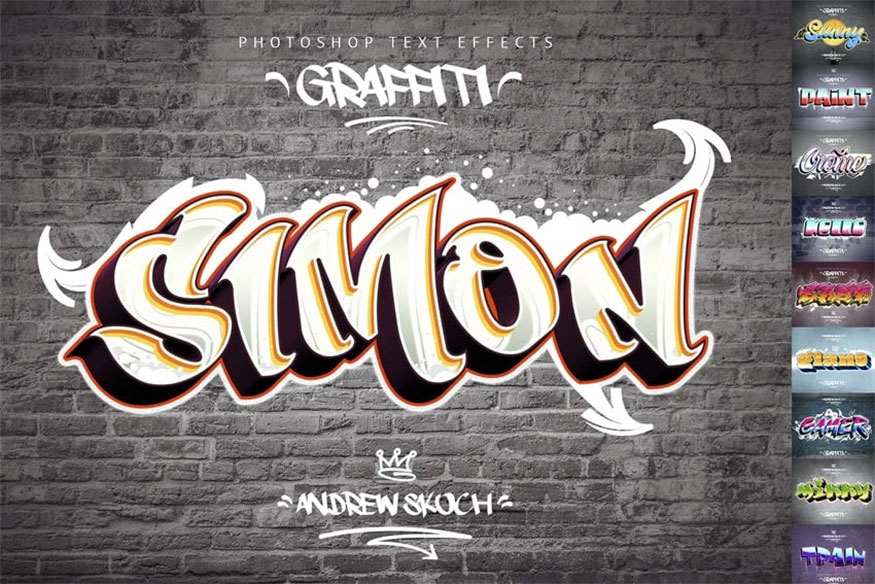
- 4.2. Photoshop Text Airbrush Graffiti Effect
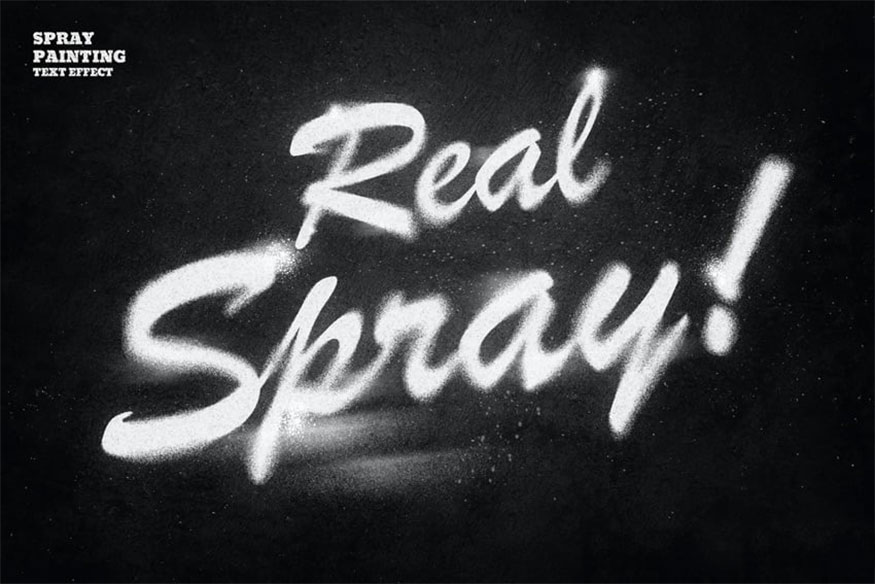
- 4.3. Paint spraying Airbrush effect
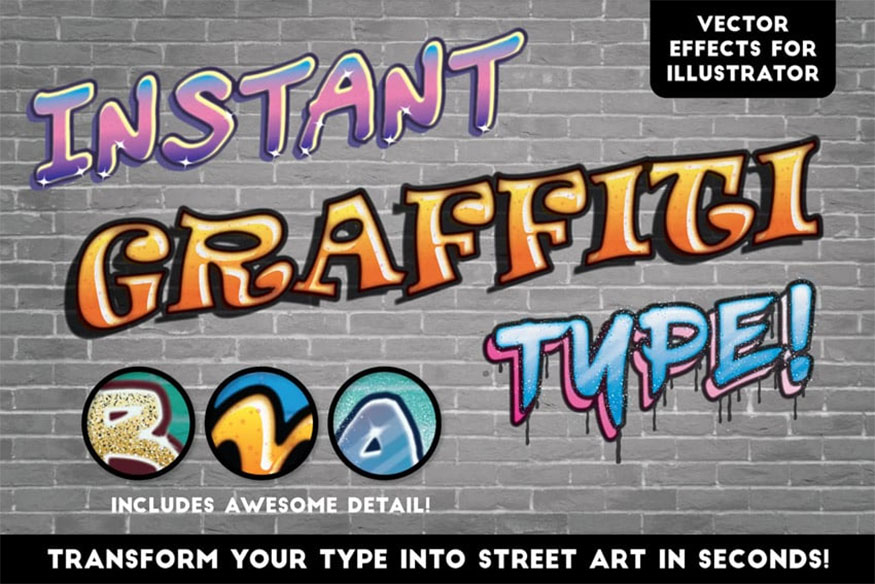
- 4.4. Graffiti brush set effect
- 4.5. Graffiti Airbrush style effect
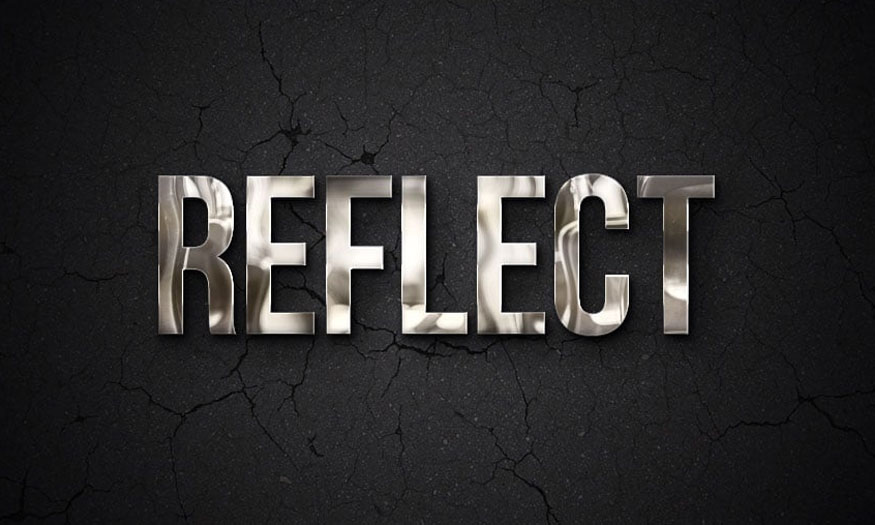
Airbrush text effects in Photoshop are a fun way to bring a nostalgic 80s feeling to your designs. Specifically how to do this will be fully informed by Sadesign in the following article!

Airbrush text effects in Photoshop are a fun way to bring a nostalgic 80s feeling to your designs. Specifically how to do this will be fully informed by Sadesign in the following article!
1. How to set up to create an Airbrushing effect
To set up an Airbrushing effect, follow these specific steps:
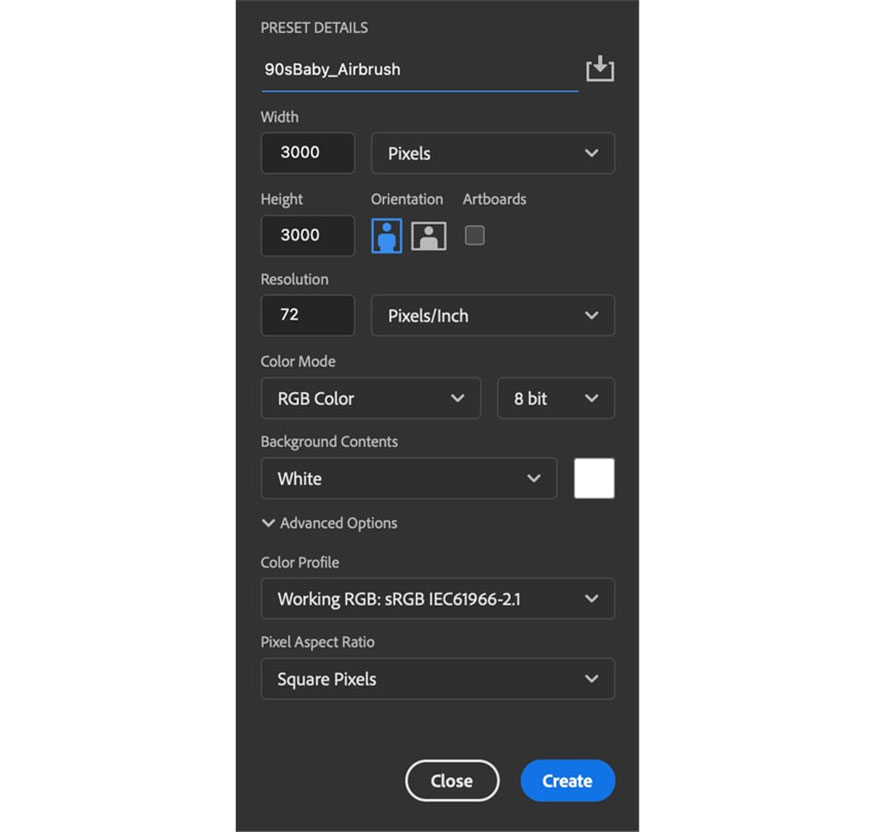
Step 1: First, you need to open Photoshop and go to File => New to create a new document. Change Width to 3000 px and Height to 3000 px.
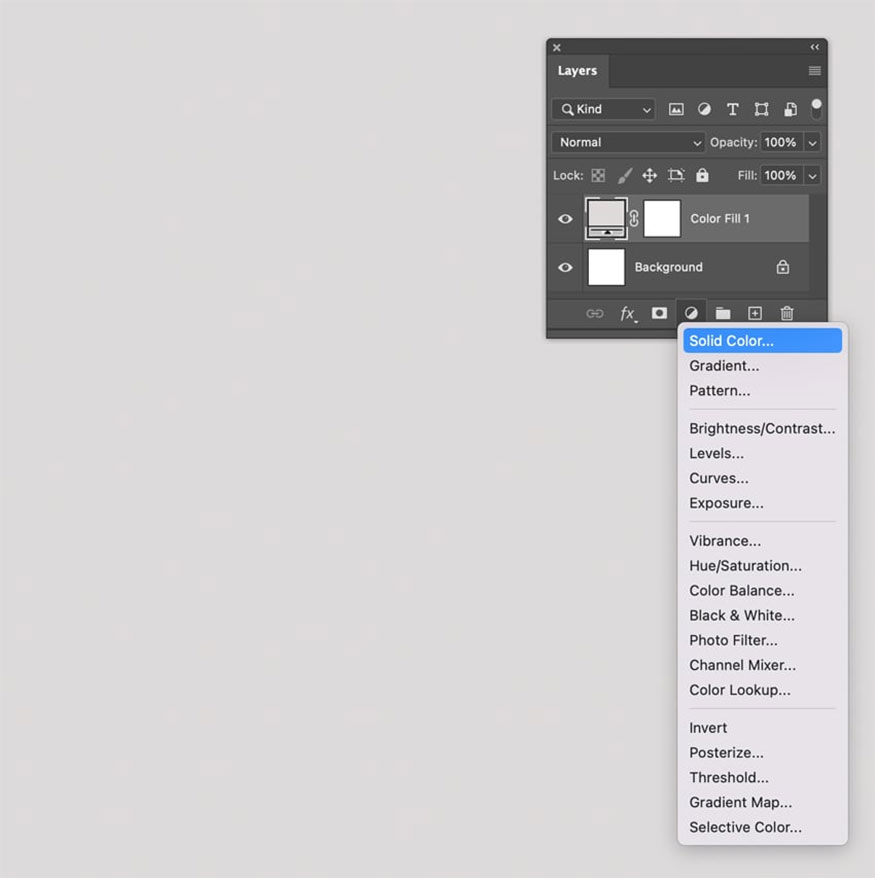
Step 2: Add a new Solid Color and change the color to #dddada.
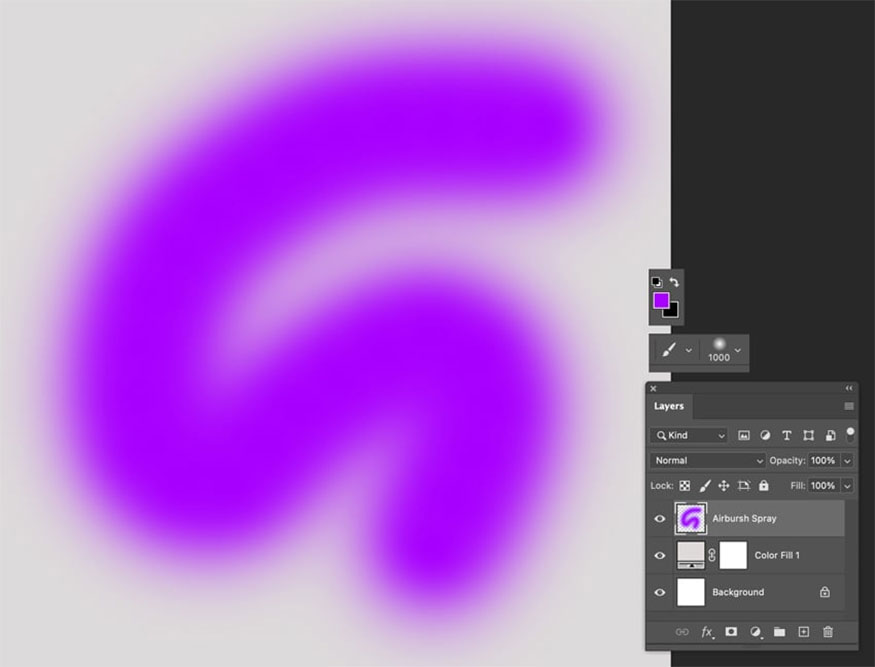
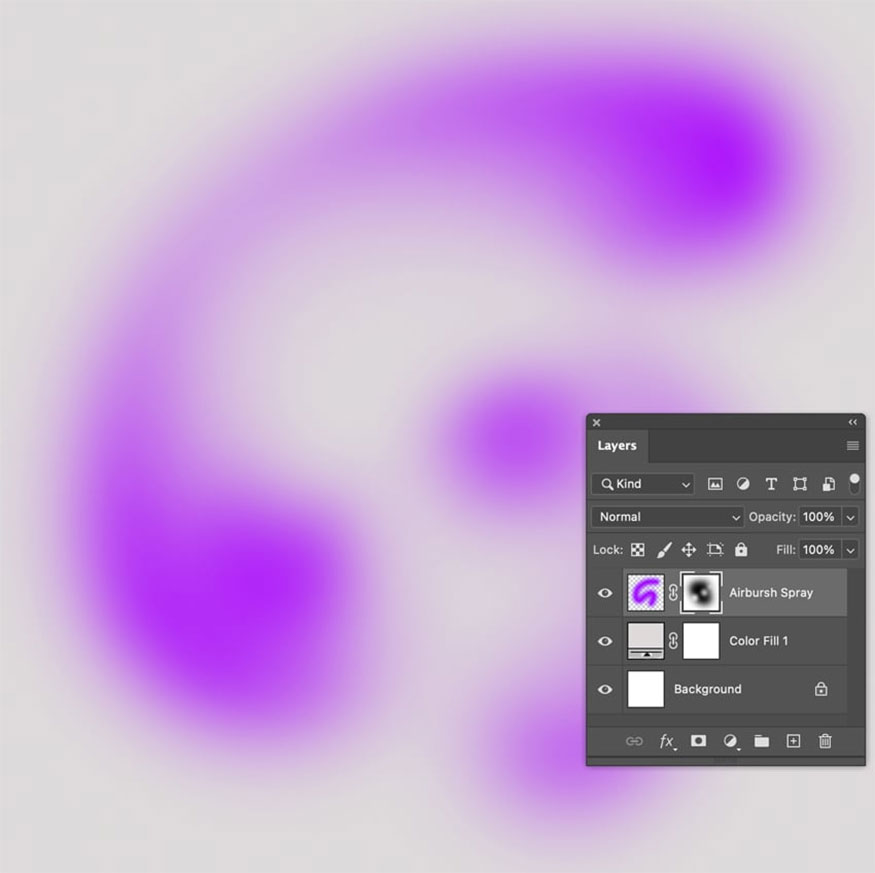
Step 3: Create a new layer above the Color Fill layer and name it “Airbrush Spray”. Use a 1000 px soft Brush to change the Foreground color to # a800ff, and then create curves on your document.
Step 4: Add a mask to the Airbrush Spray layer, then hide random areas of the path using the Brush Tool (B). Set the Foreground color to #000000.
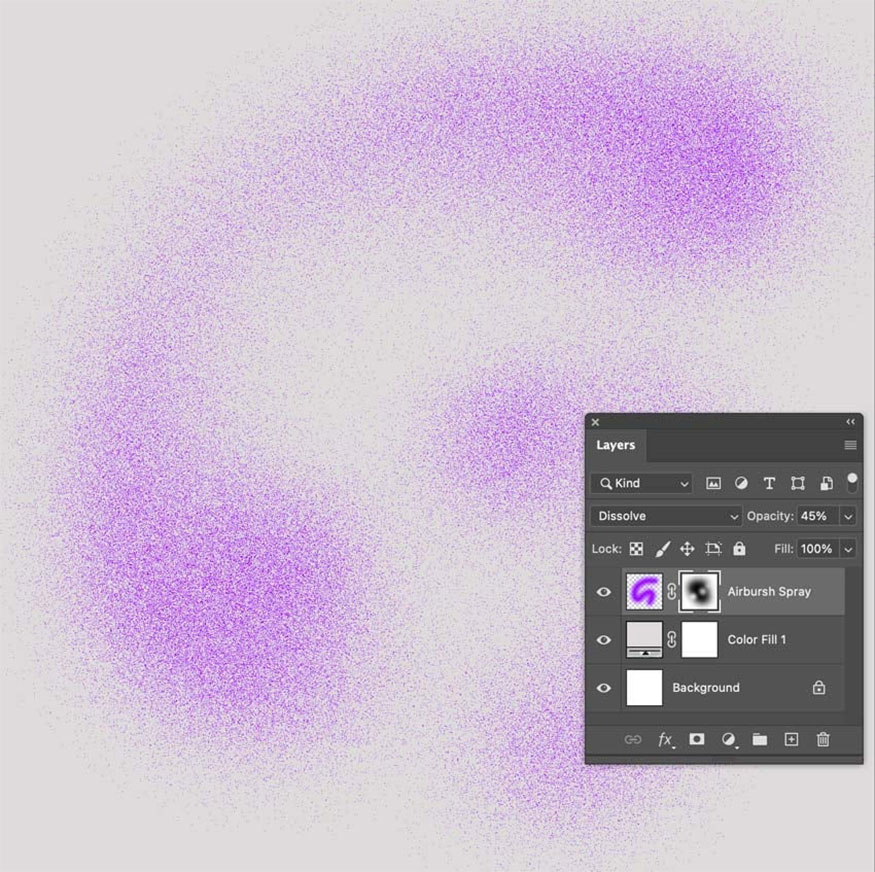
Step 5: Change Airbrush Spray layer to Dissolve and Opacity to 45%.
2. Instructions for arranging text on a document
To arrange text on a document, follow these steps:
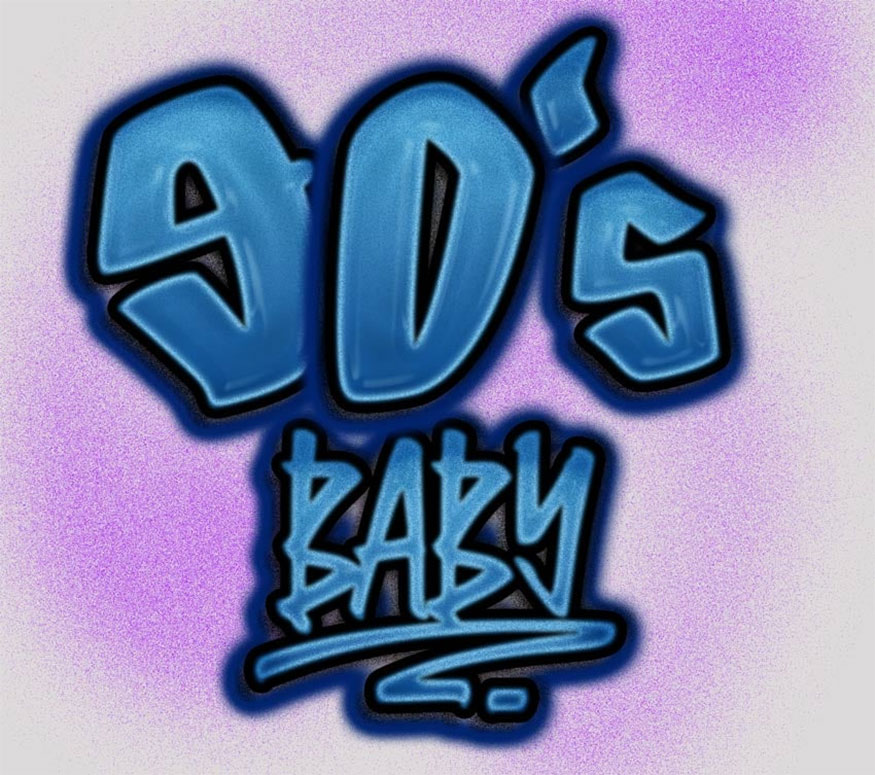
Step 1: Select Type Tool (T) and type the number "9", using the font KOEEYA, then resize it to 1296 pt. Next, select Move Tool (V) => go to Edit => Free Transform and rotate this text layer -6 °.
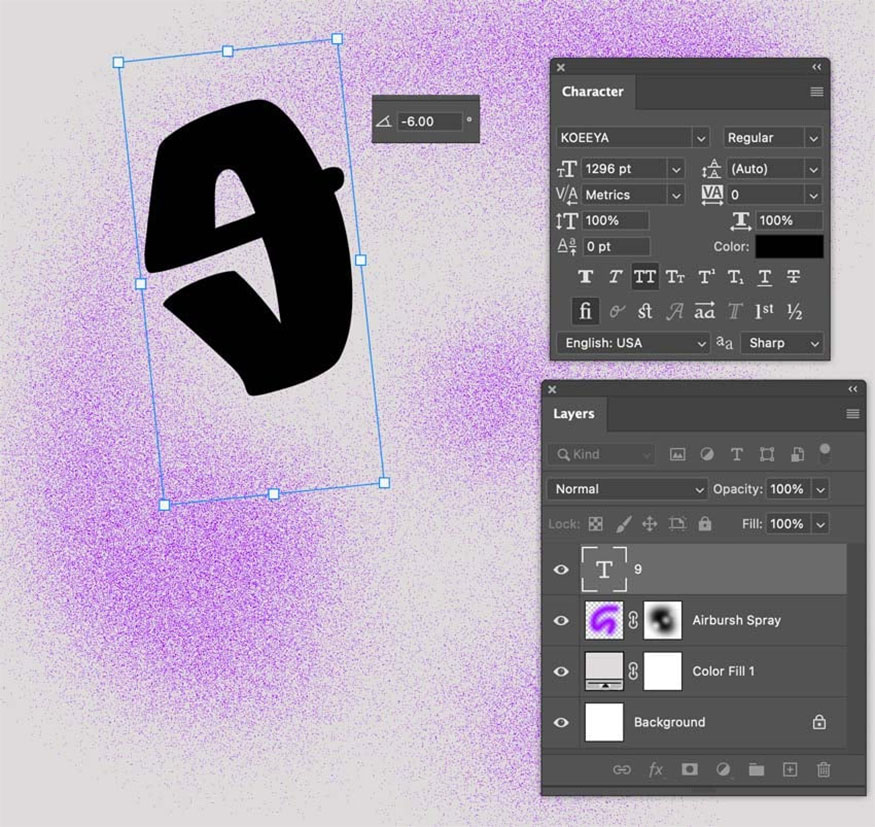
Step 2: Repeat this process for “0”, ' and “s”. You rotate each letter a little bit. Then change the font size of the letter "s" to 800 pt.
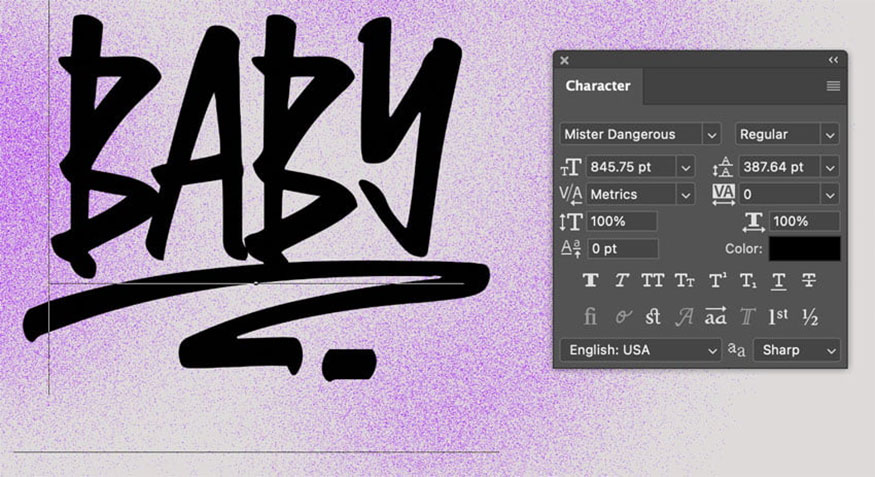
Step 3: Type "BABY" using Mister Dangerous, then change the font size to 845,75 pt. When typing "BABY" you type the letter "o" on the same text layer. Then highlight the letter "o" with the Type Tool (T), change the font to Mister Dangerous Swatches and press Enter on the keyboard to place it below the word "BABY".
3. How to create an Airbrush effect in Photoshop
To create an Airbrush effect in Photoshop, perform the following steps:
Step 1: Select text layer number 9 then right click => Convert to Smart Object. Add blur by selecting Filter => Blur => Gaussian Blur and changing the Radius to 5 pixels.
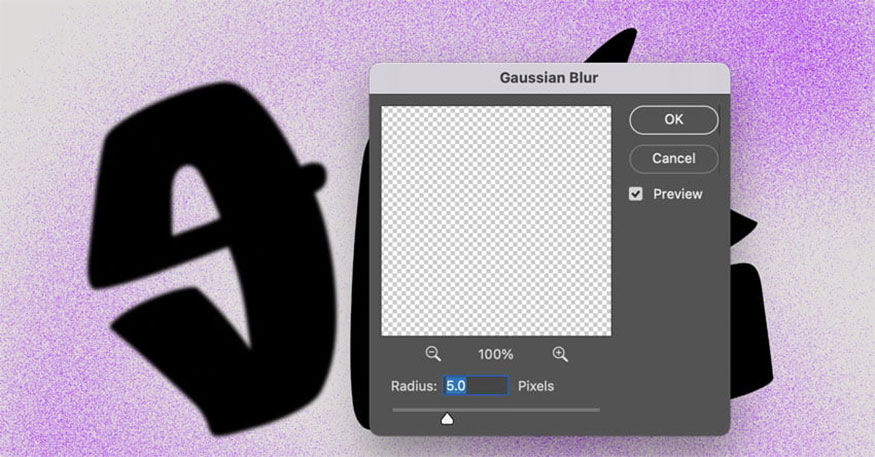
Step 2: Convert other text layers to Smart Objects and add 5 px Gaussian Blur.
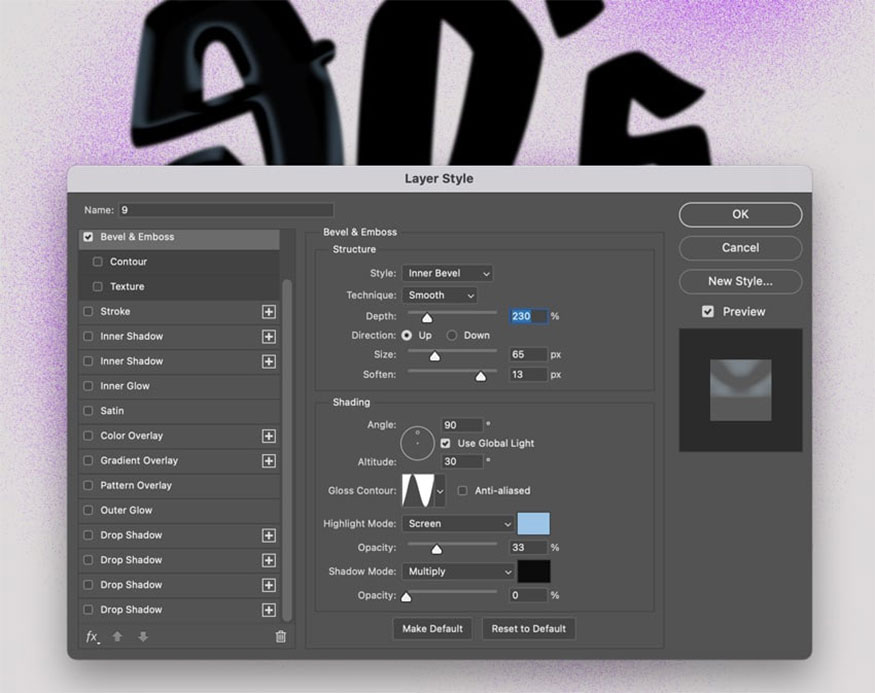
Step 3: Select layer number 9 and add some Layer Styles. Double click on this layer from the Layers panel to display Layer Styles. Make an additional Bevel and Emboss effect and use the following settings:
- Style: Inner Bevel
- Technique: Smooth
- Depth: 230%
- Direction: Up
- Size: 65
- Soften: 13
- Angle: 90
- Altitude: 30
- Gloss Contour: Ring
- Highlight Mode: Screen, #9cc4e6, 33%
- Shadow Mode: Multiply, #000000, 0%
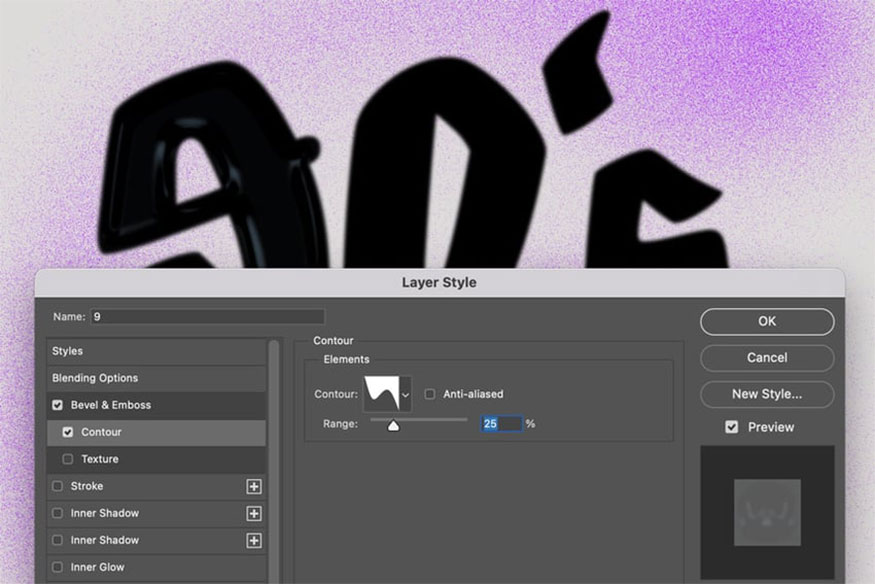
Step 4: Check Contour in the Layer Styles toolbar on the left and make the following settings:
- Contour: Rolling Slope - Descending
- Range: 25%
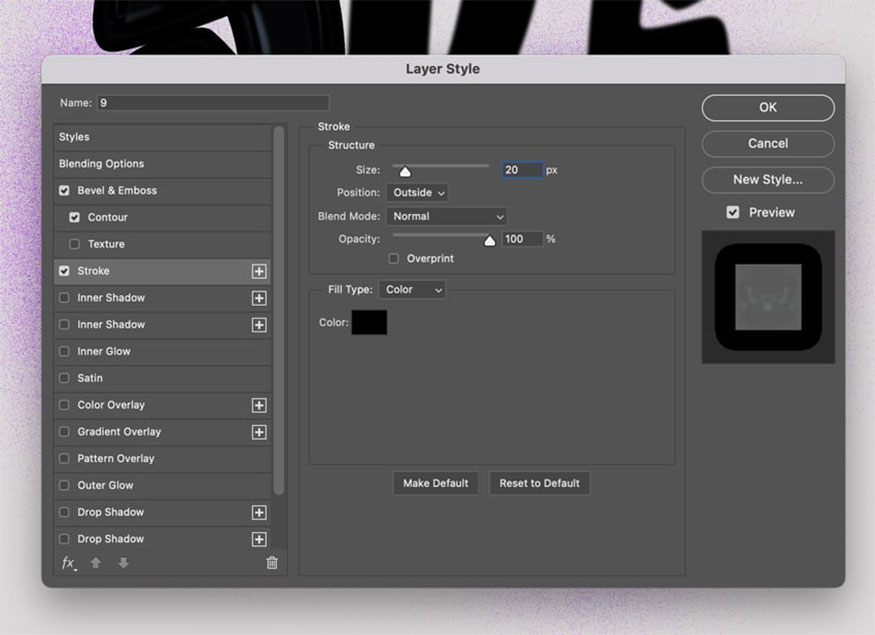
Step 5: Add Stroke by using the following settings:
- Size: 20px
- Position: Outside
- Blend Mode: Normal
- Opacity: 100%
- Fill Type: Color
- Color: #000000
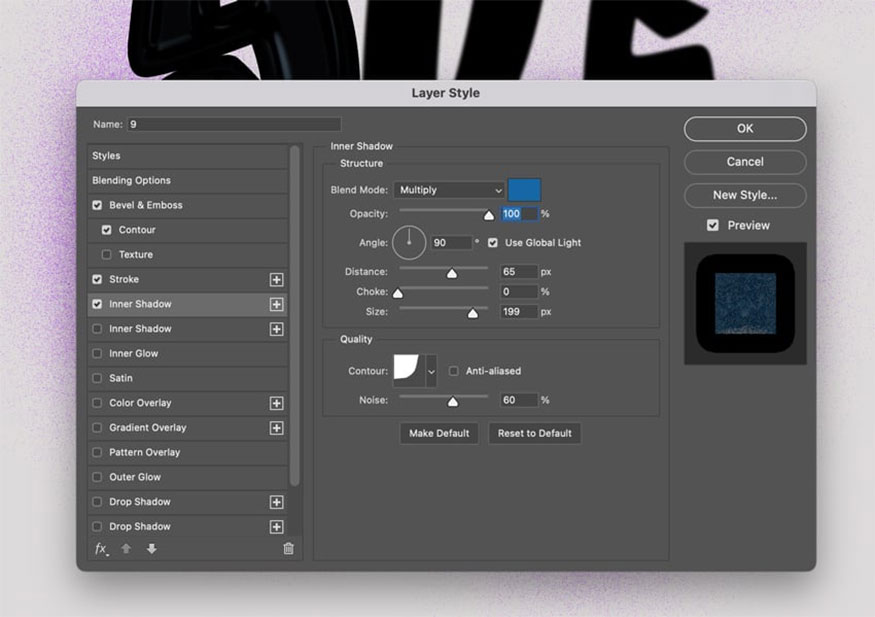
Step 6: Add the following settings in Inner Shadow:
- Blend Mode: Multiply, #1667a6
- Opacity: 100%
- Angle: 90
- Distance: 65%
- Choke: 0%
- Size: 199 px
- Contour: Cove Deep
- Noise: 60%
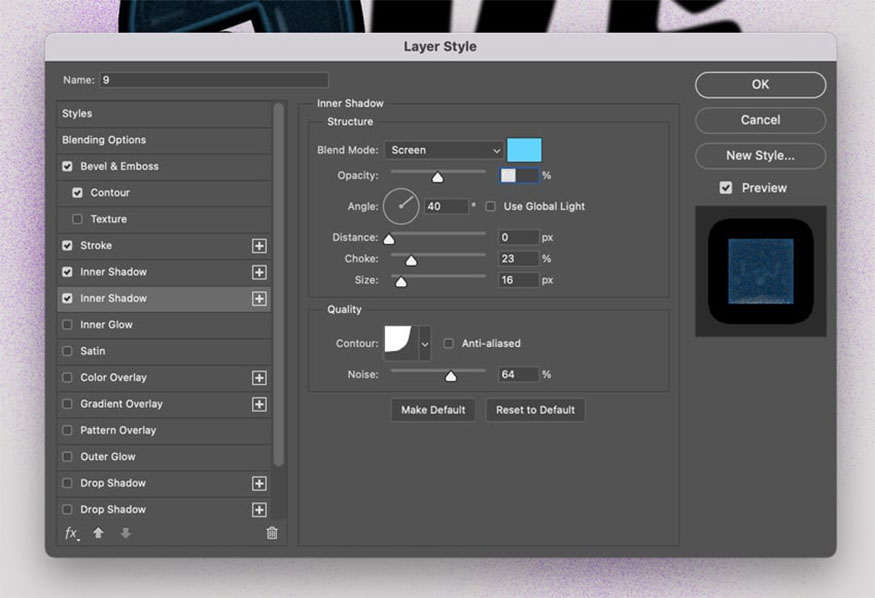
Step 7: Add another Inner Shadow effect by using the following settings:
- Blend Mode: Screen, #64d4fe
- Opacity: 50%
- Angle: 40
- Use Global Light: Unchecked
- Distance: 0%
- Choke: 23%
- Size: 16 px
- Contour: Cove Deep
- Noise: 64%
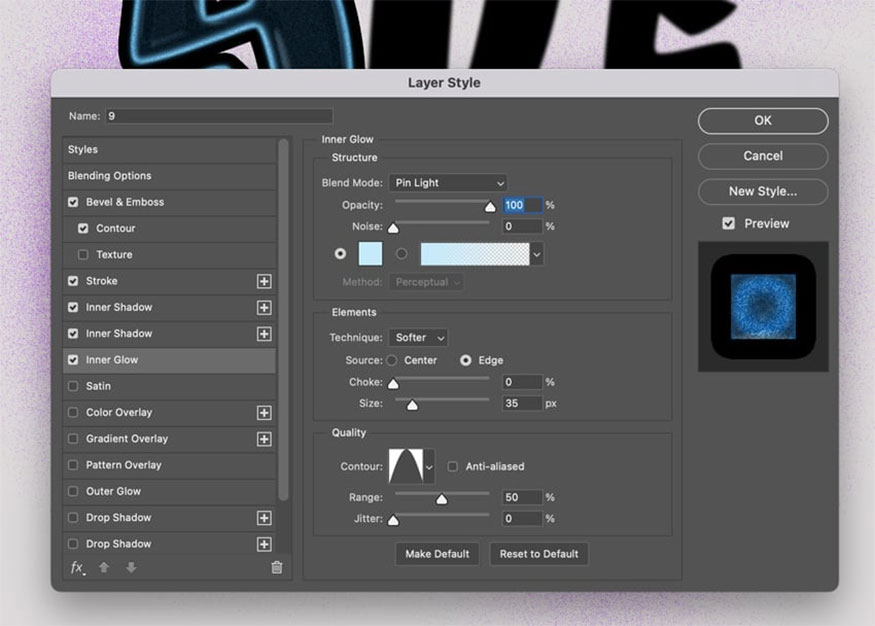
Step 8: Add Inner Glow effect by using the following settings:
- Blend Mode: Pin Light
- Opacity: 100%
- Noise: 0%
- Color: #c5e9fa
- Technique: Softer
- Source: Edge
- Choke: 0%
- Size: 35px
- Contour: Cone
- Range: 50%
- Jitter: 0%
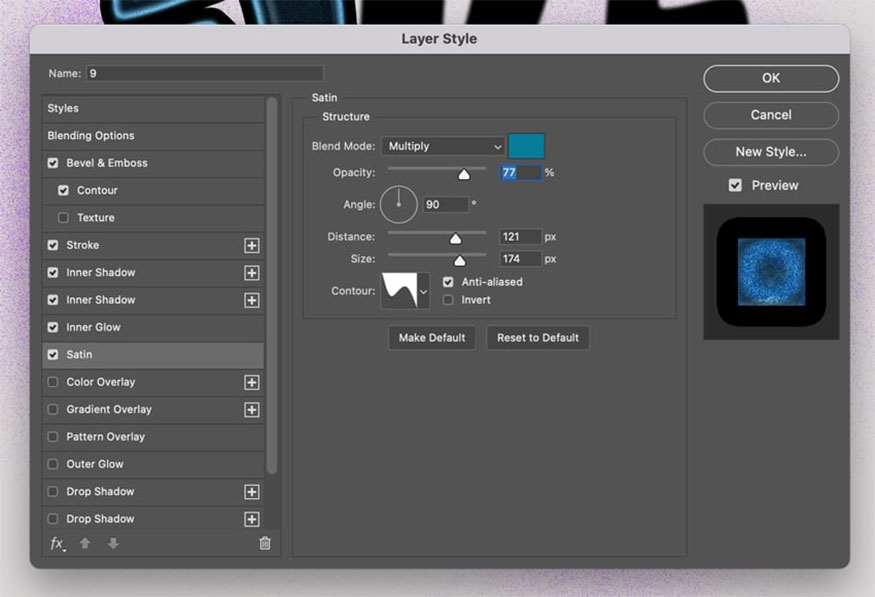
Step 9: Add Satin layer by using the following settings:
- Blend Mode: Multiply, #087d9a
- Opacity: 77%
- Angle: 90
- Distance: 121 px
- Size: 174 px
- Contour: Rolling Slope Descending
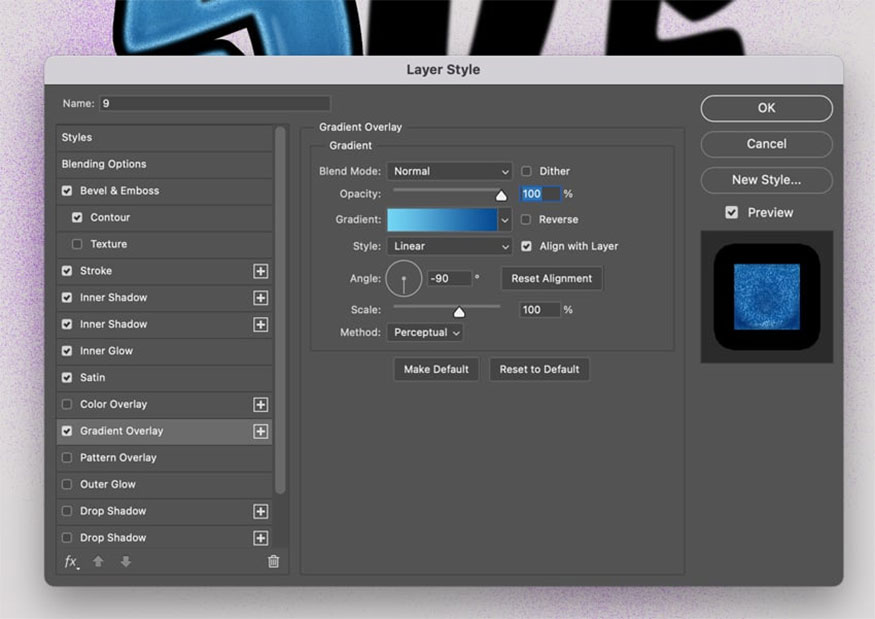
Step 10: Add Gradient Overlay by using the following settings:
- Blend Mode: Normal
- Opacity: 100%
- Gradient: #74d4f4 - #054990
- Style: Linear
- Angle: -90
- Scale: 100%
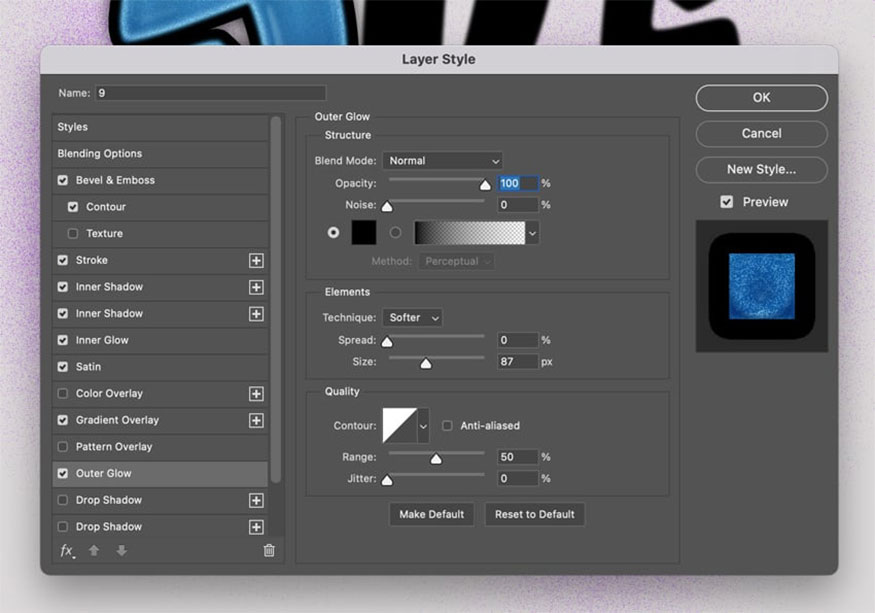
Step 11: Add Outer Glow by using the following settings:
- Blend Mode: Normal
- Opacity: 100%
- Noise: 0%
- Color: #000000
- Technique: Softer
- Spread: 0%
- Size: 87px
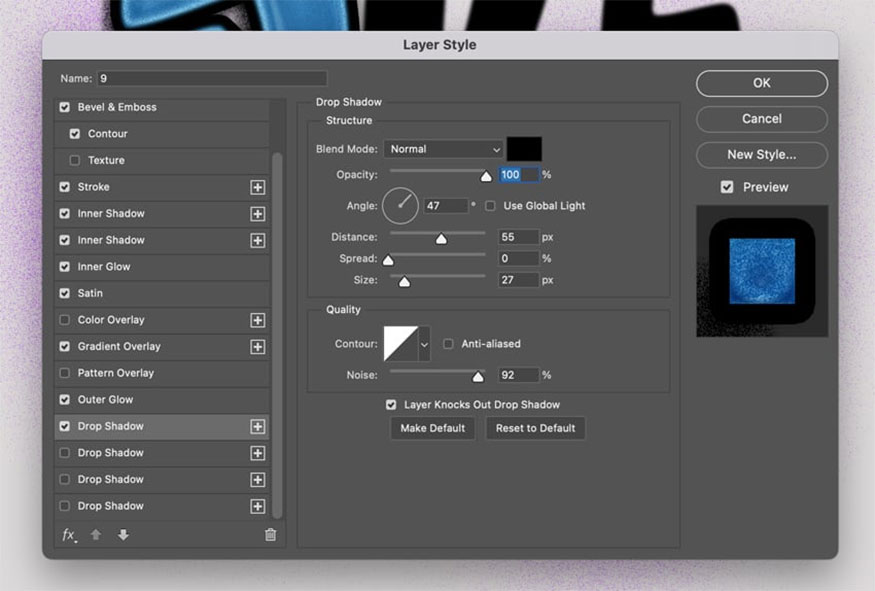
Step 12: Add Drop Shadow layer by using the following settings:
- Blend Mode: Normal, #000000
- Opacity: 100%
- Angle: 47
- Distance: 55 px
- Spread: 0%
- Size: 27 px
- Contour: Linear
- Noise: 92%
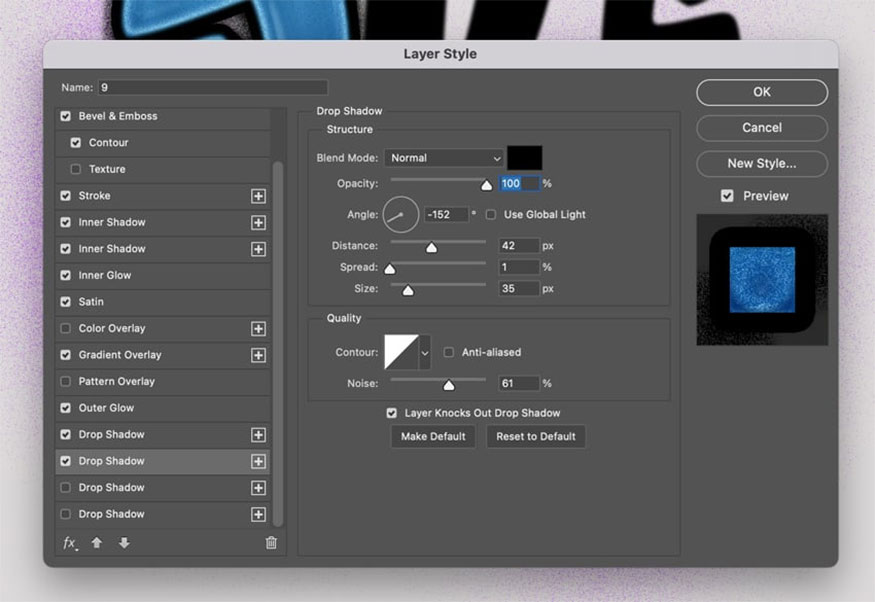
Step 13: Add another Drop Shadow layer:
- Blend Mode: Normal, #000000
- Opacity: 100%
- Angle: -152
- Distance: 42 px
- Spread: 1%
- Size: 35 px
- Contour: Linear
- Noise: 61%
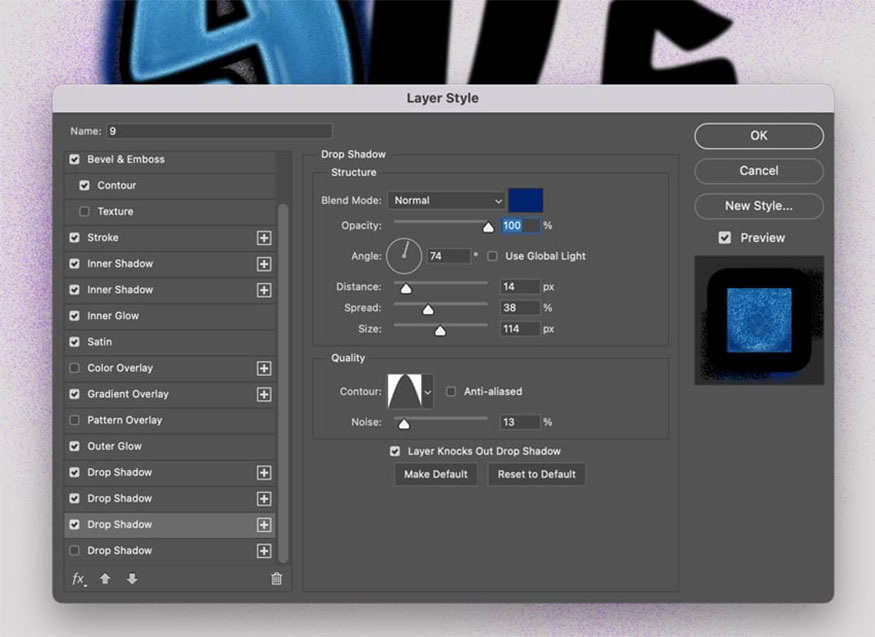
Step 14: Add another Drop Shadow layer:
- Blend Mode: Normal, #01236f
- Opacity: 100%
- Angle: 74
- Distance: 14 px
- Spread: 38%
- Size: 114 px
- Contour: Cone
- Noise: 13%
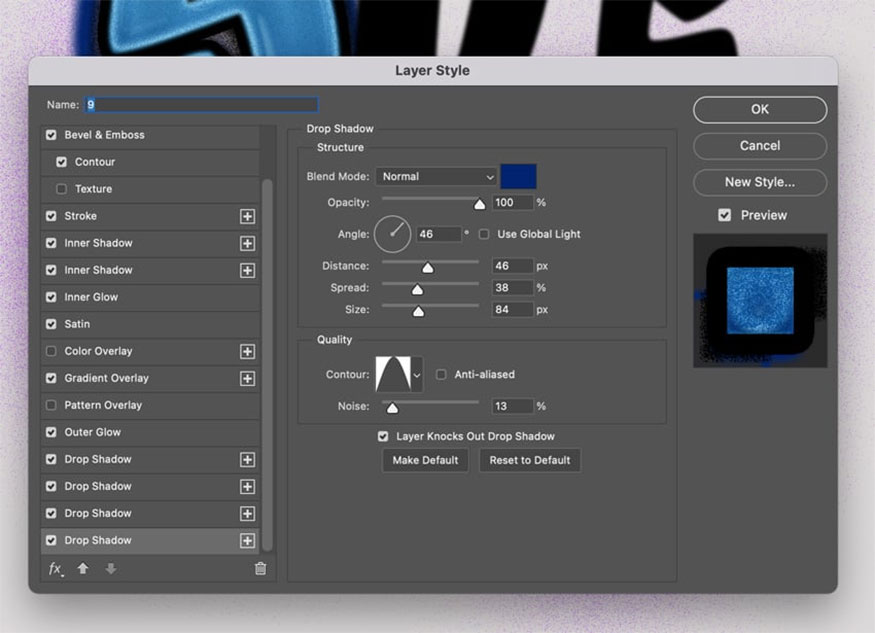
Step 15: Add Drop Shadow Layer Style:
- Blend Mode: Normal, #01236f
- Opacity: 100%
- Angle: 46
- Distance: 46 px
- Spread: 38%
- Size: 84 px
- Contour: Cone
- Noise: 13%
Step 16: Click OK.
Then copy this layer style by right clicking => Copy Layer Style.
Select other text layers then right click => Paste Layer Style.
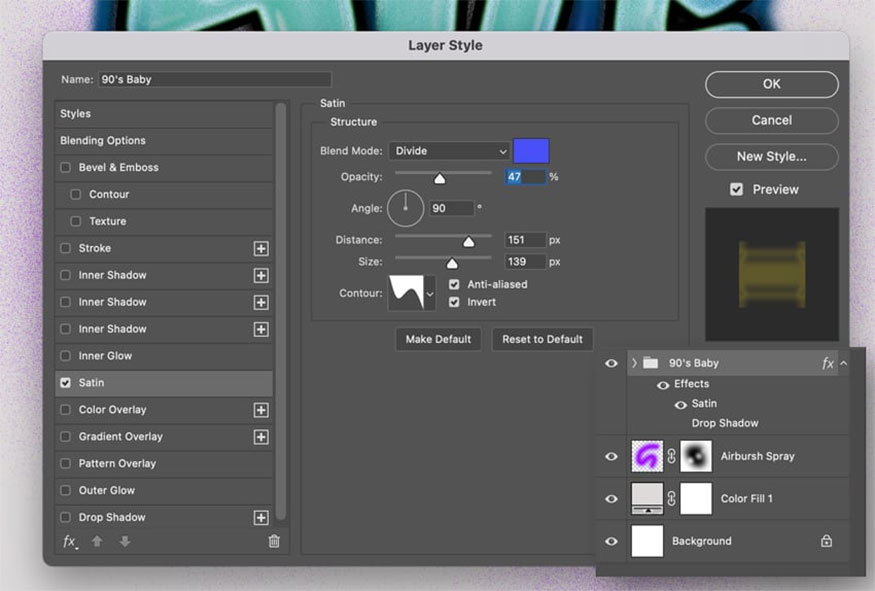
Step 17: Place the text layers in a group and apply Satin Layer Style to the group according to the following settings:
- Blend Mode: Divide, #4850f7
- Opacity: 47%
- Angle: 90
- Distance: 151 px
- Size: 139 px
- Contour: Rolling Slope Descending
- Anti-aliased: Checked
- Invert: Checked
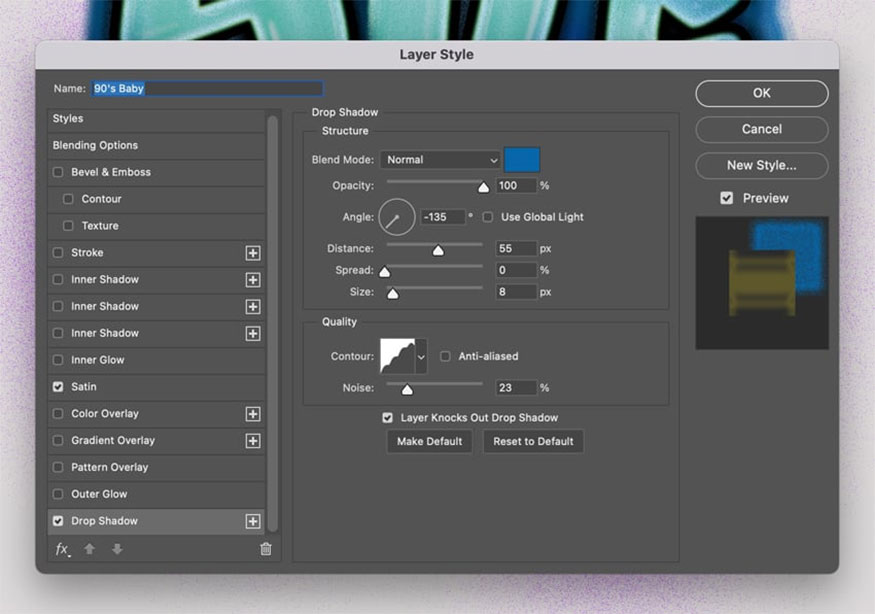
Step 18: Add Drop Shadow:
- Blend Mode: Normal, #0666a9
- Opacity: 100%
- Angle: -135
- Distance: 55 px
- Spread: 0%
- Size: 8 px
- Contour: Rounded Steps
- Noise: 23%
Step 19: Enter the letter "S" using the font Mister Dangerous Swatches. Place the heart within the letter group and change the font size to 500 pt. Make a conversion of the heart to Smart Object and add 5 pixel Gaussian Blur. Copy (Command-C) and paste (Command-V) the layer style from number 9 to this layer.
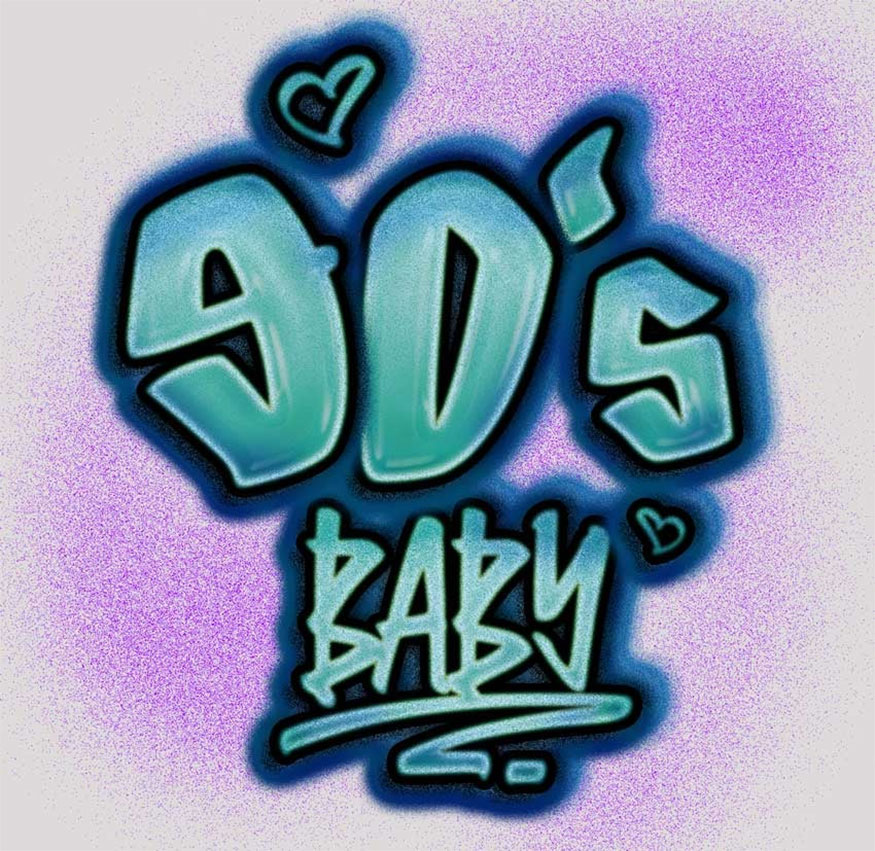
Step 20: With the heart layer selected, go to Layer => Layer Style => Scale Effects. You change the Scale to 50% then click OK.
4. Discover 5 interesting Airbrush effects
With the built-in effects you can completely transform any simple text into a classic Airbrush effect. With these airbrush effects, you are guaranteed to create great impressions:
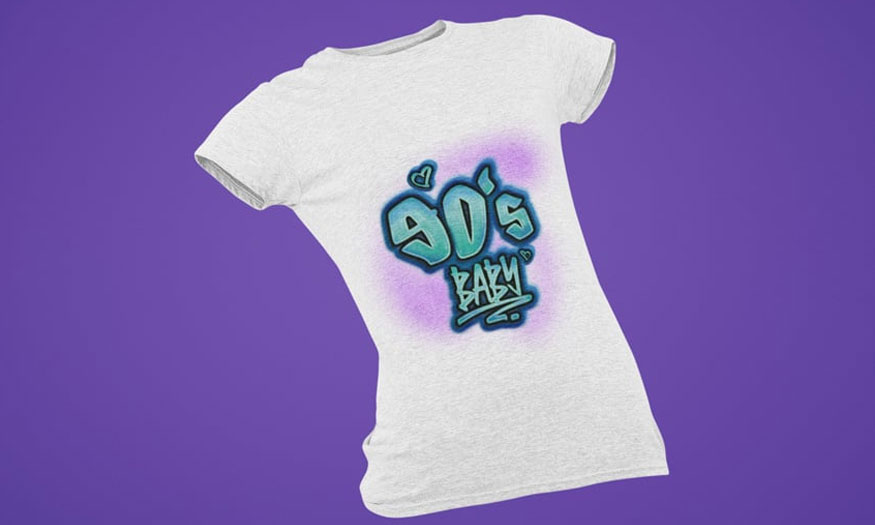
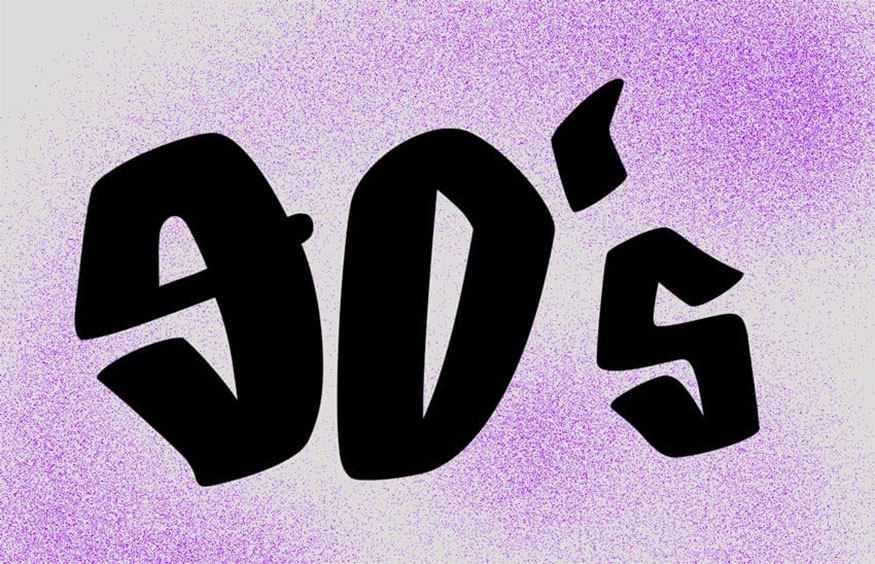
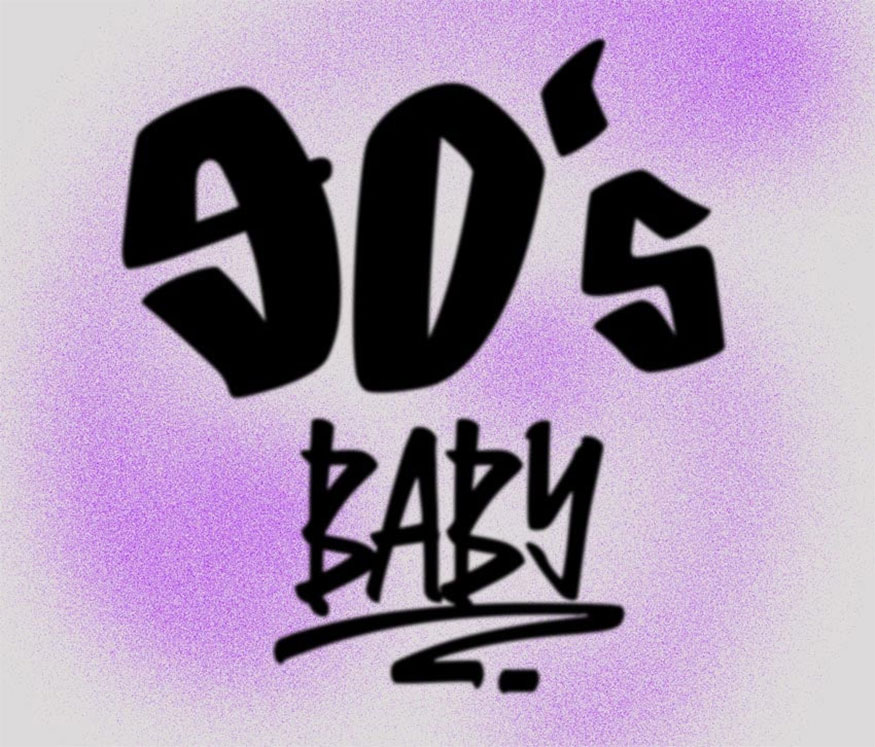
4.1. 90s Airbrush text effect
90s Airbrush text effect is the ultimate effect to help bring a vintage feel to the design your. Just a few simple clicks and you will have a great design right for you.

Besides, this smart object feature also helps you easily customize and experiment with many different styles.
4.2. Photoshop Text Airbrush Graffiti Effect
This effect turns ordinary text into vivid, eye-catching graffiti masterpieces. With Graffiti Airbrush Photoshop text allows you to easily create beautiful airbrushing effects. Your design will become more prominent and impressive.
4.3. Paint spraying Airbrush effect
With this effect you can easily add a realistic airbrush effect to your text. It brings the perfect combination of style and nostalgia.
4.4. Graffiti brush set effect
This effect helps you create beautiful masterpieces for yourself. The Graffiti brush set is considered the perfect choice to add depth and magic to your designs.
4.5. Graffiti Airbrush style effect
Instead of boring text effects, you can create vivid, eye-catching works of art thanks to Graffiti Airbrush. This special effect turns your creations into beautiful works of art.
Hopefully the detailed information that Sadesign brings above has helped you create the simplest and easiest Airbrush text effect in Photoshop. Don't forget to follow us for more interesting information!


VIP Products


Best Selling Products
ChatGPT Plus Account (GPT-4)
16 USD
MidJourney Account
29 USD
Adobe Premiere Pro Account
99 USD
Upgrade genuine Capture One account
120 USD
Genuine Adobe Illustrator account
99 USD
Copyright Adobe Lightroom Account
59 USD
Autodesk All App Account Copyright
120 USD
Adobe Photoshop Copyright - Full App
120 USD
Upgrade Genuine Office 365
49 USD
Windows 10 & 11 Pro Key
36 USD
Capcut Pro 1 Year
39 USD
Freepik Premium Account
59 USD
Genuine Cheap Canva Pro
39 USD
Plugin Retouch4me
69 USD
Upgrade Duolingo Super
29 USD