Best Selling Products

Genuine Adobe Illustrator account
99 USD

Windows 10 & 11 Pro Key
36 USD

Capcut Pro 1 Year
39 USD

Upgrade genuine Capture One account
120 USD

Autodesk All App Account Copyright
120 USD

Adobe Premiere Pro Account
99 USD

MidJourney Account
29 USD

Adobe Photoshop Copyright - Full App
120 USD

Upgrade Duolingo Super
29 USD

ChatGPT Plus Account (GPT-4)
16 USD

Plugin Retouch4me
69 USD

Upgrade Genuine Office 365
49 USD

Freepik Premium Account
59 USD

Genuine Cheap Canva Pro
39 USD

Copyright Adobe Lightroom Account
59 USD
How to create a baseball card template in Photoshop
Nội dung
- 1. Create a file for a baseball card
- 2. How to create a border for a baseball card template
- 3. How to create a baseball card background
- 4. How to add a photo to the baseball card template
- 5. Instructions for creating stars in a baseball card template
- 6. Instructions for adding text to a baseball card design
- 7. Baseball card template
- 7.1. Baseball birthday invitation card
- 7.2. Baseball style flyer design
- 7.3. Baseball Game Day Photoshop Template
You can absolutely use Photoshop software to design a baseball card for yourself. Specifically, how to create a baseball card template in Photoshop will be detailed by Sadesign in the following article.
You can absolutely use Photoshop software to design a baseball card for yourself. Specifically, how to create a baseball card template in Photoshop will be detailed by Sadesign in the following article.

1. Create a file for a baseball card
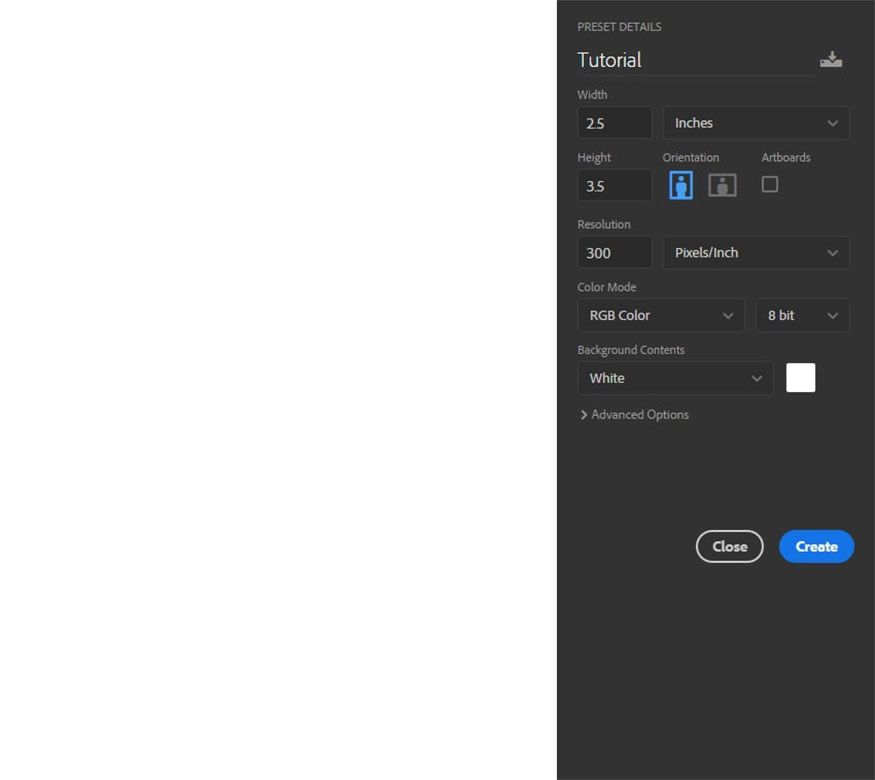
First, you need to open Photoshop => File => New => install according to the following parameters:
- Width: 2.5 inch
- Height: 3.5 inch
- Resolution to 300 px/in.
2. How to create a border for a baseball card template
To create a border for a baseball card template, click on the Rounded Rectangle Tool => click anywhere inside the canvas to create a new rounded rectangle layer. Then install according to the following parameters:
- Width: 730px
- Height: 1030 px
- Radius: 10px
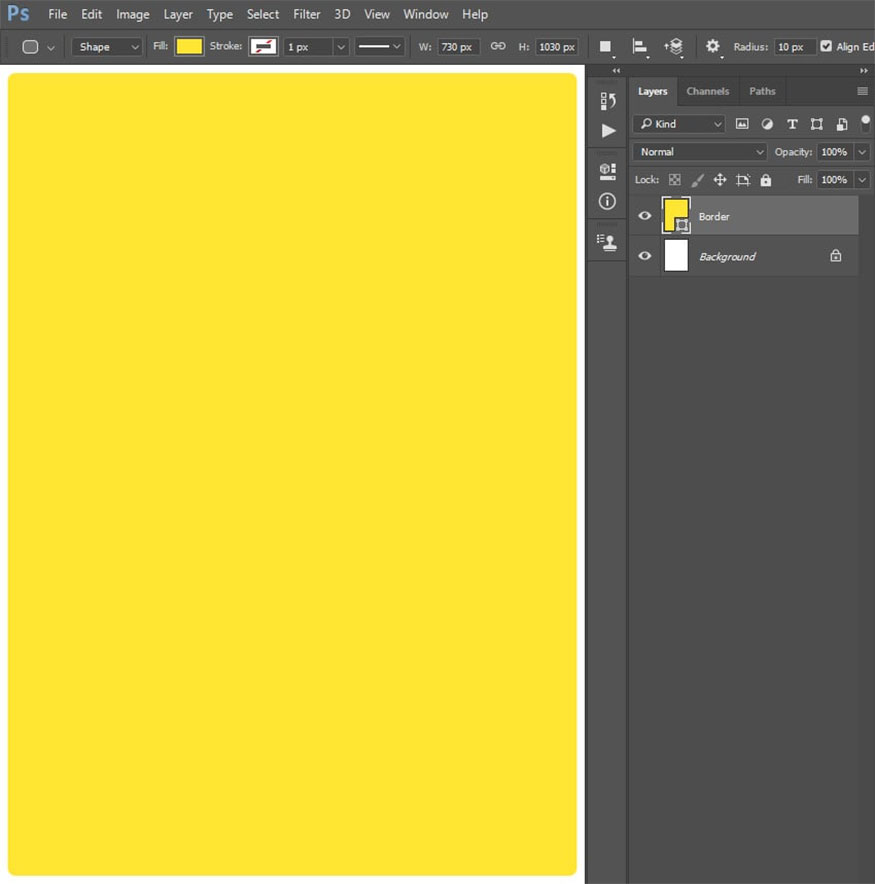
Next, set the Fill Solid Color to #ffe533, centering this layer both vertically and horizontally on the canvas. Please name this layer as “Border”.
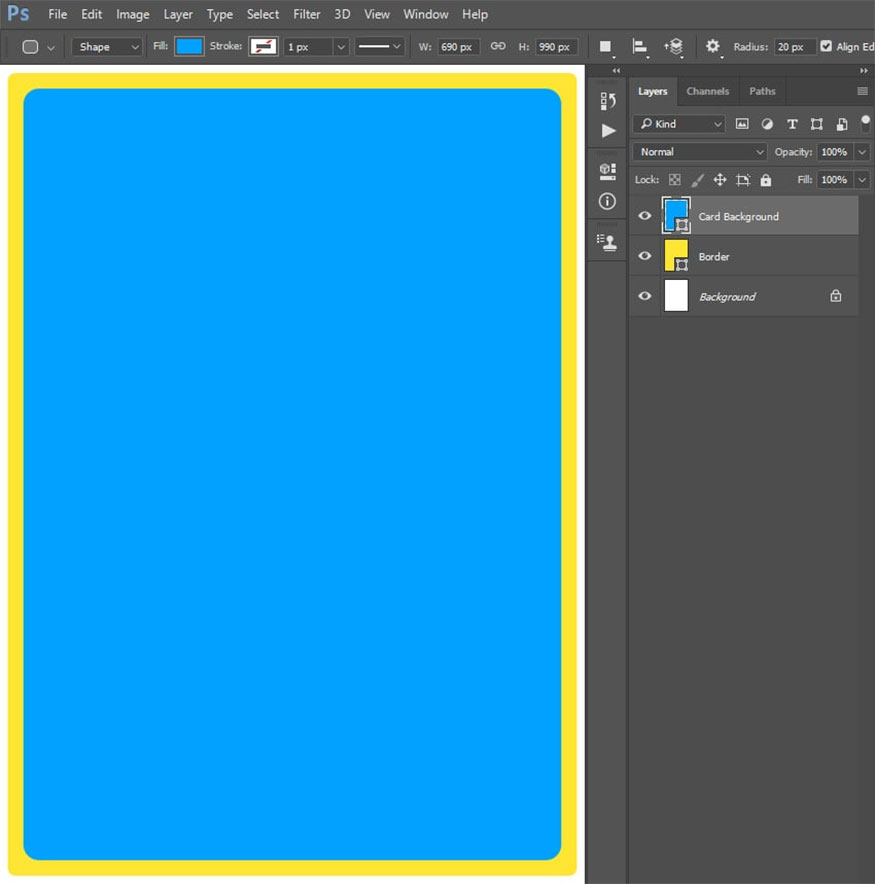
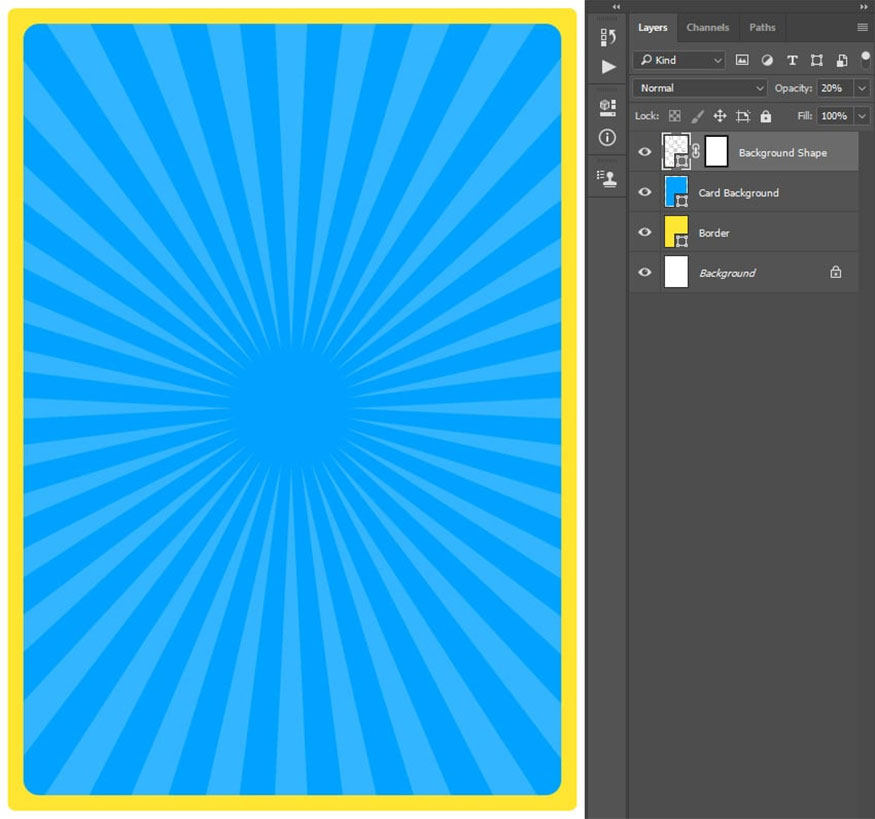
3. How to create a baseball card background
To create a baseball card background, follow the following specific instructions:
Step 1: Select the Rounded Rectangle Tool => click anywhere inside the canvas to create a new rounded rectangle layer and parameter settings:
- Width: 690px
- Height: 990px
- Radius to 20px.
Next, set the Fill Solid Color to “#00a2ff”, aligning this layer both vertically and horizontally on the canvas. Name this layer as “Card Background”.
Step 2: Select the Custom Shape Tool => Registration Target 2 => click anywhere inside the canvas to create a new custom shape layer => set Width and Height to 1350 px. Next in the Fill Solid Color section, select the color #ffffff, align this layer both vertically and horizontally on the canvas.
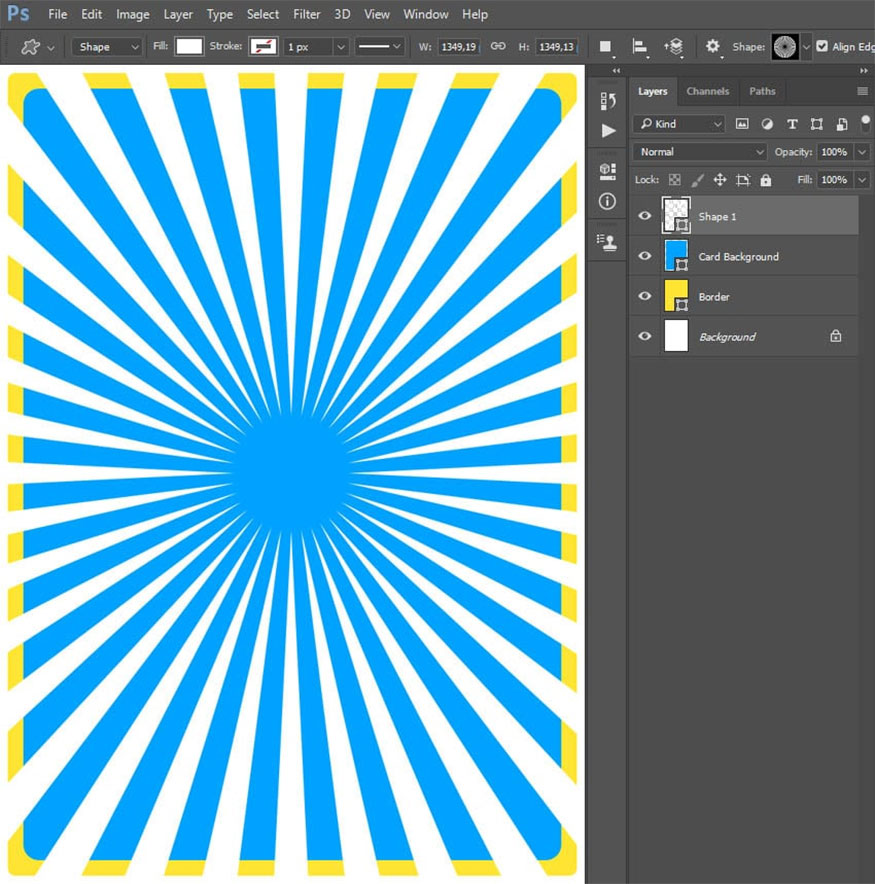
Step 3: Click on the Card Background thumbnail to create a selection for this layer. Go to Layer => Layer Mask => Reveal Selection to add a layer mask.
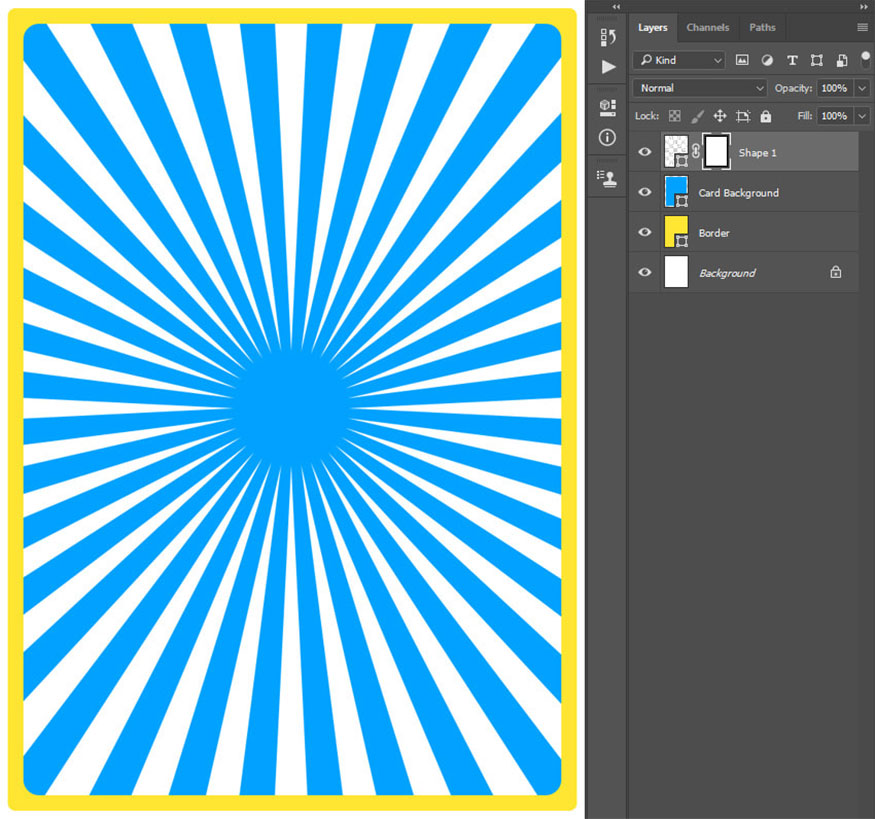
Step 4: Change the Opacity of this layer to 20% and name it as “Background Shape”.
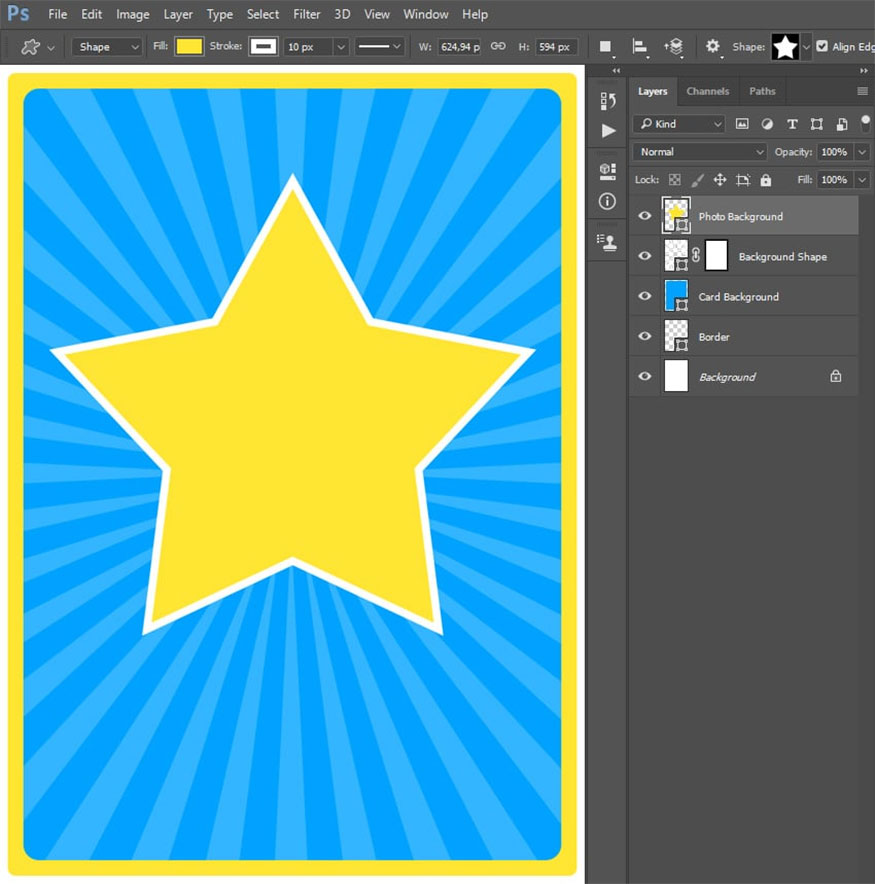
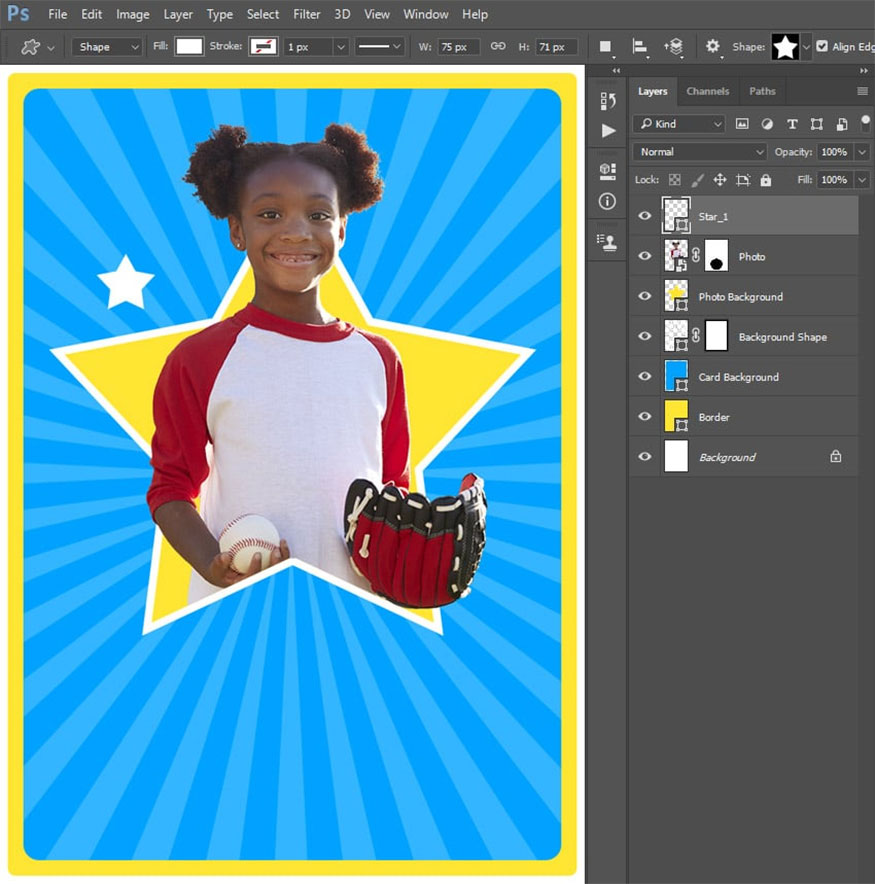
4. How to add a photo to the baseball card template
With the step of adding a photo to the baseball card template, do the following:
Step 1: Select the Custom Shape Tool => select the star 5 => click anywhere in the canvas to create a new custom shape layer.
- Width: 625 px
- Height: 594 px.
- Fill Solid Color: #ffe533
- Stroke Solid Color: #ffffff
- Stroke Height: 10 px
- Position this layer with coordinates :
- X: 375.50 px
- Y: 435 px
- Name it as “Photo Background”.
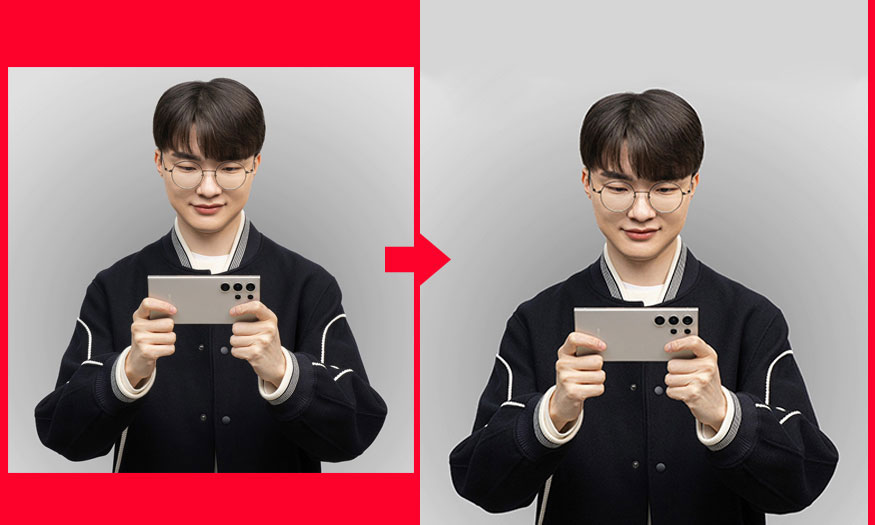
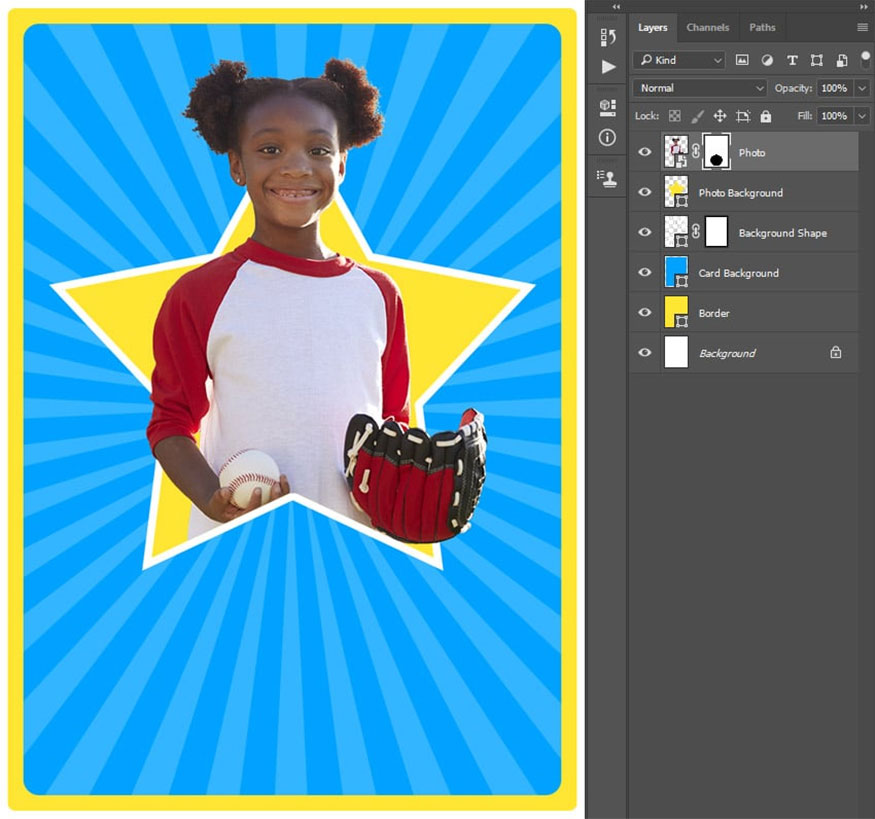
Step 2: Go to File => Open => select an existing image. Then, separate the subject from the photo.
- Right-click to select the image layer => select Convert to Smart Object.
- Use the Move Tool (V) => click and drag the subject layer onto the baseball card template PSD file => select Ctrl-T on the keyboard to open the transform options.
- Width and Height to 24%.
- Position the layer as shown below and name it “Photo”.
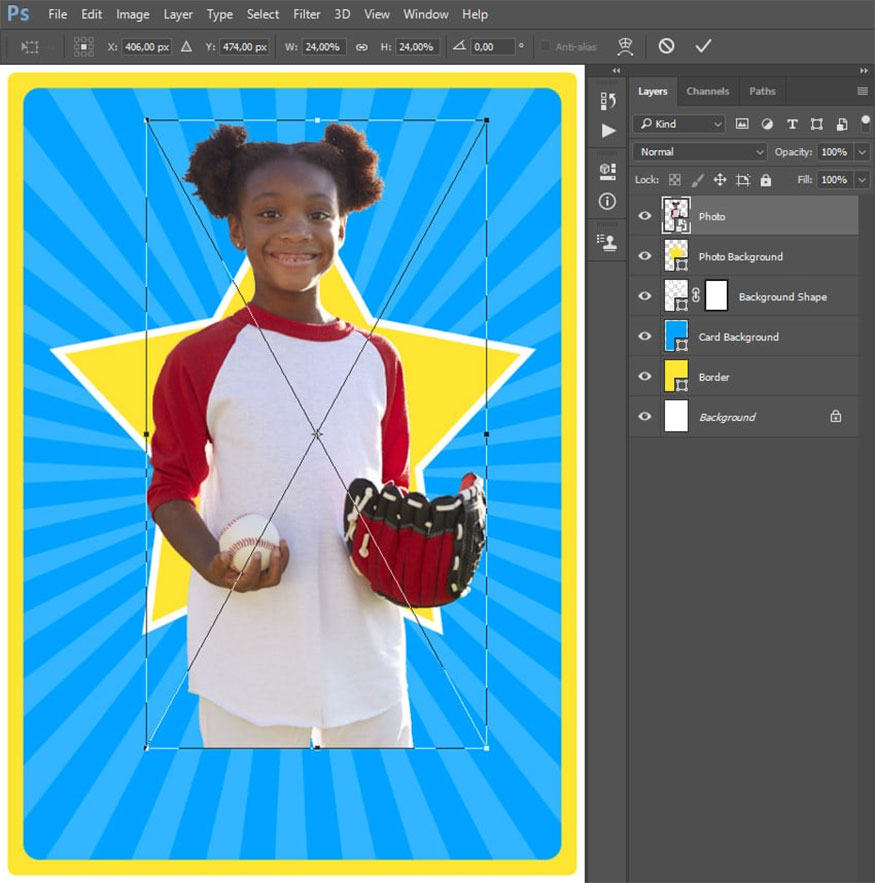
Step 3: Go to Layer => Layer Mask => Reveal All to add a layer mask => select Brush Tool (B) to select a hard brush => set the foreground color to #000000.
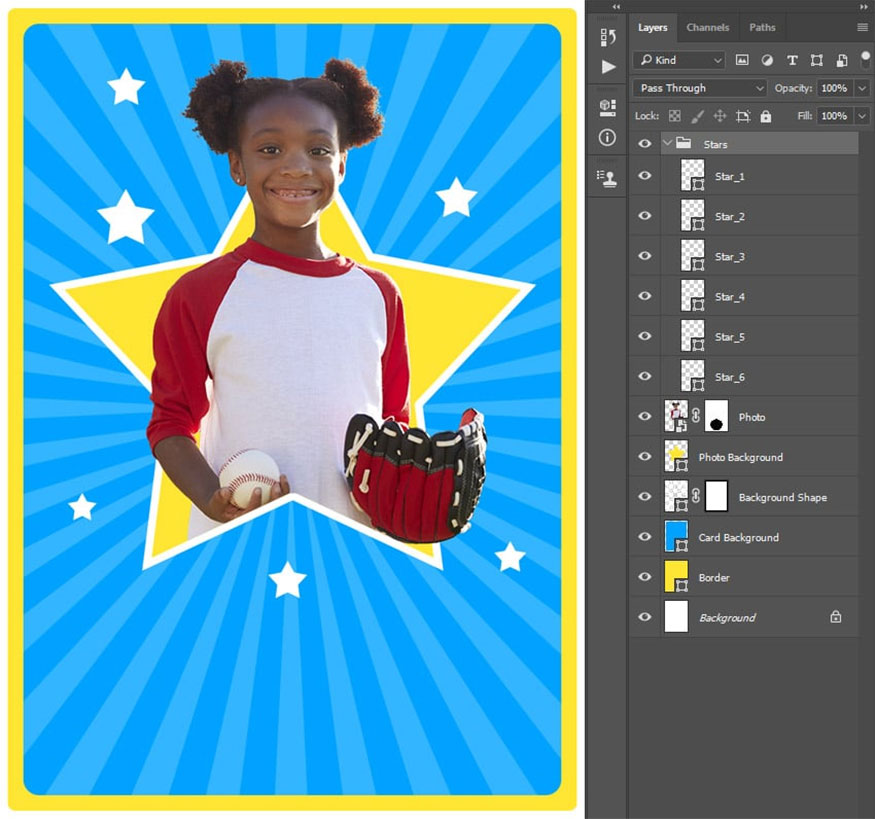
5. Instructions for creating stars in a baseball card template
To create stars in a baseball card, you can do the following:
Step 1: In the toolbar, select Custom Shape Tool => select a 5-point star shape => click anywhere inside the canvas to create a new custom shape layer.
- Width: 75 px
- Height: 71 px.
- Fill Solid Color: #ffffff
- Position this layer with coordinates X: 161.50 px and Y: 277.50 px.
- Name this layer “Star_1” .
Step 2: Repeat the process like step 1 until you add enough stars to your liking. Pay attention to naming the star layer according to their serial number and being able to customize different sizes. Select the first star and hold Shift to select all the stars to group them, name this group “Stars”.
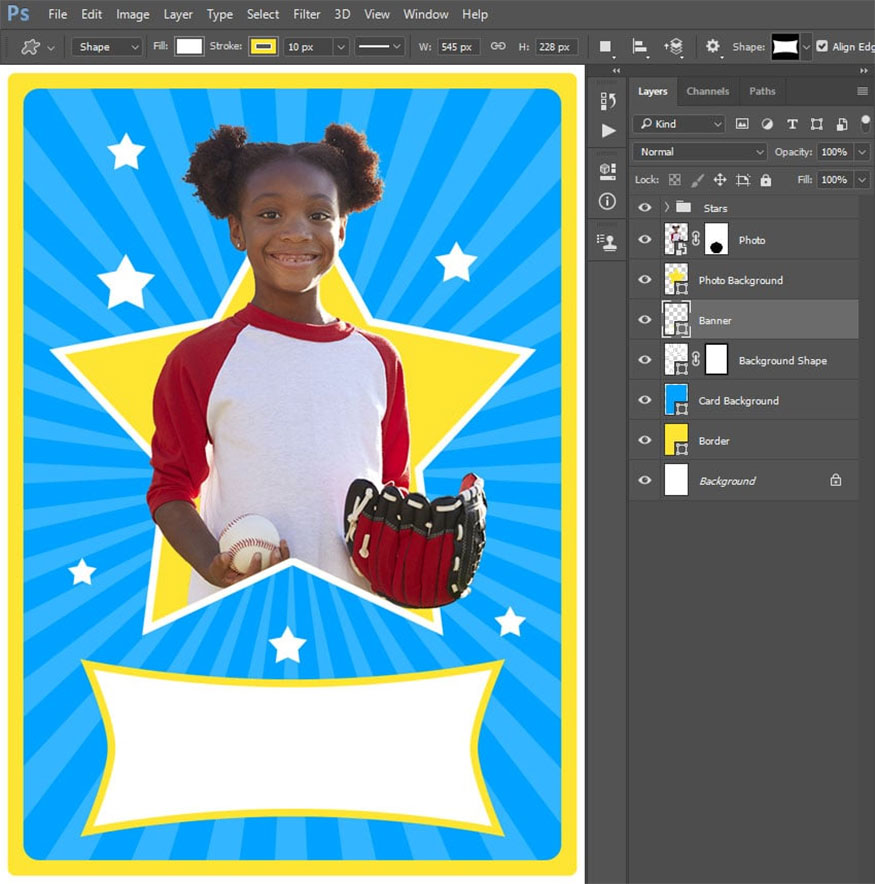
6. Instructions for adding text to a baseball card design
To add text to a baseball card design, you need to proceed with the following steps:
Step 1: Go to Custom Shape Tool => Banner 4 => click anywhere in the canvas to create a new custom shape layer.
- Width: 545 px
- Height: 228 px
- Fill Solid Color: #ffffff
- Stroke Solid Color: #ffe533
- Position this layer with coordinates X: 375.50 px and Y: 876 px
- Name it “Banner”.
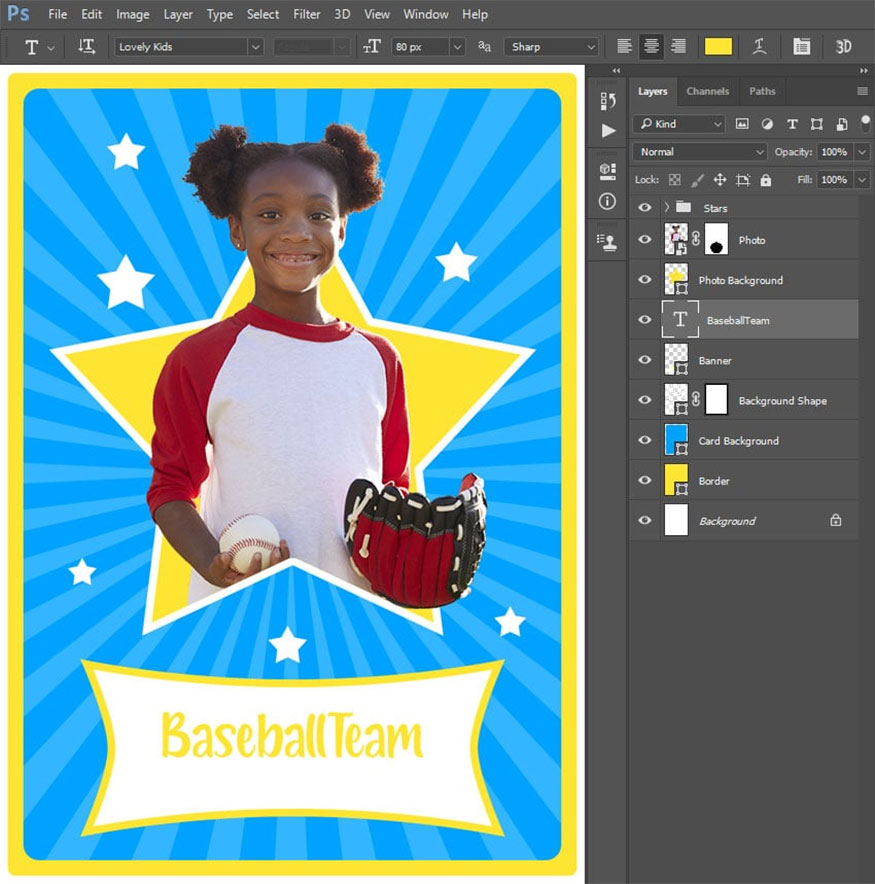
Step 2: Select Horizontal Type Tool (T) => select font as “Lovely Kids”, font size 80 px.
- Align Center
- Set color to #ffe533
- Enter any location and type the text you want => set this layer with coordinates X: 376 px and Y: 861.50 px.
Step 3: Right click on this layer and select Blending Options => select and check the Stroke style and set as below:

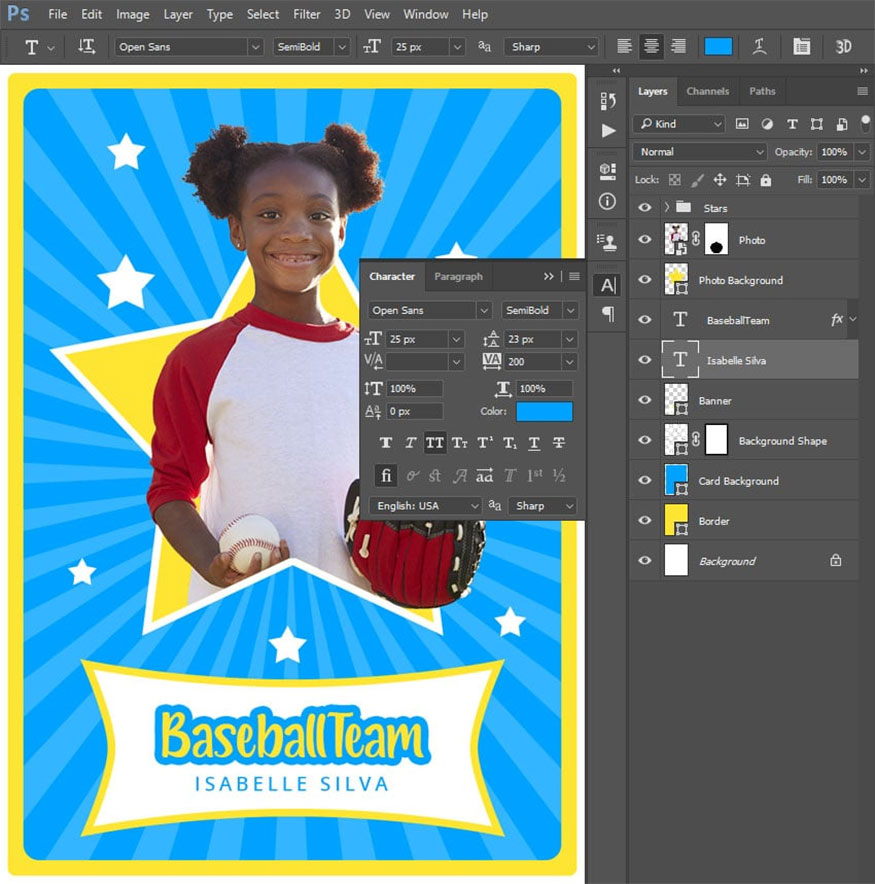
Step 4: Select Horizontal Type Tool (T) and set the font to “Open Sans” => select “SemiBold” font style, font size to 25px, adjust Center and color to #00a2ff.
In the Character panel, click the All Caps option and set Tracking to 200 => click anywhere inside the canvas and enter the text "Isabelle Silva", position this layer with coordinates X: 376.15 px and Y : 923.57 px.
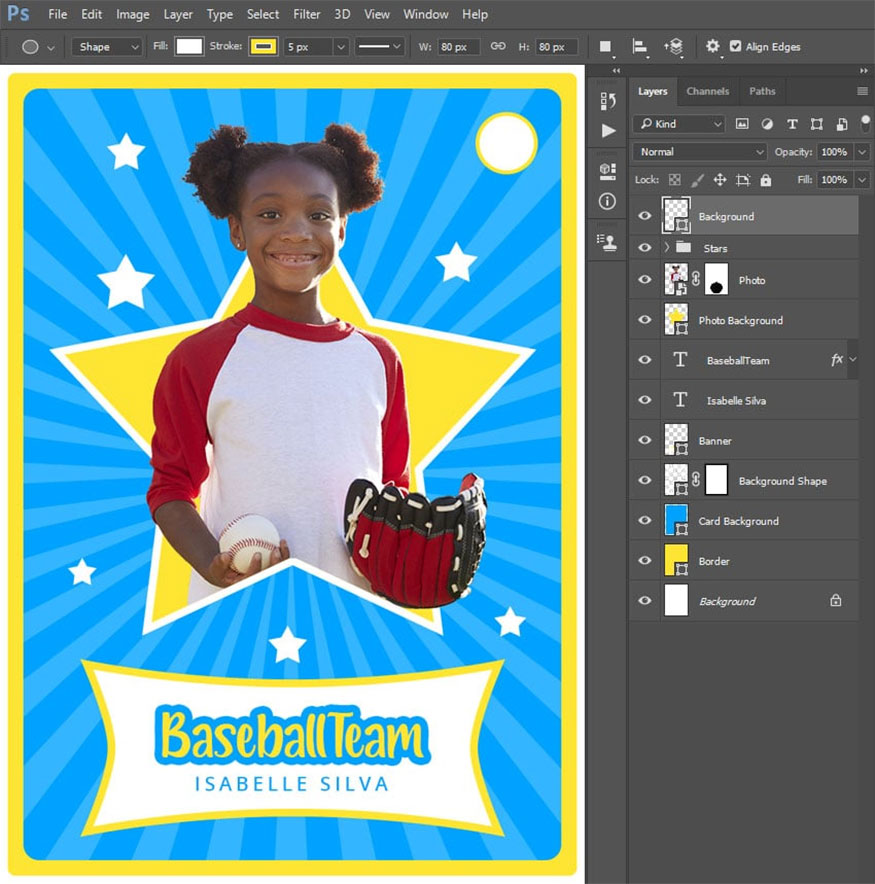
Step 5: Select Custom Shape Tool => Banner 4 => click anywhere inside the canvas to create a new custom shape layer.
- Set width and height to 80px.
- Fill Solid Color: #ffffff
- Stroke Solid Color: #ffe533.
- Position this layer with coordinates X: 650 px and Y: 100 px
- Name it “Background”.
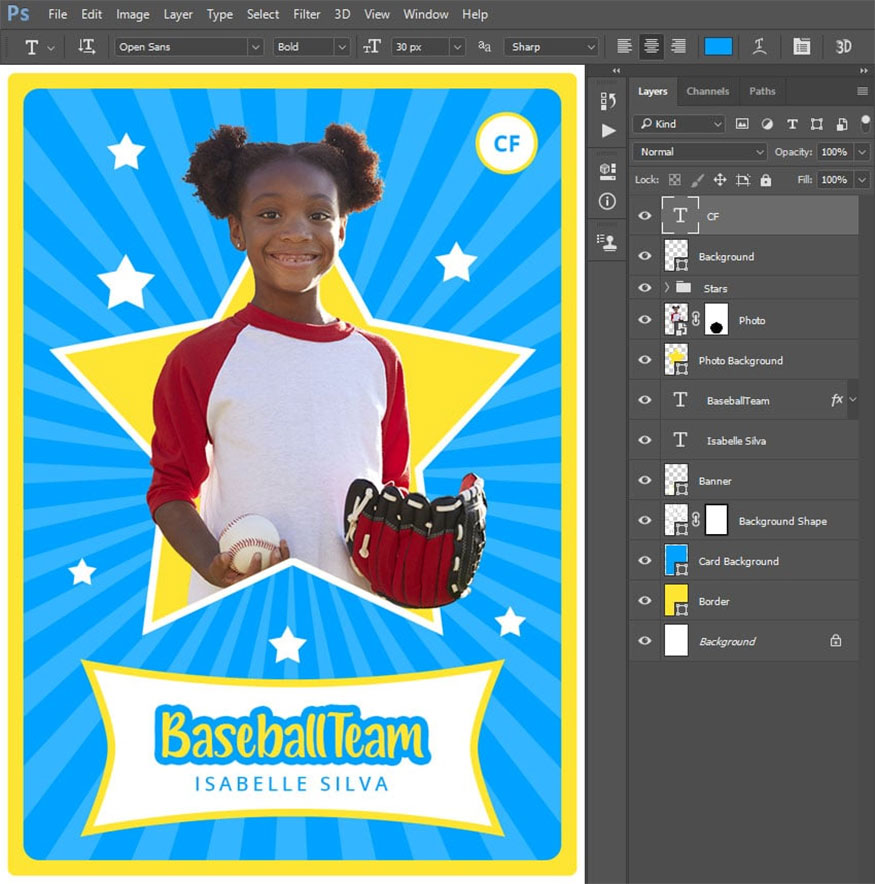
Step 6: Select the Horizontal Type Tool (T), set the font to “Open Sans”, font style to Bold, font size 30px, Center alignment and color to #00a2ff.
Enter the text "CF", then press and hold Control while clicking the Background thumbnail to create a selection for this layer => press the Move Tool (V) => Align Vertical Center and Align Horizontal Center to align the layer.
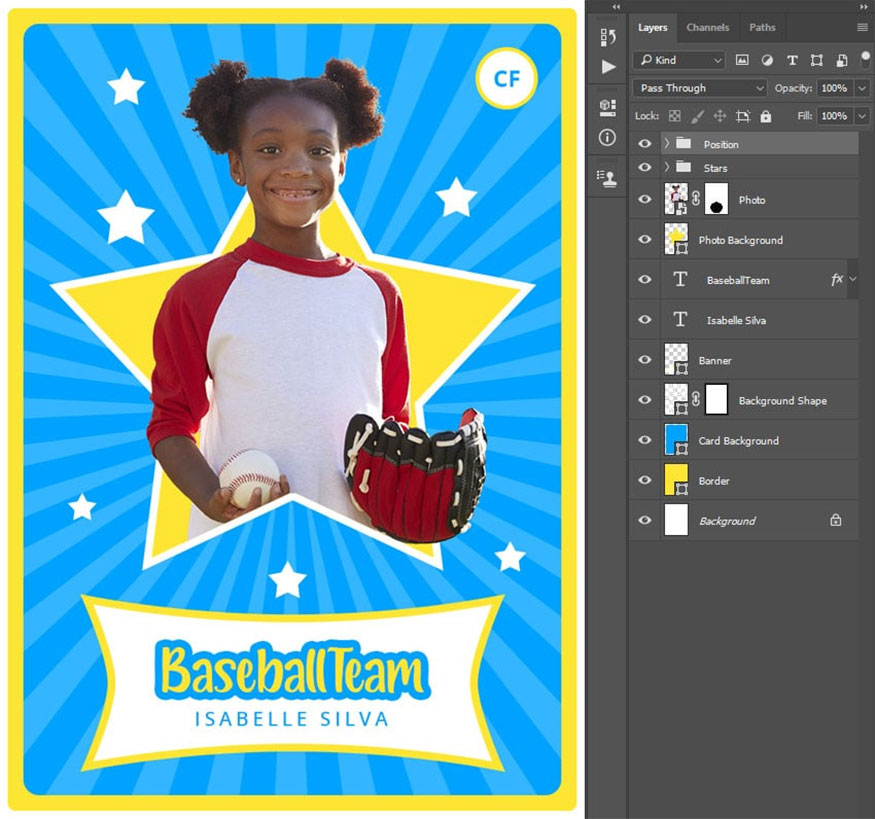
Step 7: Select the Background layer and hold Control when clicking the CF layer to select both layers at once. Press Control-G on your keyboard to create a new group from the selected layers, name them “Position”.
7. Baseball card template
If you want to create a baseball card but don't have enough time, you can refer to some of the following available flowing balloon templates to apply:
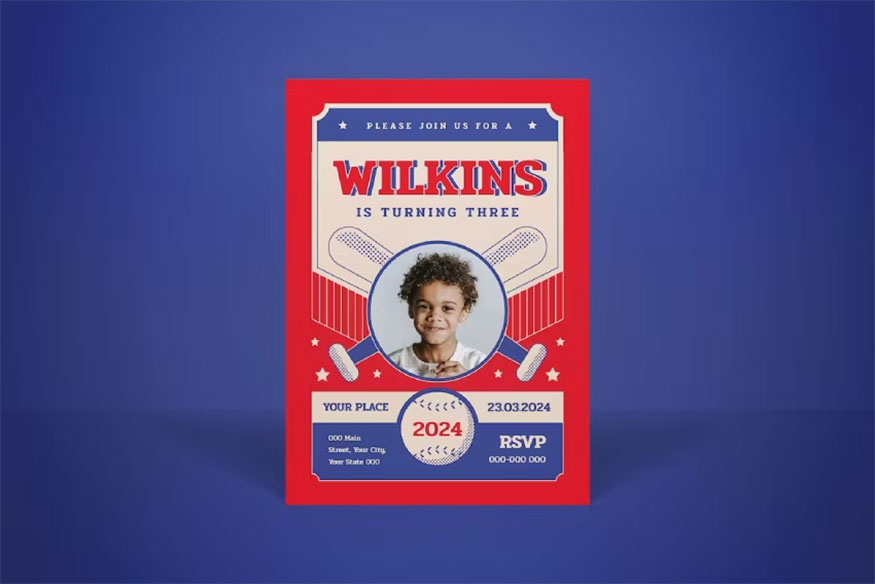
7.1. Baseball birthday invitation card
With this card template, the main character will be front and center. This is an extremely cute baseball Photoshop template that is worth trying for your designs.
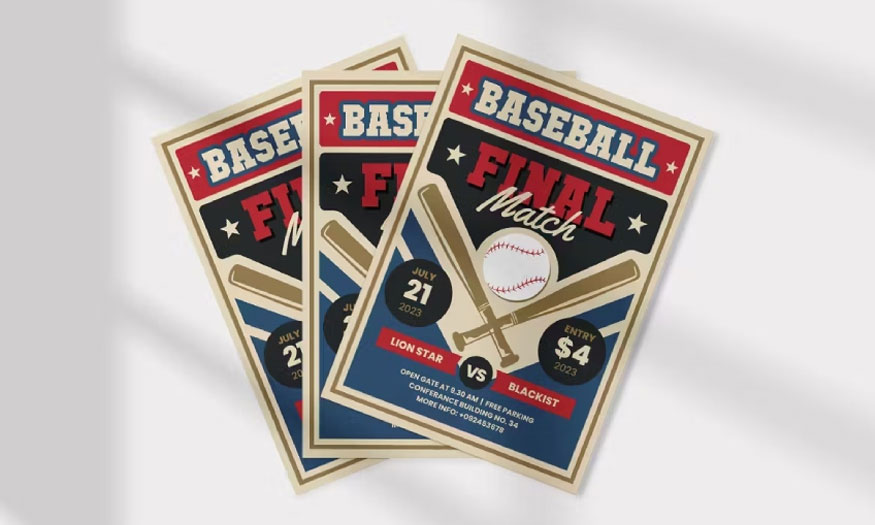
7.2. Baseball style flyer design
This design will help the flyer look impressive and stylish. You can completely design them yourself with just a few simple steps by replacing the available information with your own information to have a perfect design.

7.3. Baseball Game Day Photoshop Template
Let’s create a baseball card with this dynamic baseball Photoshop template. With this design you can easily customize it to create banners, flyers, baseball cards or anything else you want.
.jpg)
With this design, you can easily edit it with Adobe Photoshop or Adobe Illustrator.
Hopefully the instructions for creating a baseball card template in Photoshop that Sadesign brings above will be really useful to readers. Don't forget to follow us to update more useful and interesting information about Photoshop!


VIP Products


Best Selling Products
Genuine Adobe Illustrator account
99 USD
Windows 10 & 11 Pro Key
36 USD
Capcut Pro 1 Year
39 USD
Upgrade genuine Capture One account
120 USD
Autodesk All App Account Copyright
120 USD
Adobe Premiere Pro Account
99 USD
MidJourney Account
29 USD
Adobe Photoshop Copyright - Full App
120 USD
Upgrade Duolingo Super
29 USD
ChatGPT Plus Account (GPT-4)
16 USD
Plugin Retouch4me
69 USD
Upgrade Genuine Office 365
49 USD
Freepik Premium Account
59 USD
Genuine Cheap Canva Pro
39 USD
Copyright Adobe Lightroom Account
59 USD