Best Selling Products

Copyright Adobe Lightroom Account
59 USD

MidJourney Account
29 USD

Autodesk All App Account Copyright
120 USD

Capcut Pro 1 Year
39 USD

Adobe Photoshop Copyright - Full App
120 USD

Freepik Premium Account
59 USD

Genuine Cheap Canva Pro
39 USD

Adobe Premiere Pro Account
99 USD

ChatGPT Plus Account (GPT-4)
16 USD

Upgrade Genuine Office 365
49 USD

Genuine Adobe Illustrator account
99 USD

Upgrade genuine Capture One account
120 USD

Windows 10 & 11 Pro Key
36 USD

Plugin Retouch4me
69 USD

Upgrade Duolingo Super
29 USD
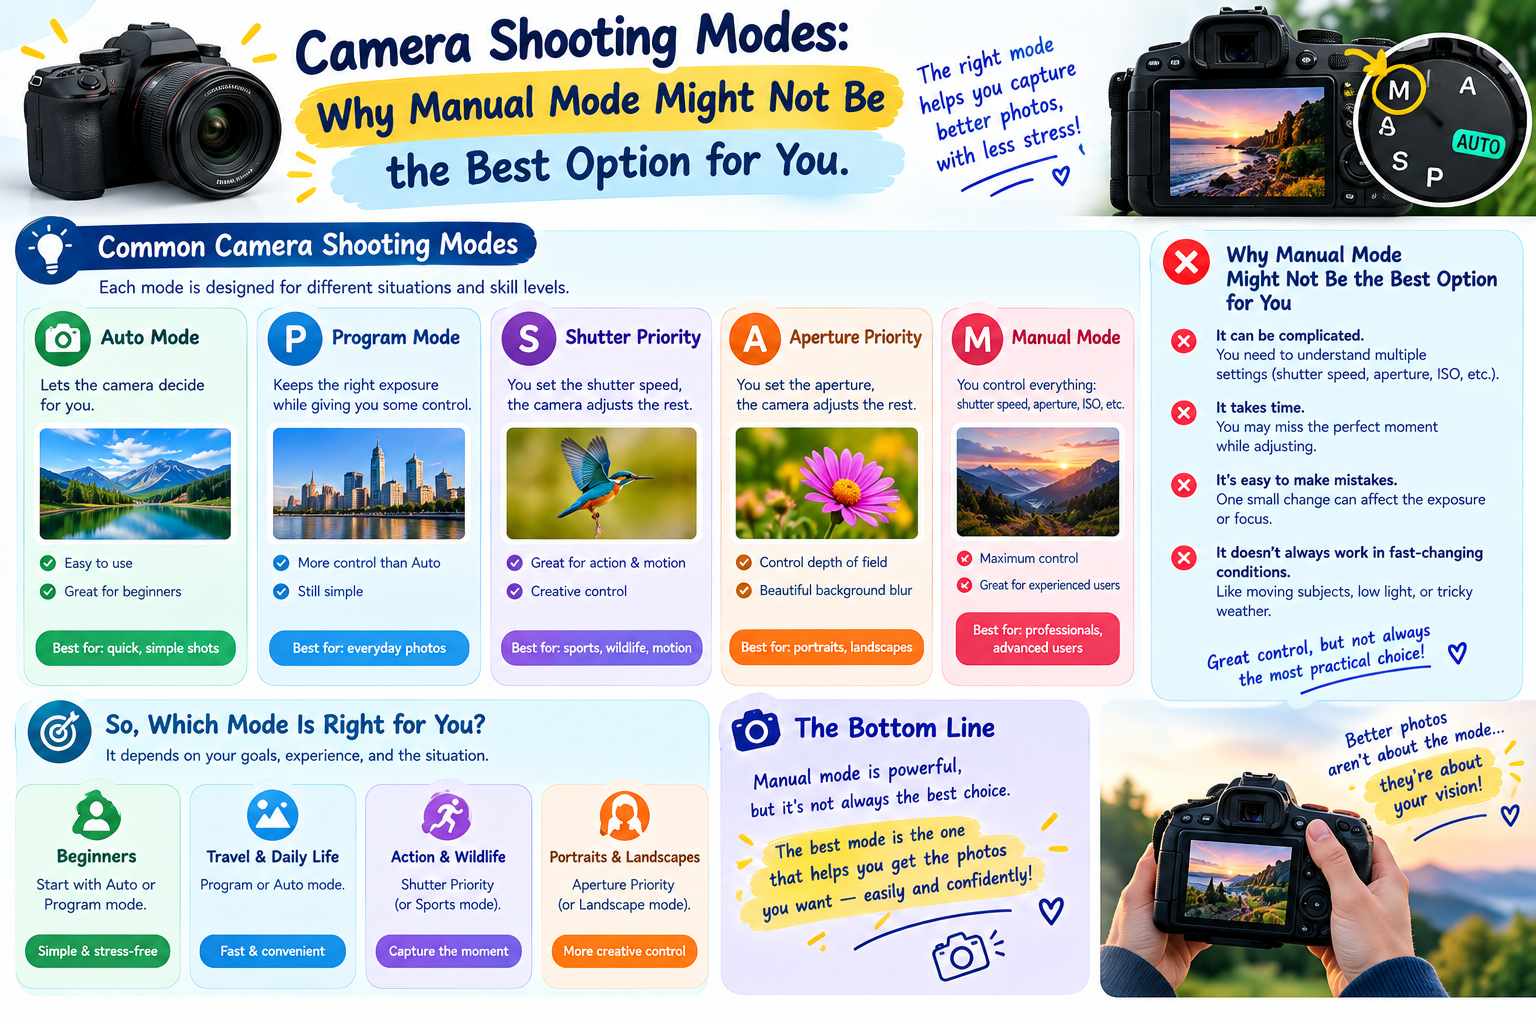
Camera shooting modes: Why manual mode might not be the best option for you.
Nội dung
- 1. Automatic mode: A familiar starting point, but don't linger too long.
- 2. Prioritize shutter speed (S or Tv)
- 3. Programming Mode (P): A less popular middle ground option.
- 4. Manual Mode (M): A specialized, powerful mode that requires timing.
- 5. Aperture Priority (A or Av)
- 6. Automatic ISO or Manual ISO: Balancing Convenience and Image Quality
- 7. Conclusion: Choose your mode according to circumstances, not reputation.
There''s a common misconception in photography: only those who shoot in manual (M) mode are skilled photographers, while those using semi-automatic modes are still beginners. In reality, this isn''t entirely true. Many experienced photographers, especially landscape photographers, switch flexibly between modes depending on the subject and lighting conditions, and many of them use manual mode less and less than before. The issue isn''t which mode is more advanced, but which mode helps you get the desired image quickly and accurately. This article goes through each mode on the camera''s mode dial, explaining how it works, its strengths, limitations, and suitable situations, finally discussing the choice between automatic and manual ISO.
1. Automatic mode: A familiar starting point, but don't linger too long.
This is usually the mode most of us set our cameras to when we first pick up our first camera. You'll recognize it by its green square icon, or a green symbol, or simply the word "Auto".
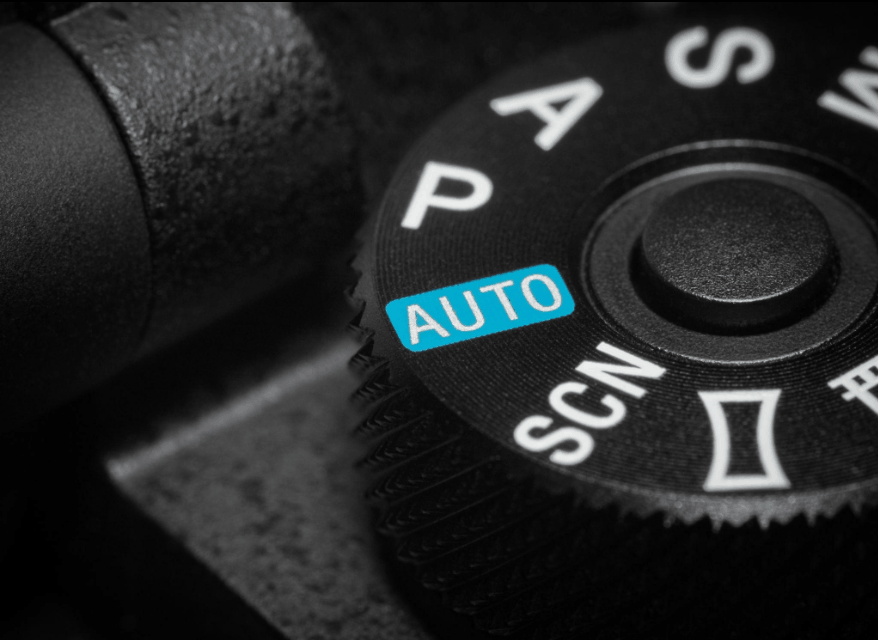
In this mode, the camera decides almost everything, from aperture, shutter speed, ISO to focus point and white balance. You just press the shutter button. This convenience comes at a significant cost. Many cameras don't allow RAW shooting in this mode, so you lose a major advantage in post-processing. You also can't choose the focus point yourself, and the parameters are determined by the processor's "evaluation," not your creative intentions. The result might be technically correct, but it's far from the image you envisioned.
Automatic mode still has its place in very specific situations, such as when you hand your camera to a stranger to take a picture for you, or when you need to capture a moment quickly without thinking. However, if you're serious about photography, you should switch to semi-automatic modes soon. These modes allow you to control one or two key parameters, letting the camera handle the rest, while unlocking control over focus, white balance, and many other settings. This is the easiest way to learn photography, as you only have to familiarize yourself with each step instead of being overwhelmed by the entire system of parameters at once.
2. Prioritize shutter speed (S or Tv)
On Canon cameras, this mode is labeled Tv, while other brands usually use the letter S. The operating principle is very clear: you select the shutter speed, and the camera will automatically select the aperture for optimal exposure.
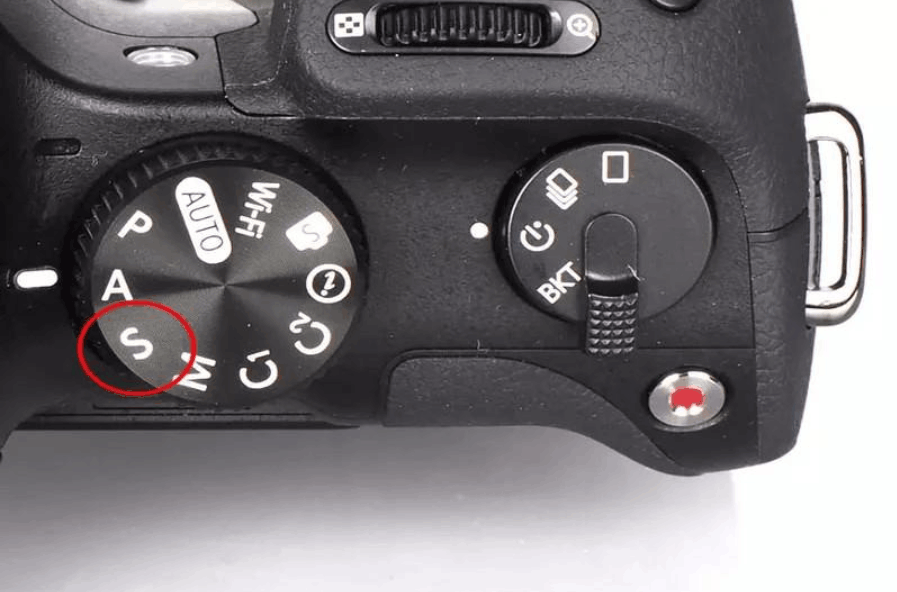
The power of this mode lies in its ability to control motion. When shooting sports, wildlife, birds, or race cars, you need a fast enough shutter speed, such as 1/1000th of a second or faster, to freeze the subject and keep the image sharp. Conversely, you can also actively choose a slow shutter speed to create motion blur effects, such as panning to follow the subject or smoothing out water currents. In both cases, the parameter you care about most is the shutter speed, and this mode puts that parameter in your hands.
However, for landscape photography, this is often not the optimal choice. When shooting landscapes, you want to decide the aperture yourself because it controls the depth of field, that is, which part of the image is in focus. If you let the camera automatically choose the aperture, you might unexpectedly get an image with a blurred foreground or a background that isn't sharp enough. Additionally, in low light conditions, if you use a very fast shutter speed, the camera may not have enough light even with the aperture wide open, resulting in underexposed images or high ISO. Therefore, use this mode when movement is the focus of the image, and combine it with automatic ISO to give the camera more "room" for exposure adjustment.
3. Programming Mode (P): A less popular middle ground option.
P mode is a rather unique setting. It's used less frequently than shutter speed priority or aperture priority, and many photographers don't particularly like it.
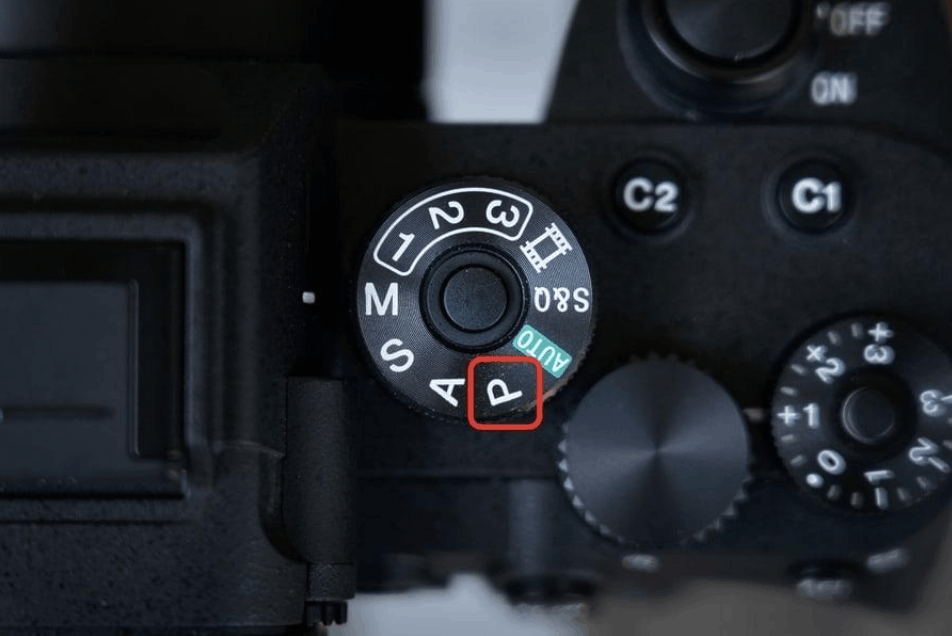
Here's how this mode works: when you press the shutter button halfway to meter, the camera automatically selects both the shutter speed and aperture it deems appropriate for the current conditions. You can still manually adjust ISO, exposure compensation, white balance, and focus settings. Additionally, on many cameras, rotating the control dial simultaneously changes both the aperture and shutter speed by a proportional ratio, maintaining consistent exposure. This feature is often referred to as program shift.
P mode is suitable when you need to take quick shots in everyday situations like traveling, strolling around town, recording family events, or when you just want to set the ISO and let the camera do the rest. However, there are two limitations worth considering. First, because the camera does almost all the work, it's difficult to deeply understand the relationships between the parameters, slowing down the learning process. Second, if you rotate the dial to adjust the aperture to your desired value, using aperture priority mode directly is much more logical, as you have more direct and decisive control over the aperture. Therefore, P mode should be considered a stepping stone, not a long-term goal.
4. Manual Mode (M): A specialized, powerful mode that requires timing.
In M mode, you have complete control: you choose your own ISO, aperture, and shutter speed, and you control everything else the camera allows, such as the focus point, focus mode, white balance, and metering mode. This mode offers absolute control and is also the mode most often associated with professional-grade photography.
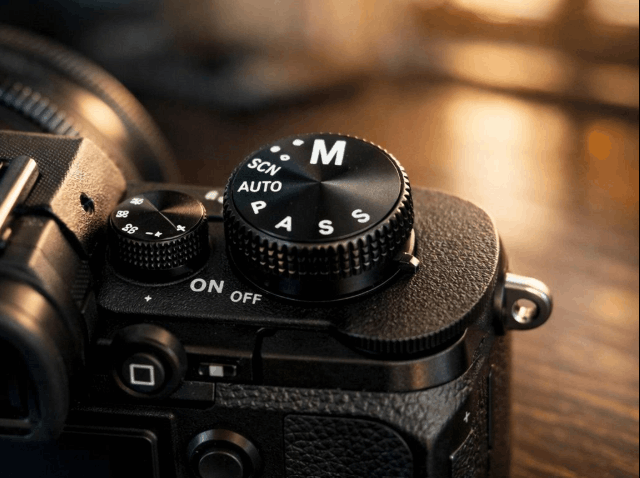
But remember, not shooting in M mode doesn't mean you're a beginner. Manual mode is useful when you have time to carefully set up your camera, when the light is stable, or when conditions are too difficult for the camera's metering system. Typical examples include astrophotography, photographing the Milky Way, and night photography, where the light is so weak that the camera no longer knows how to properly expose. Similarly, when using a strong ND filter for long exposures, manually setting the parameters is often more accurate. Studio photography with flash and series of shots requiring consistent exposure are also instances where M mode excels.
Conversely, when the light is constantly changing, and you're on the move—for example, when climbing, surveying a site, or chasing a beautiful light—manual mode becomes a burden. Adjusting each parameter slows you down and can cause you to miss the very moment of perfect light you're searching for. Think of M as a specialized tool: necessary, but not always recommended.
There's a way to leverage M mode for learning. On leisurely days, proactively shoot in manual mode to review the relationship between aperture, shutter speed, and ISO. When you're not racing against light, it's a very effective way to gain a deeper understanding of your camera.
5. Aperture Priority (A or Av)
If you have to choose a mode for general landscape photography, aperture priority (indicated by A, or Av on Canon cameras) is the choice many photographers trust. You select the aperture, and the camera automatically calculates the shutter speed to achieve the exposure it deems appropriate. If you combine this with automatic ISO, all you have to do is decide on the aperture and focus on composition.
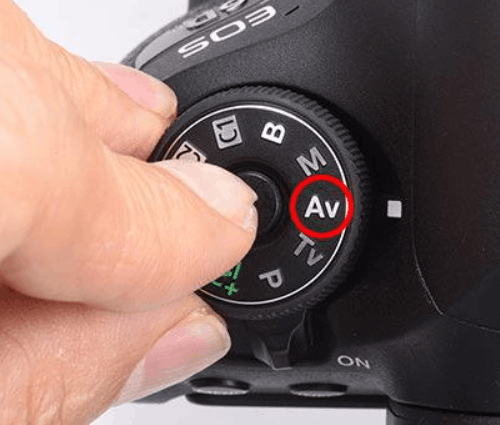
The reason aperture is so important is because it determines the depth of field. A large aperture, meaning a small f-number, results in a shallow depth of field, easily blurring the foreground or background. Closing the aperture, increasing the f-number, expands the depth of field from near to far. For landscapes, if you want everything to be sharp, many people usually shoot between f/11 and f/16. This is usually a good balance between depth of field and image quality, as closing the aperture too much can reduce sharpness due to diffraction. If you want to separate the subject from the background, such as when shooting portraits or close-ups, you open the aperture wider.
The practical power of this mode becomes apparent when lighting conditions change constantly. Whether it's clouds drifting by, you're switching from backlight to frontlight, or walking continuously through various locations, the camera will automatically adjust the shutter speed to keep up. You don't have to worry about settings; you can focus entirely on composition.
If the resulting image is darker or brighter than desired, use exposure compensation. If the image is too dark, push it towards the positive side; if it's too bright, pull it towards the negative side. For low-light scenes requiring a small aperture, a tripod is an almost indispensable accessory. It allows you to use slow shutter speeds without worrying about camera shake, while keeping the ISO low.
6. Automatic ISO or Manual ISO: Balancing Convenience and Image Quality
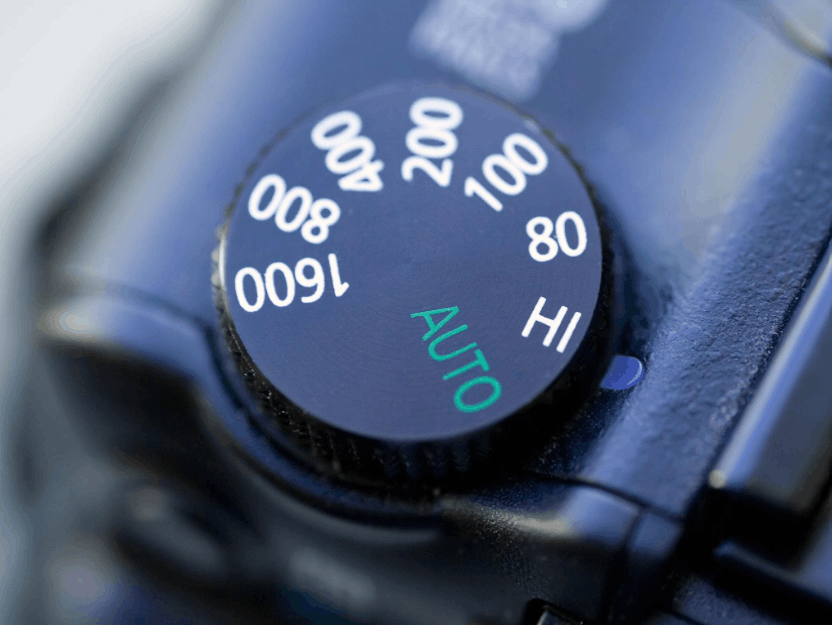
The ISO setting can also be determined automatically by the camera or you can choose it yourself. Depending on the brand and model, you'll find this setting on the ISO dial, a dedicated ISO button, or in the menu. Some cameras, like Sony models, even allow you to limit the range within which the automatic ISO is allowed to fluctuate, preventing the camera from pushing the ISO too high.
The convenience of automatic ISO is valuable, but you need to consider the type of sensor. With full-frame and medium-format cameras, such as the Sony A7 or Fujifilm GFX series, the quality at high ISOs is quite good, so you can safely leave automatic ISO on. At around 2000 to 4000, the images are still usable for online posting, especially when the frame has a lot of detail. If you plan to print the photos, you should be much more strict.
With crop sensor cameras like the Canon 200D, the Sony A6000 series, or other compact cameras with small sensors, noise tolerance at high ISOs is lower. Low light is when the ISO is pushed highest, and also when image quality is most likely to deteriorate. Therefore, with these types of cameras, many photographers choose manual ISO control, keeping it low, for example below 800 with small-sensor cameras, and accepting a slower shutter speed. When the light is low, they use a tripod instead of increasing the ISO.
Alternatively, if you prefer a simpler, less stressful shooting method, set your camera to aperture priority mode and enable automatic ISO. You just select the aperture, and the camera handles the rest. To enhance this technique, learn more about exposure compensation, as it's a tool that allows you to quickly fine-tune the brightness and contrast of your photos without switching to manual mode.
7. Conclusion: Choose your mode according to circumstances, not reputation.
There's no single best mode for all situations. Automatic mode is for emergencies, prioritizing speed for motion; programmed mode is for everyday quick shots; manual mode is for special conditions; and aperture priority is for most everyday landscape needs. The important thing is that you understand which parameters you need to control and let the camera do the rest.
Try shooting the same scene in different modes, observe the differences, and develop a routine that suits your style. A good photographer isn't someone who uses the most difficult mode, but someone who chooses the right tools at the right time.
If you wish, I can export this article as a Word or Markdown file for easier publication.





















VIP Products








Best Selling Products
Copyright Adobe Lightroom Account
59 USD
MidJourney Account
29 USD
Autodesk All App Account Copyright
120 USD
Capcut Pro 1 Year
39 USD
Adobe Photoshop Copyright - Full App
120 USD
Freepik Premium Account
59 USD
Genuine Cheap Canva Pro
39 USD
Adobe Premiere Pro Account
99 USD
ChatGPT Plus Account (GPT-4)
16 USD
Upgrade Genuine Office 365
49 USD
Genuine Adobe Illustrator account
99 USD
Upgrade genuine Capture One account
120 USD
Windows 10 & 11 Pro Key
36 USD
Plugin Retouch4me
69 USD
Upgrade Duolingo Super
29 USD