Best Selling Products

Upgrade genuine Capture One account
120 USD

Genuine Adobe Illustrator account
99 USD

Genuine Cheap Canva Pro
39 USD

Upgrade Duolingo Super
29 USD

Capcut Pro 1 Year
39 USD

Windows 10 & 11 Pro Key
36 USD

Adobe Premiere Pro Account
99 USD

Adobe Photoshop Copyright - Full App
120 USD

MidJourney Account
29 USD

Plugin Retouch4me
69 USD

Copyright Adobe Lightroom Account
59 USD

Autodesk All App Account Copyright
120 USD

Upgrade Genuine Office 365
49 USD

ChatGPT Plus Account (GPT-4)
16 USD

Freepik Premium Account
59 USD
How to change Line-Art color in Photoshop with SaDesign
Nội dung
Knowing how to change Line-Art color in Photoshop is one of the important skills that any designer should understand. The following article SaDesign will guide you on how to change colors very easily and simply that even beginners can apply.
Knowing how to change Line-Art color in Photoshop is one of the important skills that any designer should understand. The following article SaDesign will guide you on how to change colors very easily and simply that even beginners can apply.

1. Reasons why you want to change Line-Art color in Photoshop
Changing Line-Art color brings many benefits such as:
- Help change style by creating new effects through color conversion. This helps to fit the themes better and highlight important details.
- Help correct mistakes about color and balance colors to bring harmony in the design.
- Help express your own style in your work.
- Increase applicability of design.

However, when changing line-art color, you need to pay attention to the following:
- When changing line-art color, pay attention to contrast, as well as color harmony.
- Use color editing tools in Photoshop to control on colors as desired.
- Be sure to save the original line-art before making changes.
2. Instructions for changing Line-Art color in Photoshop
The steps to change Line-Art color in Photoshop are as follows:
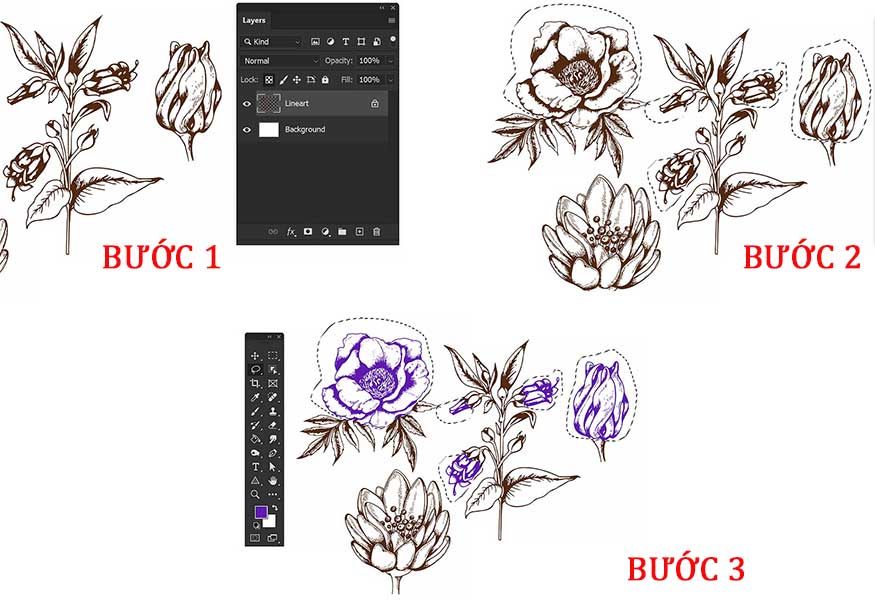
- Step 1: First you need to select the layer with art and draw the line your. Then click Lock in the Layers panel above and select the Transparency button. This action ensures that no pixels are added or removed from a layer.
- Step 2: Click on the Lasso tool and make a selection around the line art you want to change.
- Step 3: Change the Foreground color to any color you want for your selected lines. Press Alt-Delete to change the selected strokes to the foreground color.
3. Instructions for isolating Line Art in Photoshop
To isolate Line Art in Photoshop, we follow the following specific process:
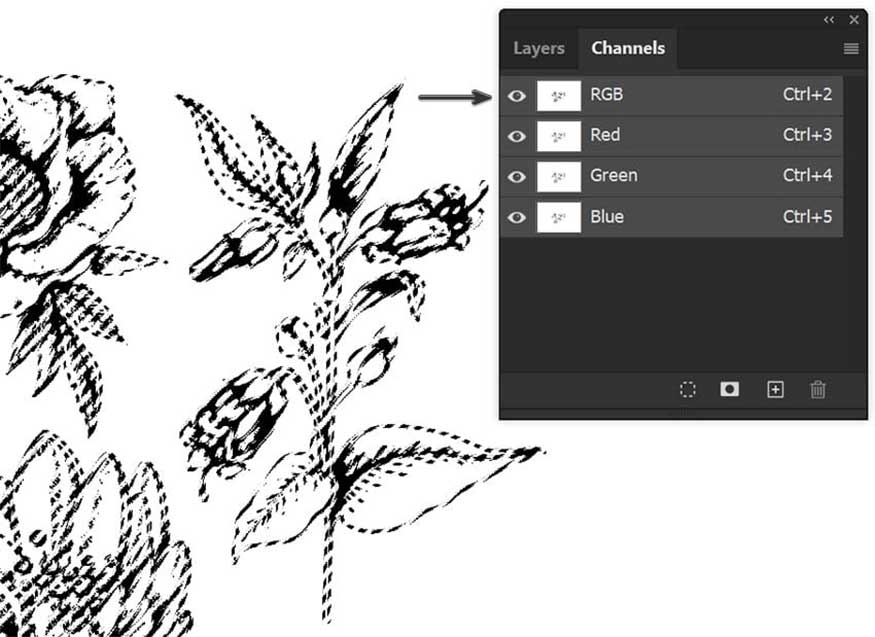
Step 1: First, you need to separate your lines from the white background.
To do this is quite easy, select the layer that has the line art on it, then go to Window => Channels.
Hold Control/Command then click on the RGB channel located at the top of the display. This will help select the black line art in your image.
Next, go to Selection => Invert.
Step 2: Next, select New Layer and add a Layer Mask to that layer. The Layer Mask will have the shape of the selected line art. Make sure the new empty layer is active, fill it black by using the Paint Bucket tool.
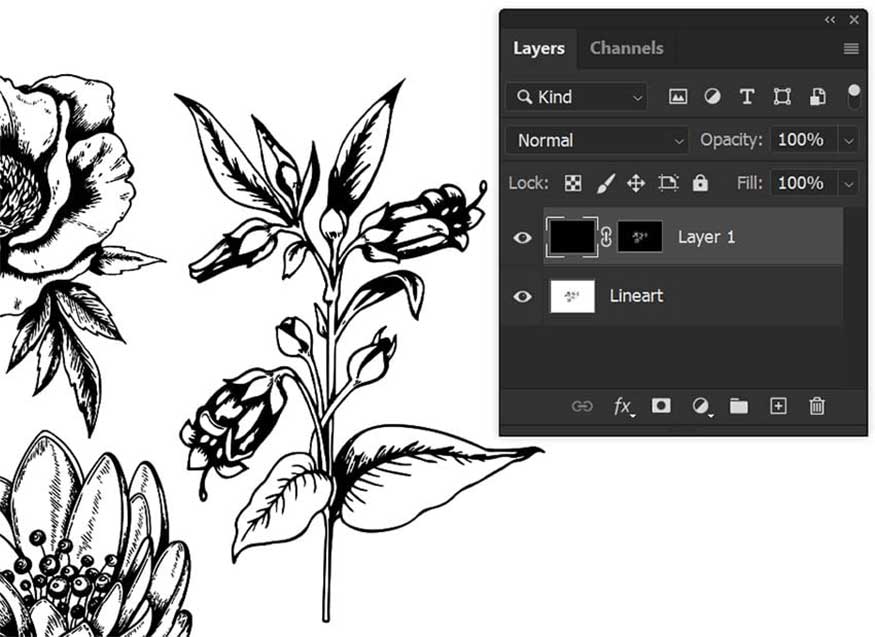
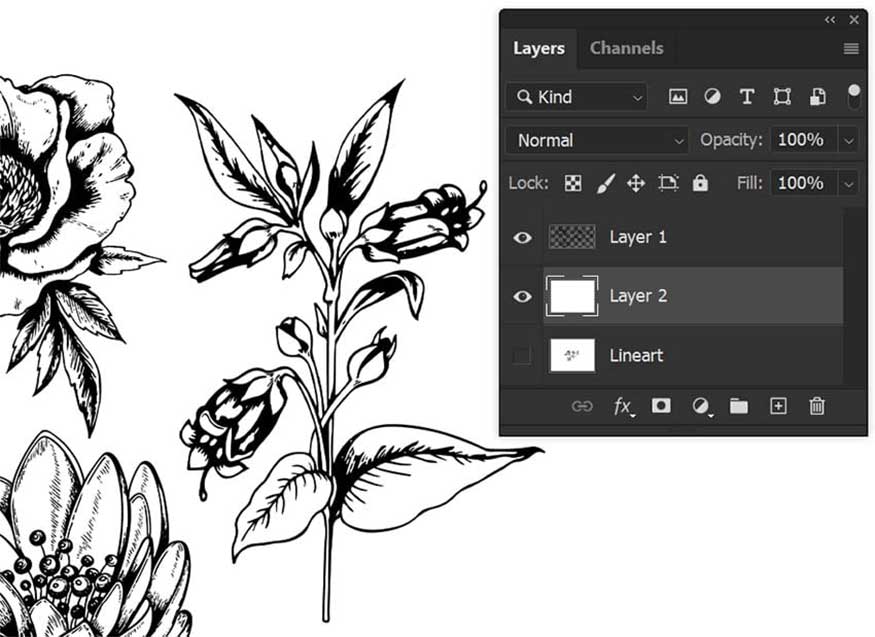
Step 3: Finally, right-click on the layer mask then click Apply Layer Mask to apply the layer mask. Next, hide your original line and create a New Layer filled with white.
So, we have completed for ourselves the ways to color Line Art in Photoshop. You can see how to do it quite easily in just a few simple steps.
This simple technique will help you quickly add a little color to your sketches. This skill will be extremely useful for all designers, so try and apply the above instructions from Sadesign to make Line-Art color changes in Photoshop as quickly as possible!


VIP Products


Best Selling Products
Upgrade genuine Capture One account
120 USD
Genuine Adobe Illustrator account
99 USD
Genuine Cheap Canva Pro
39 USD
Upgrade Duolingo Super
29 USD
Capcut Pro 1 Year
39 USD
Windows 10 & 11 Pro Key
36 USD
Adobe Premiere Pro Account
99 USD
Adobe Photoshop Copyright - Full App
120 USD
MidJourney Account
29 USD
Plugin Retouch4me
69 USD
Copyright Adobe Lightroom Account
59 USD
Autodesk All App Account Copyright
120 USD
Upgrade Genuine Office 365
49 USD
ChatGPT Plus Account (GPT-4)
16 USD
Freepik Premium Account
59 USD