Best Selling Products

MidJourney Account
29 USD

Upgrade Genuine Office 365
49 USD

Genuine Adobe Illustrator account
99 USD

Adobe Premiere Pro Account
99 USD

Capcut Pro 1 Year
39 USD

Windows 10 & 11 Pro Key
36 USD

Adobe Photoshop Copyright - Full App
120 USD

Autodesk All App Account Copyright
120 USD

Plugin Retouch4me
69 USD

Copyright Adobe Lightroom Account
59 USD

Freepik Premium Account
59 USD

Upgrade Duolingo Super
29 USD

ChatGPT Plus Account (GPT-4)
16 USD

Genuine Cheap Canva Pro
39 USD

Upgrade genuine Capture One account
120 USD
How to make a classic Bootleg T-shirt in Photoshop
Designing T-shirt is an idea that many people apply to create their style. If you are interested in how to make a classic Bootleg T-shirt in Photoshop, absolutely don't miss the detailed instructions that SaDesign brings below!
Designing T-shirt is an idea that many people apply to create their style. If you are interested in how to make a classic Bootleg T-shirt in Photoshop, absolutely don't miss the detailed instructions that SaDesign brings below!

1. Step 1
First, open Photoshop and create a T-shirt design, the recommended size is 10 x 12 inches with a resolution of 300.
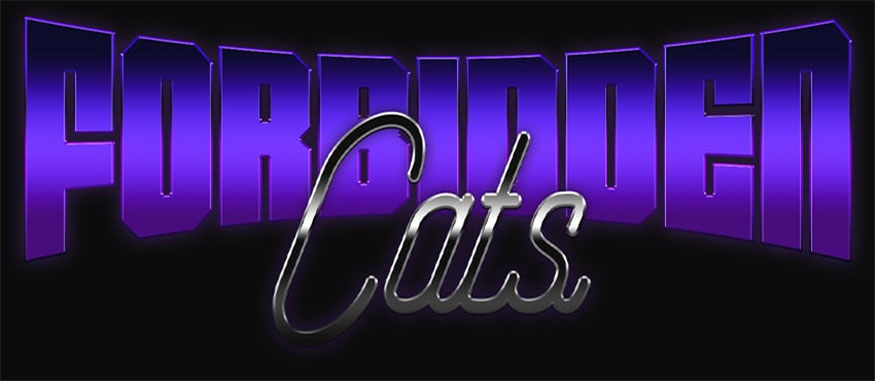
Next, add text and use the font Handstood Ultra Black and Rising Star.

Use the Warp Text setting in the Text tool in the options bar above to add curves to the top font. In the example below, we set it to Style Bulge with a Bend as -13%.
2. Step 2
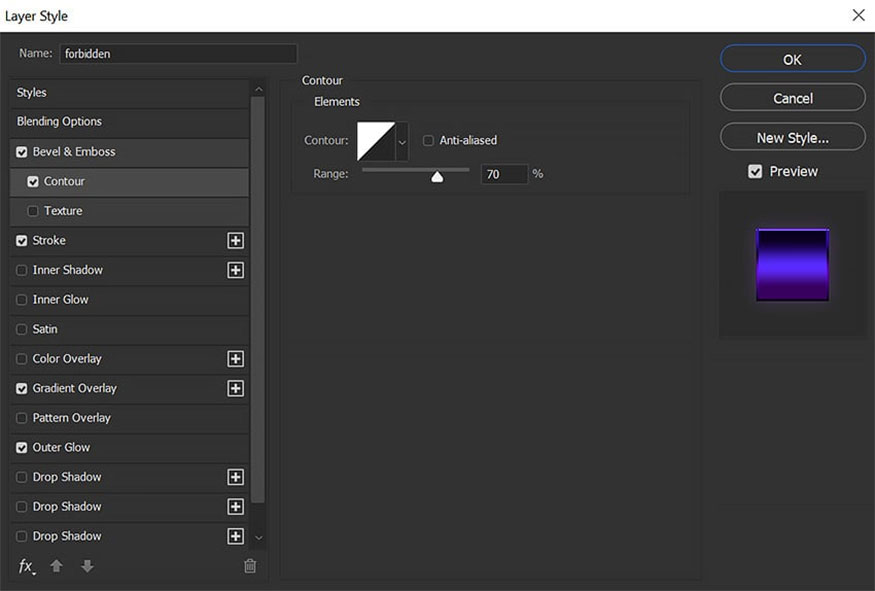
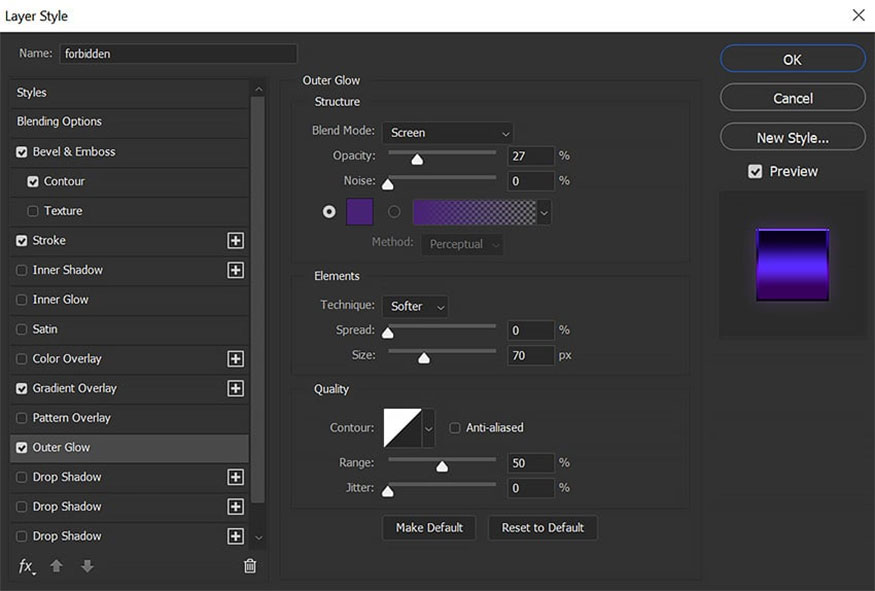
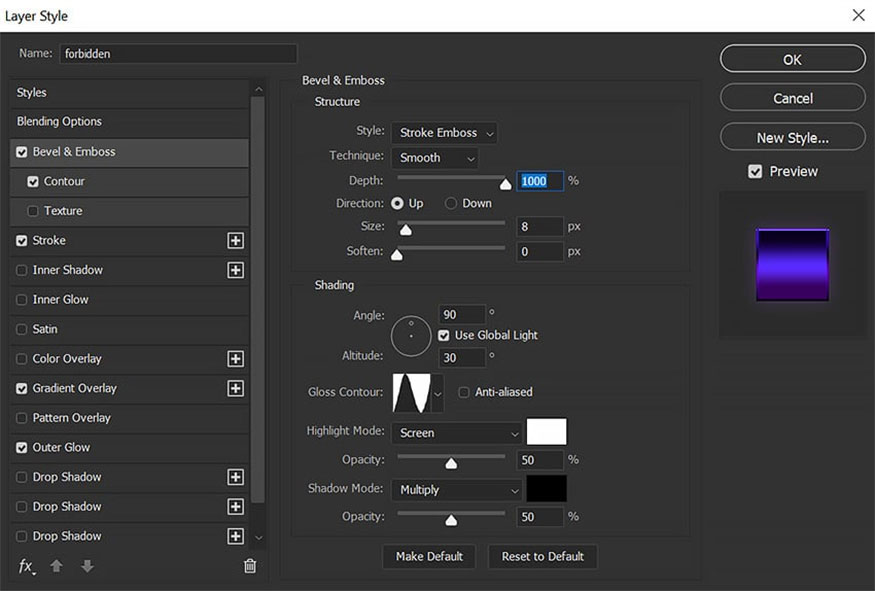
Add a color transition effect to both paragraphs of text, first add settings and name them “Forbidden”, you can see this setting right in the gallery below:


3. Step 3
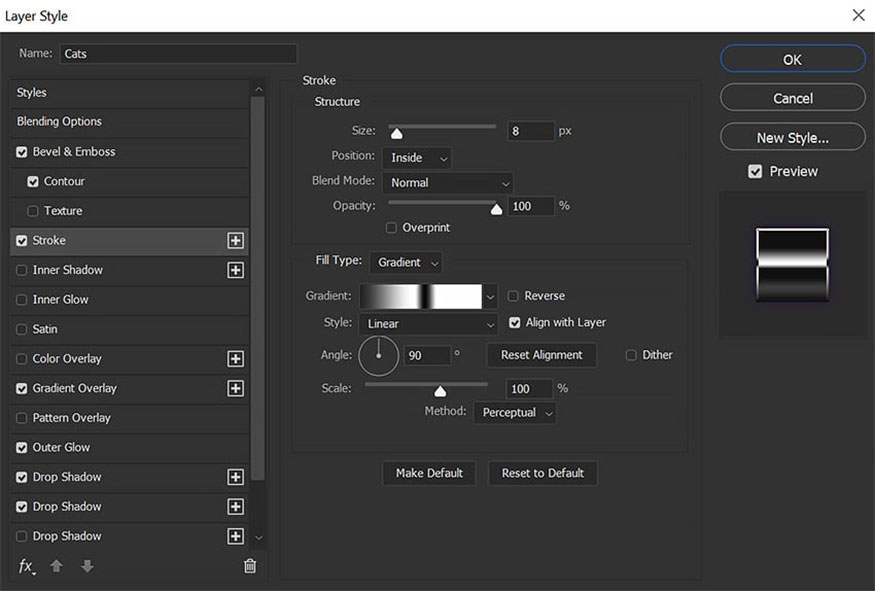
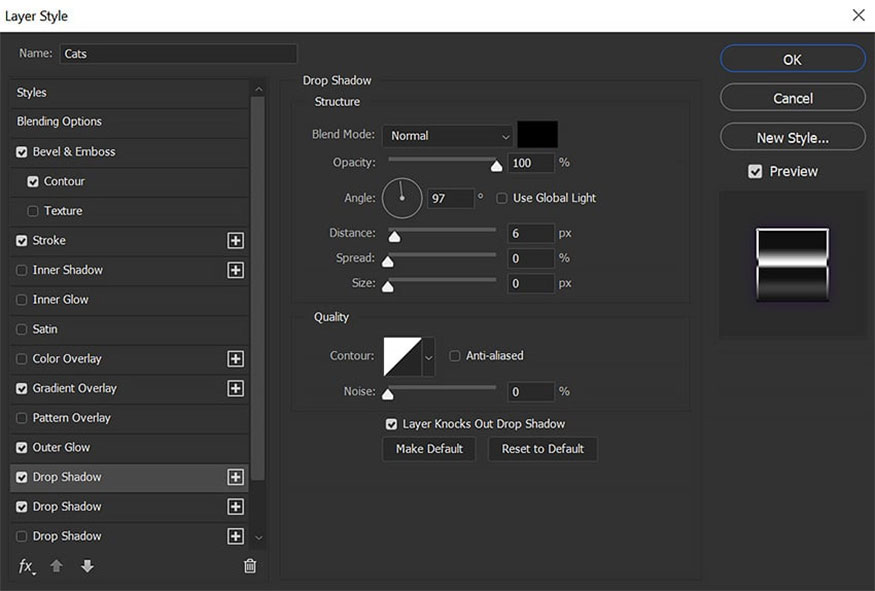
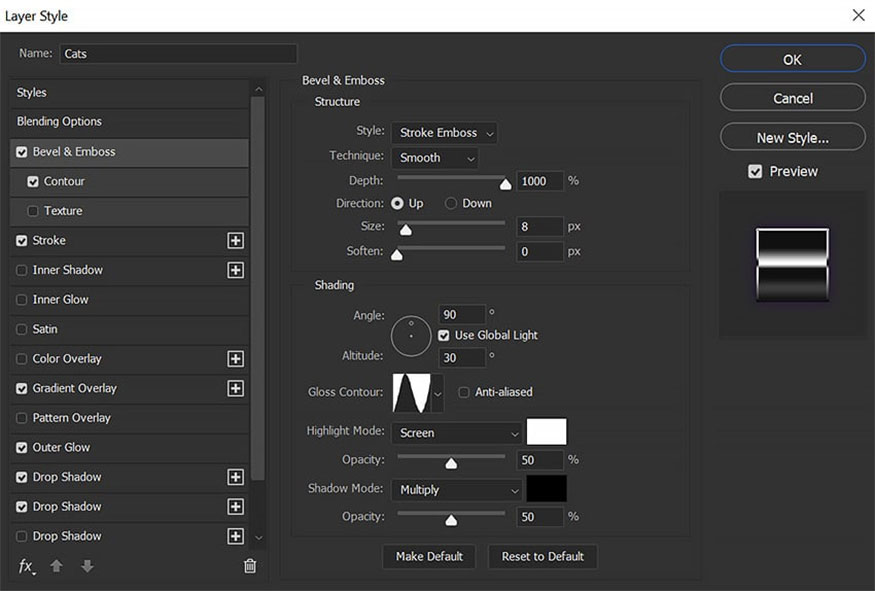
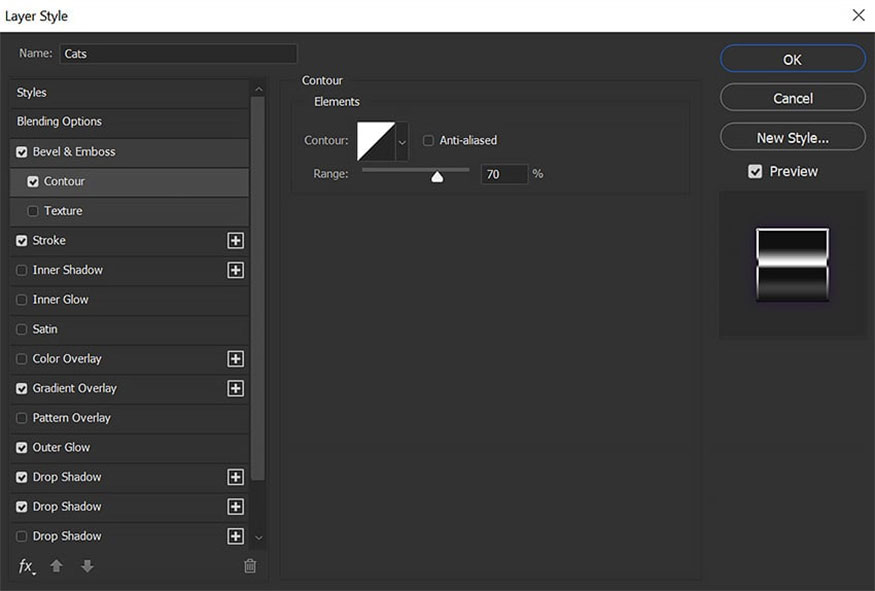
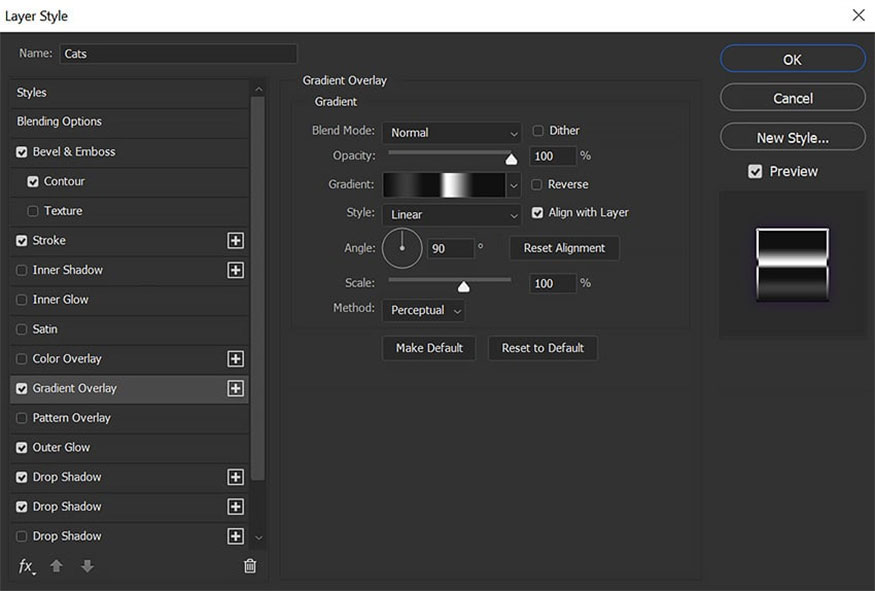
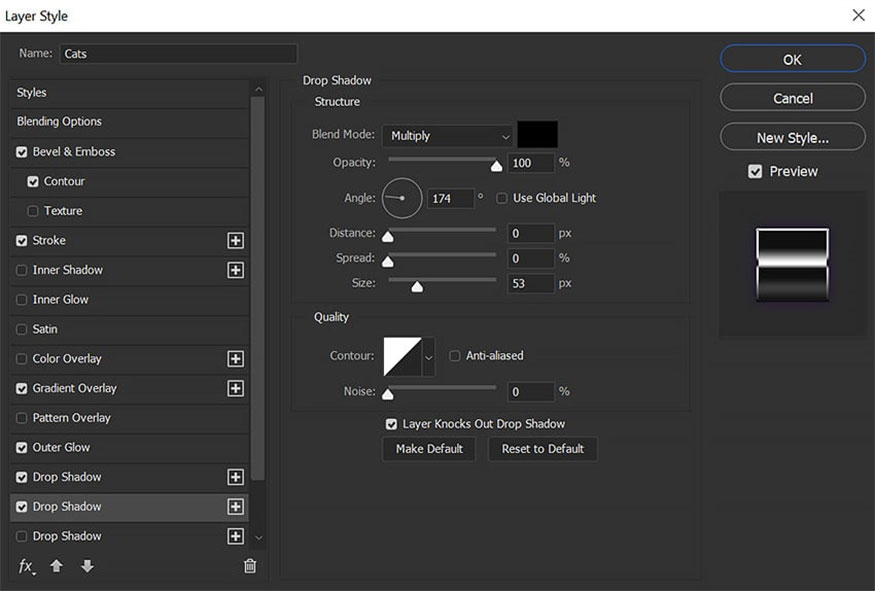
Add chrome effect to "Cats", switch to gallery to see settings as follows:

4. Step 4
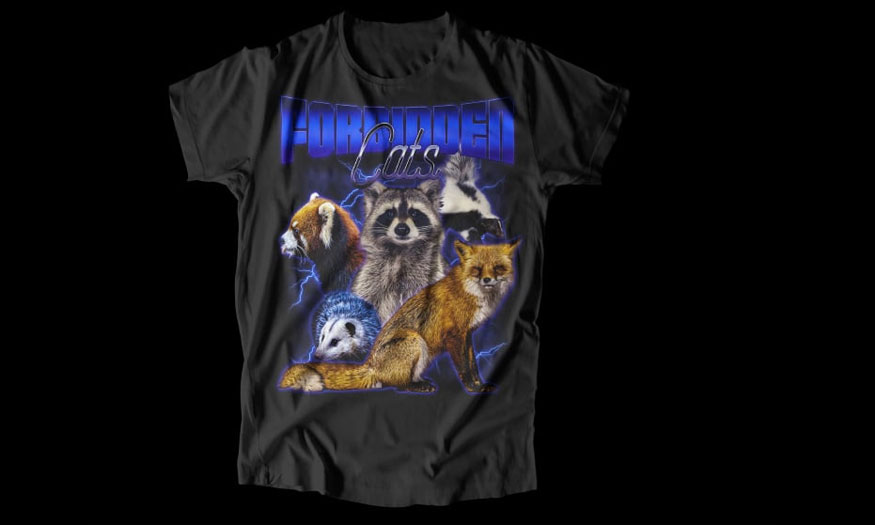
Use the Select Subject tool and Layer Masks to place the object on the T-shirt. First of all, we will place the largest subject in this example, the panda, in the center. Then place other subjects around the panda, hiding the cut edges behind the other images.
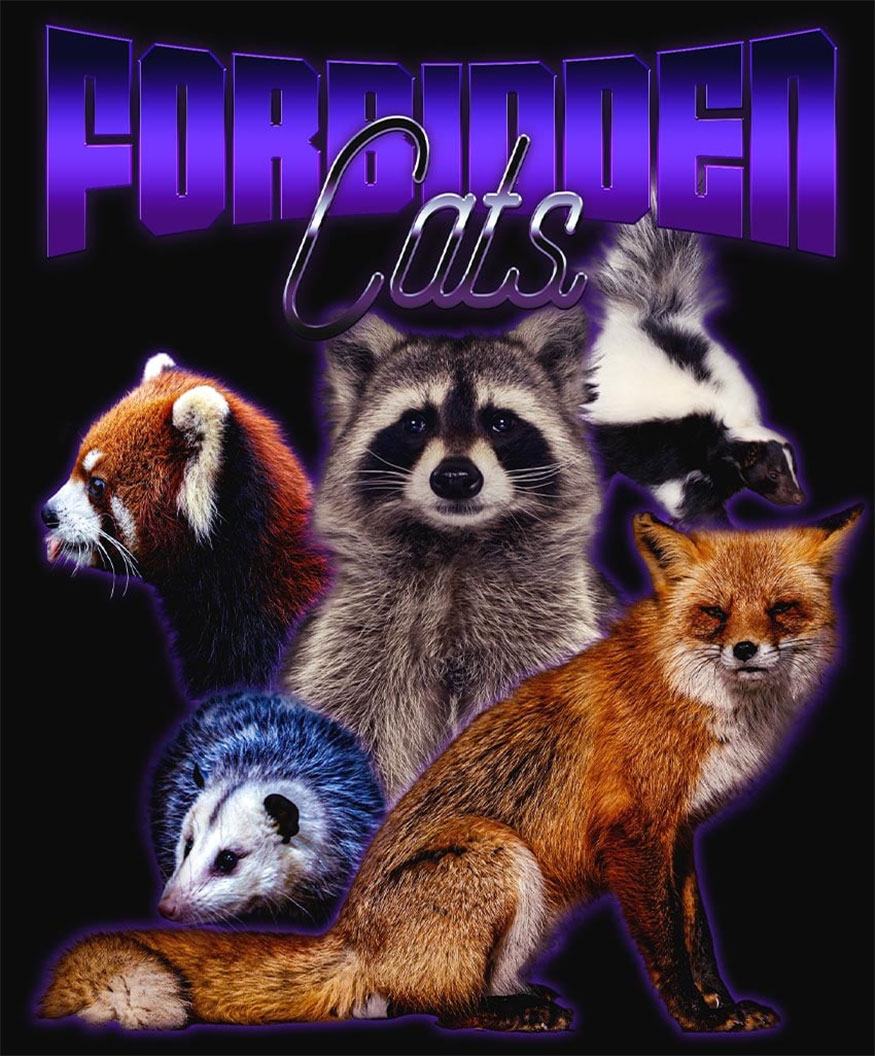
Add a purple Outer Glow layer style color coded #492276 to all objects. Then group all the objects together, each Color Balance layer set to Green -100 and Blue +100. This is to give all images a purple tone.
5. Step 5
Create a New Layer just below all the current layers. Set the Foreground Color first to purple with color code #382763, and the Background Color to black. Then go to Filter => Render => Clouds.
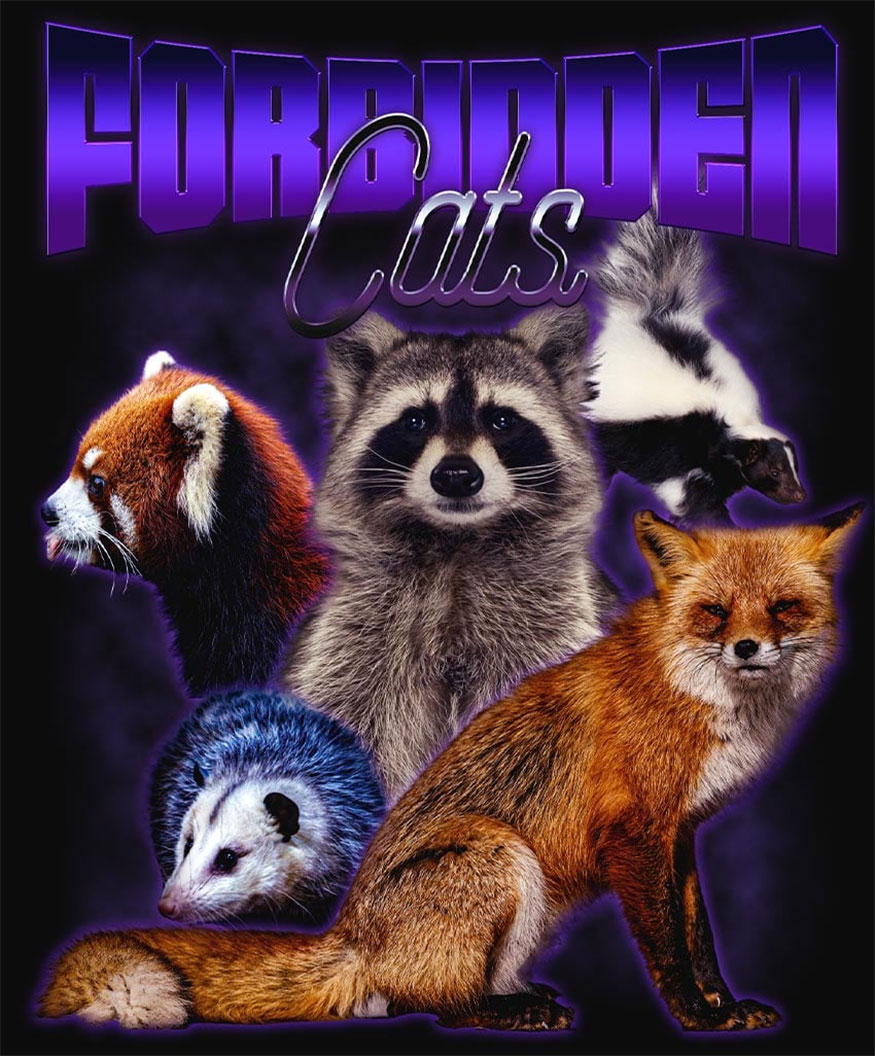
Add a Layer Mask to mask the clouds from the edges of the canvas, leaving them just behind the object.
6. Step 6
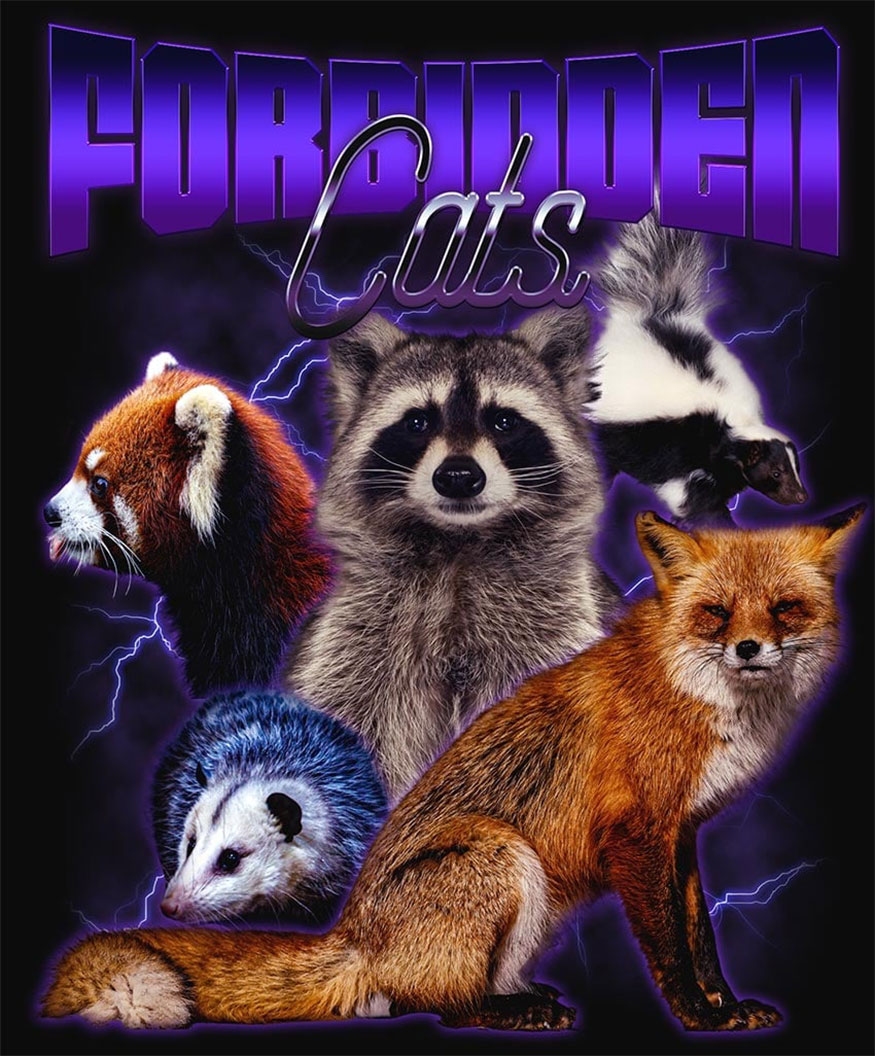
Add some lightning graphics right behind the objects, you should use this graphic in PNG format and place it right into the design without separating the background.
7. Step 7
Next, we will make color and contrast adjustments to the design. To do this, first right-click then go to Merge Visible => Filter => Camera Raw.
Make adjustments to the overall brightness and contrast in Light, then add texture in Effects and use Calibration to create an effect with two tones of blue and orange as the example.
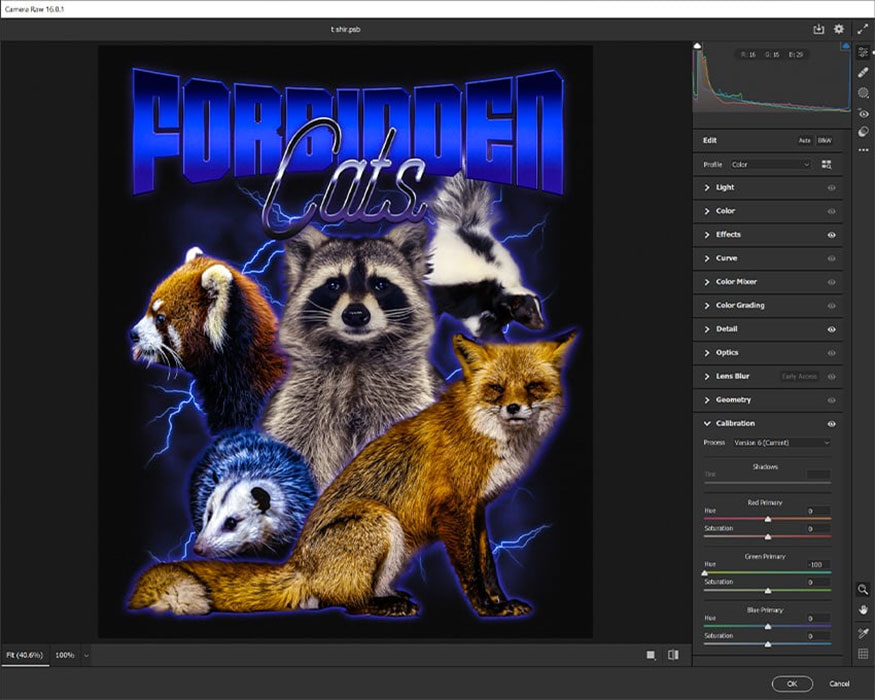
This step is intended to simplify the colors, while also giving the T-shirt a 90s feel. Set the Blue Primary Hue to -100.
With just a few simple steps, we can complete the creation of a classic T-shirt design. This is the T-shirt design result we get.
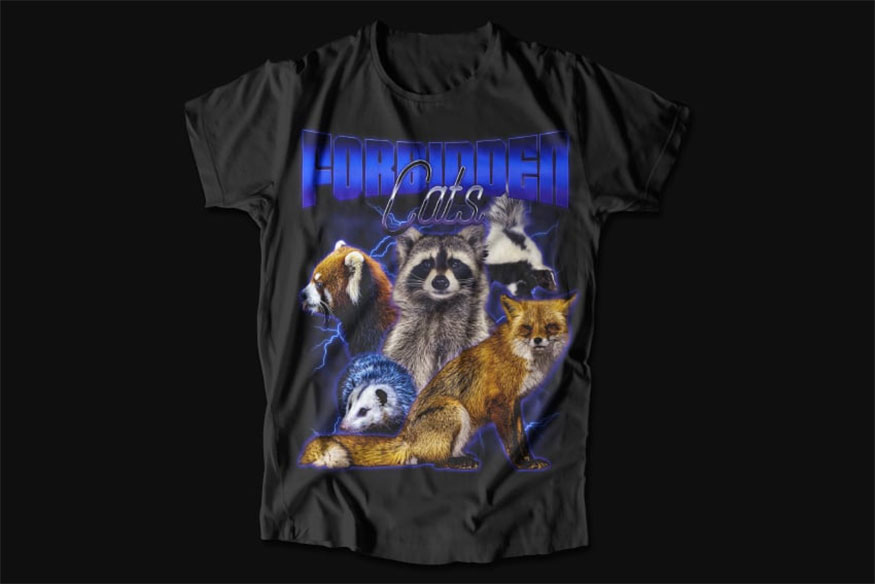
It can be seen that making a classic Bootleg T-shirt in Photoshop is quite simple. Hopefully the instructions that Sadesign brings in the article above will help you apply it successfully to your design. Don't forget to share if you find our article useful!


VIP Products


Best Selling Products
MidJourney Account
29 USD
Upgrade Genuine Office 365
49 USD
Genuine Adobe Illustrator account
99 USD
Adobe Premiere Pro Account
99 USD
Capcut Pro 1 Year
39 USD
Windows 10 & 11 Pro Key
36 USD
Adobe Photoshop Copyright - Full App
120 USD
Autodesk All App Account Copyright
120 USD
Plugin Retouch4me
69 USD
Copyright Adobe Lightroom Account
59 USD
Freepik Premium Account
59 USD
Upgrade Duolingo Super
29 USD
ChatGPT Plus Account (GPT-4)
16 USD
Genuine Cheap Canva Pro
39 USD
Upgrade genuine Capture One account
120 USD