Best Selling Products
How to Create a Mandalorian-Inspired Effect in Photoshop
Nội dung
If you are a fan of the Star Wars universe, you definitely cannot miss the following Mandalorian-inspired effect tutorial in Photoshop. With these instructions from SaDesign, you can create extremely impressive and super "cool" designs.

1. How to create an impressive sky in Photoshop
To create a sky in photoshop, follow these basic steps:
Step 1: First, we will combine the sky, focus on creating a beautiful combination of sunset and starry night sky.
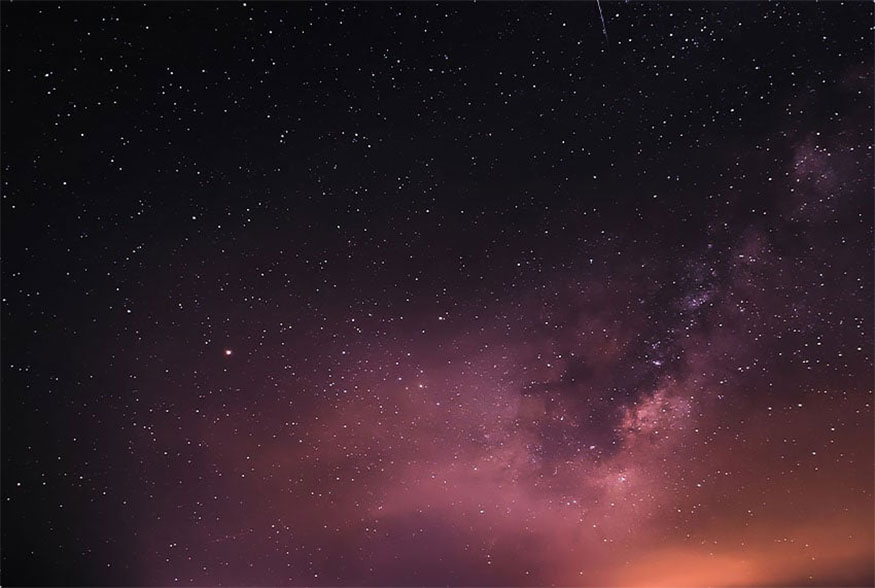
Step 2: Next, we need to create a New Layer and set it to Screen and draw a streak of color code #f1792e on the lower half of the canvas. To make them less uniform, let's paint them at an angle.
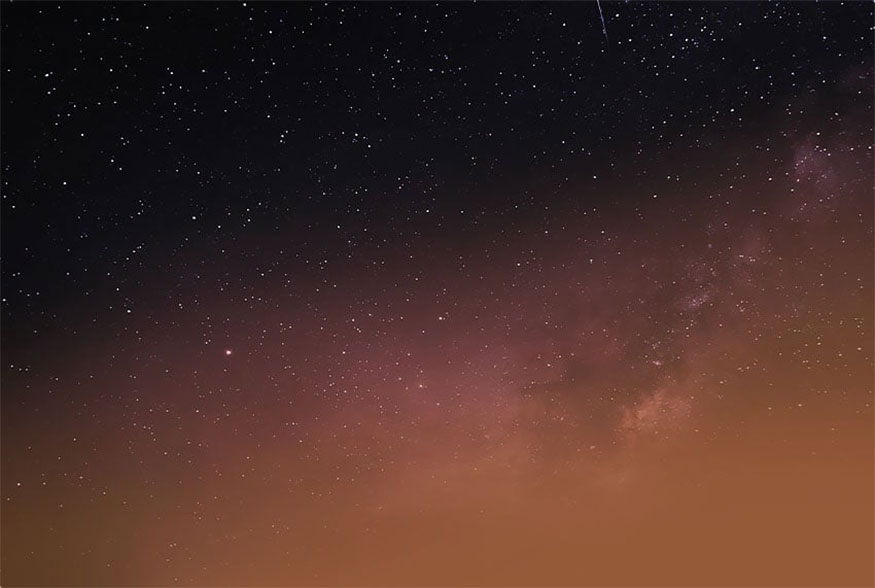
Step 3: We want to have an image of scattered clouds on a dark blue background.
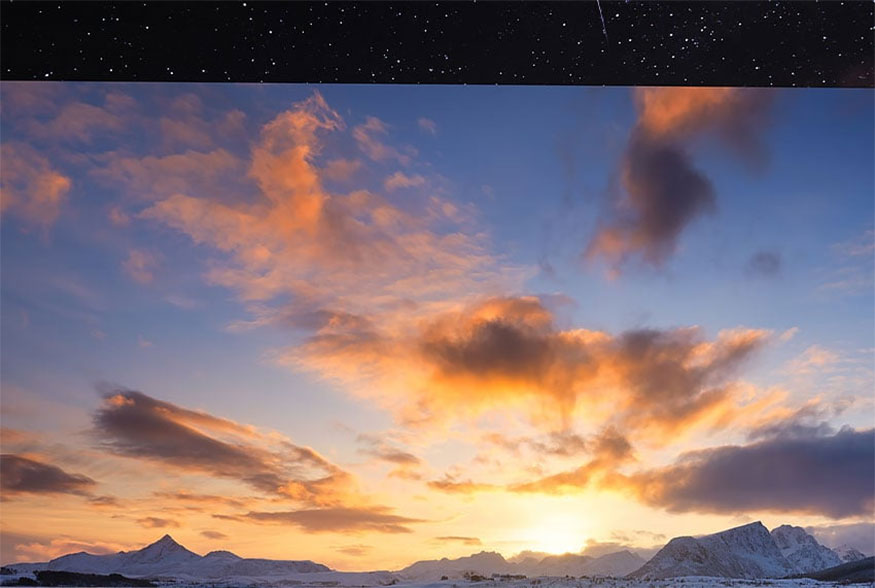
Step 4: You need to double-click on the sky layer and look at the Blend If section, let's focus on this layer. We will use these transform nodes to remove the darker values of the image to blend the sky. Hold down the Shift key to separate the transform nodes and continue dragging them to the right until we achieve the blended sky effect we want.
Clean up any rough edges with a Layer Mask.
.jpg)
Step 5: Duplicate the sky layer, right-click > Clear Layer Style and bring it below the original sky. Then add a Layer Mask, invert the mask with Control/Command-I and mask out the clouds where we don't want the stars to show through.

Step 6: Add more bright layers by setting the New Layer to Screen. Fill the bottom with orange #f9863f and the top with light blue 1badd3. Reduce the Opacity of this layer to about 25%.

Step 7: You need to push the blues and oranges even further with a Gradient Fill layer that goes from orange to turquoise, set the Blend Mode to Overlay. Darken the top of the sky with an overlay and set the brush to black to get a bright orange sunset and starry sky.

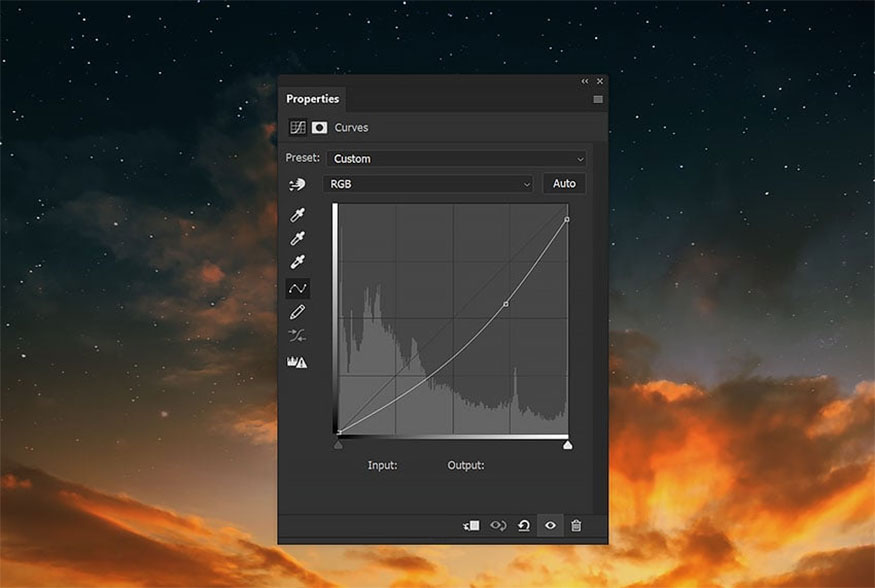
Step 8: Finally, darken the entire sky with a Curves adjustment layer, reducing the mid-tones and highlights.
2. How to Create an Orange and Blue Layer
Here are the steps to create an orange and blue layer:
Step 1: Start with a Color Lookup adjustment layer set to Teal Orange Plus Contrast, with the Blend Mode Pin Light at 75% Opacity.
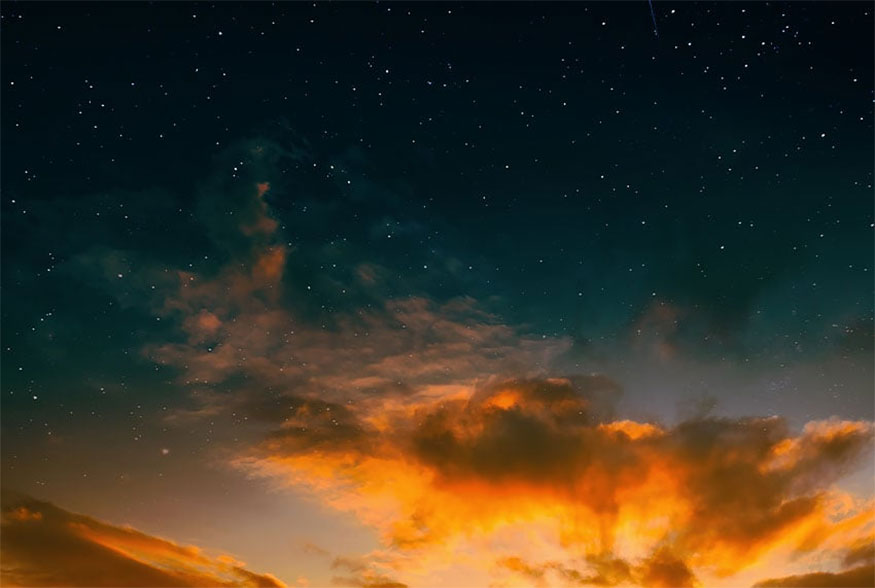
Step 2: Add a Vibrance layer set to 100 Vibrance. If it's too harsh, reduce it to around 50.
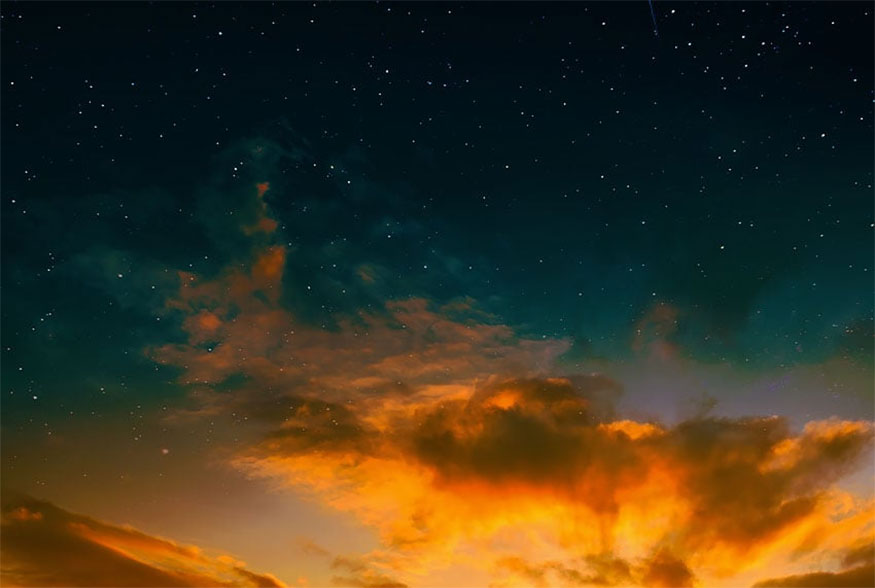
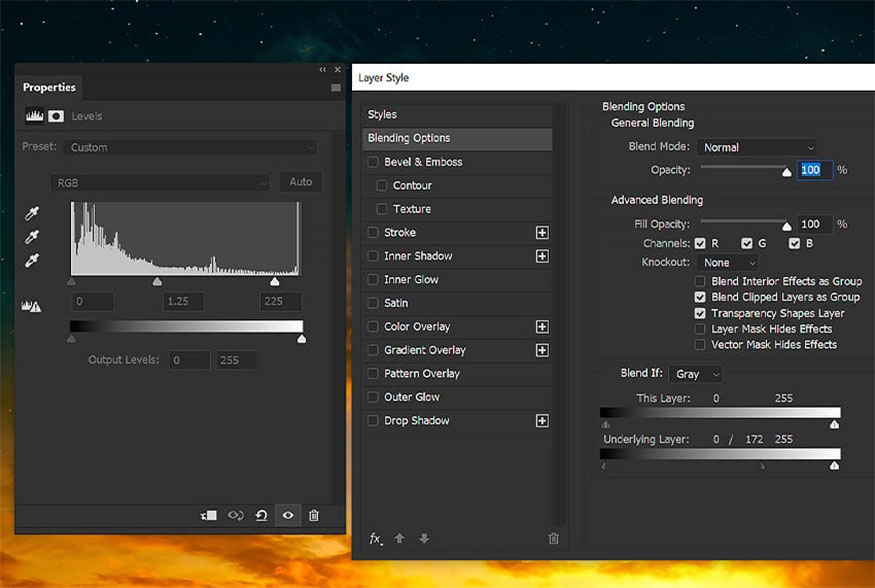
Step 3: Add a Levels layer and drag the midtones to the left to brighten the image. Use Blend If to slightly remove the levels from the shadows. Remember to hold Shift to separate these transitions.
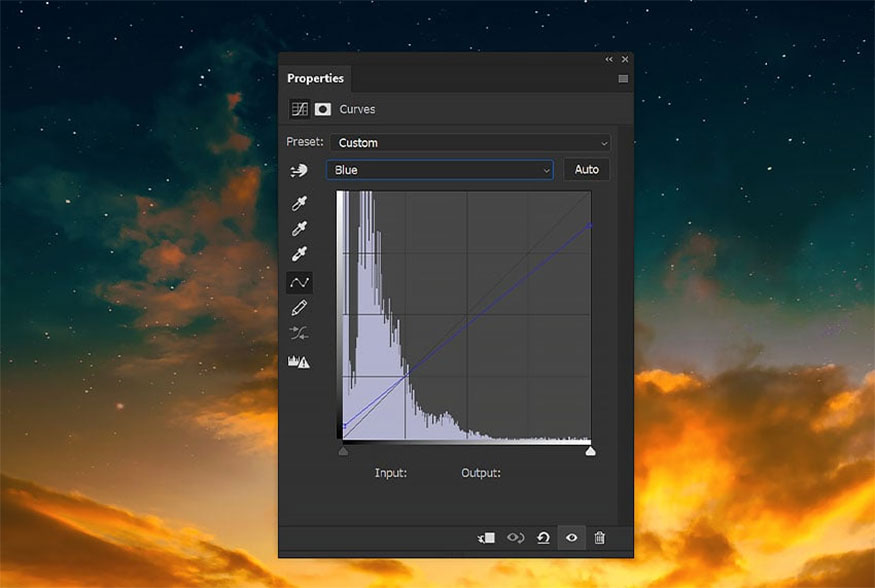
Step 4: Add a Curves layer, bring up the shadows and lower the highlights. This will add blue to the shadows and yellow to the highlights.
3. How to create dramatic shadows in Photoshop
Here are the detailed steps to create dramatic shadows in Photoshop:
Step 1: Place and extract the subject in the center of the canvas, then do some quick color adjustments using Filter > Camera Raw and select Auto. This is to just add some quick contrast. Add contrast using a Curves layer inside the subject. Lighten the shadows and use the Opacity setting to adjust the contrast. Use the cropped Adjustment layer to edit later and place the layers below this layer in the following steps.
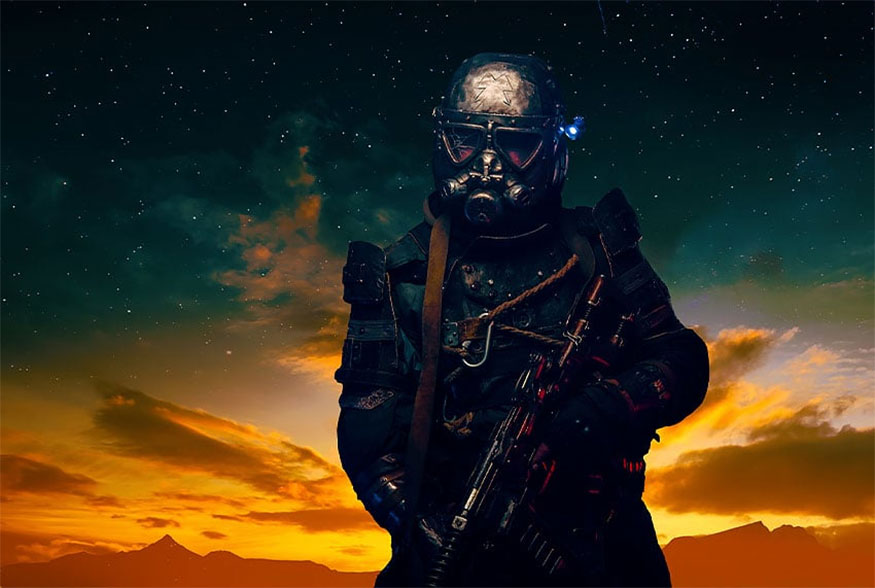
Step 2: Place your subject in a group called "Subject". Clip some color adjustment layers into this group. Start with a Hue/Saturation layer, removing -70 Saturation from the Blues. Next, add a Curves layer to create the shadow.
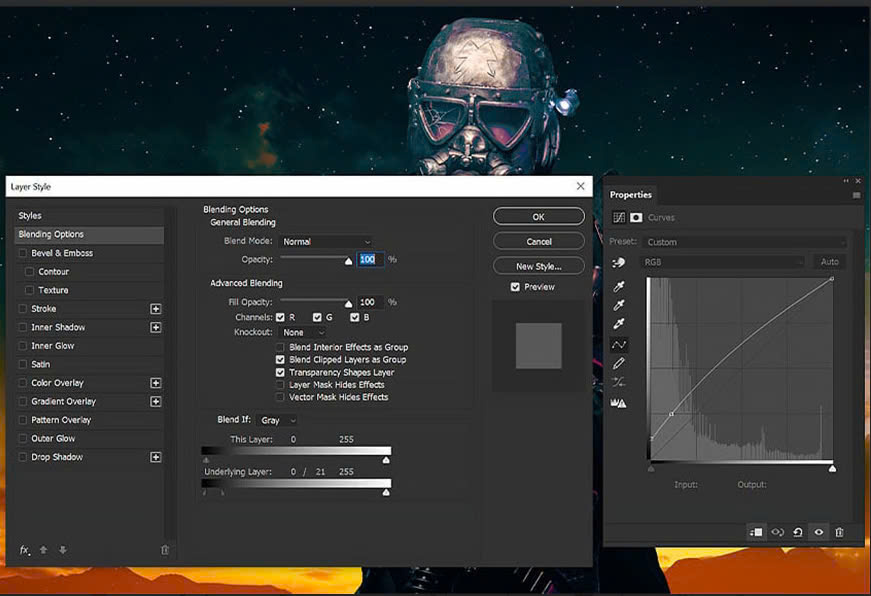
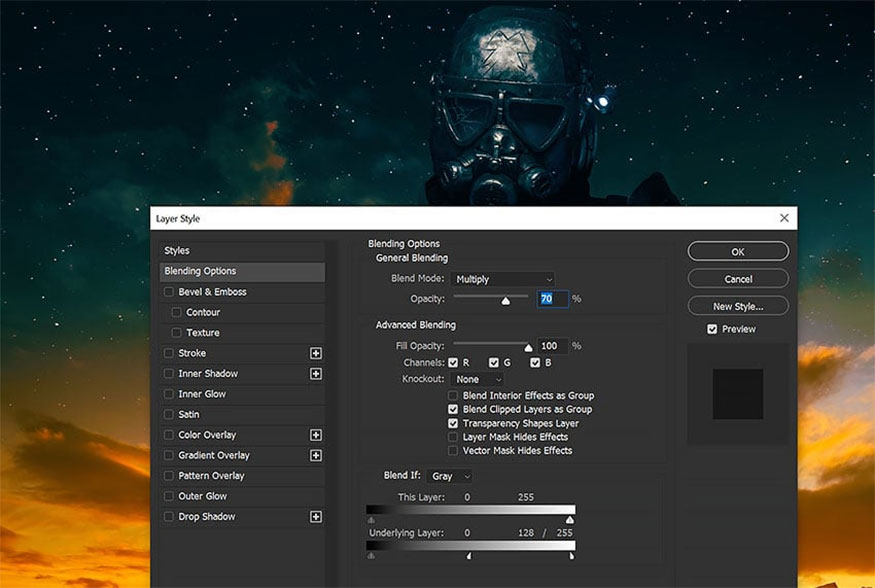
Step 3: To create the background for the shadow, create a Color Fill layer set to a dark blue #002644 and clip it above the last Curves layer in the "Subject" group. Set the layer to Multiply and reduce the Opacity to 70%.
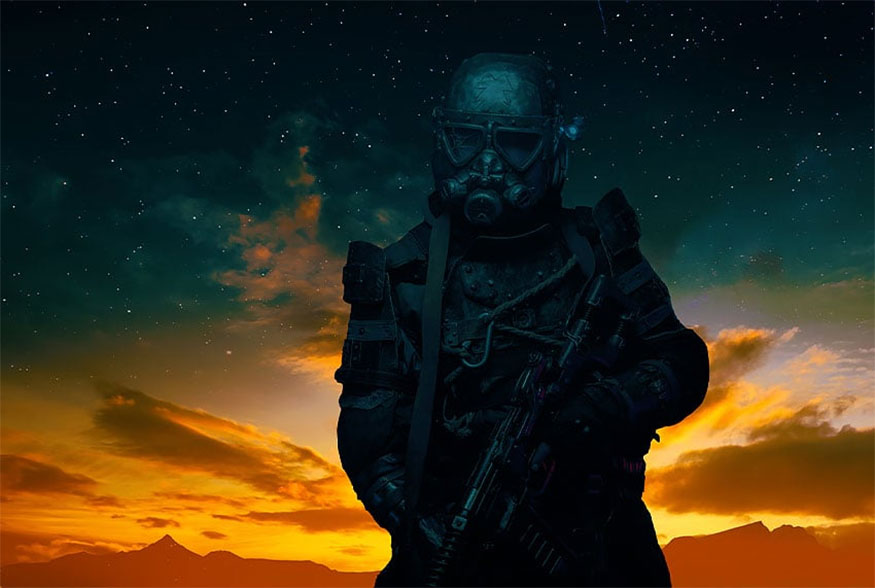
Step 4: Adjust the Blend If settings, blending the layer away from the subject's highlights.
Step 5: Remove the shadow from the edge of the subject by deleting the current layer mask on the Color Fill layer. Hold Control/Command and click on the Subject layer. This will create a selection around the subject. Go to Select > Modify > Contract and shrink it by 150 px. The amount will depend on the size of the image. Add a New Layer Mask to the Color Fill layer, increasing the Feather by about 50 px.
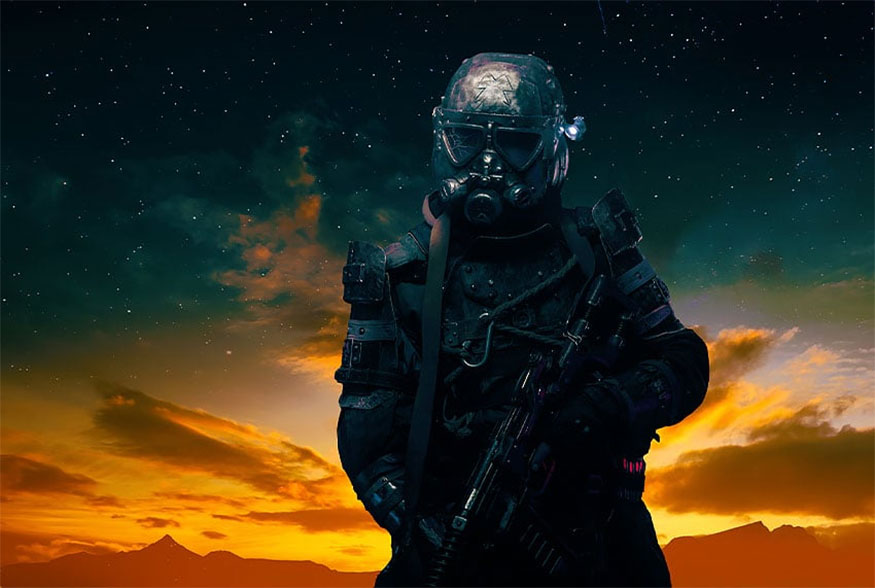
Step 6: Duplicate that shadow layer and set it to Hue to bring more blue to the other shadows.
Step 7: These shadows always come with a rim light, and we can use existing layers to create one. Duplicate the Shadow Color Fill layer and bring it to the top of the clipped layer stack. Set the color to #b3782c, the Blend Mode to Color, and the Opacity to 100%.
Invert the layer mask, and the mask will change from appearing only in the center of the object to appearing everywhere except the center. Finally, we need to toggle the Blend If settings so that the layer blends out of the shadows, not the highlights.
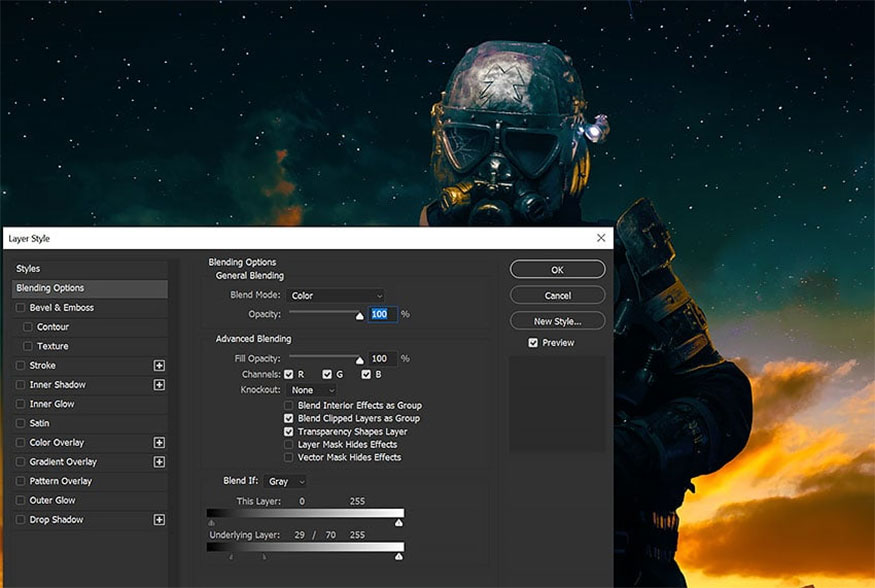
Step 8: If the edges need a little more light, add some using a clipped Curves layer, and remove the layer from the shadows using Blend If.
.jpg)
4. How to Create a Helmet in Photoshop
To create a helmet in Photoshop, we follow these steps:
Step 1: The main goal is to turn a regular sci-fi outfit into something inspired by the Mandalorian. To do this, you first need a blank sheet of paper, which is where Content Aware fills come in!
Use the Lasso tool and set the Feather to 10px to select the mouth and nose of the helmet.
.jpg)
Step 2: Now, go to Edit > Content Aware Fill. The default settings should work fine. Remove the green from any areas that we don't want Photoshop to sample. This is to only include the helmet and upper chest.
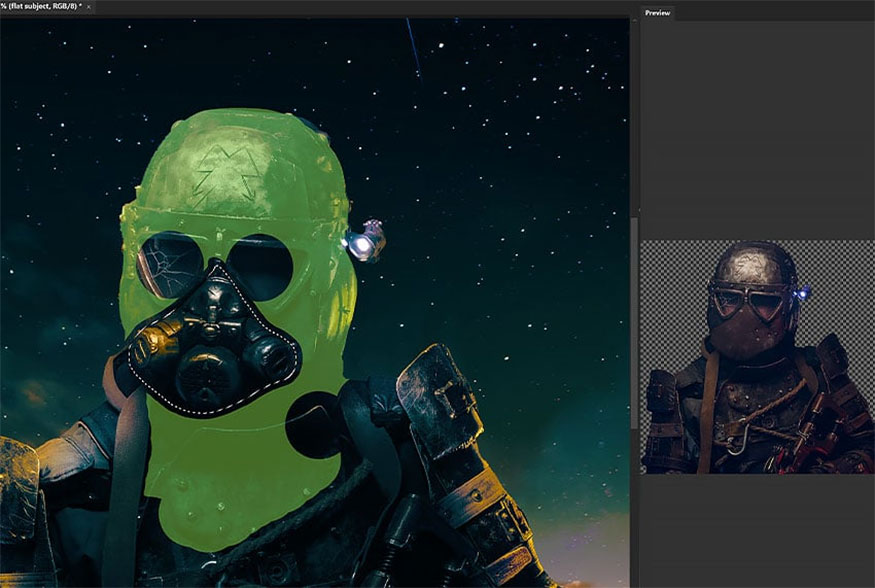
Step 3: Hold down the Shift key, then select the flat object and the content layer. Hold Alt/Option to drag the layers to Duplicate and right click > Merge. On the newly merged layer, we want to repeat step 2. Let's focus on the eyes. After removing the eyes, duplicate and merge the layers as we did before.
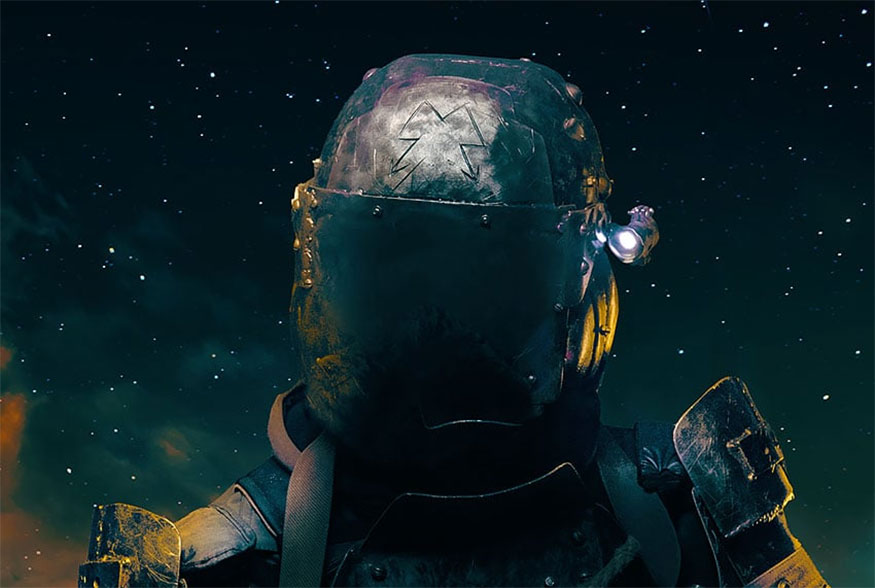
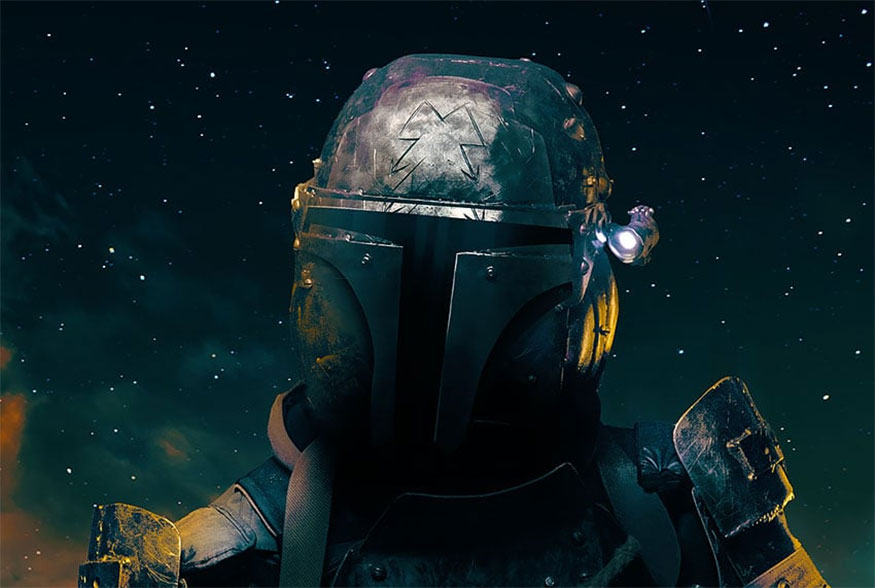
Step 4: Consider referring to the Mandalorian helmet. We'll recreate a very simplified version of the main visor on three new Layers. Leave the eyes a soft black and the base a medium gray, then add highlights and shadows on each side of the base to create a metallic curve shape.

Step 5: Once we have the basic shapes done, we can add some texture using the Lasso Tool to select and copy the surface of the helmet.
Now, paste and clip it to each of the grey shapes. Set each layer to Hard Light. You will need to adjust the angle and size of the texture to best fit the helmet. You can also try different Blending Modes and Opacity levels.

Step 6: In this step you will need to paint some shadows and highlights onto all three layers. We used layers set to Overlay and Screen and a soft round Brush set to Black and White. I used a harder brush for the harder highlights on the visor and the edge of the helmet.
You can use as many layers as you need, then clip each layer into whatever shape you want to light and shade.

Step 7: You can also group all the shapes and use the clipped Overlay layer to create a global light that makes the three shapes appear as one object. Also, create some shadow layers below the shapes if you need some shadows.
5. How to Add Sci-Fi Elements to Your Photos
To add sci-fi elements to your photos, you'll need to follow these steps:
Step 1: We'll finish things off with a simple white flame on our flashlight. Then set it to Screen and change it to a light orange color.
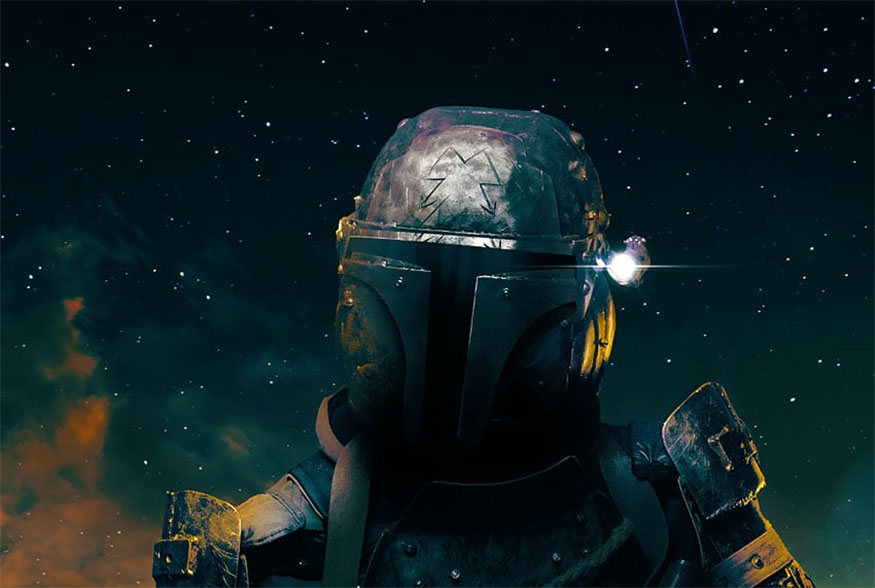
Step 2: We'll really need something to frame our desire to be the Mandalorian. Let's place and extract a planet onto our canvas, above the starry Milky Way layer but below all the other sky layers.
Also, we'll want to make sure the planet is a Smart Object by right-clicking > Smart Object.
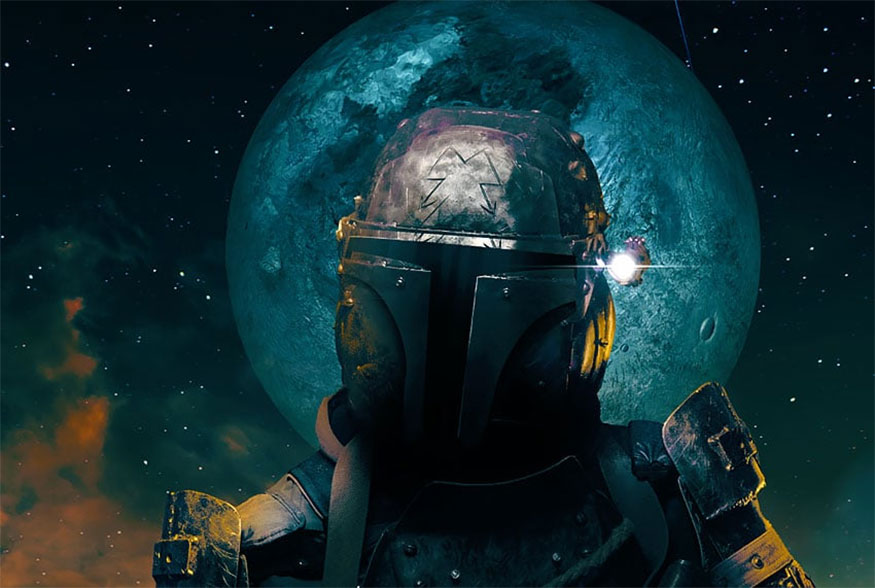
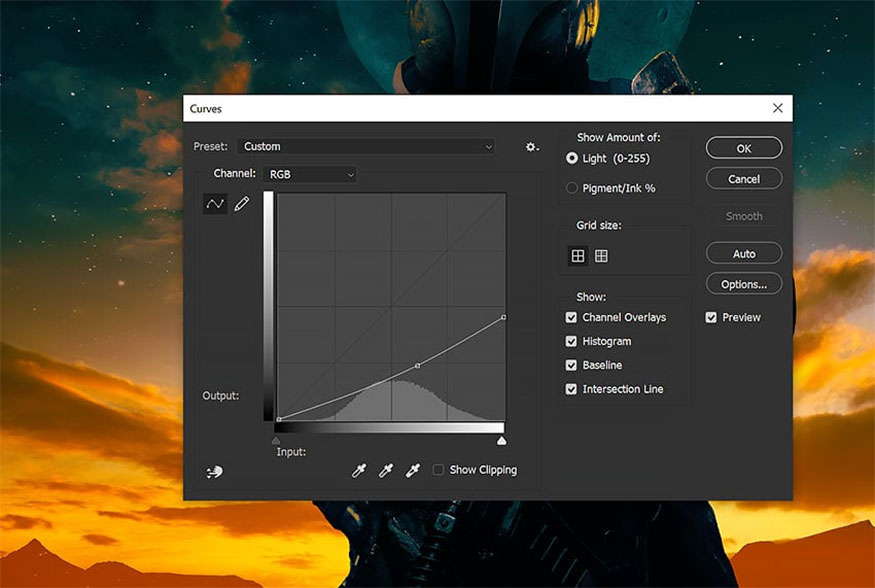
Step 3: Now we need to make some lighting adjustments to the moon. Start by going to Image > Adjustments > Curves, reduce the brightness and make it nice and dark.
Since our layer is a Smart Object, we can use a Smart Mask to erase the edges for the Curves adjustment so the middle of the moon is darker than the outer edges.
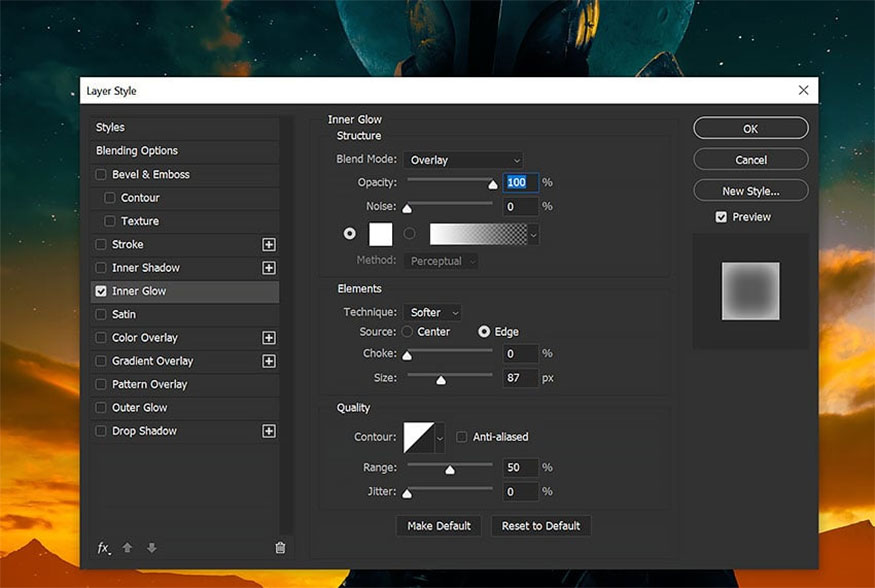
Step 4: Make the shadow darker by adding an Inner Glow effect.
Step 5: Finish by clipping a New Layer to the moon, set it to Multiply and paint #b3782c a dark blue shadow in the middle and top of the moon so the outer edges are brighter and the middle is nice and dark.
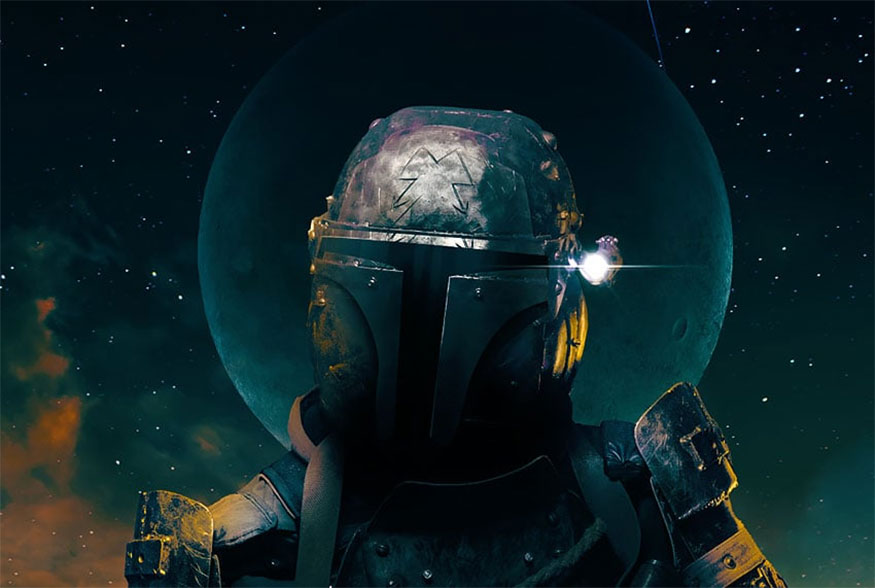
And here is the result:
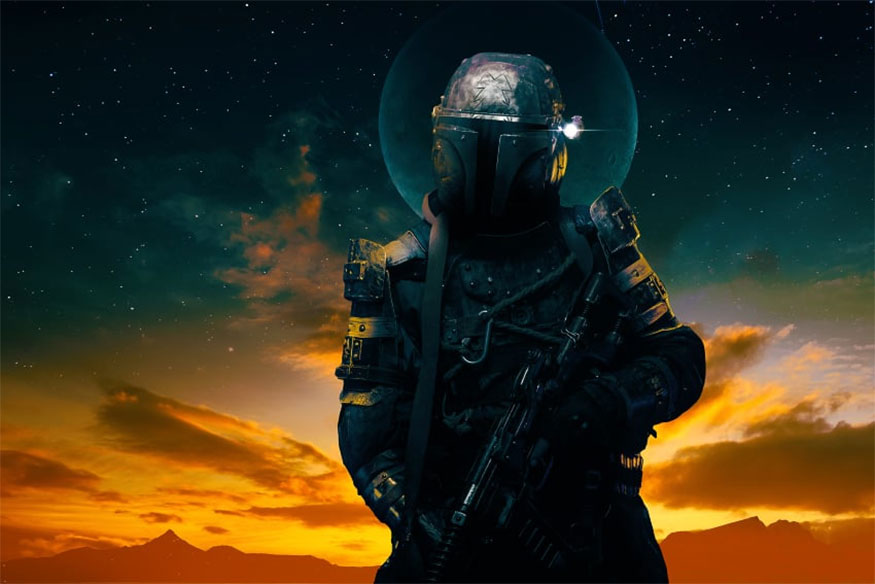
With just these simple steps, we have created an impressive design inspired by the Mandalorian. You can see that the implementation is quite simple and does not take too much time, right?
Above are the details on how to create a Mandalorian-inspired effect in Photoshop. We wish you success in applying the detailed instructions we have provided above. We wish you success and do not forget to follow us to continuously update useful information on the topic of Photoshop!
Installation and support contact information:
🏡 SADESIGN Software Company Limited
📨 Email: phamvansa@gmail.com
🌍 Website: https://sadesign.ai

Installation and support contact information:
🏡 SADESIGN Software Company Limited
📨 Email: phamvansa@gmail.com
🌍 Website: https://sadesign.ai


.png)


