Best Selling Products
Create a Vivid Grain Effect in Photoshop
Nội dung
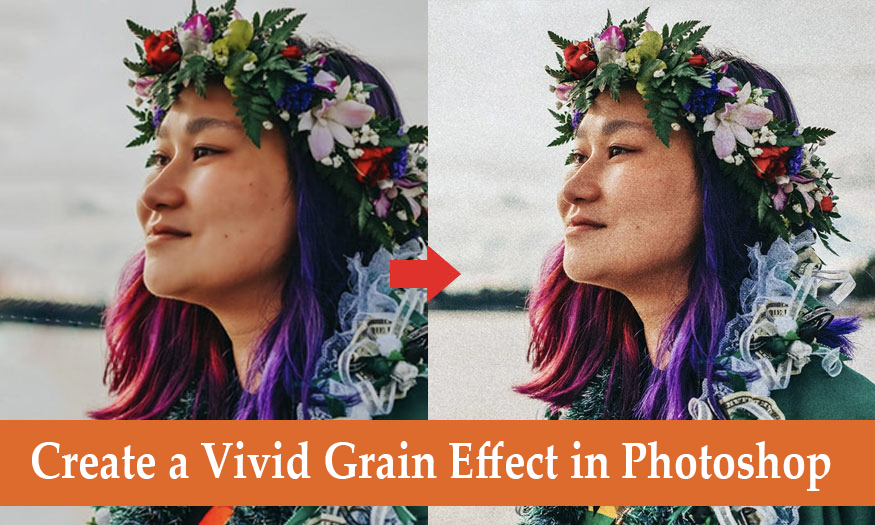
When looking at photos taken with a film camera, you will see that it has noise dots. These noise dots are also called Grain, which is the soul of film photos, making them different from digital photos. Instead of taking photos with a film camera, you can now create Grain dots on photos yourself through Adobe Photoshop. Let's learn with SaDesign about how to create Grain effects in Photoshop through the following shares.
1. Learn about the Grain effect in Photoshop
Grain is a term commonly used in film photography. It is the tiny particles on the surface of the film, appearing in any dark or bright area, depending on the type of film, the particles will appear fine or large.
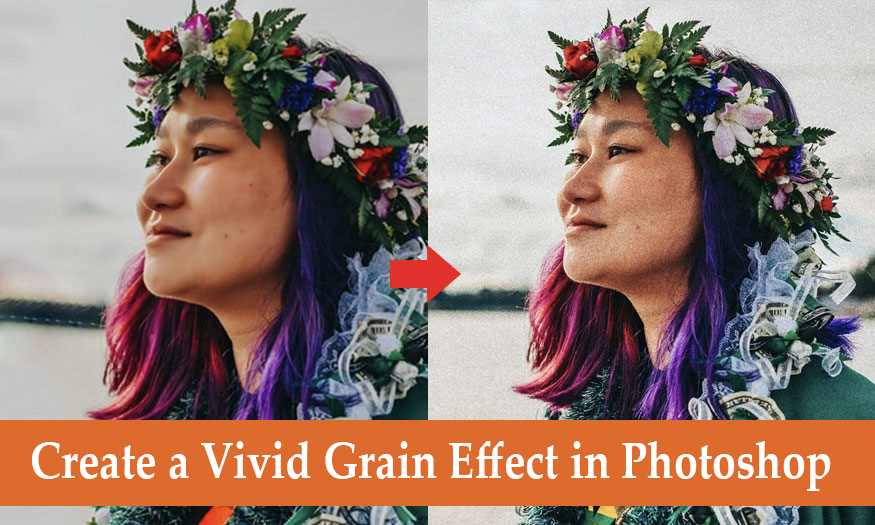
Grain is the soul of film photography, it is one of the main differences between film photography and digital photography. Therefore, this effect is favored by many photographers, many people even try to create grain effects on digital cameras, creating a trend in photography. Because it is loved, many people have created Grain effects in Photoshop for regular digital photos. With the combination of many tools, regular digital photos have added Grain grains like real film photos.
2. How to create Grain effect in Photoshop
To create the Grain effect in Photoshop, you need to go through many steps with a combination of many different tools, specifically as follows:
2.1. Create a layer containing Grain particles
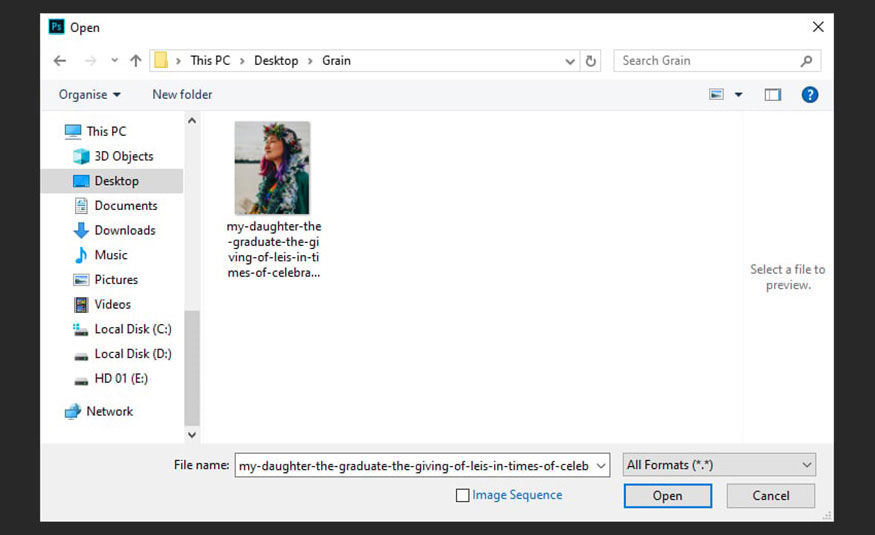
Step 1: The first step in adding a Grain effect in Photoshop is to open your selected photo in Adobe Photoshop. On the menu bar, select File => Open or Ctrl+O then select your photo and click the Open button.
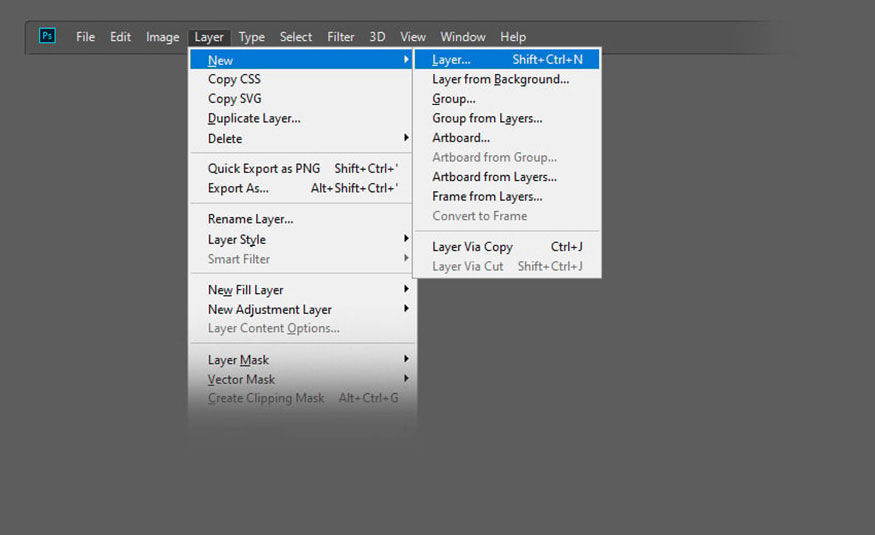
Step 2: To keep the original photo, we need to create a new layer. Press Shift + Ctrl + N. Or on the menu bar, select Layer => New => Layer.
Step 3: Name the new layer “Film Grain”, then select the Grain effect Photoshop options as follows:
Mode: Overlay
Opacity: 100%
Tick the box: Fill with Overlay-neutral color (50% gray)

Click OK to close the dialog box and a new layer named Film Grain will appear. It will be located in the Layers panel, above the original image.
2.2. Convert layer to Smart Object
This section will allow us to create a grainy filter in Photoshop. Here's how:
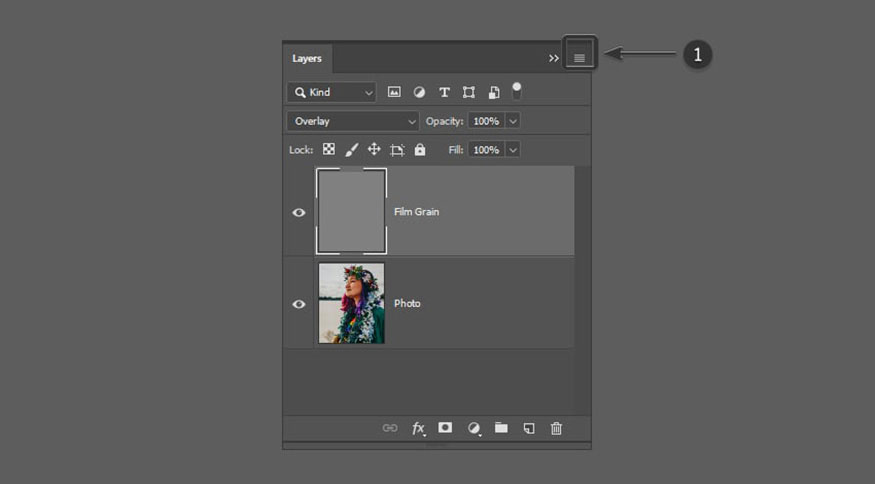
Step 1: Select the Film Grain layer and click on the small menu button located in the upper right corner of the Layers panel.
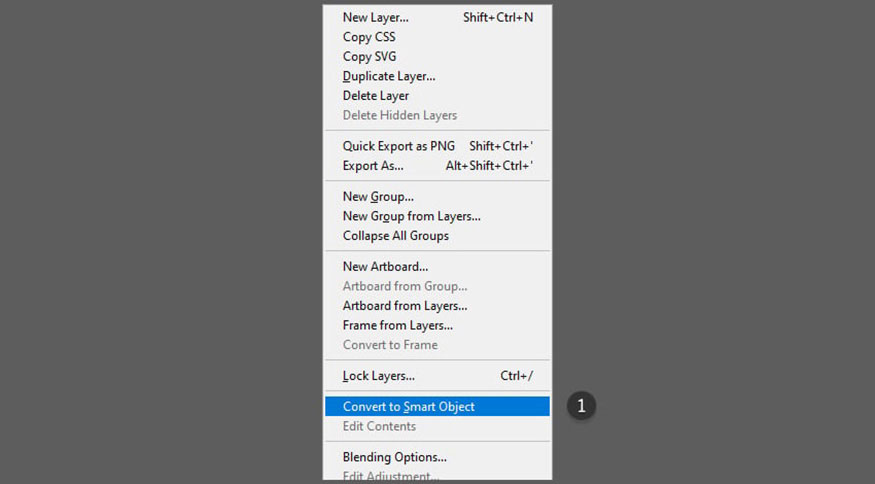
Step 2: A drop-down menu will appear after clicking on the small menu button. Select Convert to Smart Object from the list.
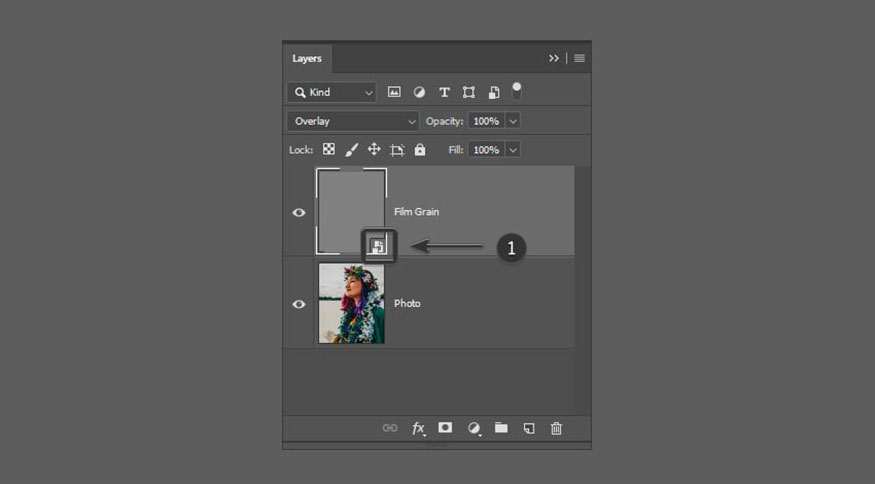
Step 3: A small icon will appear in the lower right corner of the layer's preview thumbnail, indicating that it has been converted to a Smart Object. This means that any Photoshop grain filters or other effects we add to this layer will be fully editable.
2.3. Create Film Grain Overlay layer in Photoshop
In this section, we will learn how to add film grain to your photos to enhance the look of your photos.
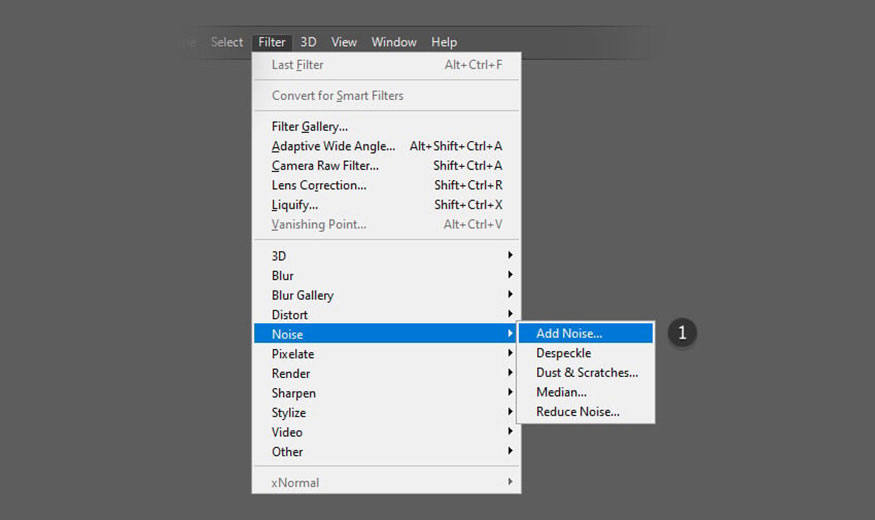
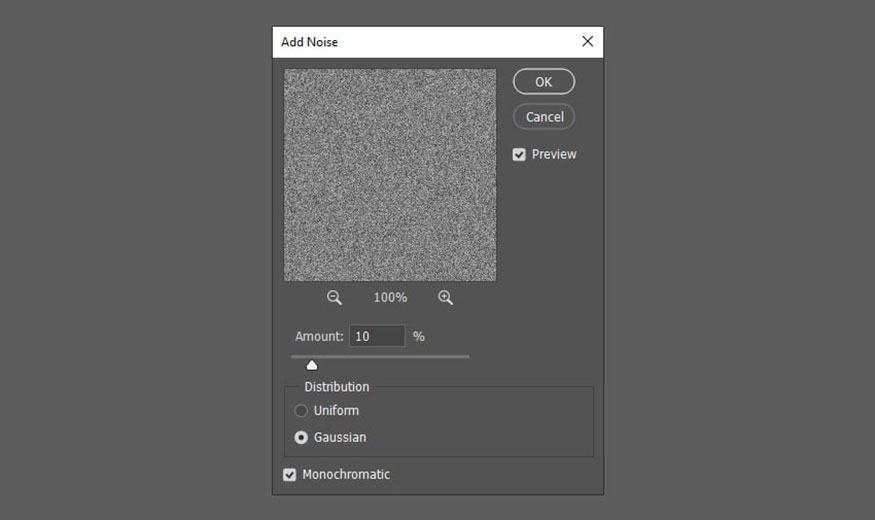
Step 1: Add a Noise filter to the Film Grain layer by going to Filter => Noise => Add Noise in the top menu bar.
Step 2: In the Add Noise dialog box that appears, use the following film grain effect Photoshop settings:
Amount: 10%
Distribution: Gaussian
Monochromatic: Tick
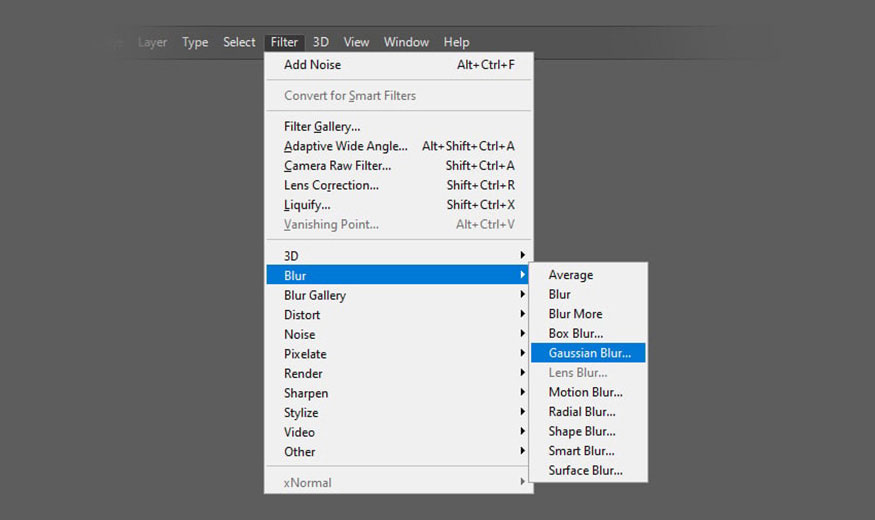
Step 3: With the Film Grain layer still selected, go to Filter => Blur => Gaussian Blur in the top menu bar.
Step 4: This will open the Gaussian Blur dialog box. Use the settings below to soften the grainy texture in Photoshop a bit: Radius: 0.5 pixels.
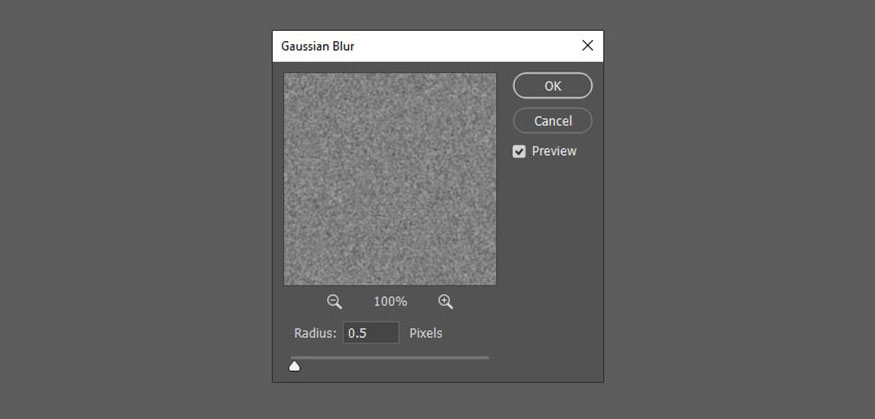
Step 5: Click OK to close the dialog box and apply the Gaussian Blur to the layer. You have now successfully added a subtle Grain Photoshop overlay layer to your image.
3. Adjust Grain effect in Photoshop
Basically, we have created the Grain effect in Photoshop. However, to make the photo more unique and the effect more realistic like film, we need to make some adjustments.
Step 1: Since we have used Smart Objects and Smart Filters, we can open the filter dialog again by double clicking on the filter name. This will allow us to edit the Grain texture in Photoshop even after it has been applied. This can be found as a list below the Smart Object layer.
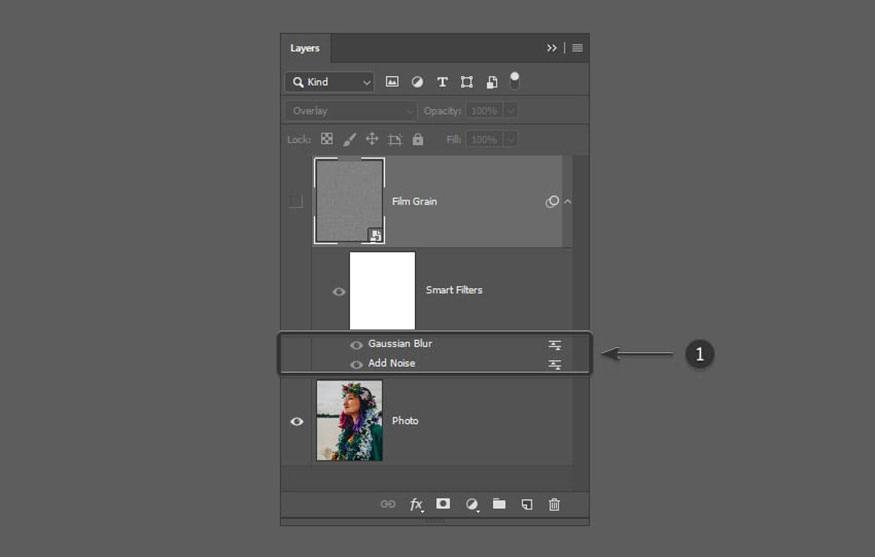
Step 2: After double-clicking on the Smart Filter, you can adjust the settings to your liking. You have now successfully added a grainy texture Photoshop layer to your document.

After adjusting we will get the result as shown below:

Above is a summary of how to create the Grain effect in Photoshop. The digital photo with added Grain particles looks like it was taken with a film camera. The method is simple so try it now.
Installation and support contact information:
🏡 SADESIGN Software Company Limited
📨 Email: phamvansa@gmail.com
🌍 Website: https://sadesign.ai


.png)


