Best Selling Products

Capcut Pro 1 Year
39 USD

Upgrade Genuine Office 365
49 USD

Adobe Premiere Pro Account
99 USD

Upgrade genuine Capture One account
120 USD

MidJourney Account
29 USD

Copyright Adobe Lightroom Account
59 USD

Windows 10 & 11 Pro Key
36 USD

Adobe Photoshop Copyright - Full App
120 USD

Plugin Retouch4me
69 USD

Upgrade Duolingo Super
29 USD

ChatGPT Plus Account (GPT-4)
16 USD

Genuine Cheap Canva Pro
39 USD

Genuine Adobe Illustrator account
99 USD

Autodesk All App Account Copyright
120 USD

Freepik Premium Account
59 USD
Master the skills to create animated text effects in Photoshop
Nội dung
Animated text effects will make your designs more adorable and unique. So, do you know how to create animated text effects in Photoshop? Let's join SaDesign to learn in detail about the steps to create this unique text effect through the article below.

Animated text effects will make your designs more adorable and unique. So, do you know how to create animated text effects in Photoshop? Let's join SaDesign to learn in detail about the steps to create this unique text effect through the article below.
1. How to download a document background
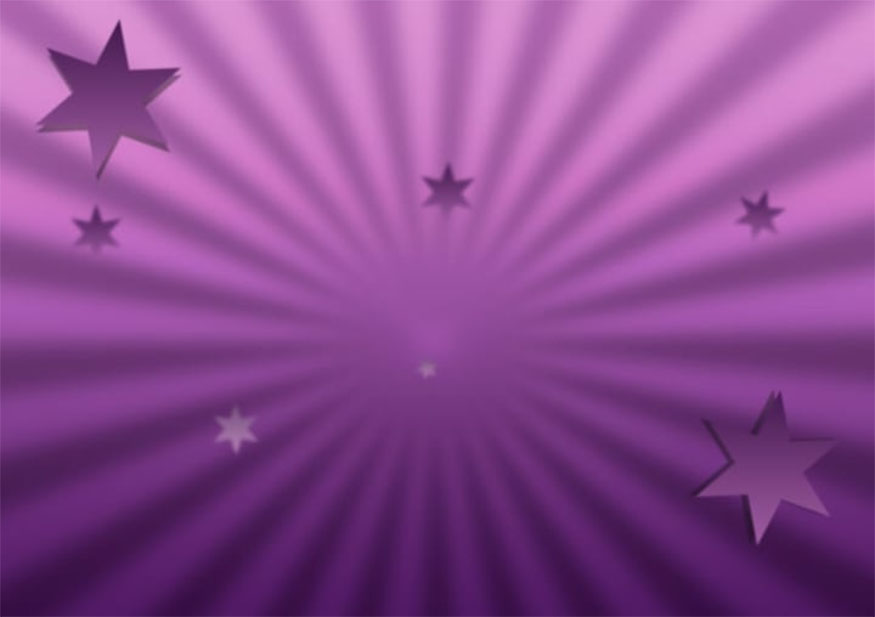
Before creating an animated text effect in Photoshop, you need to choose a background for the document. In this example, SaDesign will use the Star background from the guide source. It's a JPG file with dimensions of 850 x 600px. Select File => Open and open Star-background.jpg.
2. How to create and curve text
This animated text effect is made up of a layer, so you can save it as a new style in the Styles panel once you're done.
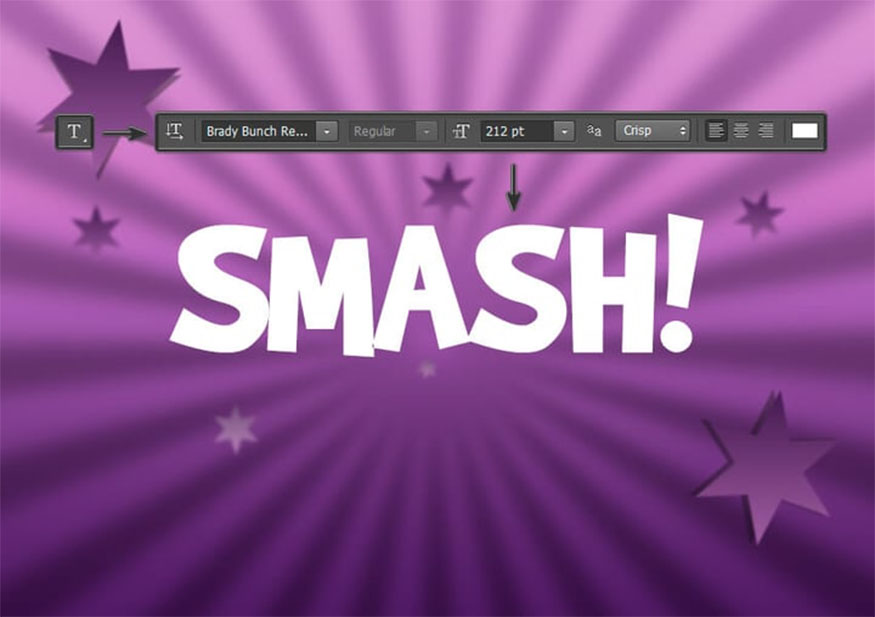
Step 1: Select the Type Tool then select the animated text font Brady Bunch Remastered. Font size is about 212pt. Write the word “Smash!” in capital letters then choose any color you want.
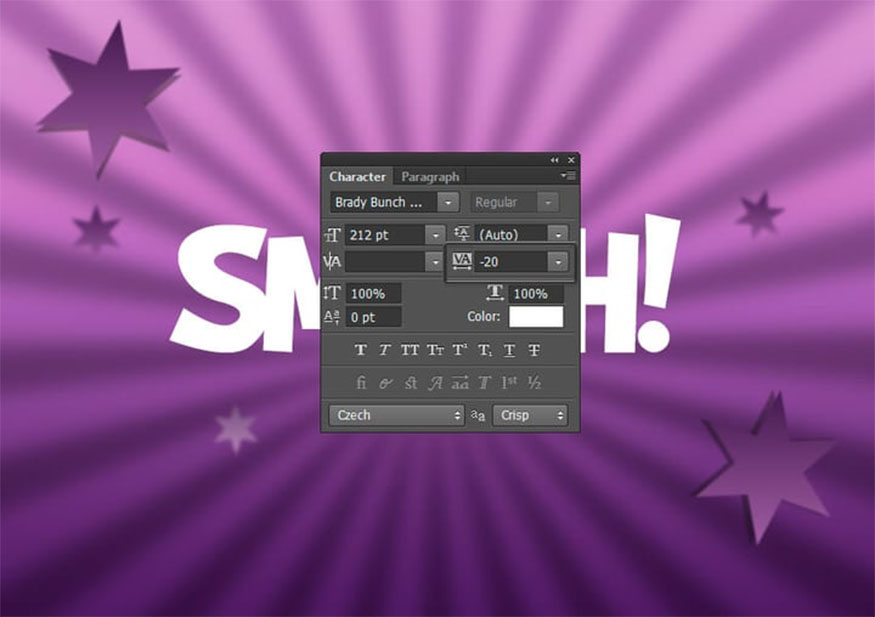
Step 2: After creating the letters, we need to space the letters evenly. Select the text layer, then go to the Character panel and change Tracking to -20.
If you don't see the character panel icons, continue selecting Type => Panels => Character.
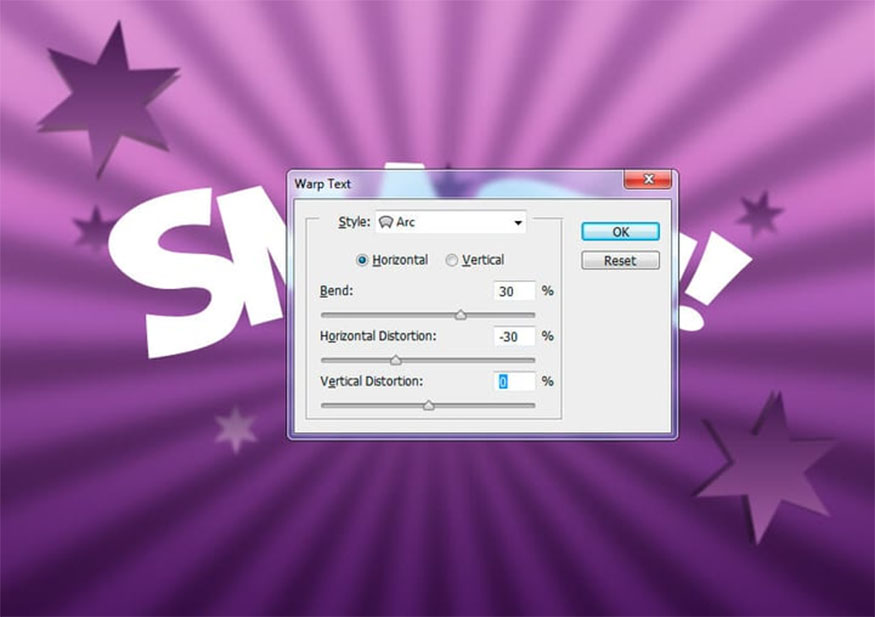
Step 3: This is the last step is curving the text. Right click on the text layer and select Warp Text from the Menu. Then set Style to Arc, select Horizontal and set Bend to 30%, Horizontal Distortion to -30%. Now, continue selecting OK to apply the changes to your text.
3. How to create an animated text effect
Step 1: Select the text layer SMASH! then double-click this layer to apply the following layer styles:
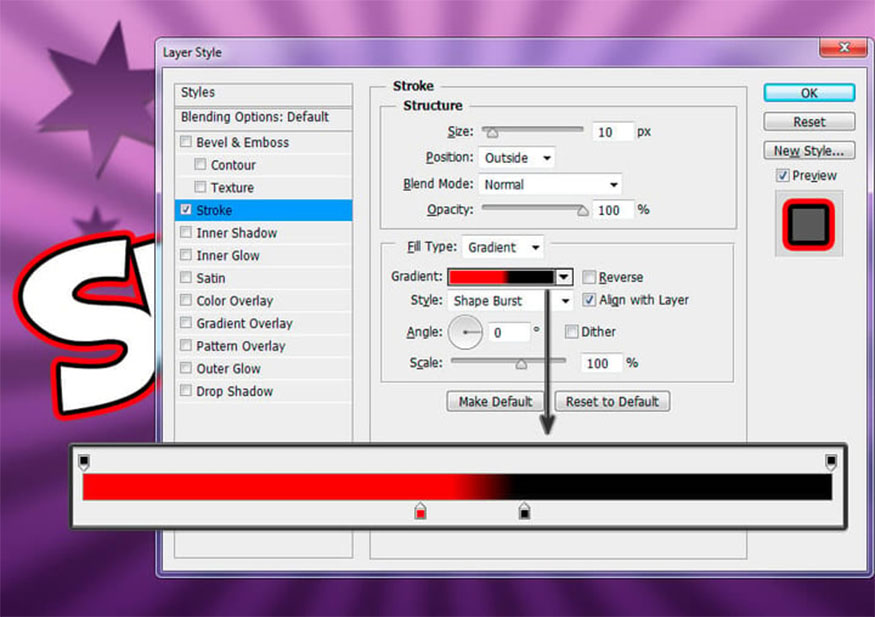
Add Stroke to the following settings:
-
Size: 10 px
-
Position: Outside
-
Blend Mode: Normal
-
Opacity: 100%
-
Fill Type: Gradient
-
Style: Shape Burst
-
Angle: 0°
-
Dither: Check
-
Set up the Gradient with the following color stops: The first gradient stop has color #f80000 and position at 45%; The secondary gradient stop has color #000000 and position is at 59%.
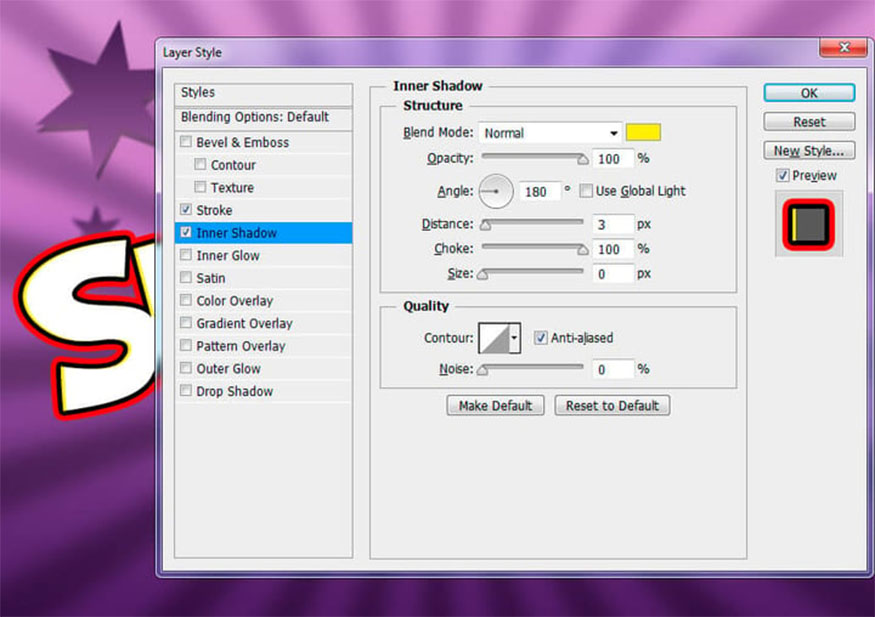
Step 2: Add Inner Shadow with the settings below:
- Blending mode: Normal with color #fff000
- Opacity: 100%
- Uncheck Use Global Light before doing the setting Angle: 180°
- Distance: 3px
- Choke: 100%
- Size 0px
- Check the Anti-aliased box
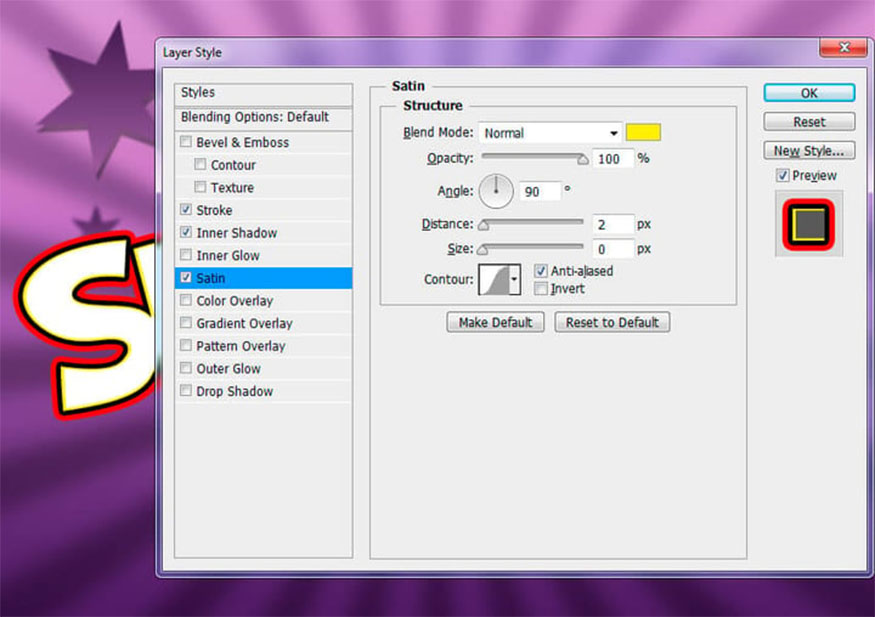
Step 3: Add a Satin effect with the settings below:
- Blend Mode: Normal with color #fff000
- Opacity: 100%
- Angle: 90°
- Distance: 2 px
- Size: 0 px
- Check the Anti-aliased box
- Uncheck the invert box.
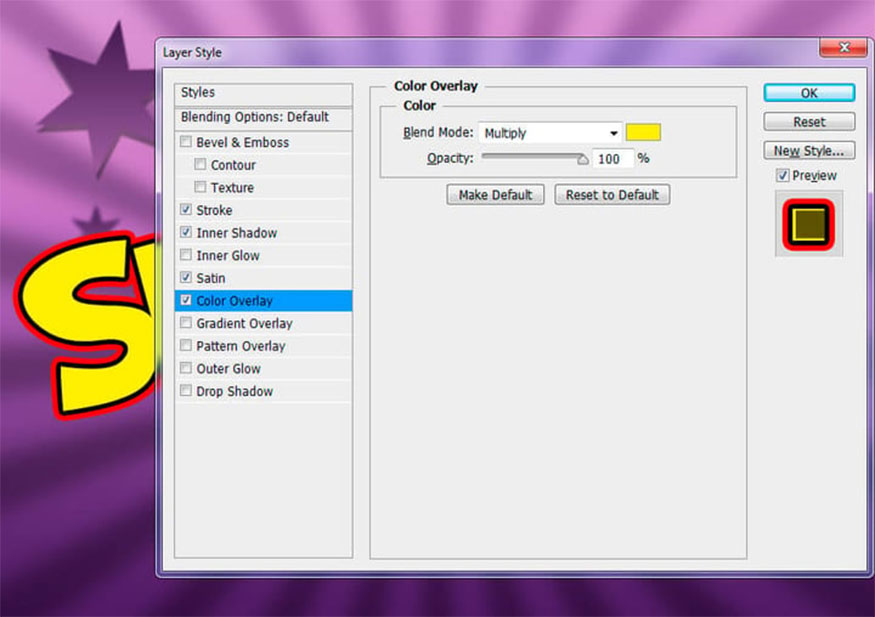
Step 4: Add Color Overlay with the settings below:
- Blend Mode: Multiply
- Click on the Color box and select the color as #fff000
- Opacity: 100%
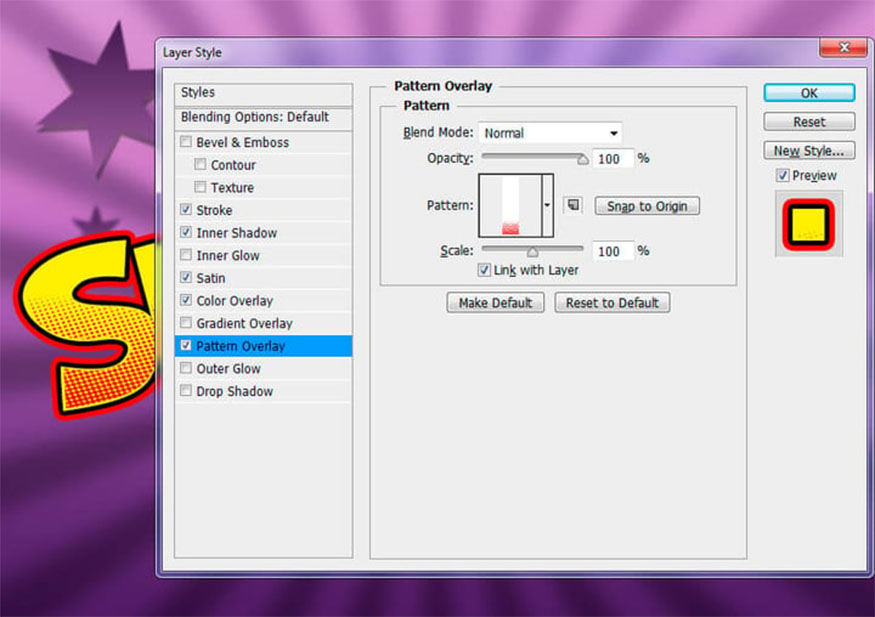
Step 5: Add a Pattern layer with the settings below:
- Select the Pattern box and select the Red Dots pattern
- Opacity: 100%
- Scale: 100%.
You can now change the template position by clicking and dragging your mouse over the text in the document to move the template up or down.
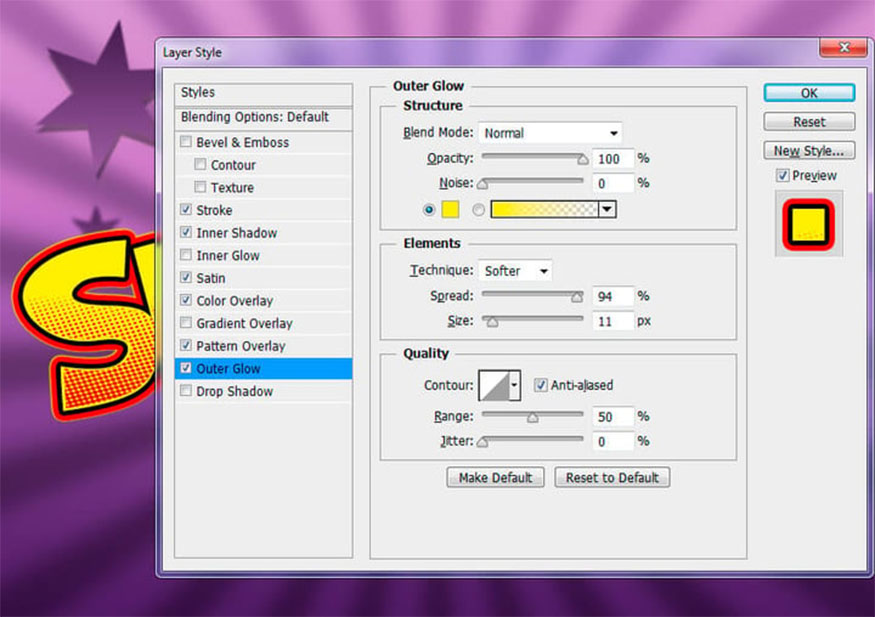
Step 6: Add Outer Glow with the settings below:
- Blend Mode: Normal
- Opacity: 100%
- Set the color of the glow to #fff000
- Technique: Softer
- Spread: 94%
- Size: 11 px
- Select Anti-aliased box
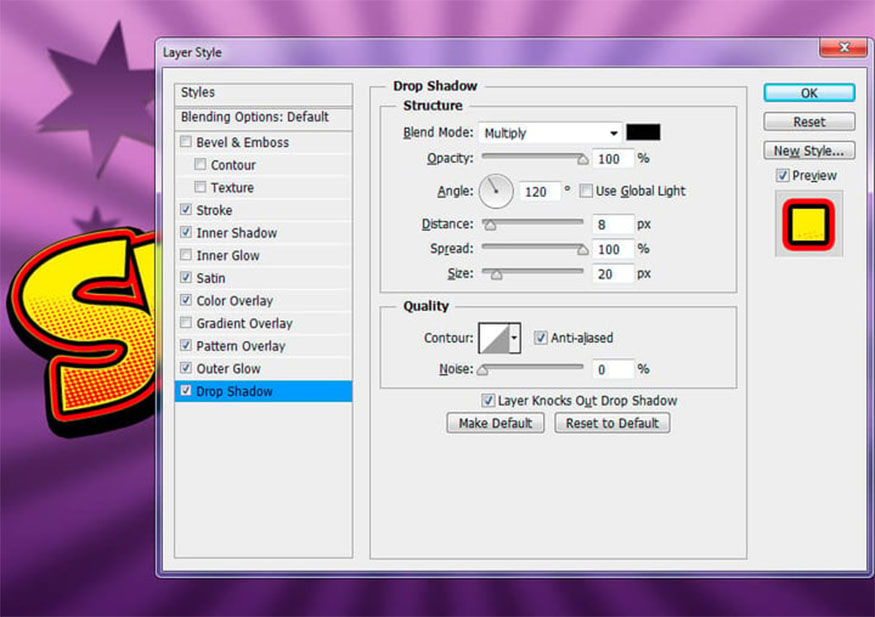
Step 7: This is the final step, add Drop Shadow with the settings below:
- Blend Mode: Duplicate then select color as #000000
- Opacity: 100%
- Uncheck Use Global Light before setting Angle: 120°
- Distance: 8 px
- Spread: 100%
- Size: 20 px
- Check the Anti-aliased box
Click OK to apply for all layers.
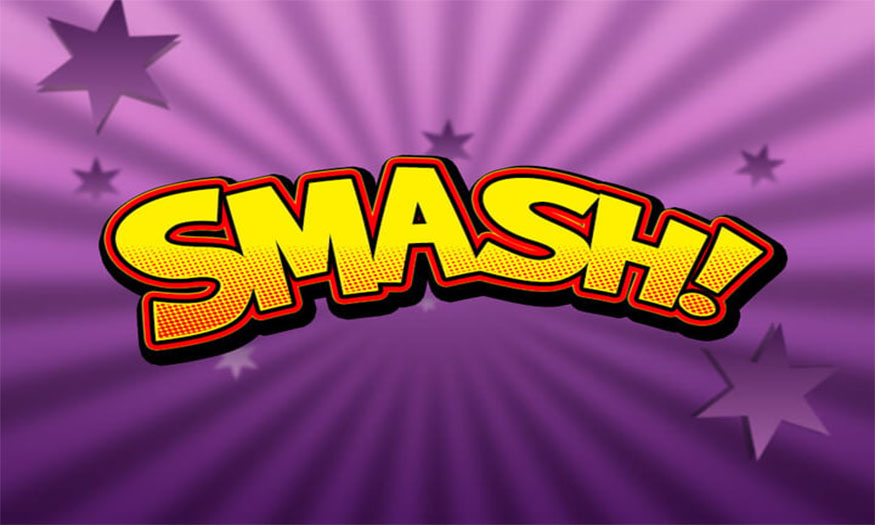
Above are detailed steps to create animated text effects in Photoshop that are simple and easy to implement but bring the best results. Hopefully this article will help readers know how to create animated text effects, thereby making their animation designs more impressive and meaningful. Good luck!
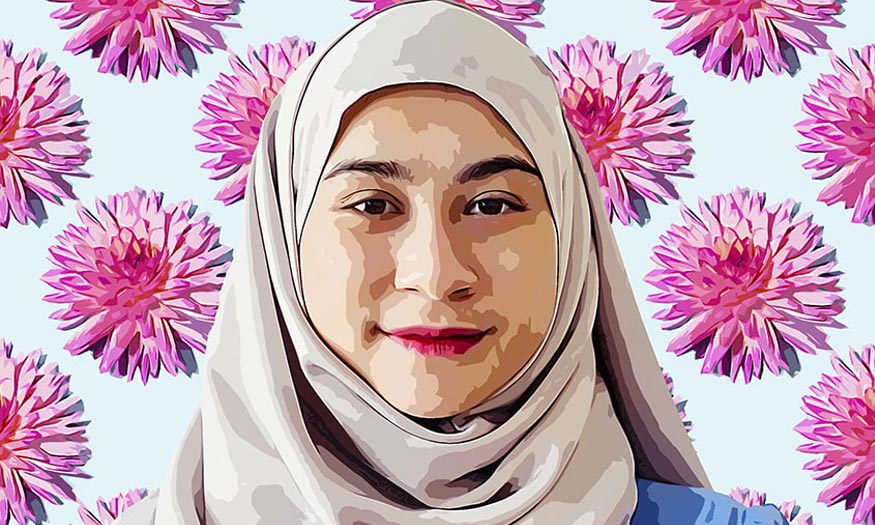
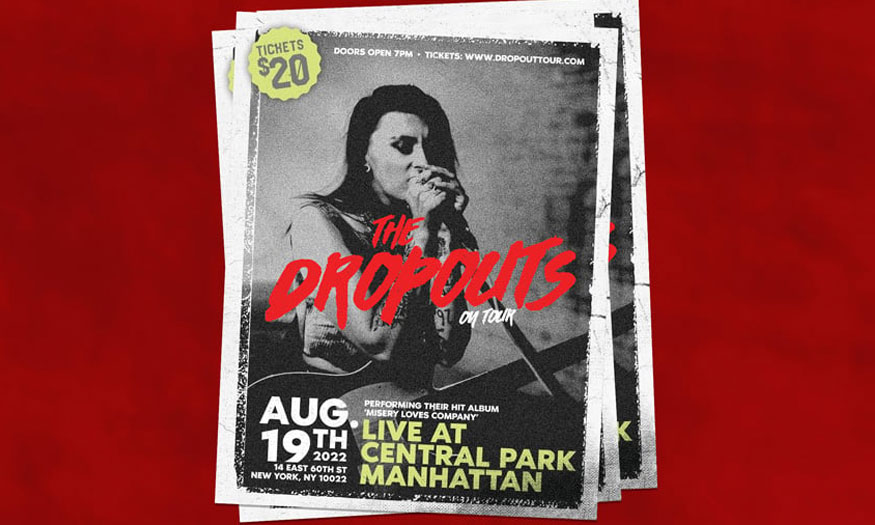
- Guide to create a band flyer in Photoshop
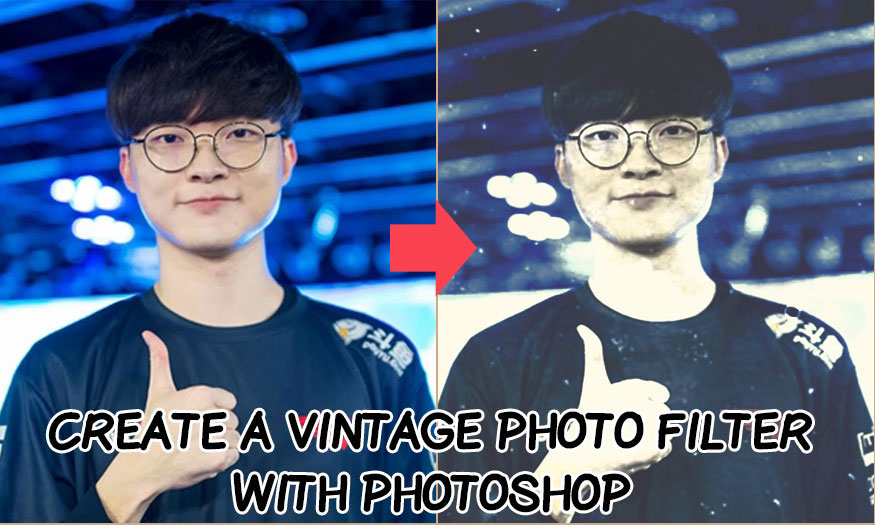
- Quick Tips to Turn a Photo into an Illustration in Photoshop


VIP Products


Best Selling Products
Capcut Pro 1 Year
39 USD
Upgrade Genuine Office 365
49 USD
Adobe Premiere Pro Account
99 USD
Upgrade genuine Capture One account
120 USD
MidJourney Account
29 USD
Copyright Adobe Lightroom Account
59 USD
Windows 10 & 11 Pro Key
36 USD
Adobe Photoshop Copyright - Full App
120 USD
Plugin Retouch4me
69 USD
Upgrade Duolingo Super
29 USD
ChatGPT Plus Account (GPT-4)
16 USD
Genuine Cheap Canva Pro
39 USD
Genuine Adobe Illustrator account
99 USD
Autodesk All App Account Copyright
120 USD
Freepik Premium Account
59 USD