Best Selling Products

Upgrade Duolingo Super
29 USD

Copyright Adobe Lightroom Account
59 USD

Windows 10 & 11 Pro Key
36 USD

MidJourney Account
29 USD

Adobe Photoshop Copyright - Full App
120 USD

Upgrade Genuine Office 365
49 USD

Plugin Retouch4me
69 USD

Freepik Premium Account
59 USD

Genuine Adobe Illustrator account
99 USD

Genuine Cheap Canva Pro
39 USD

Adobe Premiere Pro Account
99 USD

Upgrade genuine Capture One account
120 USD

Autodesk All App Account Copyright
120 USD

Capcut Pro 1 Year
39 USD

ChatGPT Plus Account (GPT-4)
16 USD
How to create a pool party flyer template in Photoshop
Nội dung
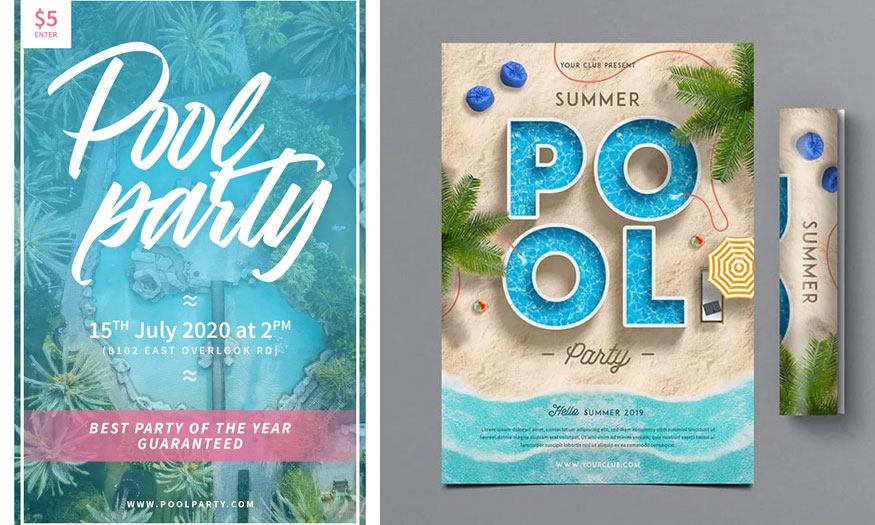
The exciting summer has arrived and this is also the time when party templates on the pool party theme take over. If you don't know how to create the most beautiful and impressive pool party flyer template in Photoshop, let's find out the details with SaDesign in the following article!

The exciting summer has arrived and this is also the time when party templates on the pool party theme take over. If you don't know how to create the most beautiful and impressive pool party flyer template in Photoshop, let's find out the details with SaDesign in the following article!
1. How to create a flyer template
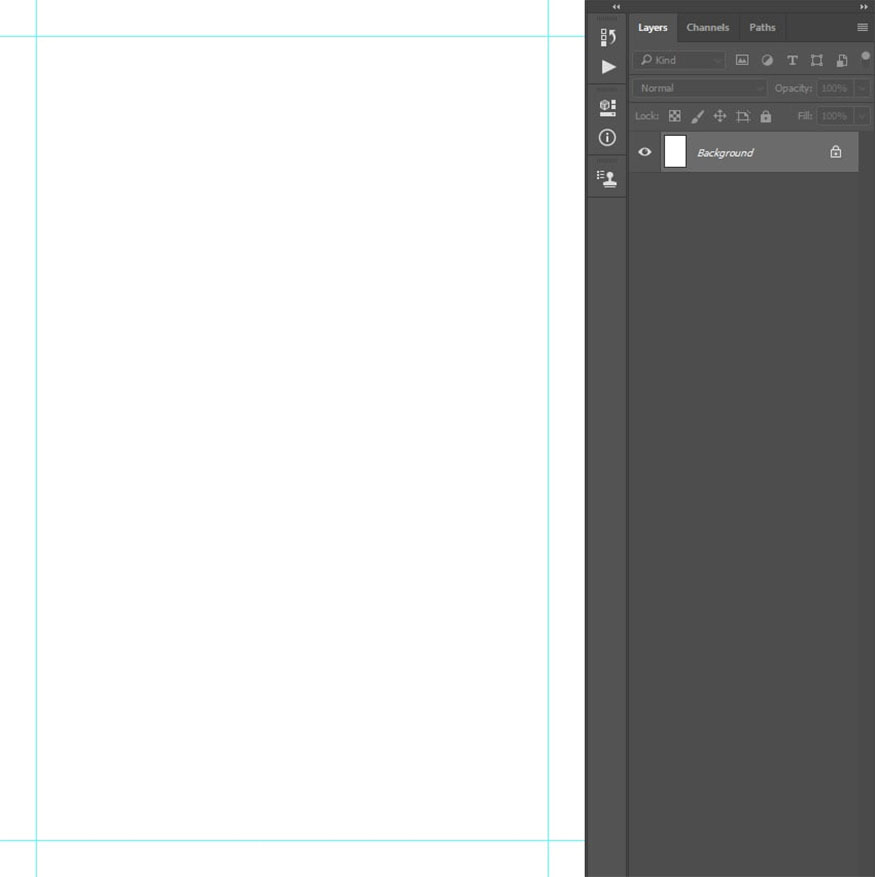
Create a new file by going to File => New and setting the parameters as follows:
-
Width: 4 in
-
Height: 6 in
-
Resolution: 300 px/in.
2. How to create a flyer template frame
Press Ctrl-R to display the ruler. Then use the Move Tool (V) to click and drag from the ruler to the canvas to create new guides. Make 4 guides and place each guide 0.25 inches away from the canvas.
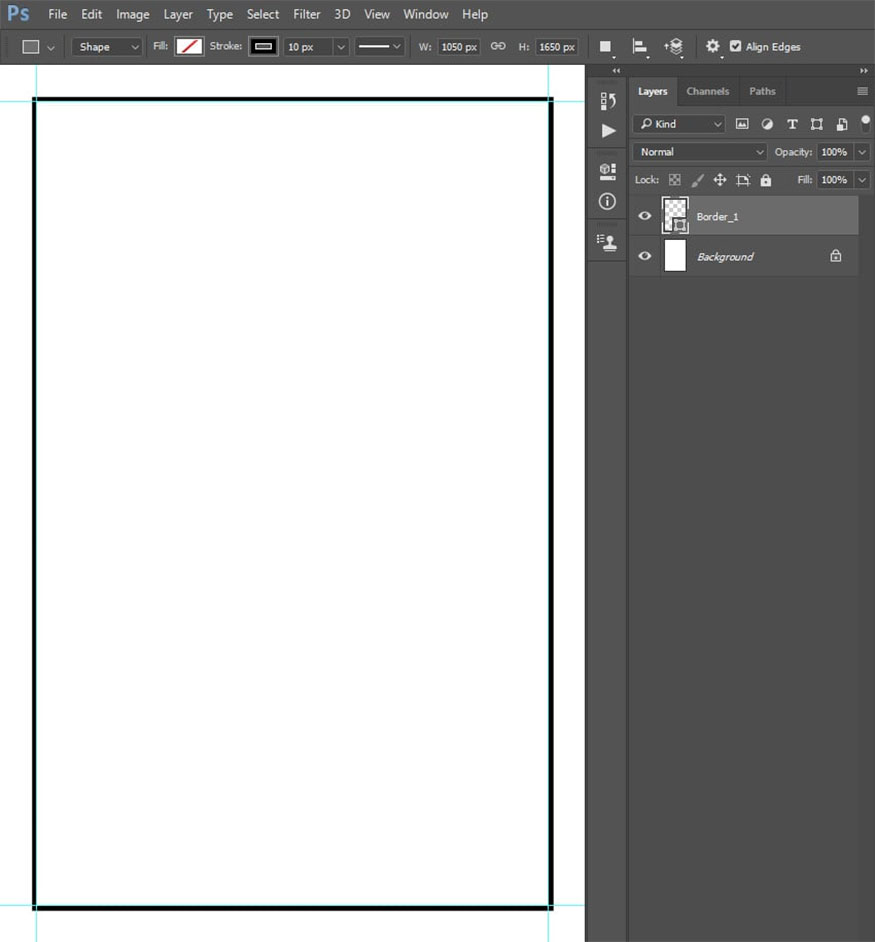
3. How to create a border for a flyer template
Step 1: Create a border for the flyer by selecting the Rectangle Tool (U), then click anywhere in the canvas to create a new rectangle layer, set the Width to 1050 px and Height to 1650 px.
Then set Fill Solid Color to No Color, Stroke Solid Color to color code #000000. Center this layer both vertically and horizontally on the canvas and name this layer “Border_1”.
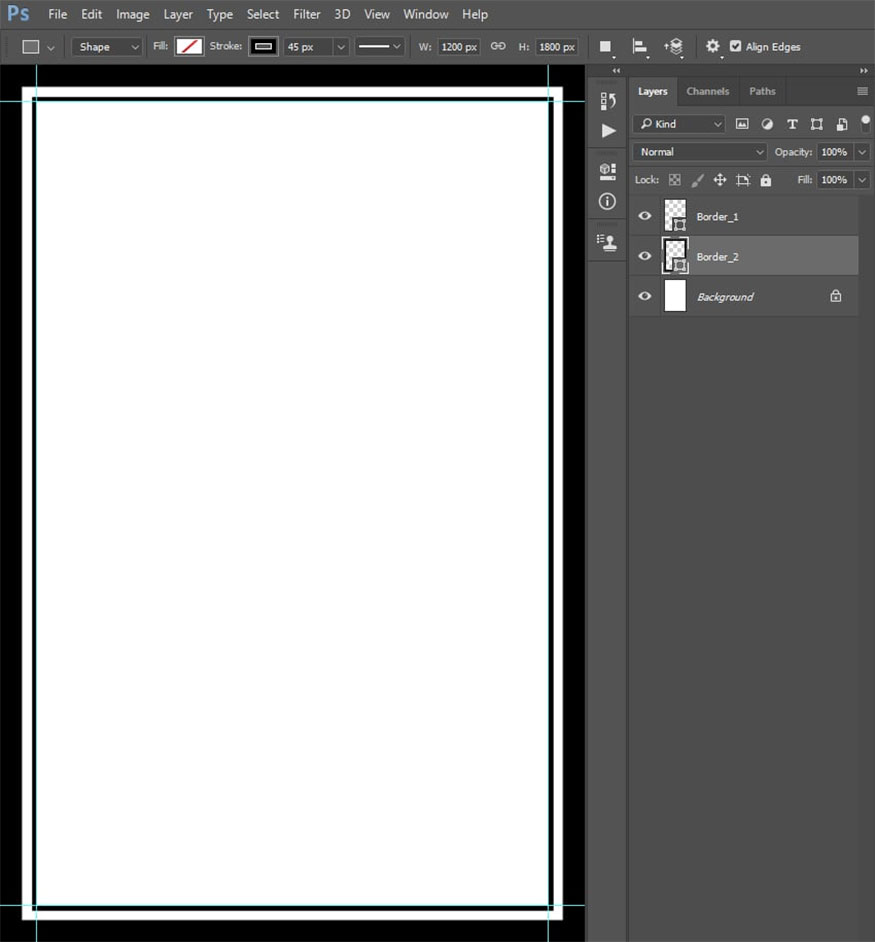
Step 2: Now, select the Background layer, then select the Rectangle Tool (U), click anywhere inside the canvas to create a new rectangular layer. Set Width to 1200px and Height to 1800px.
Then set Fill Solid Color to No Color, Stroke Solid Color to color code #000000, center this layer both vertically and horizontally on the canvas and name them “Border_2”.
4. How to create a background for a pool party flyer
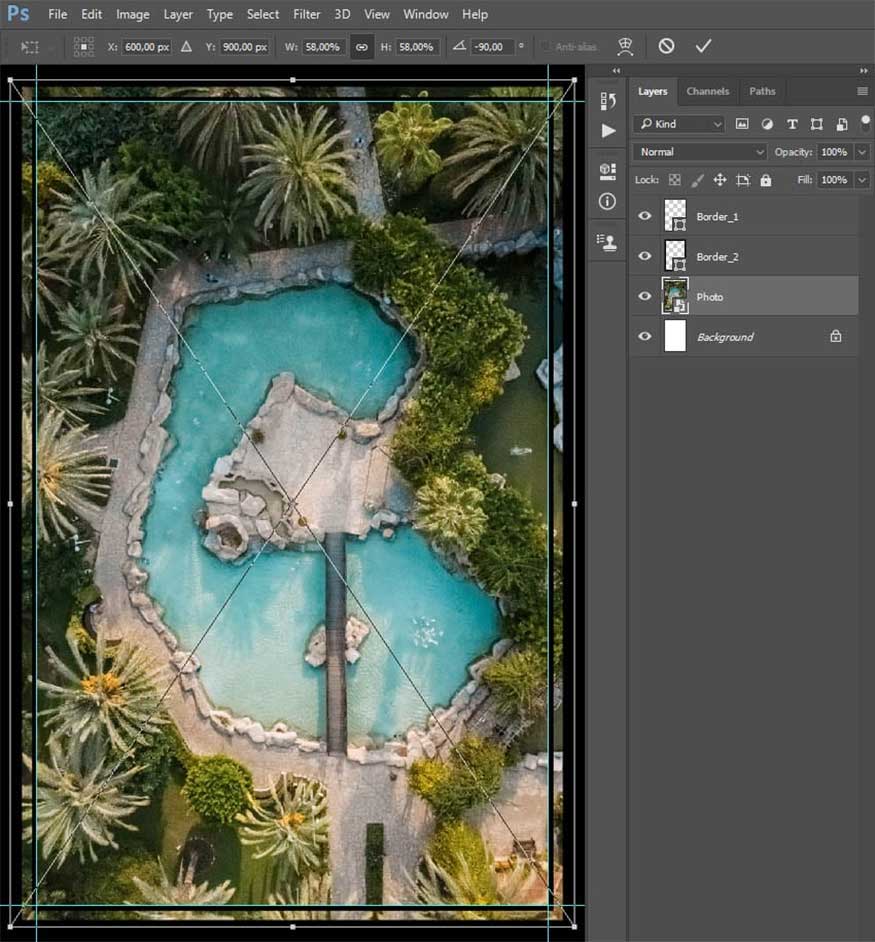
- Step 1: First, select the Background layer, then go to File => Place Embedded, select photo to the available link and click Place.
Set the Angle to -90°, Width and Height to 58%, place the photo as shown below, and name this layer “Photo”.
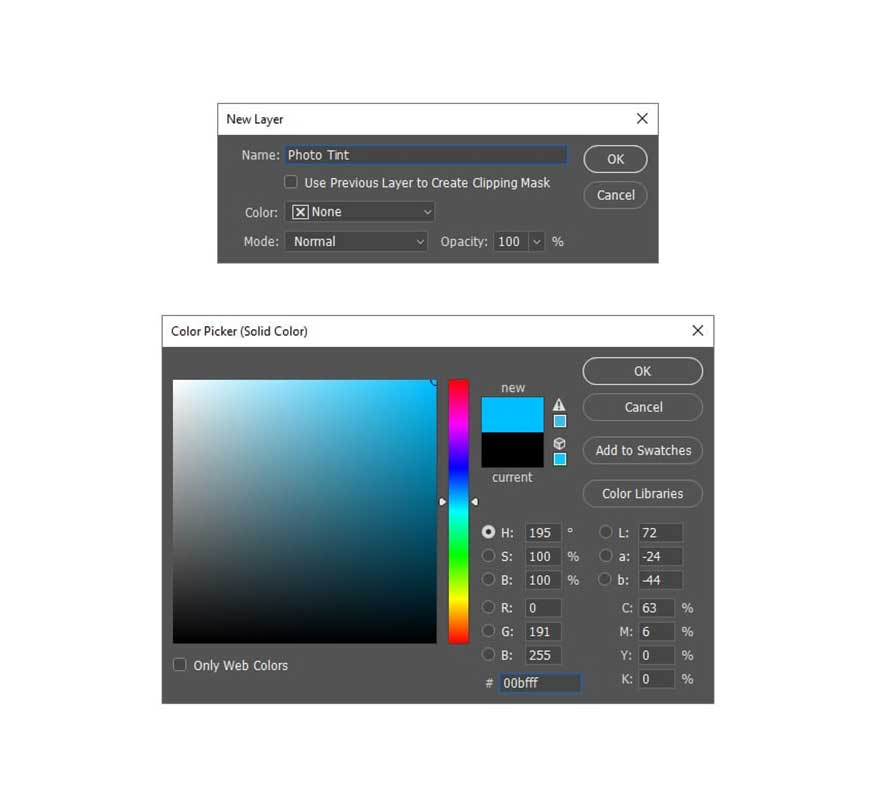
- Step 2: Go to Layer => New Fill Layer => Solid Color to create a new fill layer and name them “Photo Tint”, choose color #00bfff.
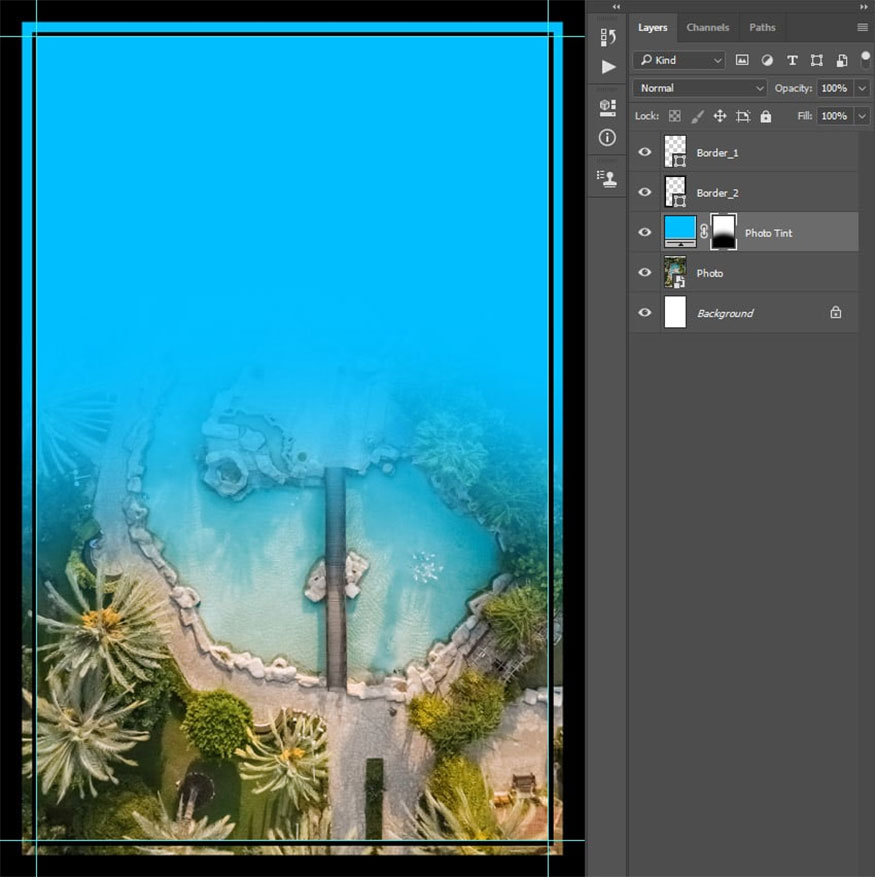
- Step 3: Select the layer mask for the Photo Tint layer, select the Brush Tool (B), choose a soft brush and set the foreground color to #000000. The result we get is as shown below:
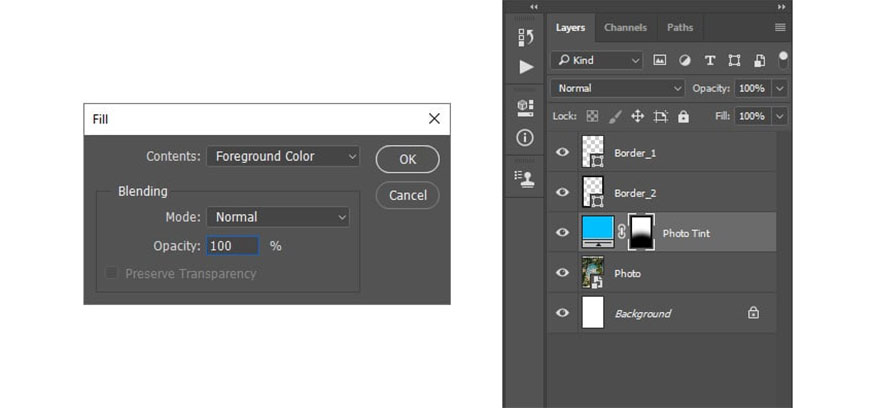
- Step 4: Hold Ctrl while clicking on the Border_1 layer thumbnail to create a selection for this layer. Then press Ctrl-Shift-I on the keyboard to invert the selection. Go to Edit => Fill, set Contents to Foreground Color, Mode to Normal, Opacity to 100%.
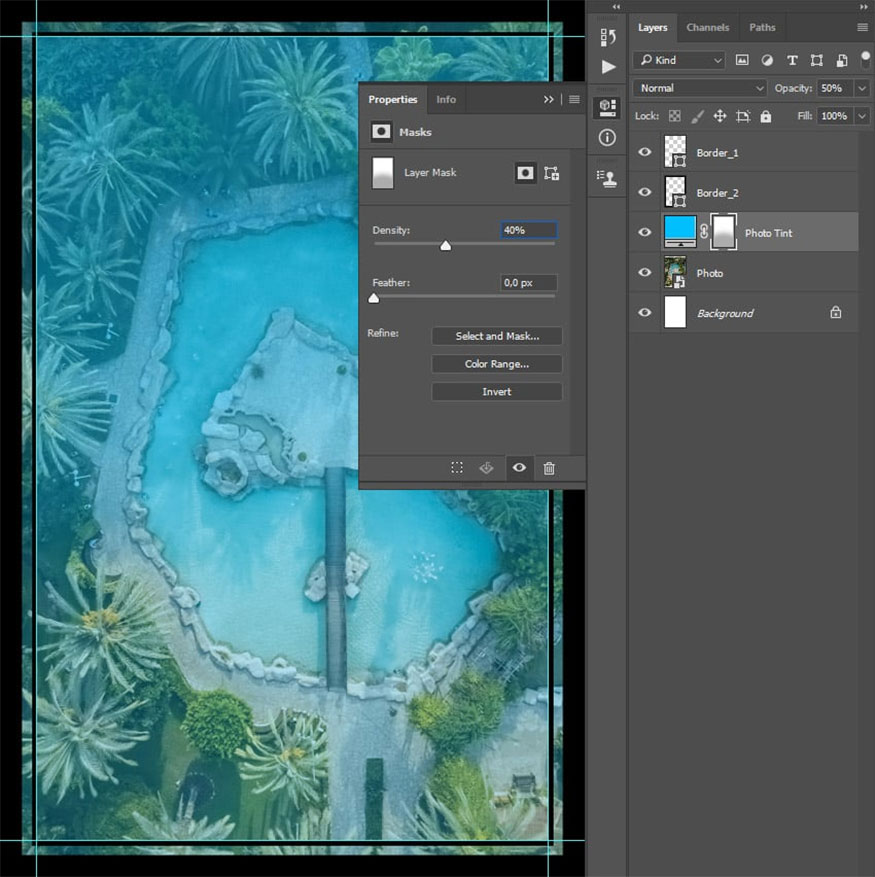
- Step 5: In the Properties panel, select the Density of the layer mask to 40% and Opacity to 50%.
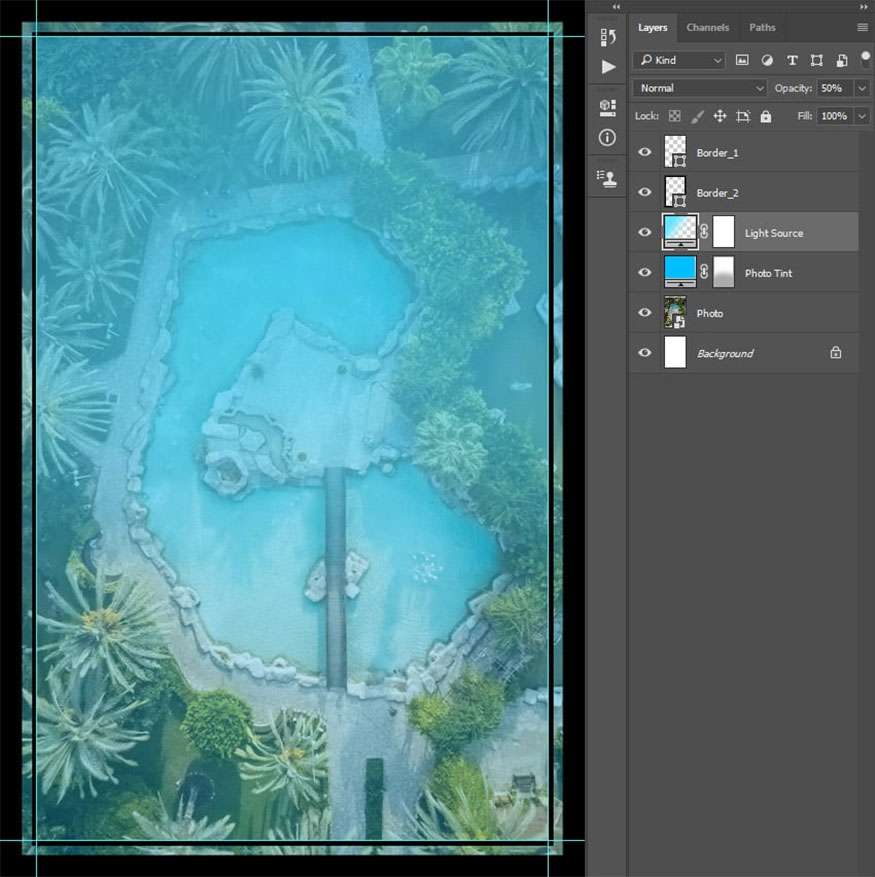
- Step 6: Next, go to Layer => New Fill Layer => Gradient Fill to create a new gradient fill layer. Name this layer “Light Source” and make the following settings:
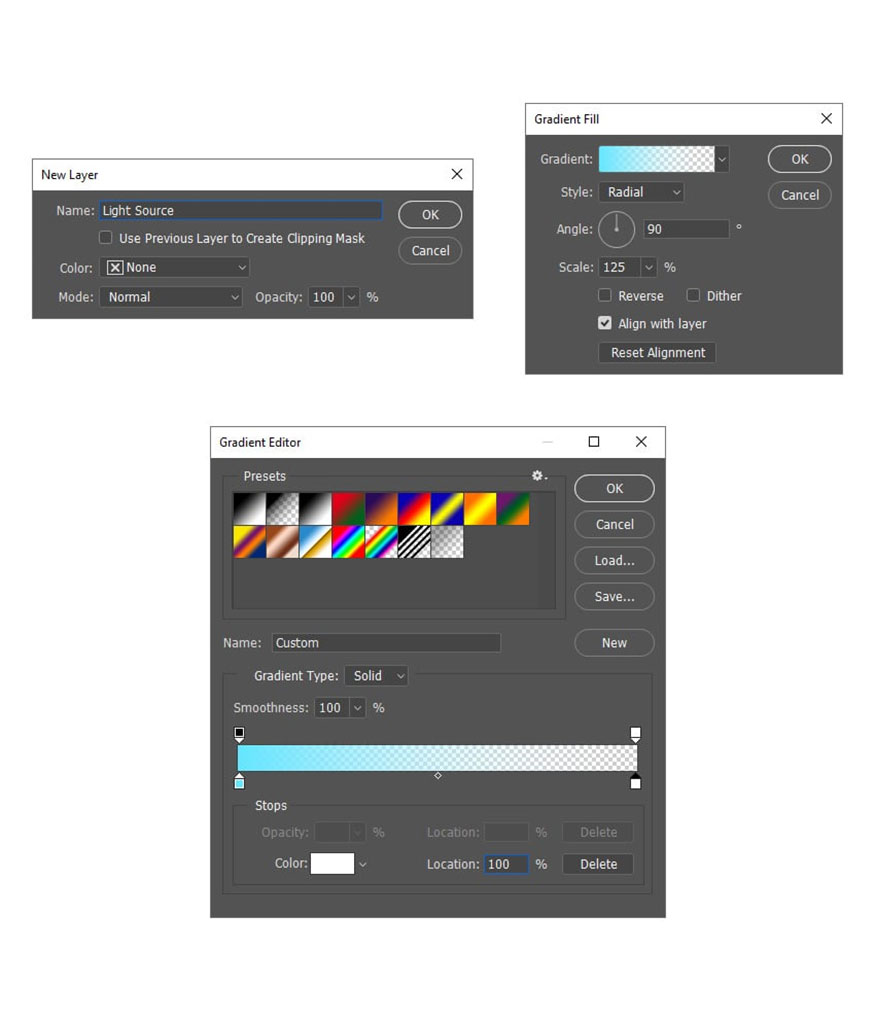
- Step 7: Install the gradient as the image shown below. Change the Opacity of this layer to 50%.
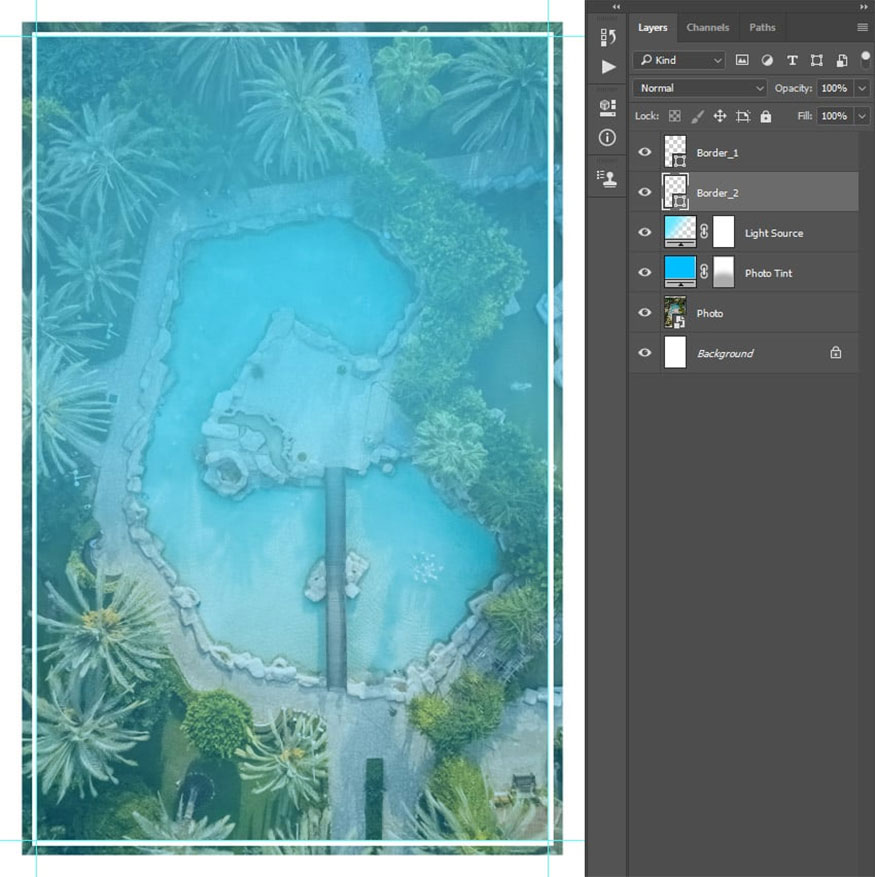
- Step 8: Select the Rectangle Tool (U) => select layer Border_1 and set Stroke Solid Color to color code #ffffff. Next, select layer Border_2 and set Stroke Solid Color to color code #ffffff.
5. Instructions for creating content for a flyer template
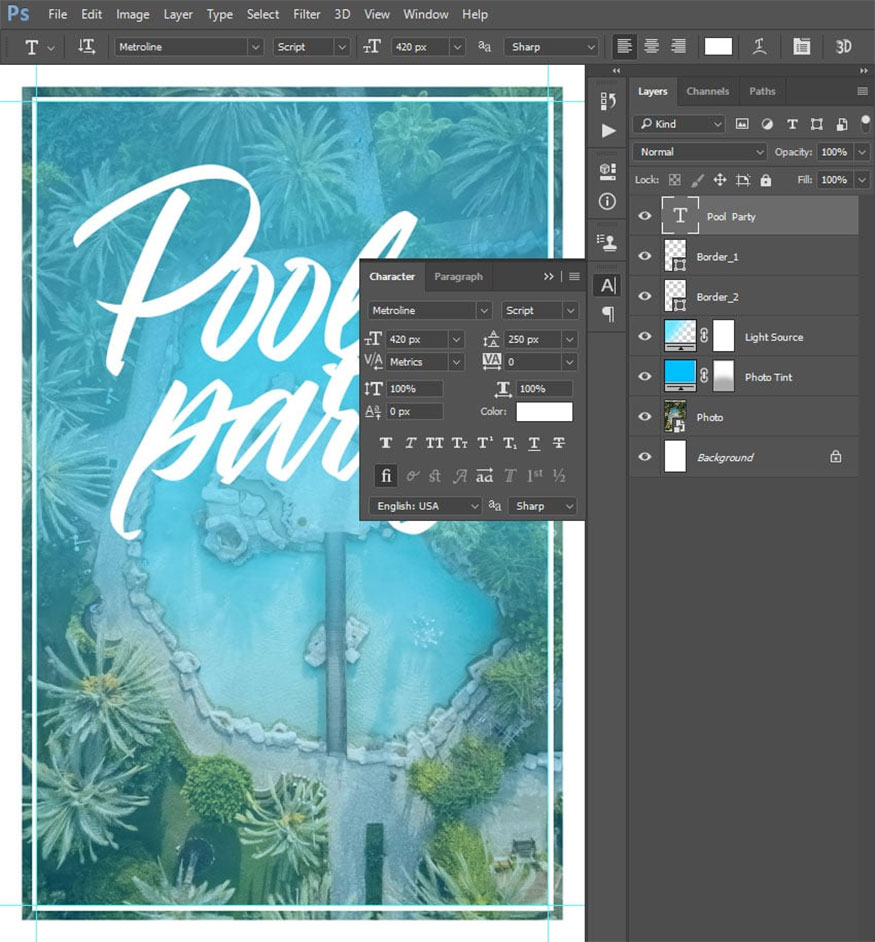
- Step 1: First, select layer Border_1 => select Horizontal Type Tool (T) and install as follows:
- Font: Metroline
- Font: Script
- Size: 420 px
- Align: Left
- Color code: #ffffff.
In the Character panel, set Leading to 250 px, then click anywhere inside the canvas, enter the text below. Position this layer at coordinates X: 599.55 px and Y: 613.29 px.
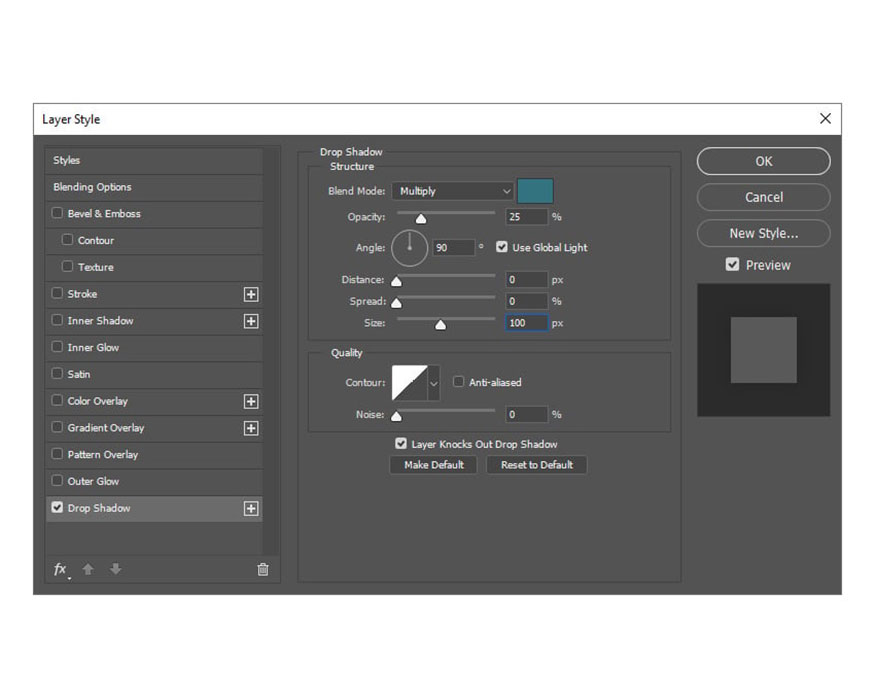
- Step 2: Right click on this layer and select Blending Options. Then, select and check the Drop Shadow style and follow the settings below:
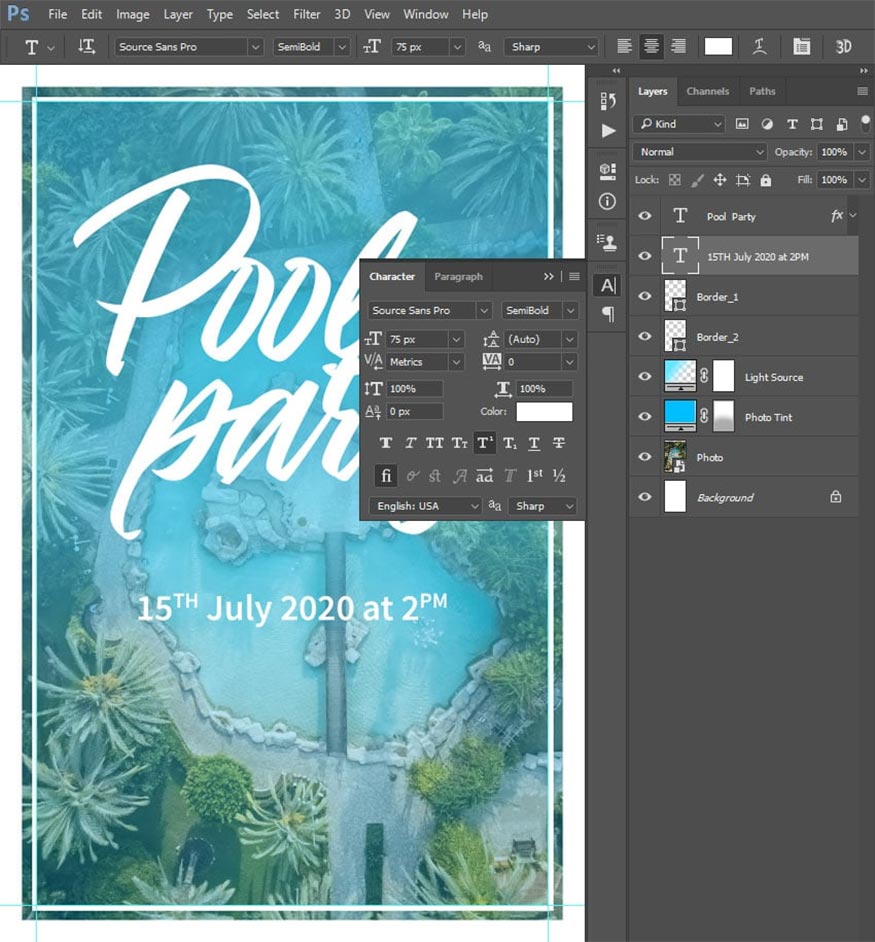
- Step 3: Select layer Border_1 => select Horizontal Type Tool (T), set font to Linear Grotesk, font style to SemiBold, font size to 75 px and align to Center, color code #ffffff.
Click anywhere inside the canvas, then enter the text below. In the Character panel, click Superscript for the specific letters shown below. Let's position this layer at coordinates X: 599px and Y: 1106.79px.
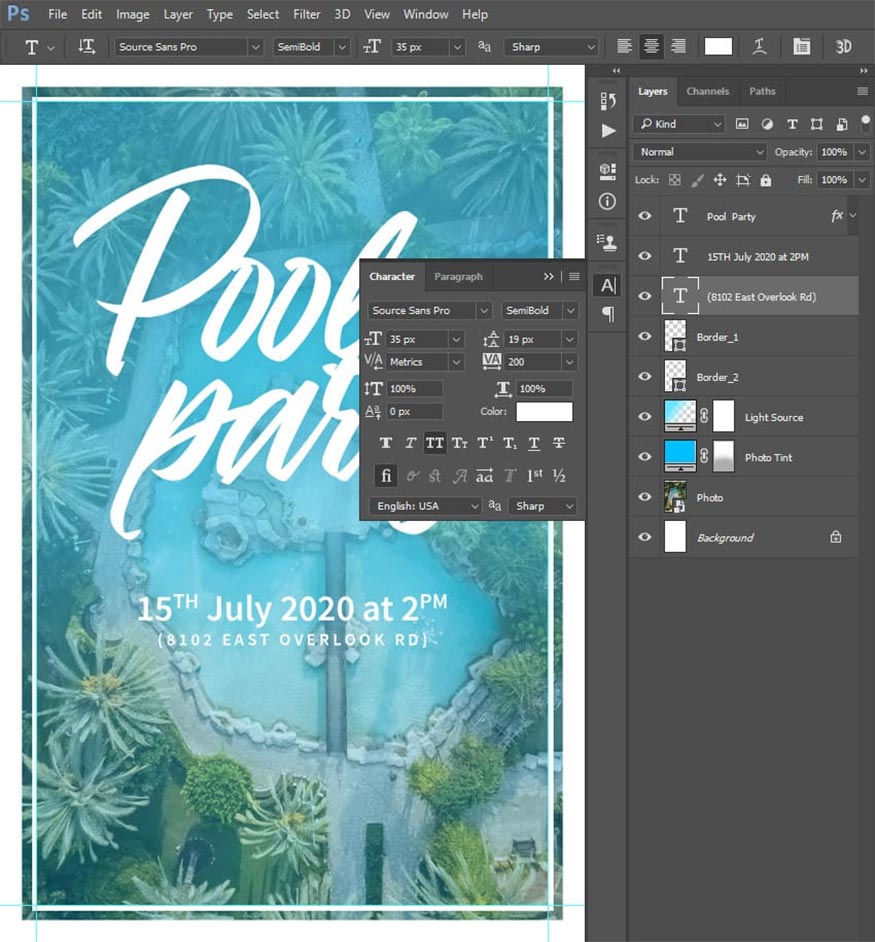
- Step 4: Click on the Border_1 layer => select Horizontal Type Tool (T), set the font to Linear Grotesk, SemiBold font style, font size to 35 px, alignment to Center, color to #ffffff color code.
In the Character panel, click the All Caps option, set Lead to 19 px and Tracking to 200. Click anywhere inside the canvas, enter the text below, then position this layer at coordinate X: 604 px and Y: 1181.79 px.
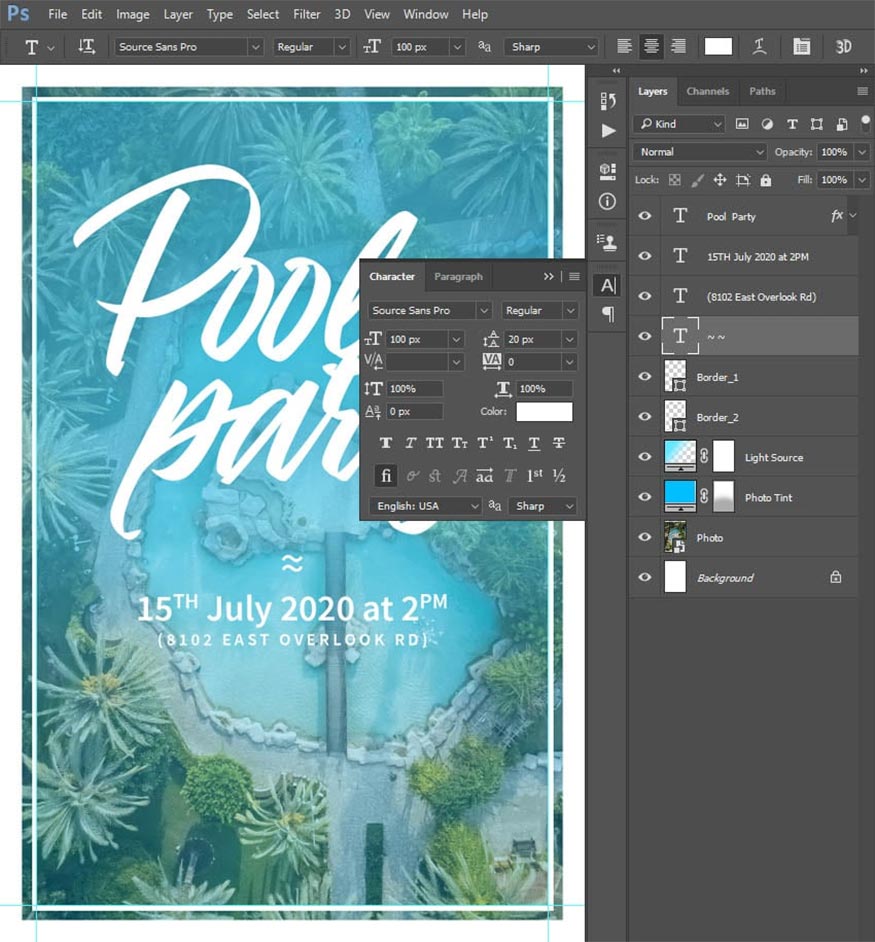
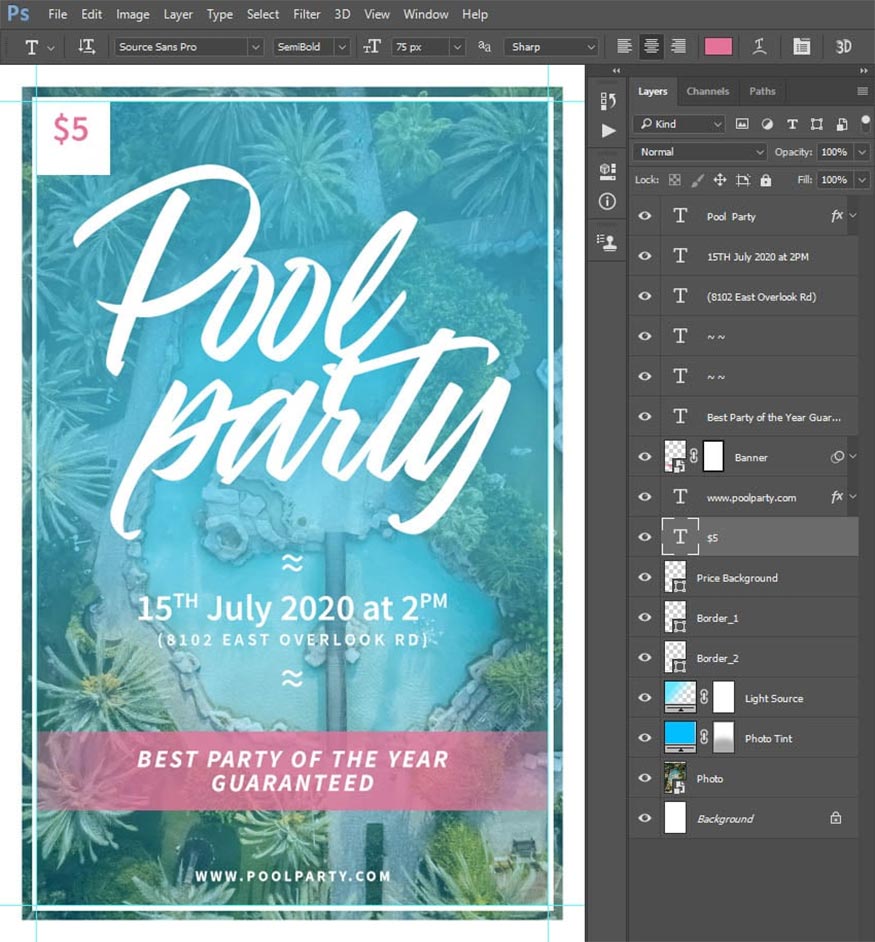
- Step 5: Next, click on the Border_1 layer => select Horizontal Type Tool (T) and set the font to Linear Grotesk, font style to Regular, font size to 100px, alignment to Center, color to color code #ffffff.
In the Character panel, set Leading to 20 px. Next, click anywhere inside the canvas, enter the text below, and position this layer with coordinates X: 599.89 px and Y: 1028.35 px.
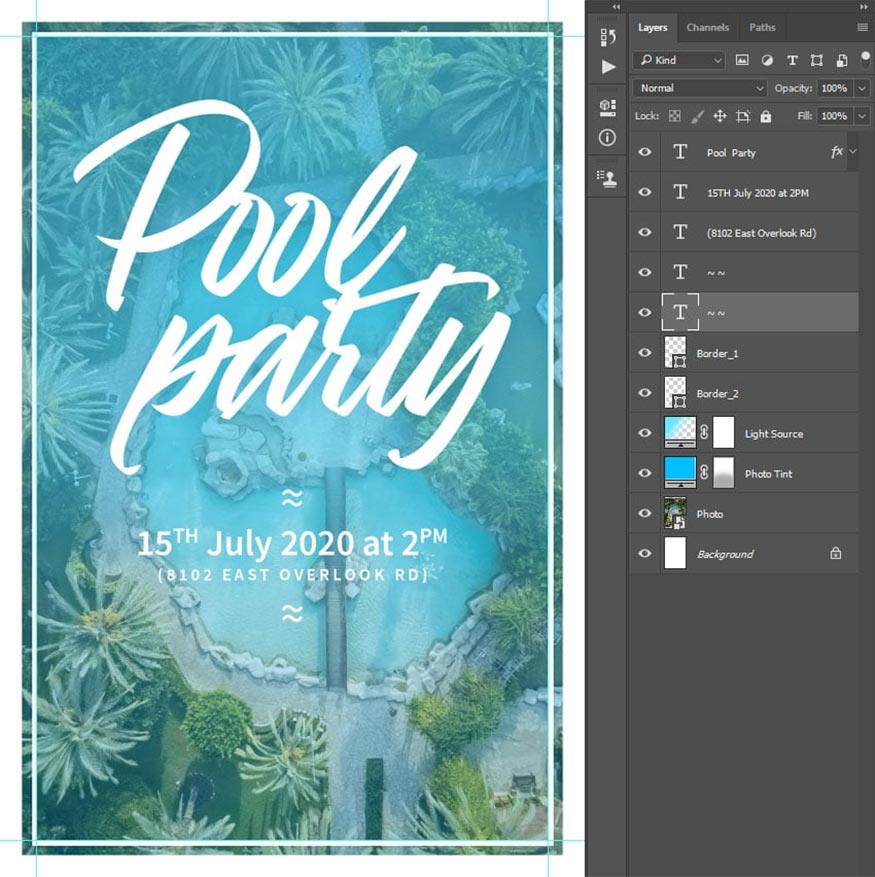
- Step 6: Press Ctrl-J on the keyboard to duplicate this layer and drag it above the Border_1 layer in the layers panel.
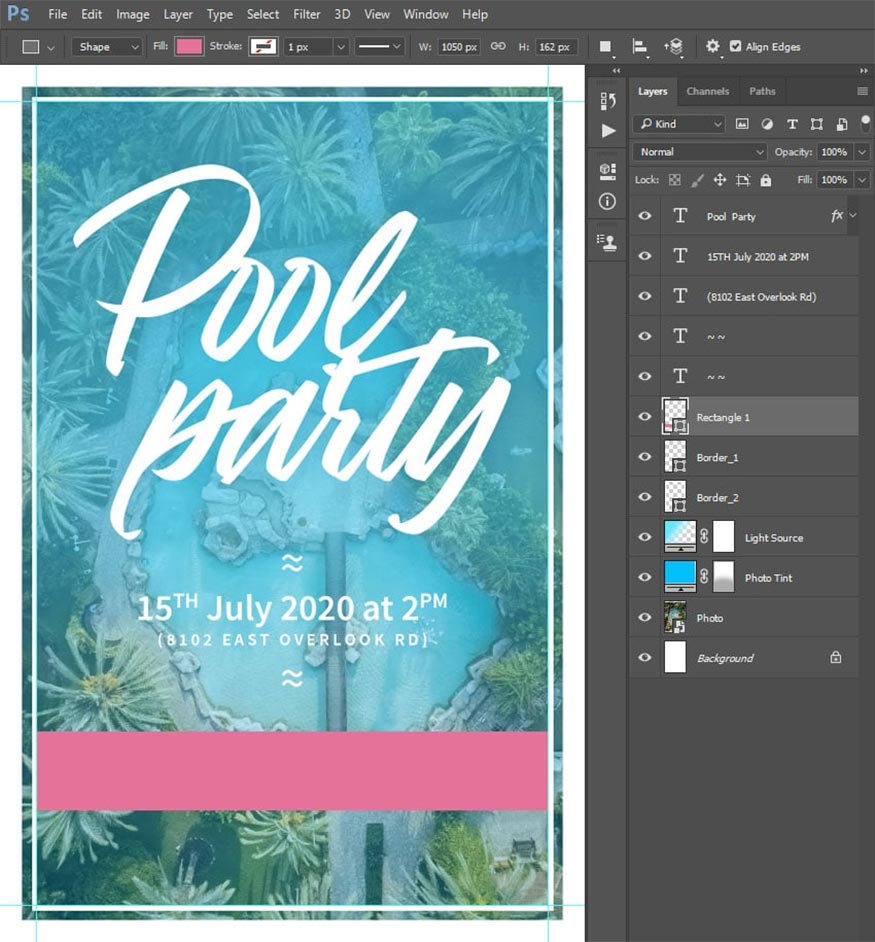
- Step 7: Click on layer Border_1 => select Rectangle Tool (U) and click anywhere inside the canvas to create a new rectangular layer. Set the width to 1050 px and the height to 162 px.
Then, set Fill Solid Color to color code #e57399, Stroke Solid Color to No Color. Let's position this layer with coordinates X: 600 px and Y: 1449 px.
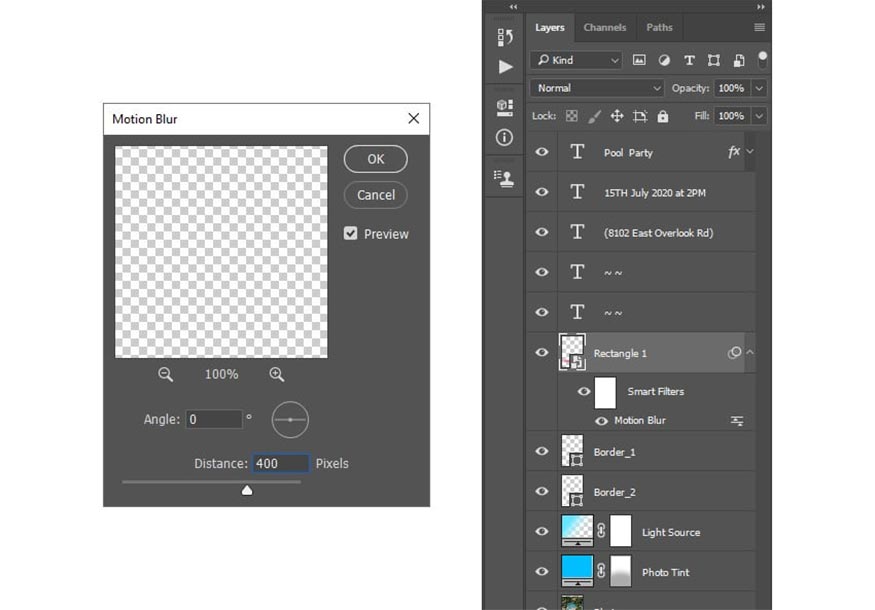
- Step 8: Go to Filter => Blur => Motion Blur and set Angle to 0° and Distance to 400px.
- Step 9: Press and hold Ctrl when clicking the Border_1 layer thumbnail to create a selection for this layer. Press the keyboard shortcut Ctrl-Shift-I to invert the selection. Next, go to Layer => Layer Mask => Hide Selection to add a hidden layer mask for the selected area of the layer.
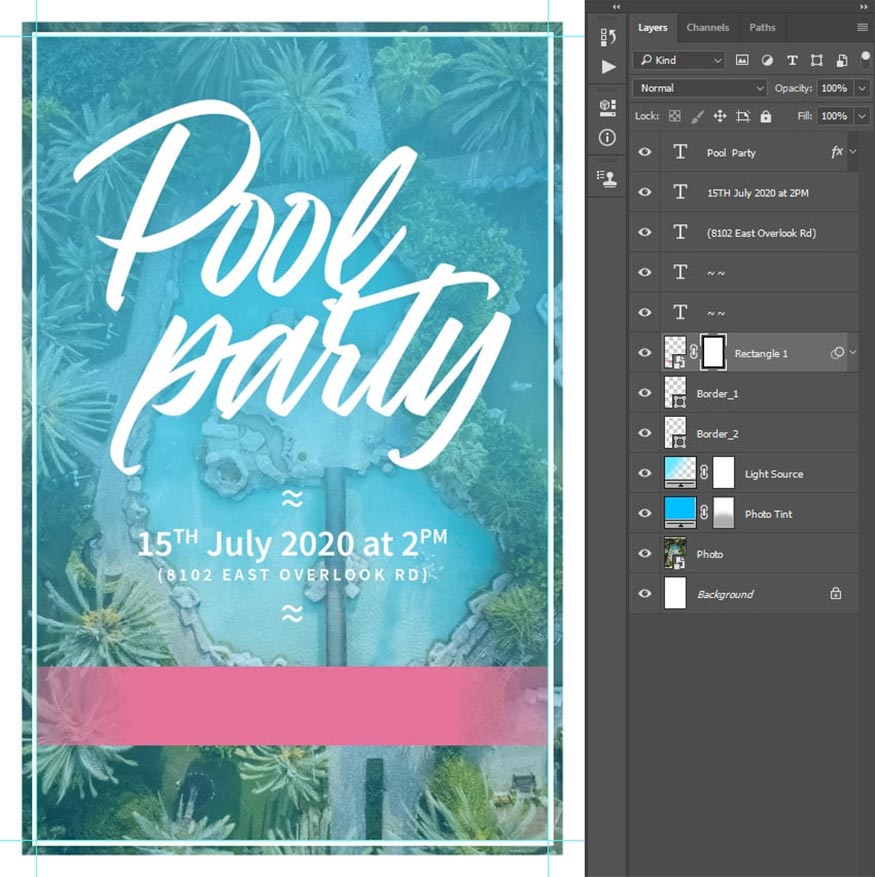
- Step 10: Change the Opacity of this layer to 80%, name this layer “Banner”.
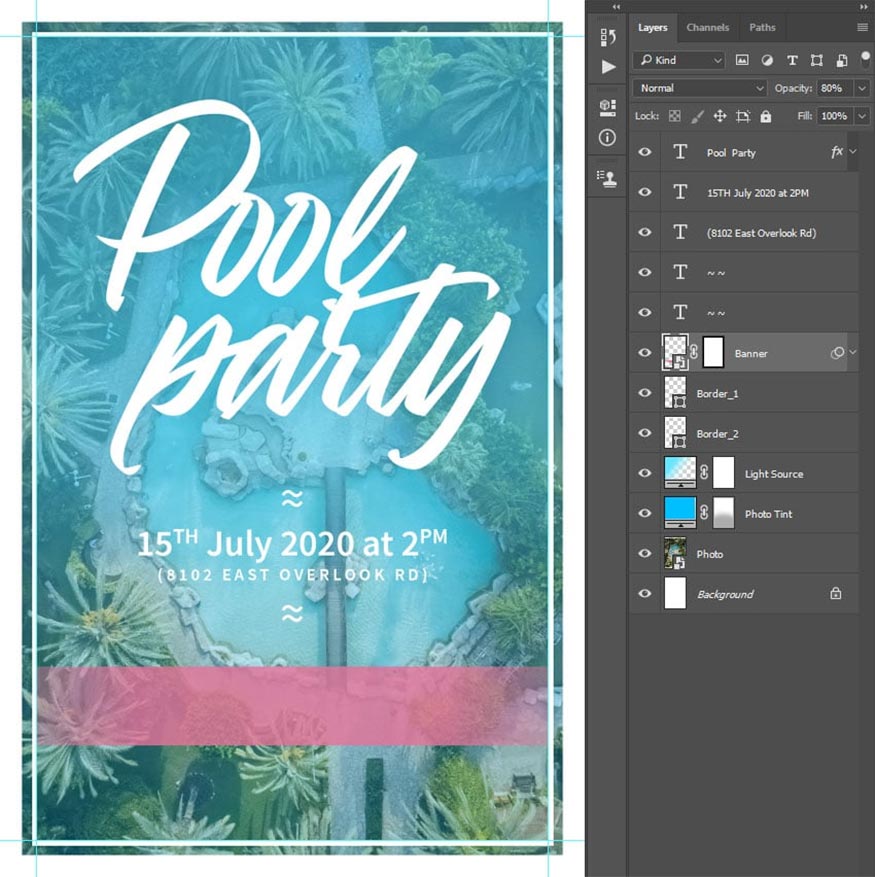
- Step 11: Select the Horizontal Type Tool (T) => set the font to Linear Grotesk, font style to Bold Italic, font size to 50 px, align to Center, color to #ffffff color code.
In the Character panel, press the All Caps option and set Lead to 49px and Tracking to 100. Click anywhere inside the canvas and enter the text below, positioning this layer with coordinates X: 602, 5 px and Y: 1452.15 px.

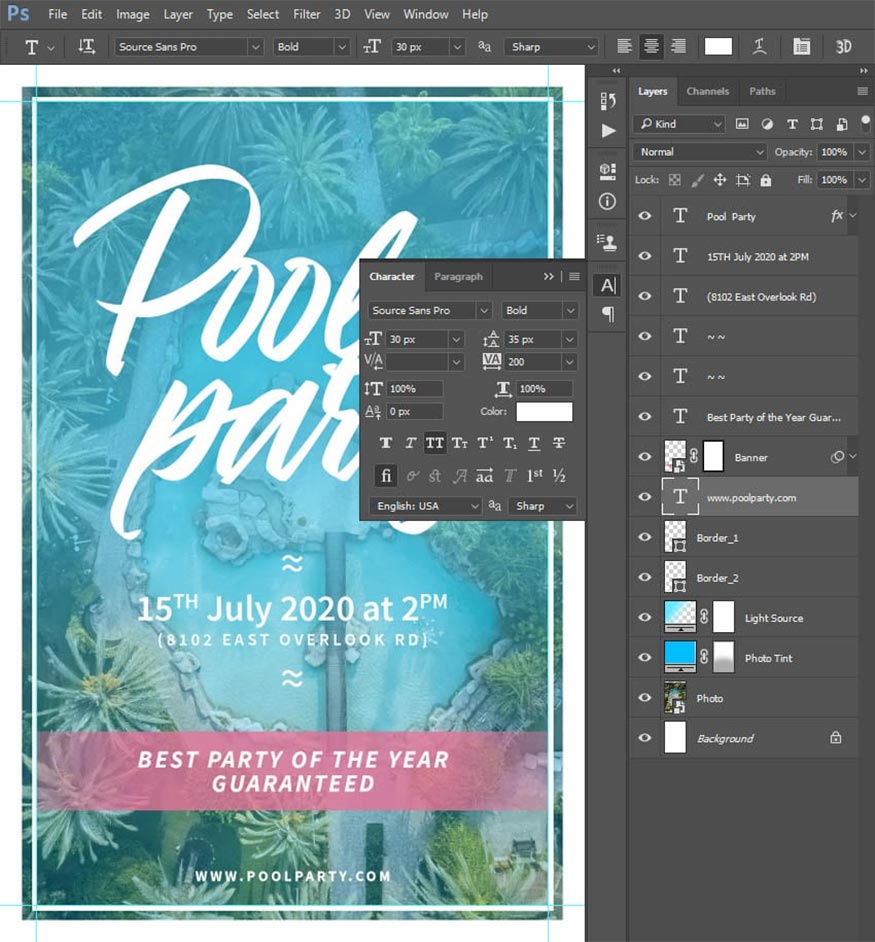
- Step 12: Select layer Border_1 => select Horizontal Type Tool (T) and set the font to Linear Grotesk, font style to Bold, font size to 30px, make alignment to Center and color to color code #ffffff.
In the Character panel, select the All Caps option and set Lead to 35 px and Tracking to 200.
Next, click anywhere inside the canvas, enter the text below and position this layer at coordinate the X: 604 px and Y: 1667.28 px.
- Step 13: Right click on the layer and select Blending Options. Then, select and check the Drop Shadow style and settings as shown below:

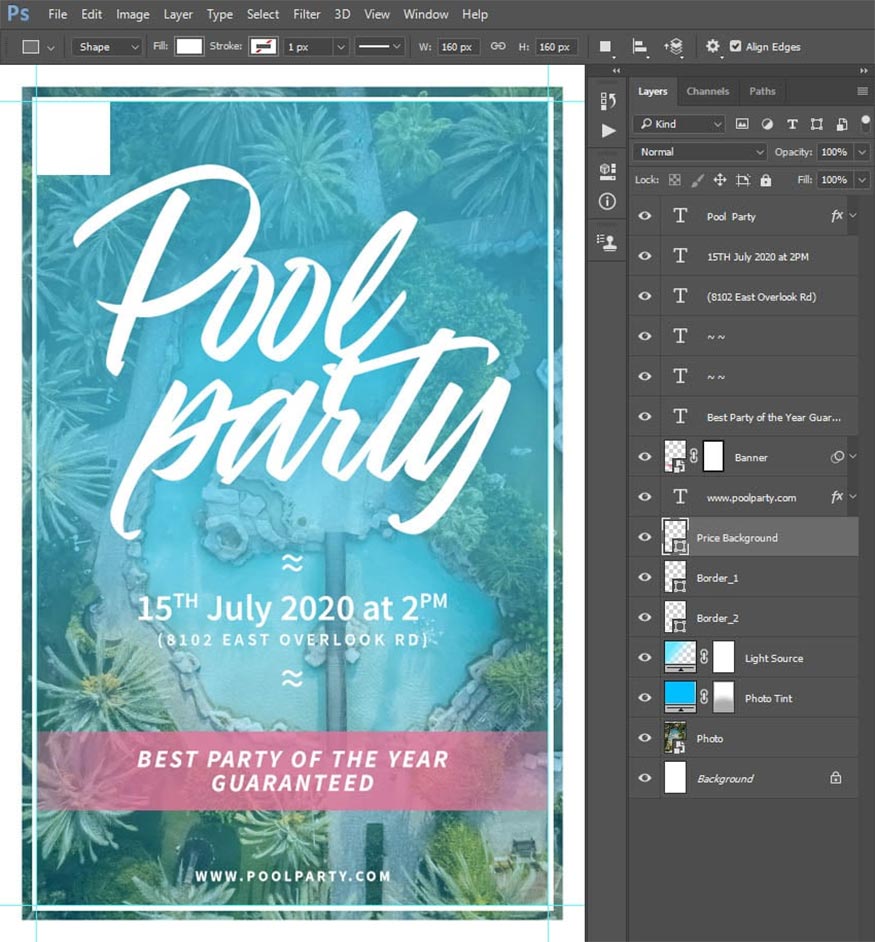
- Step 14: Select layer Border_1 => select Rectangle Tool (U), click anywhere inside the canvas to create a new rectangular layer, set width and height to 160 px. Set Fill Solid Color to color code #ffffff, Stroke Solid Color to No Color. Set this layer with coordinates X: 145 px and Y: 145 px and name it “Price Background”.
- Step 15: Click on the Horizontal Type Tool (T) => set the font to Linear Grotesk, font style to SemiBold, font size to 75 px, then align to Center, change color to color code #e57399.
Next, click anywhere inside the canvas, enter the text below and position this layer with coordinates X: 145 px and Y: 135.27 px.
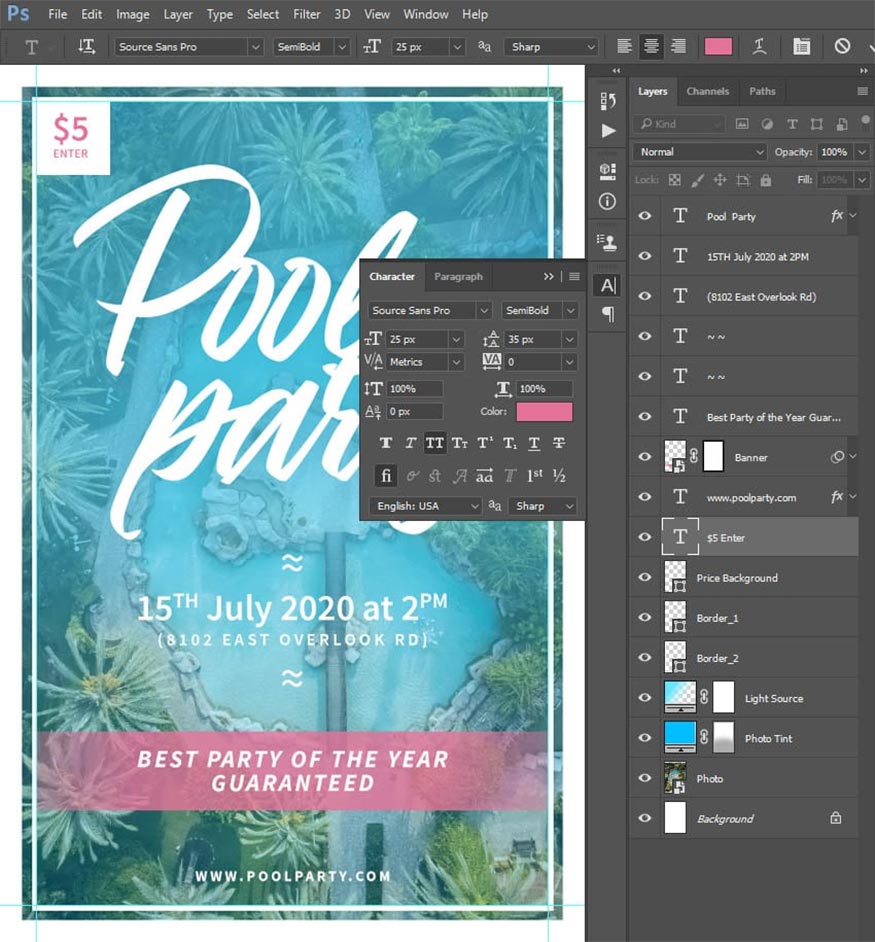
- Step 16: Select the Horizontal Type Tool (T), then click on the text of the current text layer to edit and start a new line. Set the font to Linear Grotesk, font style to SemiBold, font size to 25 px, alignment to Center, color setting to #e57399.
In the Character panel, click the All Caps option => set Lead to 35 px and enter the text below:
Above are specific instructions on how to create the simplest pool party flyer template in Photoshop. Hopefully the information that Sadesign shares above will help you apply successfully to your designs. Don't forget to follow us to update more useful information.


VIP Products


Best Selling Products
Upgrade Duolingo Super
29 USD
Copyright Adobe Lightroom Account
59 USD
Windows 10 & 11 Pro Key
36 USD
MidJourney Account
29 USD
Adobe Photoshop Copyright - Full App
120 USD
Upgrade Genuine Office 365
49 USD
Plugin Retouch4me
69 USD
Freepik Premium Account
59 USD
Genuine Adobe Illustrator account
99 USD
Genuine Cheap Canva Pro
39 USD
Adobe Premiere Pro Account
99 USD
Upgrade genuine Capture One account
120 USD
Autodesk All App Account Copyright
120 USD
Capcut Pro 1 Year
39 USD
ChatGPT Plus Account (GPT-4)
16 USD