Best Selling Products

Genuine Adobe Illustrator account
99 USD

Upgrade Genuine Office 365
49 USD

Copyright Adobe Lightroom Account
59 USD

Autodesk All App Account Copyright
120 USD

Genuine Cheap Canva Pro
39 USD

Plugin Retouch4me
69 USD

Upgrade genuine Capture One account
120 USD

MidJourney Account
29 USD

Freepik Premium Account
59 USD

Adobe Photoshop Copyright - Full App
120 USD

Windows 10 & 11 Pro Key
36 USD

ChatGPT Plus Account (GPT-4)
16 USD

Upgrade Duolingo Super
29 USD

Adobe Premiere Pro Account
99 USD

Capcut Pro 1 Year
39 USD
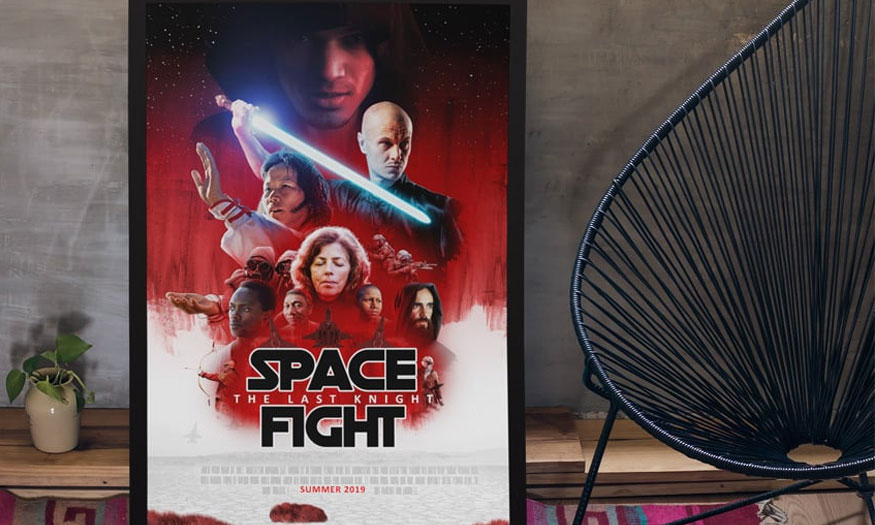
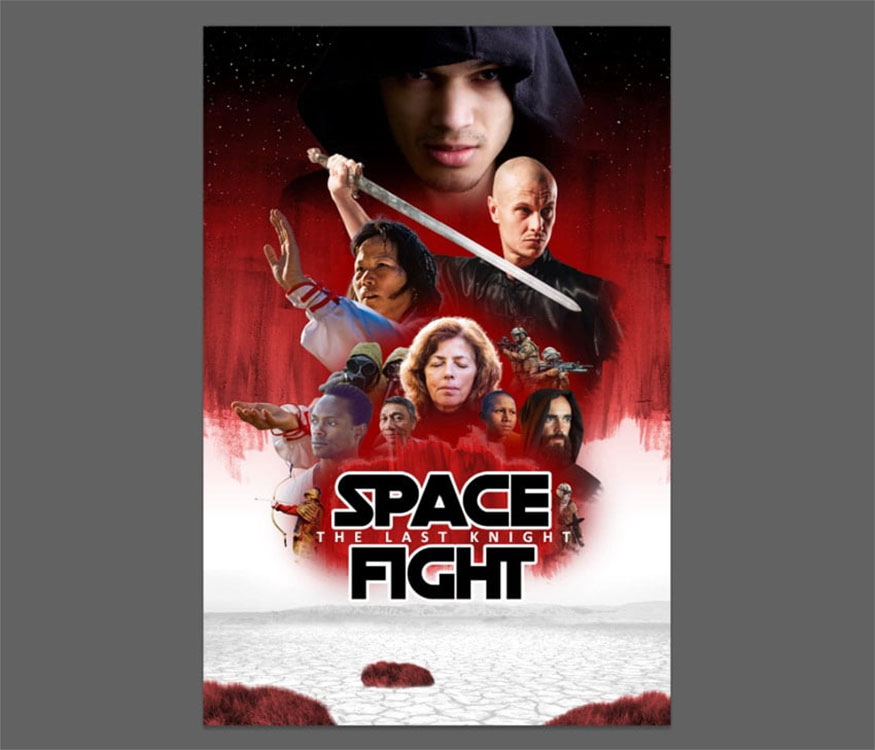
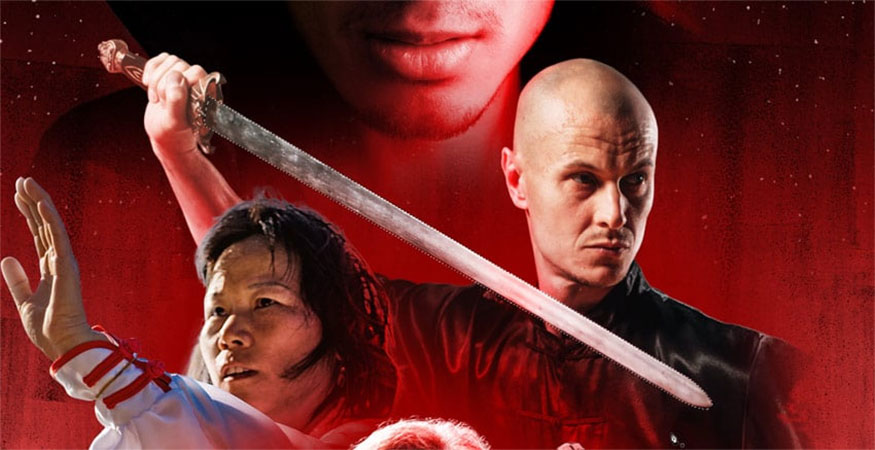
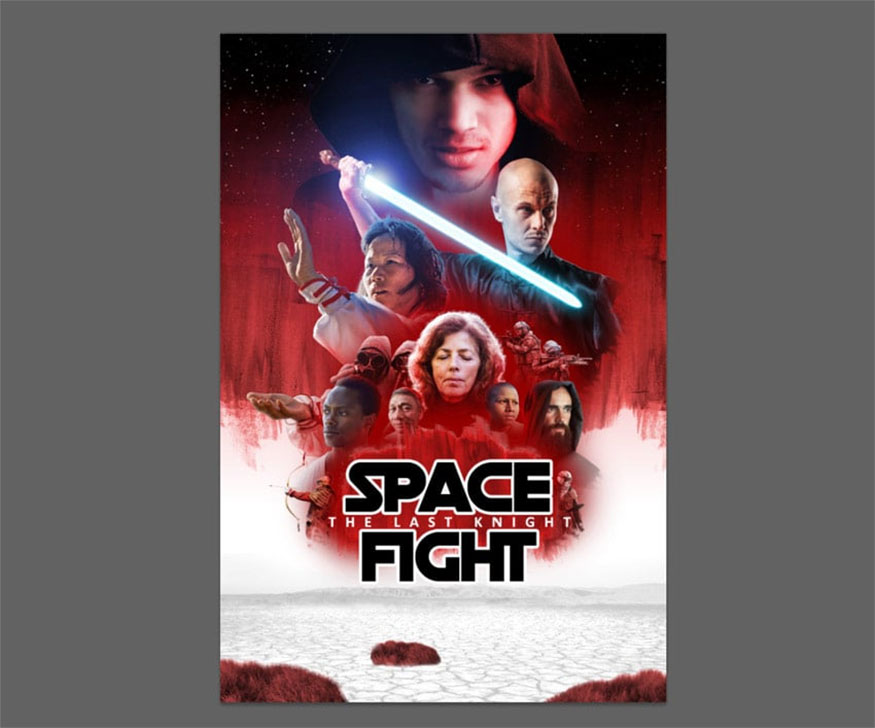
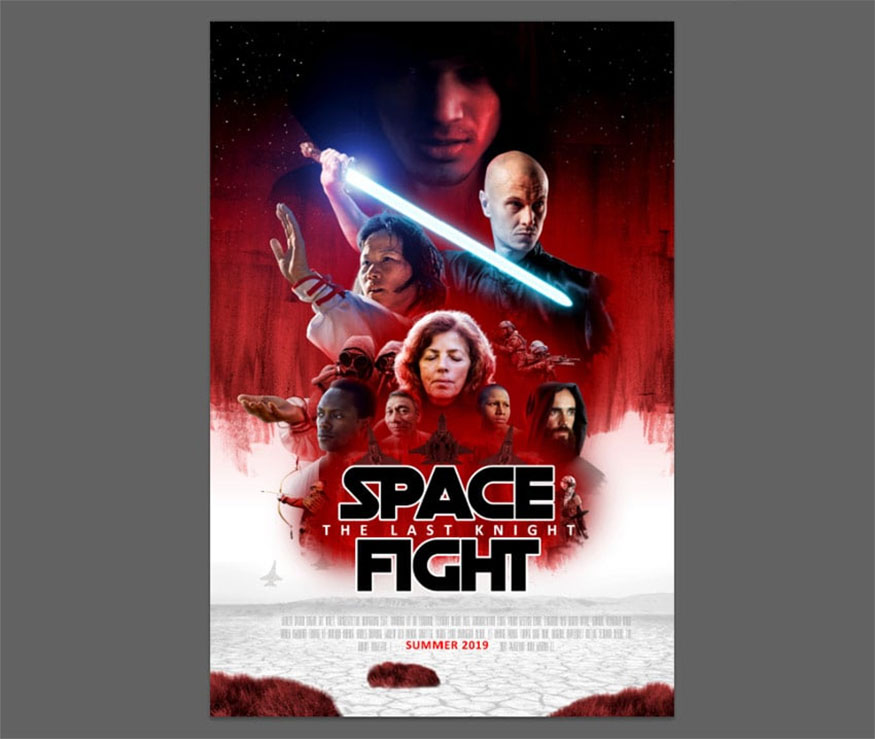
How to create a movie poster inspired by Star War using Photoshop
Nội dung
Are you looking to try your hand at creativity with a unique movie poster design style? Then you absolutely should not ignore the following instructions on how to create movie posters inspired by Star War using Photoshop from SaDesign.
Are you looking to try your hand at creativity with a unique movie poster design style? Then you absolutely should not ignore the following instructions on how to create movie posters inspired by Star War using Photoshop from SaDesign.

1. Prepare to create a movie poster inspired by Star War in photoshop
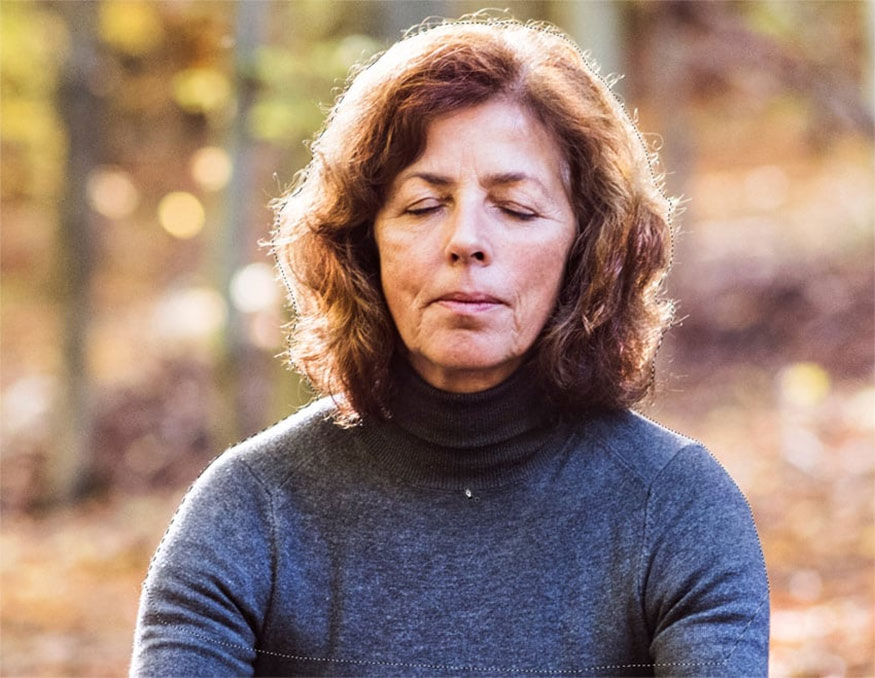
- Step 1: First, cut the characters out of the background image. To do this, you need to open the image in Photoshop, then use the Pen Tool (P) to select the outline for the character. Cut only the parts you use to create the poster.
Note, instead of trying to outline each strand of hair, you should sketch the visible "blocks" of hair.
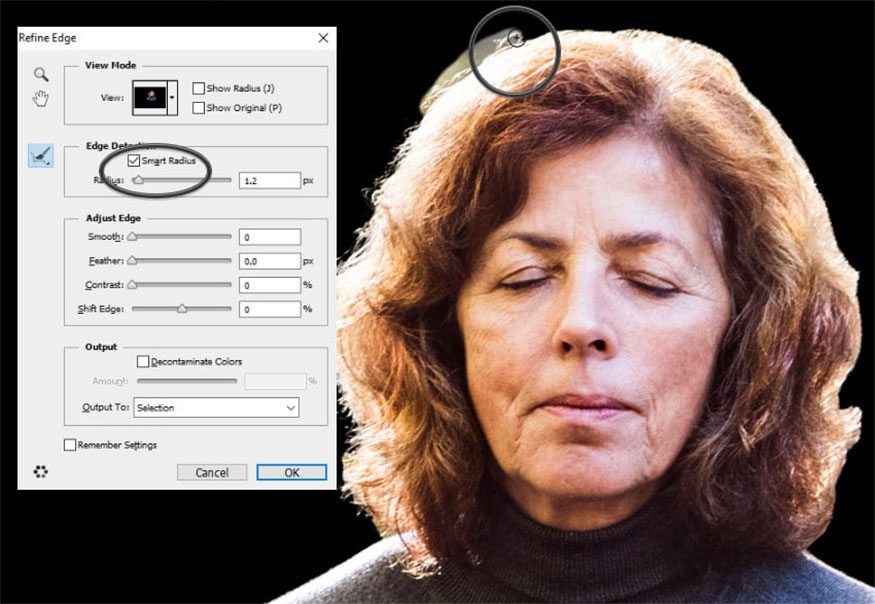
- Step 2: Go to Select => Refine Edge, check Smart Radius and increase the Radius to soften the edges.
Use the brush to paint on the hairs that are outside the main outline. Once completed, change Output to New Layer and click OK.
Do the same for the photos of the other characters in the center of the poster.
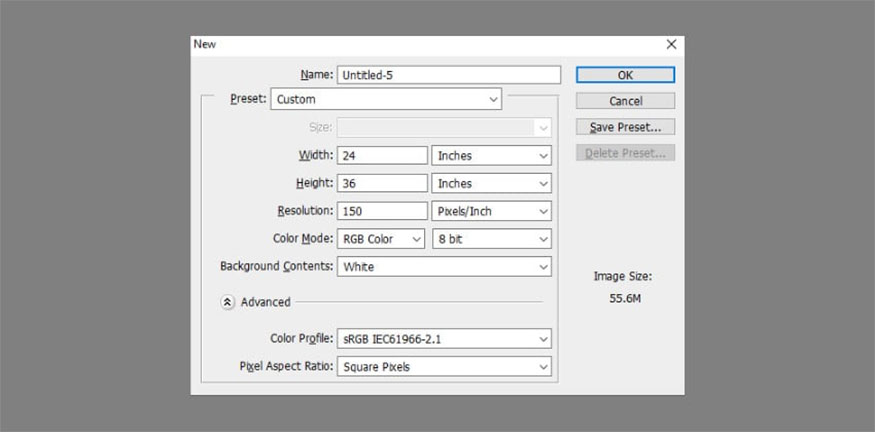
- Step 3: Create a New File => set the size for the poster, usually the posters will have the following dimensions:
-
Width: 24 Inches
-
Height: 36 Inches
-
Resolution: 150 Pixels/Inch.
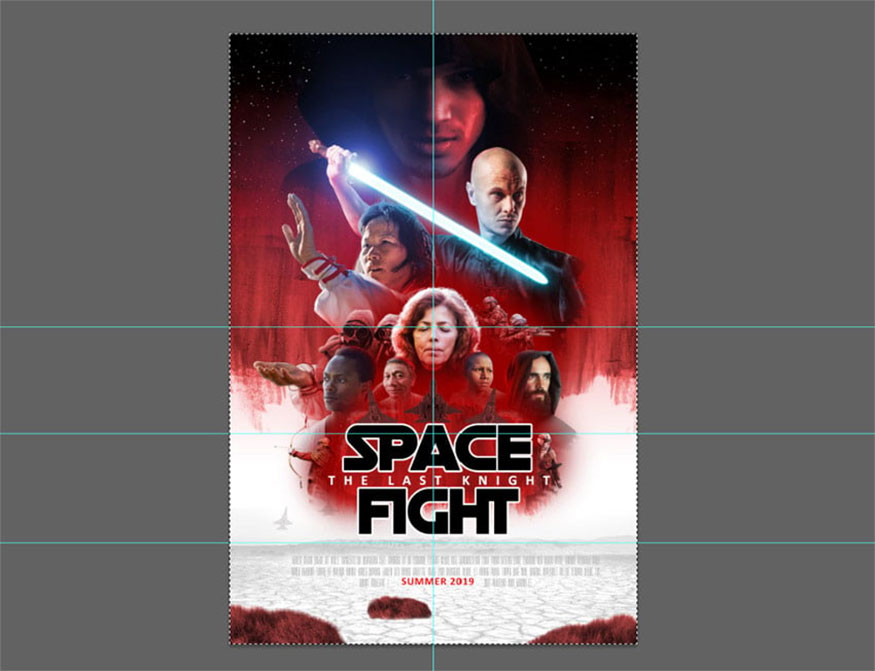
- Step 4: Plan the layout of the poster by going to View => Show => Grid. Add a Ruler (Ctrl-R) and drag to arrange the layout of the poster.
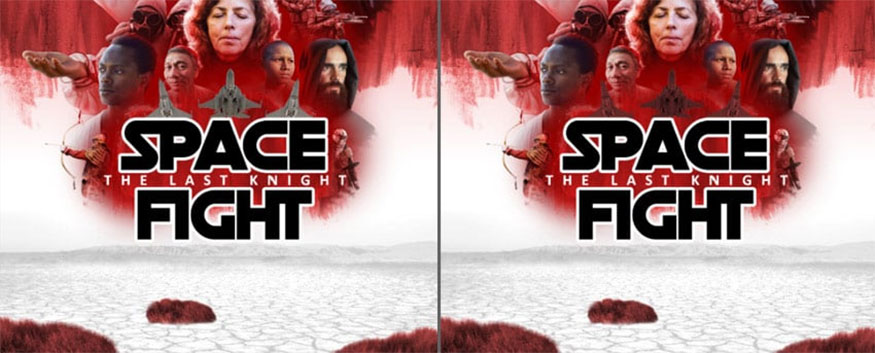
Add the title to the selected location, in this tutorial we use the Death Star font with large spacing between lines. To edit text, press Ctrl-T to open the Character panel.

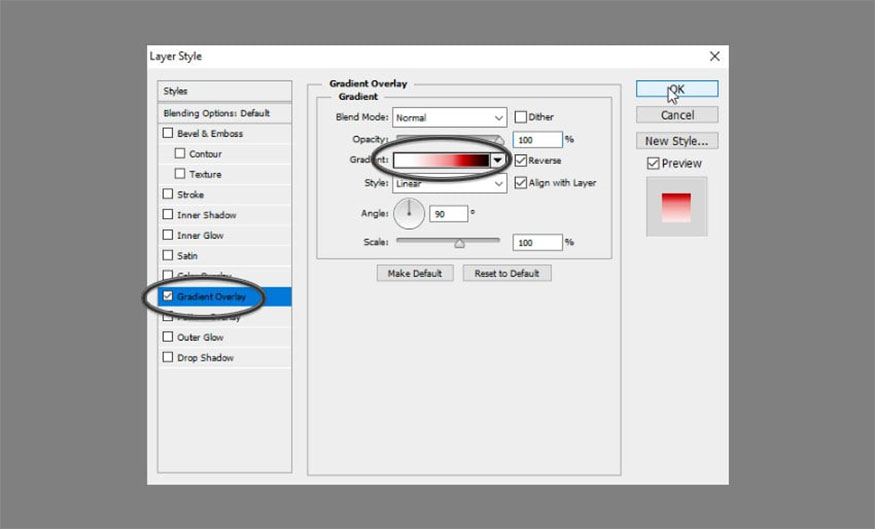
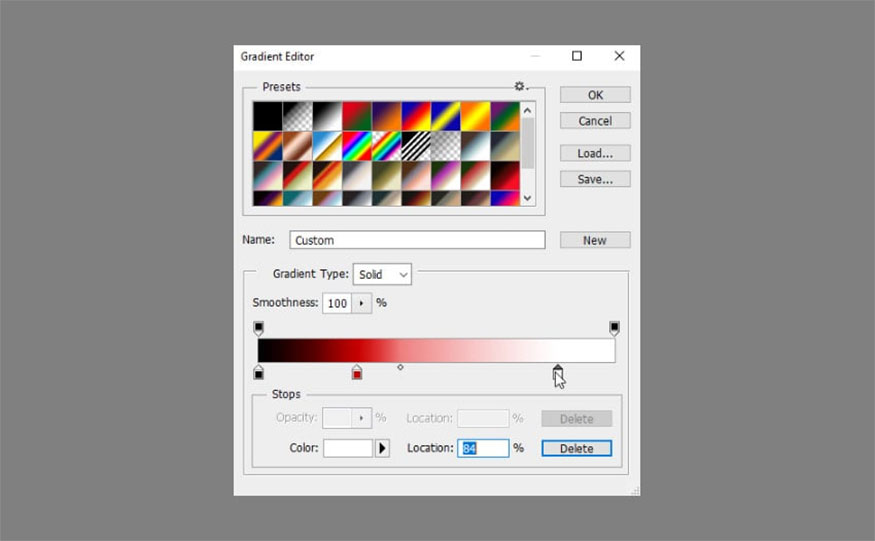
- Step 5: Create a new layer below and paint them to any color with the Paint Bucket Tool (G).
Next, double-click the layer to open the Layer Style panel. Check out gradient overlays and add gradients to make creating backgrounds simpler.
- Step 6: Double click on the text layer, select Stroke and add a white outline to the letters.
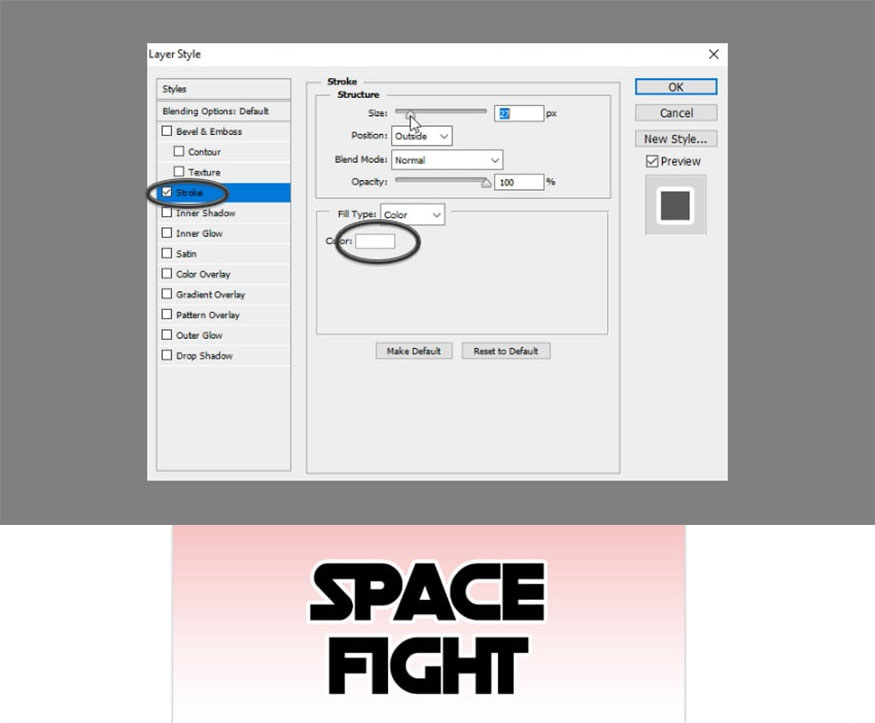
- Step 7: Add another text layer. Click in the middle the words of the title to add a subtitle. In this tutorial, we used the font Calibri Bold with large spaces between the letters.

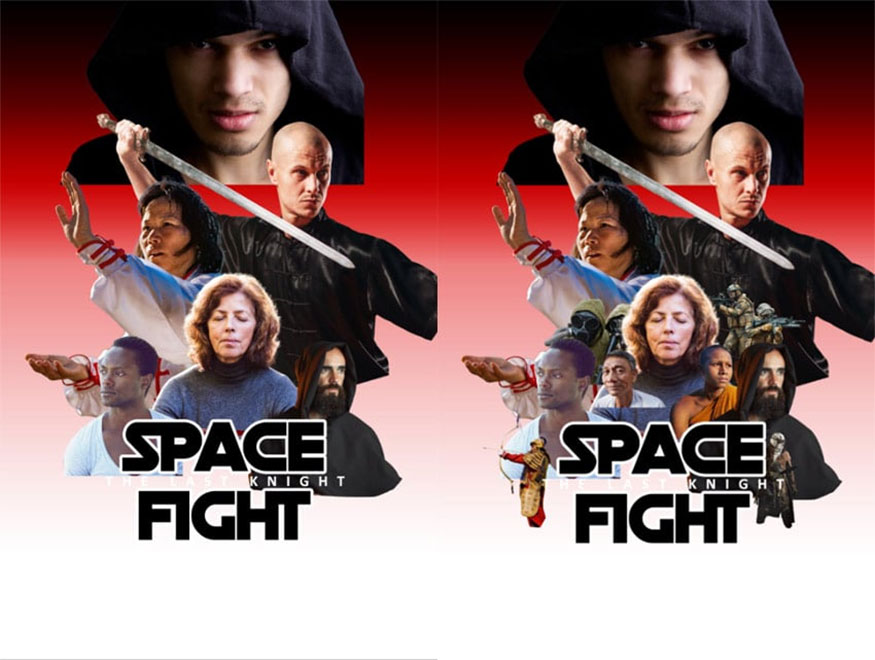
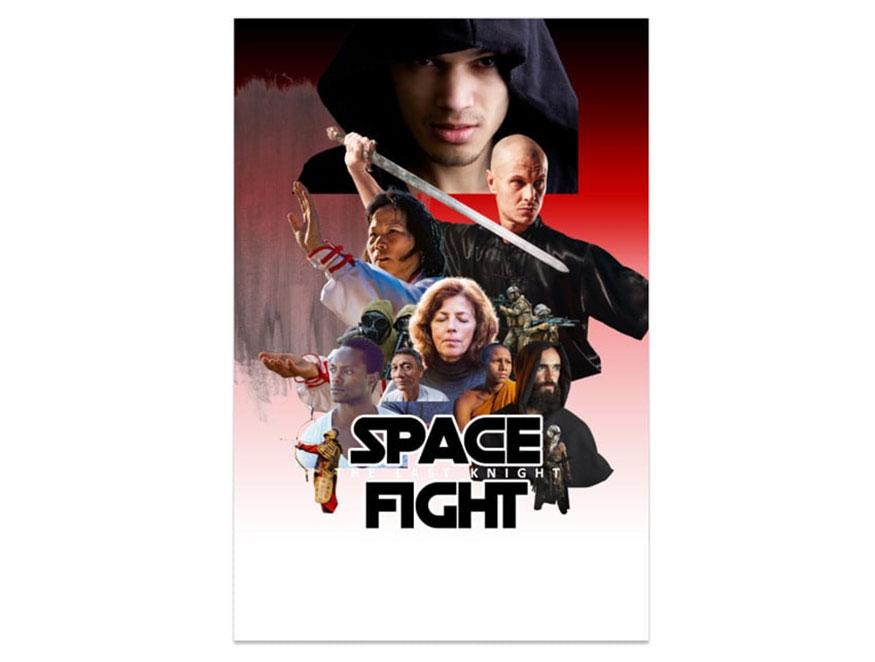
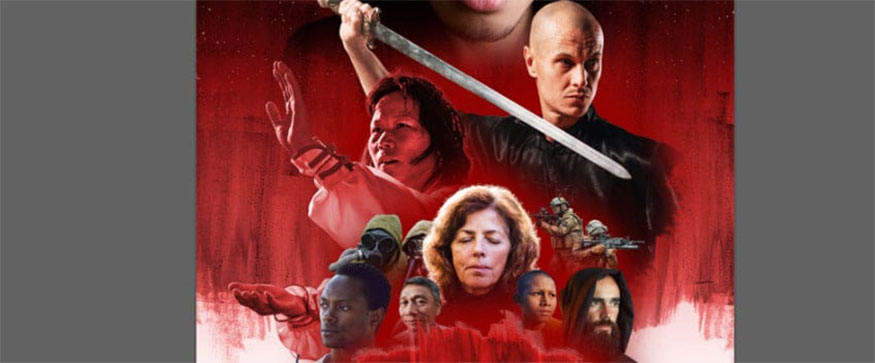
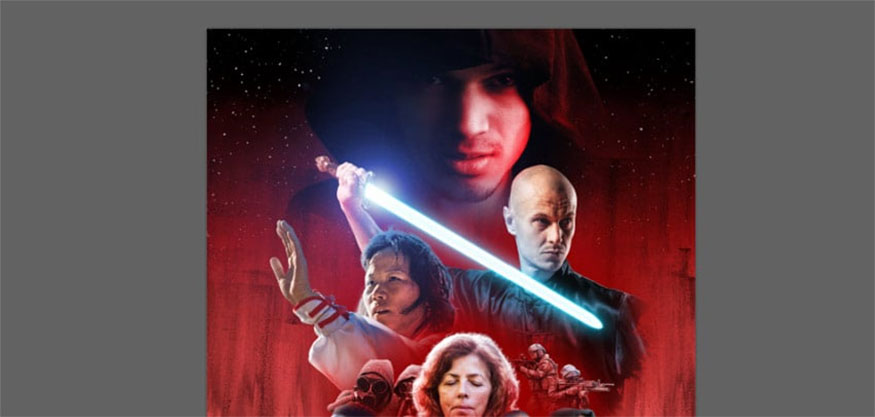
- Step 8: Copy and paste your characters into the poster. Resize them by pressing Ctrl-T. To change the direction you can go to Edit => Transform => Flip Horizontal. Place the main characters first, then fill the spaces between them with secondary characters.
2. Create a Star Wars poster background
- Step 1: You first need to choose one of the patterns you want to use as the background, then open them in Photoshop.
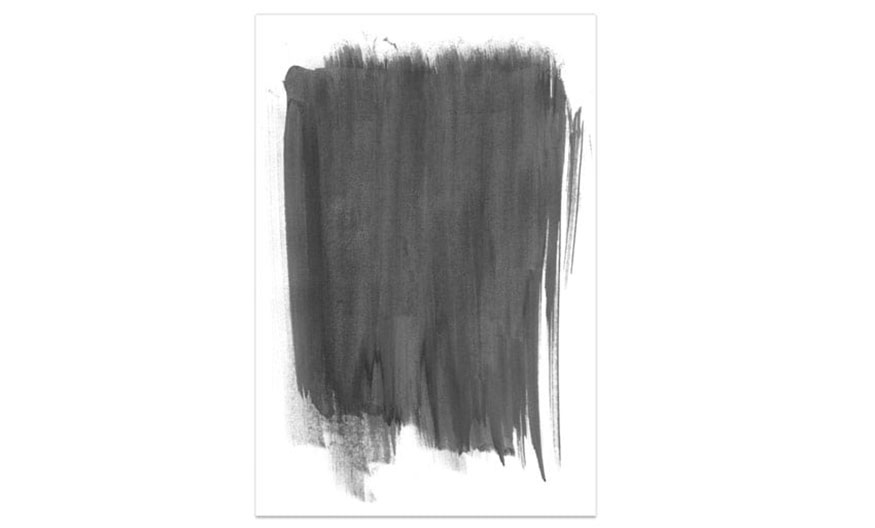
- Step 2: Go to the Channels tab, hold Ctrl and click the Gray Channels thumbnail. Then go back to the Layers tab, go to Select => Inverse and copy the selection.
- Step 3: Paste the selected texture below the characters. Merge the textures into one group by selecting the textures and pressing Ctrl-G.
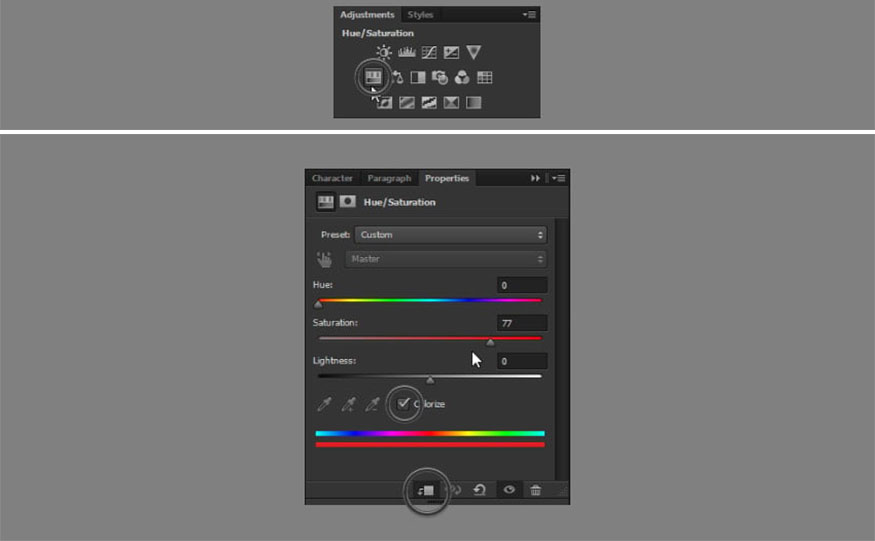
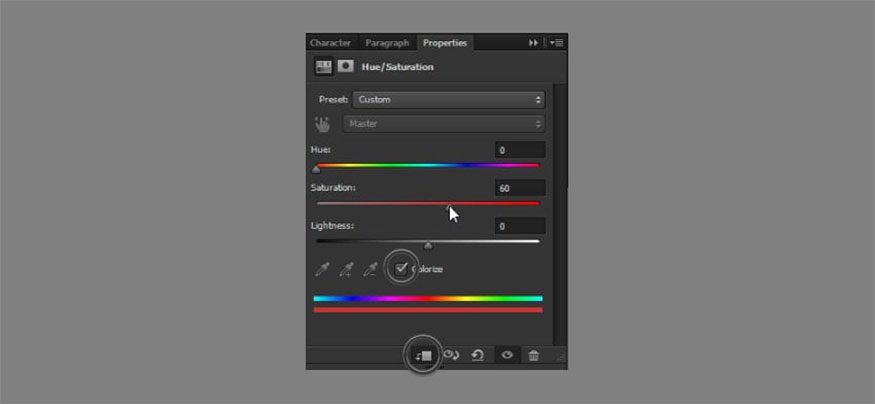
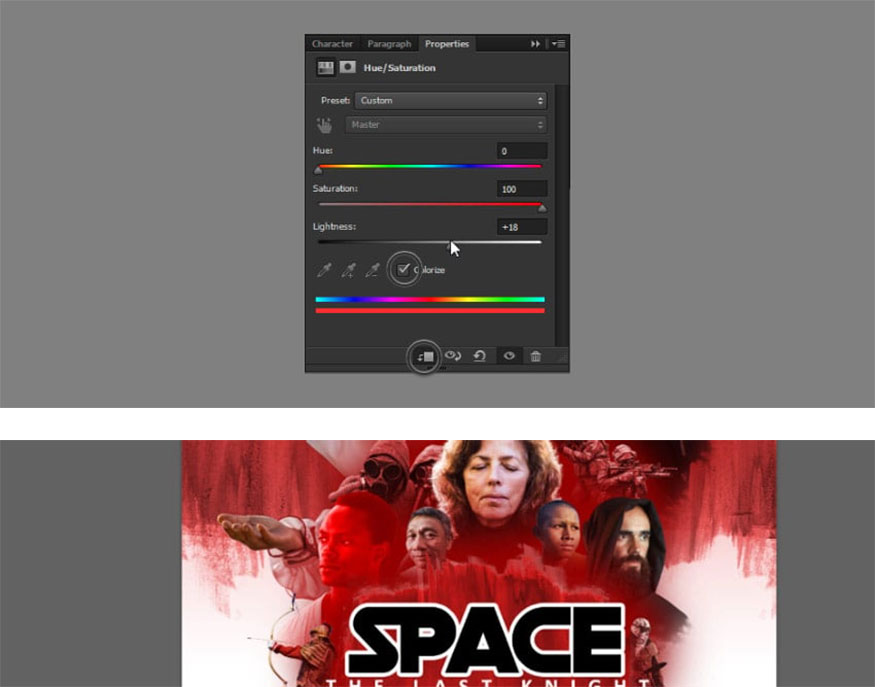
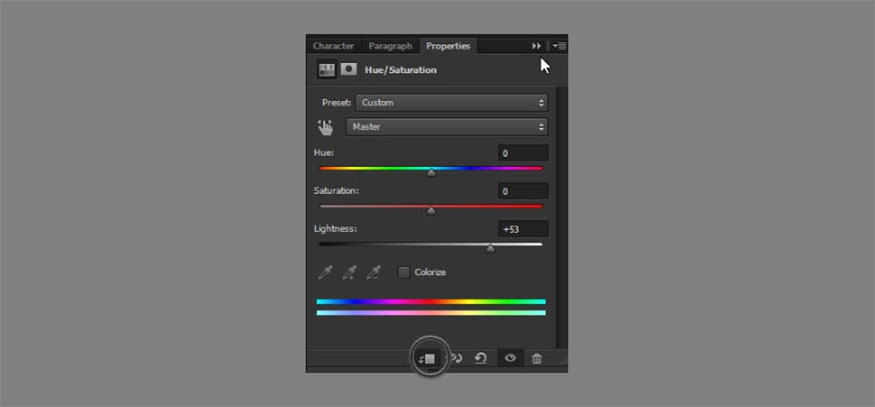
- Step 4: Add Hue/Saturation adjustments.
Cut them into the layer below (texture group) and select Colorize. Drag the slider to change the color as desired.
- Step 5: Add a variety of other patterns to the group so that they will all be colored automatically.

- Step 6: Use the same method to create the background for the title.
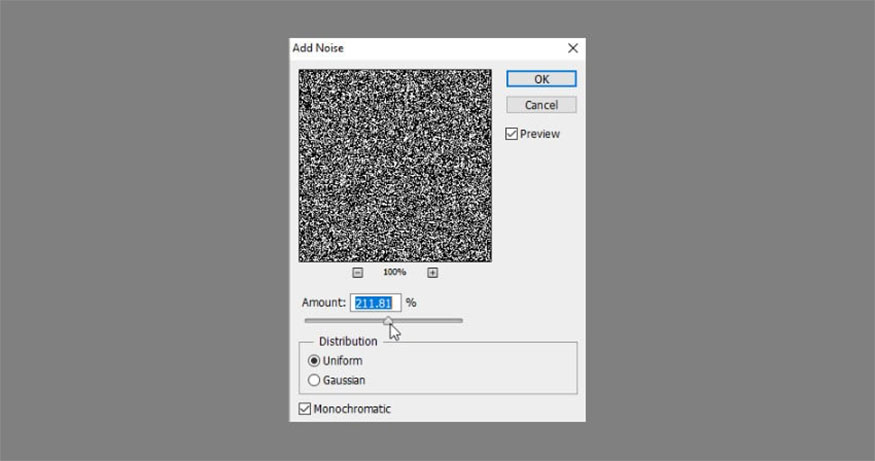
- Step 7: Create a new Layer above the background, but below the characters. Fill them with black using the Paint Bucket Tool (G).
Then go to Filter => Noise => Add Noise to add some monochromatic noise.
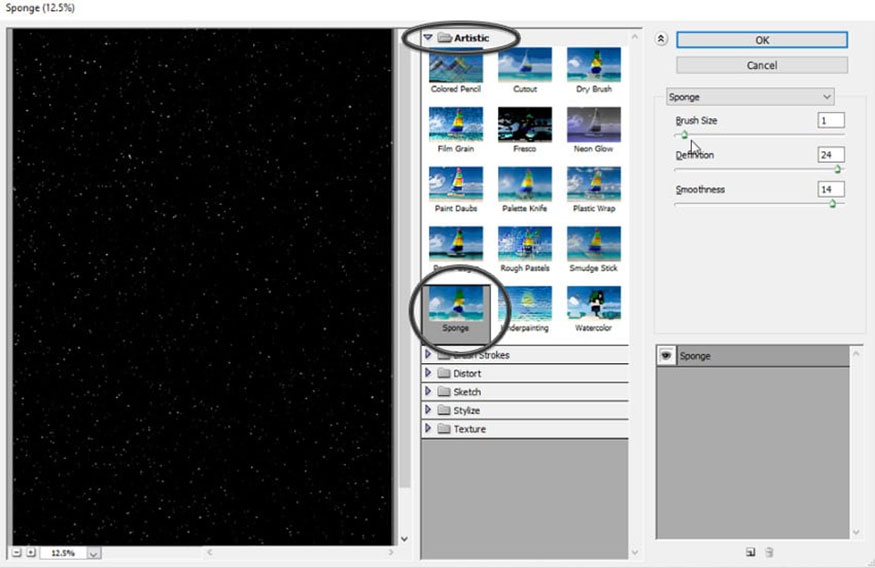
- Step 8: Go to Filter => Filter Gallery => Artistic => Sponge. Adjust the settings to turn noise into stars.
- Step 9: Add a Layer Mask to this layer. Select the mask and use the Gradient Tool (G) to add a black and white gradient on top. The black color of the gradient makes the layer transparent.
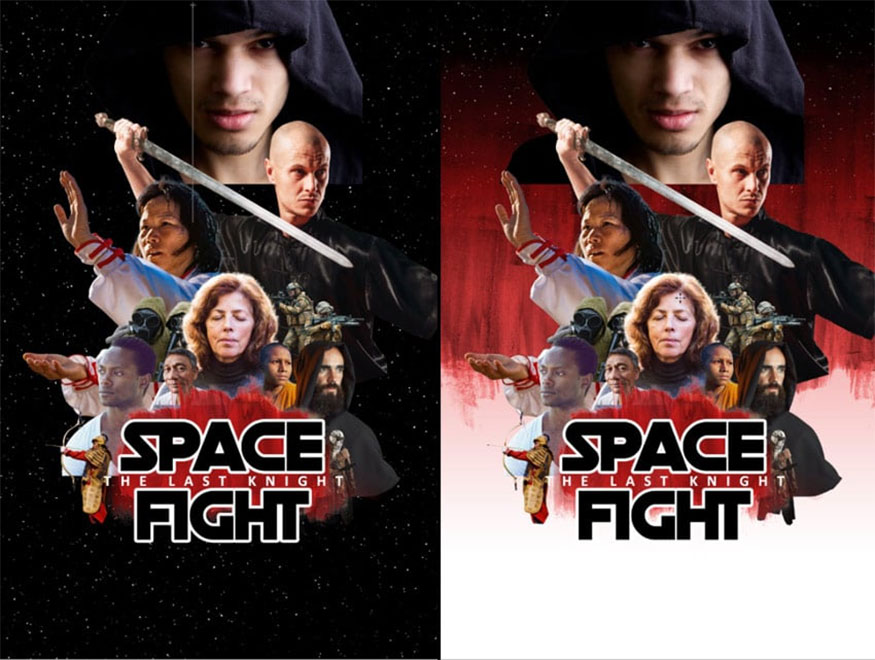
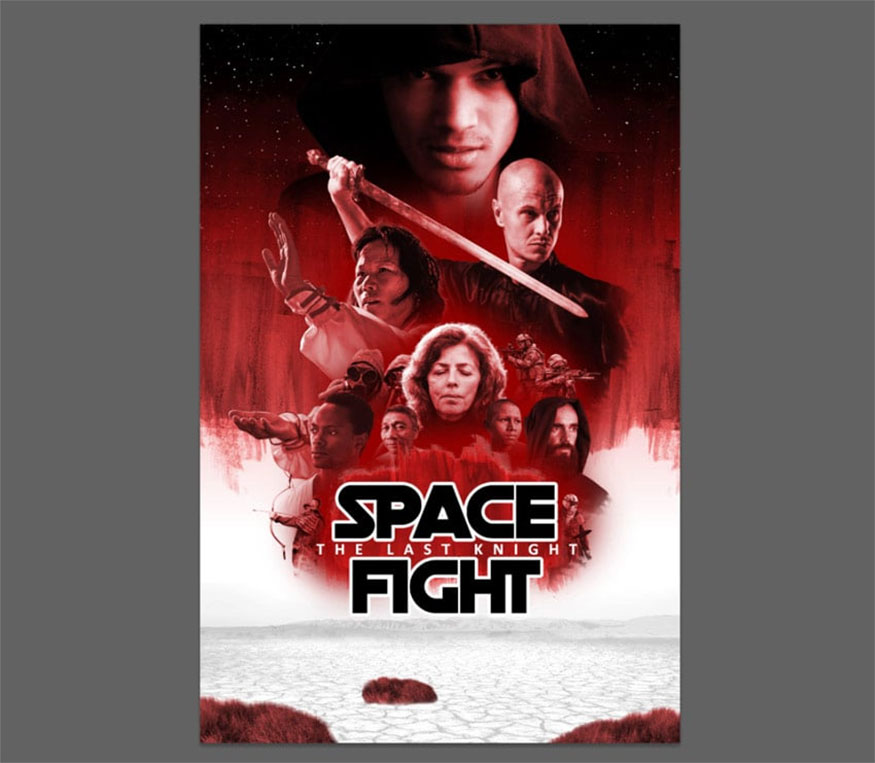
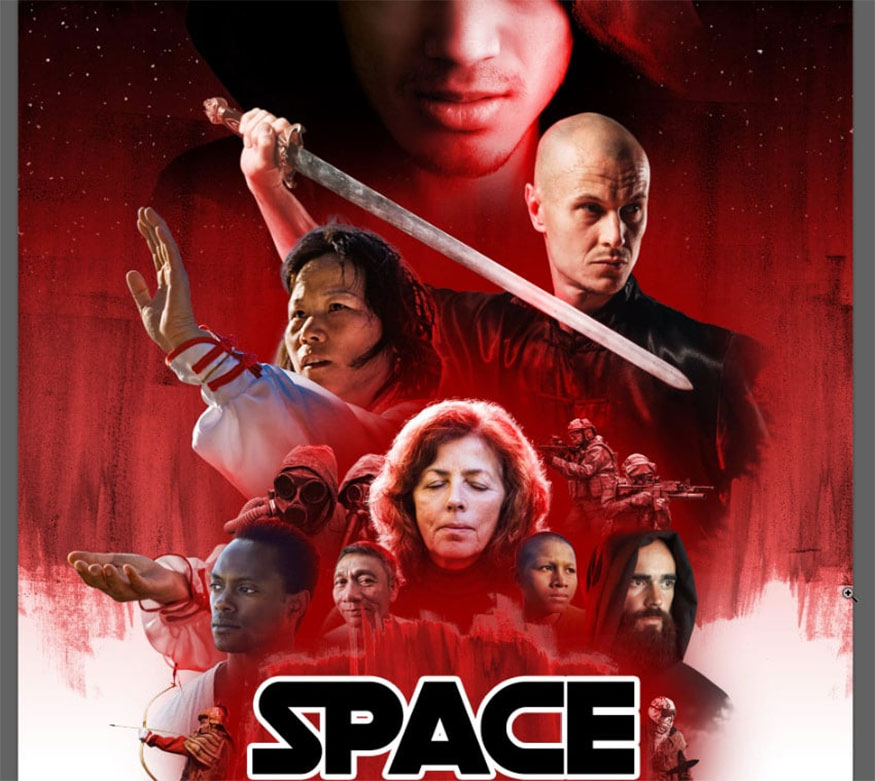
- Step 10: Adjust the gradient in the background of the Star Wars poster to keep the red tone just below the brush stroke.
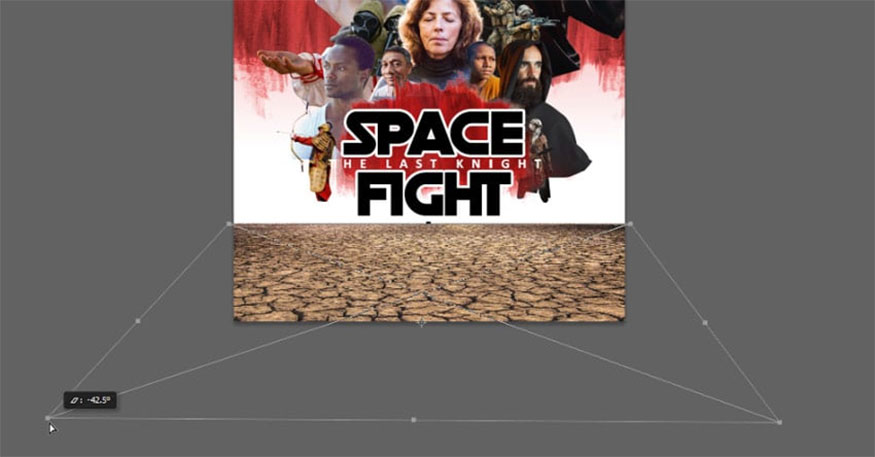
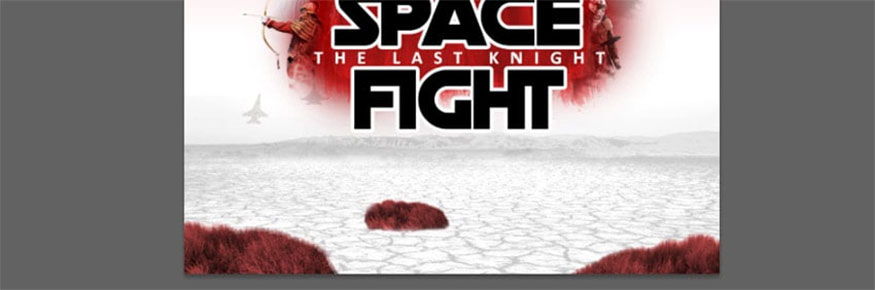
- Step 11: Use a photo of dry land right at the bottom of the poster. Use the Free Transform Tool (Ctrl-T) to resize, hold Ctrl to drag separate corners.
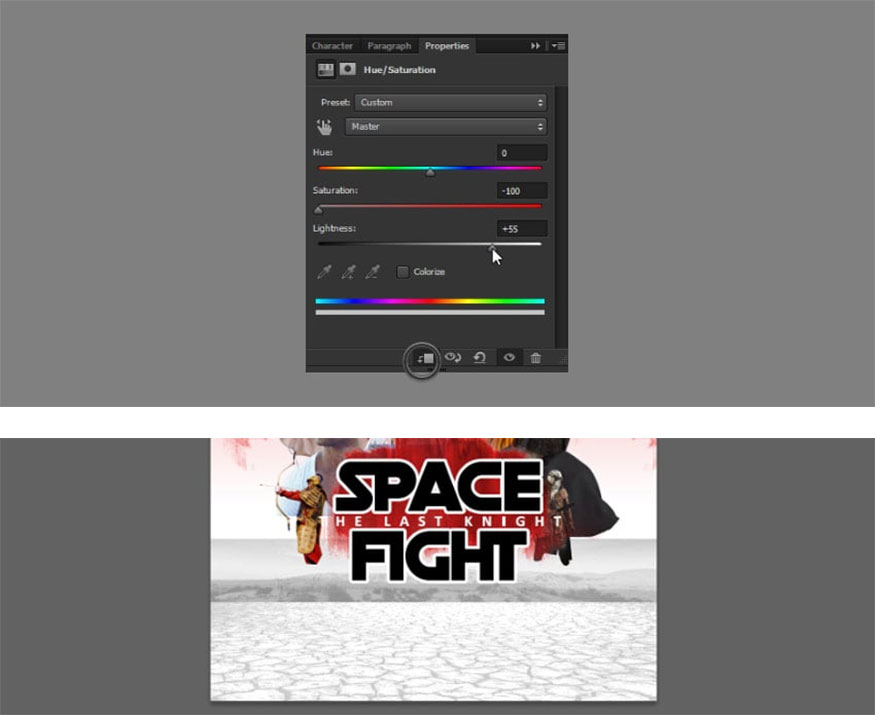
- Step 12: Add Hue/Saturation adjustment to desaturate the soil.

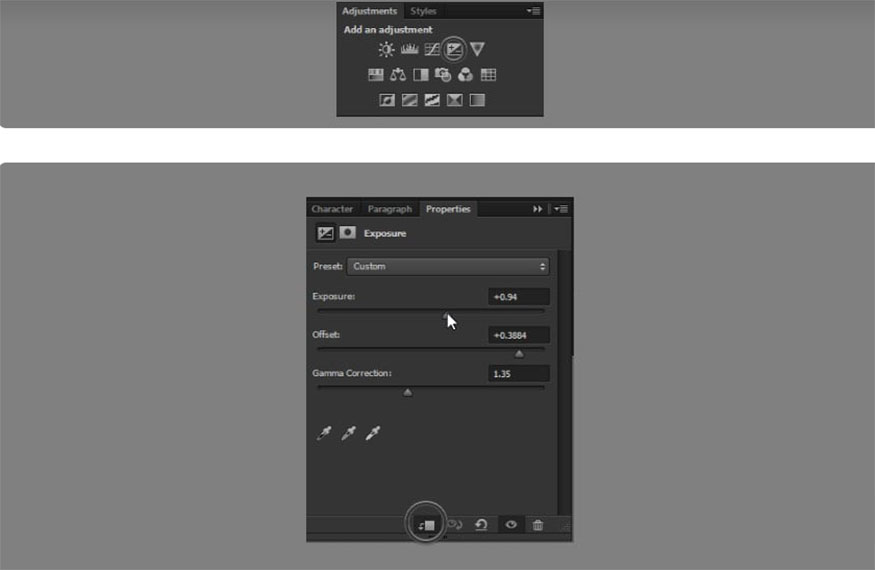
- Step 13: Add Exposure adjustment to make the image less contrasting.
- Step 14: Paste the mountain photo on the ground and change the size. Then, add a Hue/Saturation adjustment so that the mountain has a color more similar to the ground.
- Step 15: Use Layer Mask to merge the mountains with the background and remove the gray sky.

- Step 16: Paste the grass images and change their size.
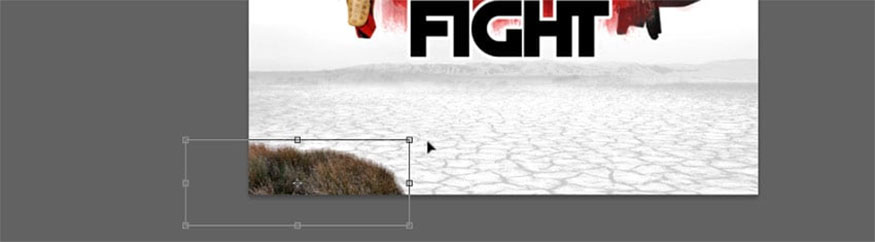
- Step 17: Color the grass by changing the Hue/Saturation adjustment.
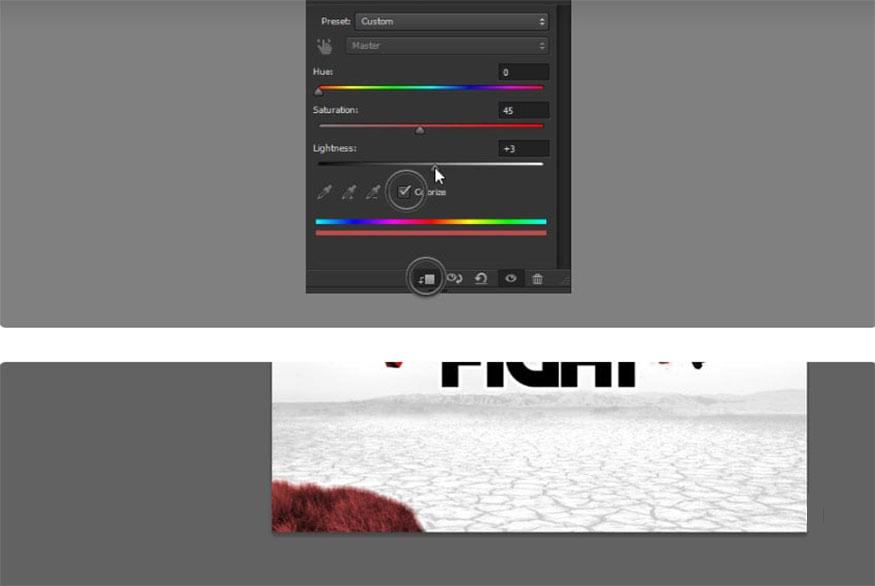
- Step 18: Apply the same technique to add more grass.
3. Add Consistent Lighting for Characters in Poster
- Step 1: To blend the characters with the background, add Layer Masks and clean up the edges. Use a soft brush, then a textured brush for a more interesting effect.
- Step 2: Place a New Layer between all the characters. Separate the characters by using a soft brush to draw on these characters.
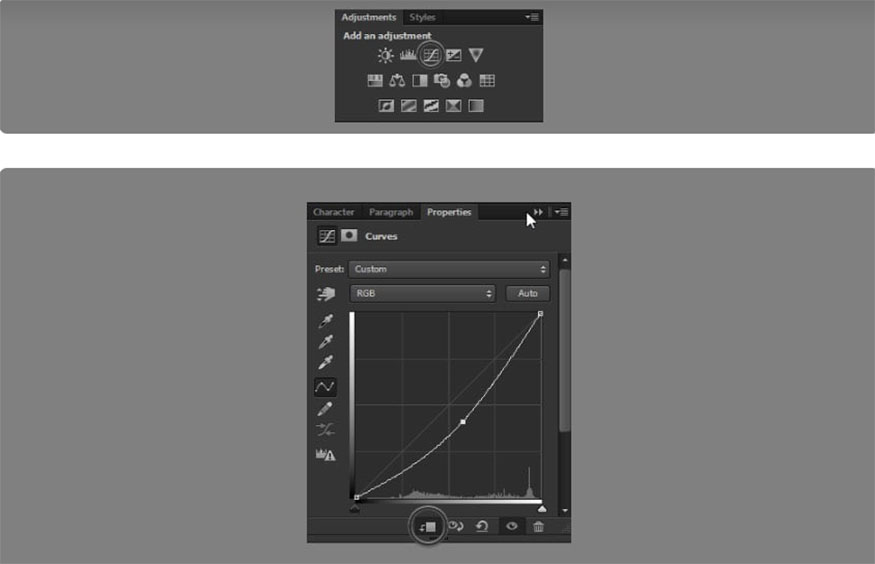
- Step 3: You will see that the photos have completely different lighting. To fix it, add a Curves adjustment.
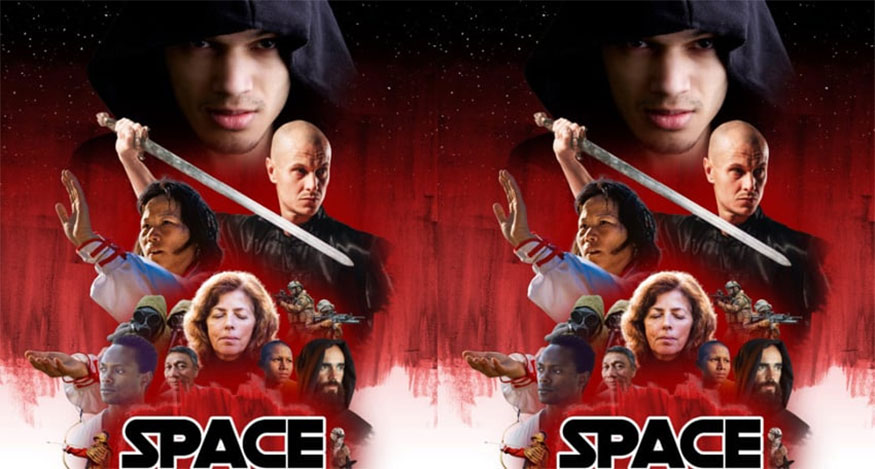
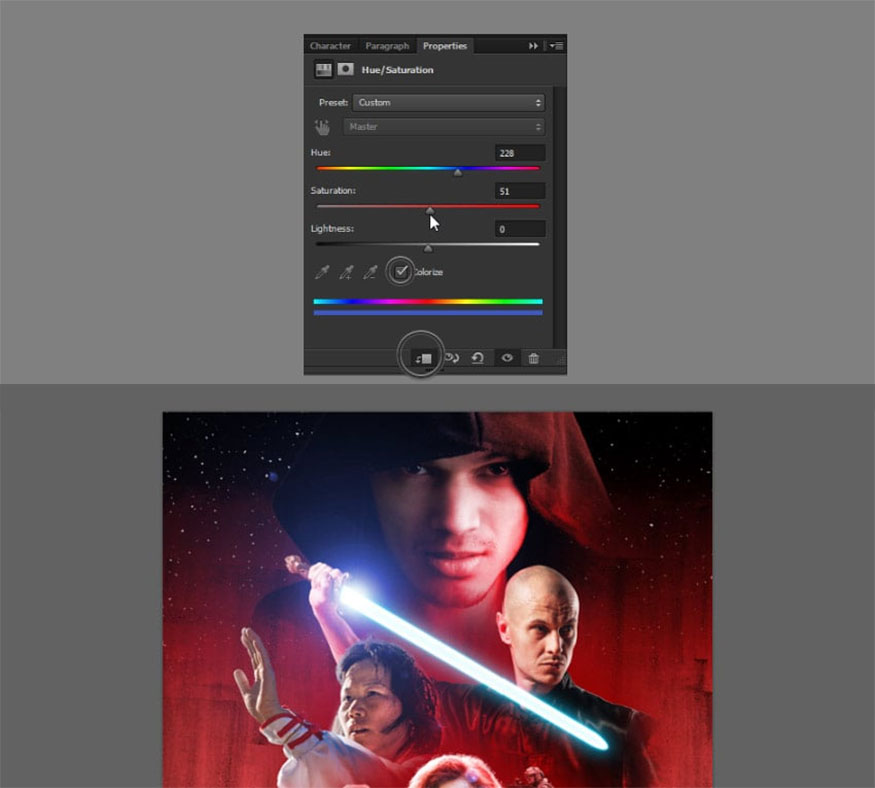
- Step 4: The surrounding red color will affect the characters. So, add a Hue/Saturation adjustment to one of them, then color the character red.
- Step 5: Press and hold Alt, then drag the adjustment to duplicate it and add text to each character. To make a cut, click the shortcut Ctrl-Alt-G.
- Step 6: Paint on the mask of each adjustment layer, reveal only part of the face so as not to be affected by red light.
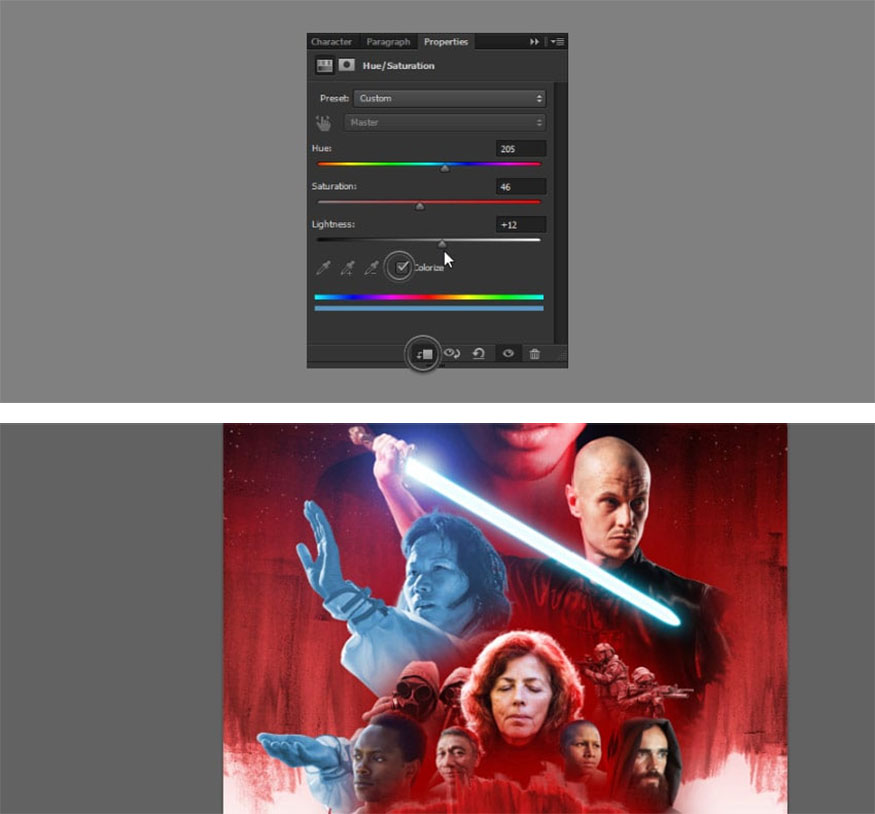
- Step 7: Add some stronger light and continue adjusting Hue/Saturation.
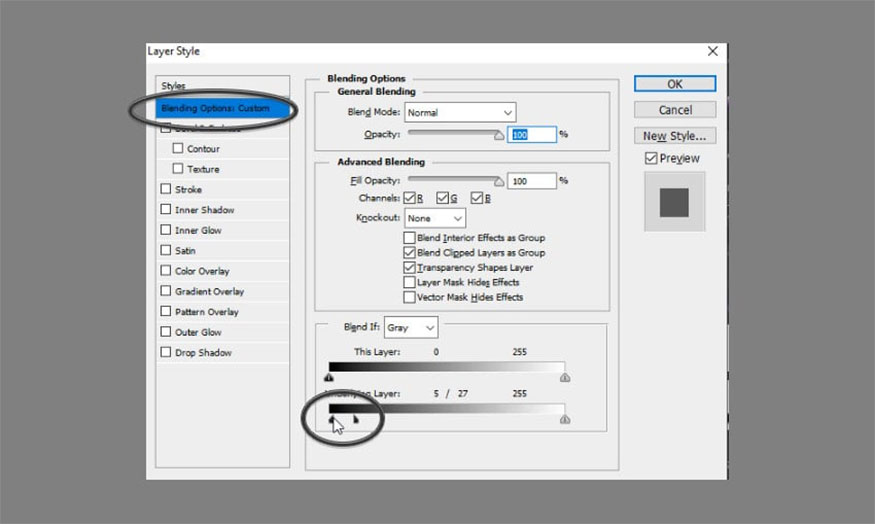
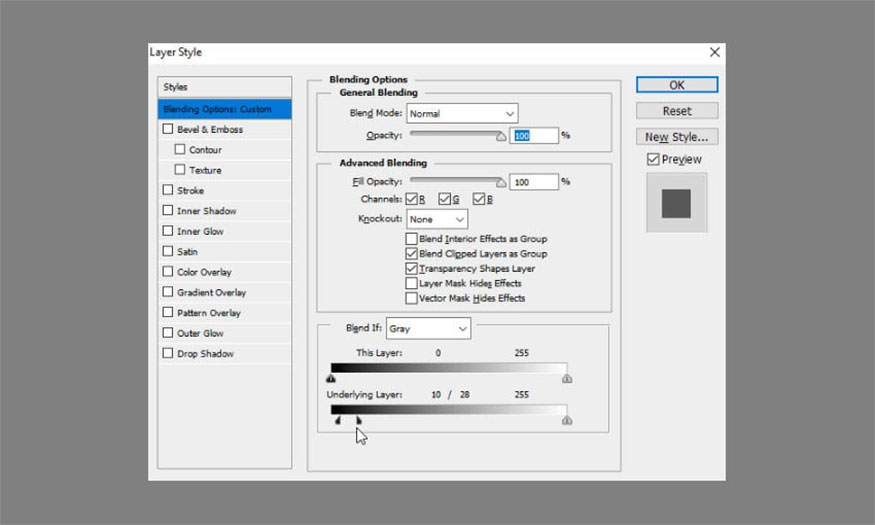
- Step 8: Double click on the adjustment and change the Blending Options mode.
Hold Alt to separate the bottom black marker. This helps make the effect transparent on the darkest areas.
Next, draw on the Layer Mask to keep the effect only on the edges.
Apply the same effect to the remaining characters.
- Step 9: To add white border lights, apply Hue/Saturation, Blending Options and Layer Masks.
4. How to create a lightsaber for Poster
- Step 1: Select the blade, then create a New Layer and fill it with white. Place them above all the characters.
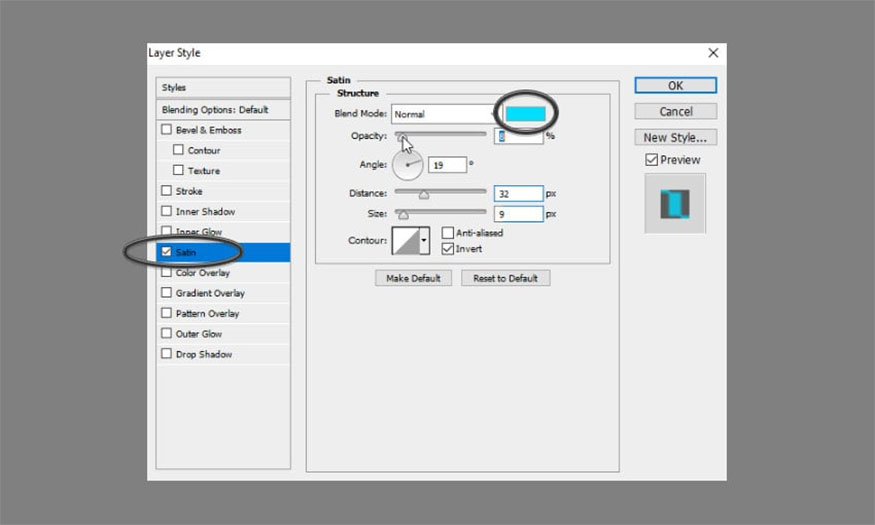
- Step 2: Double-click on the layer, check the Satin and make them blue, creating a soft bright blue streak inside the blade.
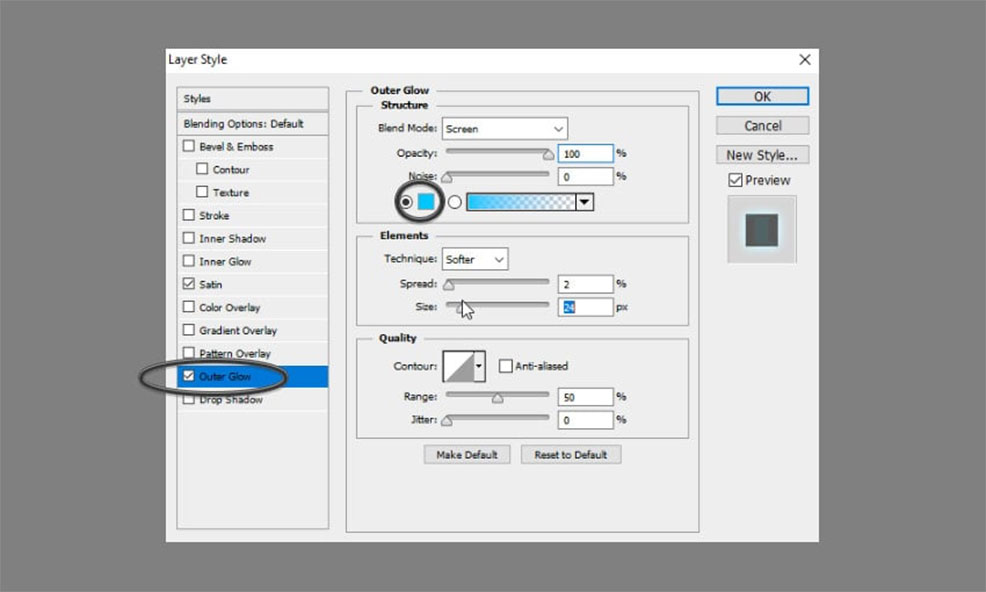
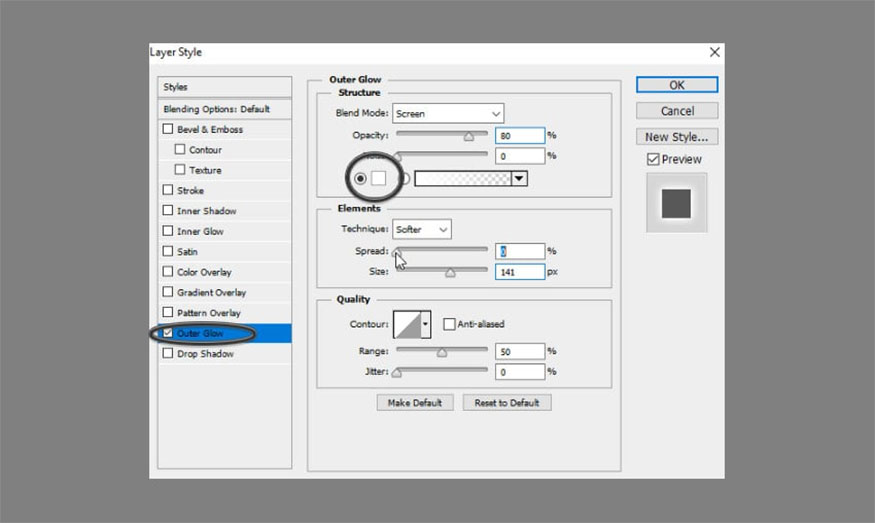
- Step 3: Check the Outer Glow and change the color to blue.
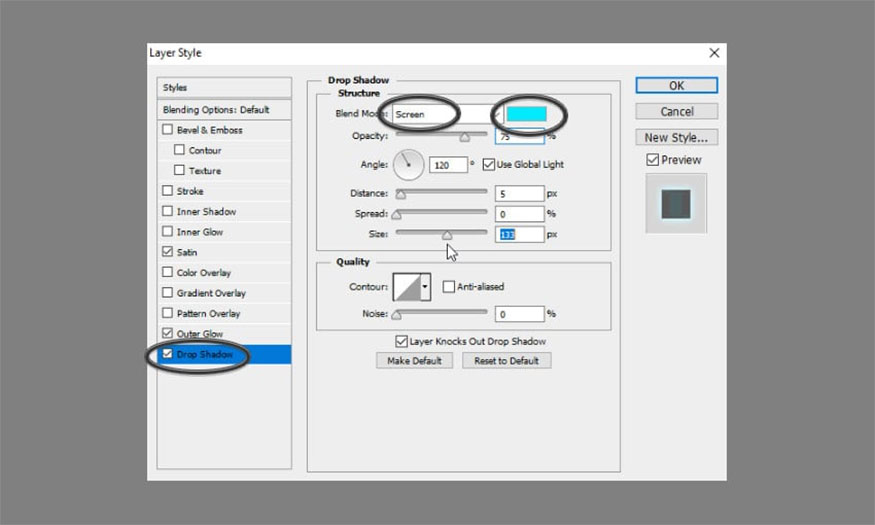
- Step 4: Check the Drop Shadow, turn it into another type of light by changing the Blend Mode to Screen, change the color to blue.
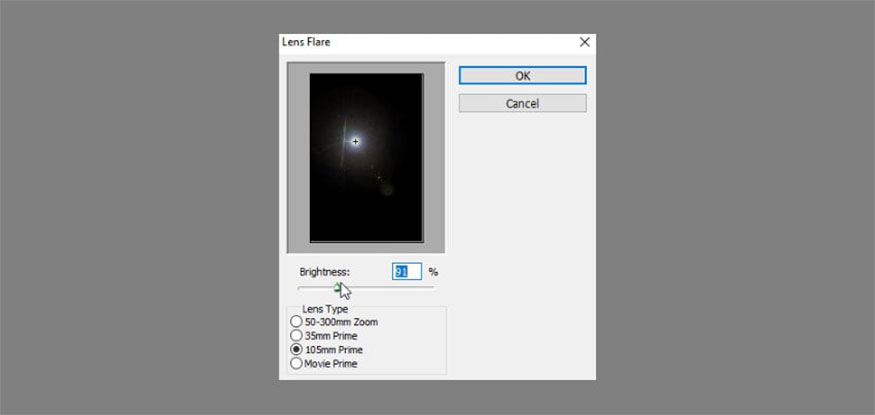
- Step 5: Create a new layer and fill it with black. Go to Filter => Rendering => Lens Flare. Select the type you want, and then adjust the brightness.
- Step 6: Change the Blend Mode to Screen to remove black areas. Add a Hue/Saturation adjustment to make them bluer. Pull and place them on top of the blade.
- Step 7: Because the scene has a new light source added, the character close to the light source also needs more light to make the image more realistic. Follow the same steps as above, only change the color to blue.
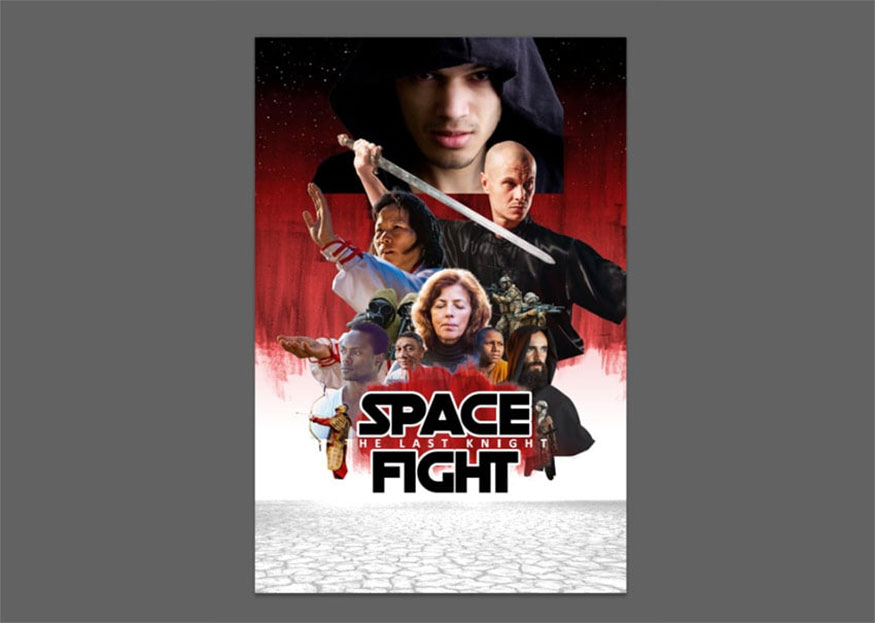
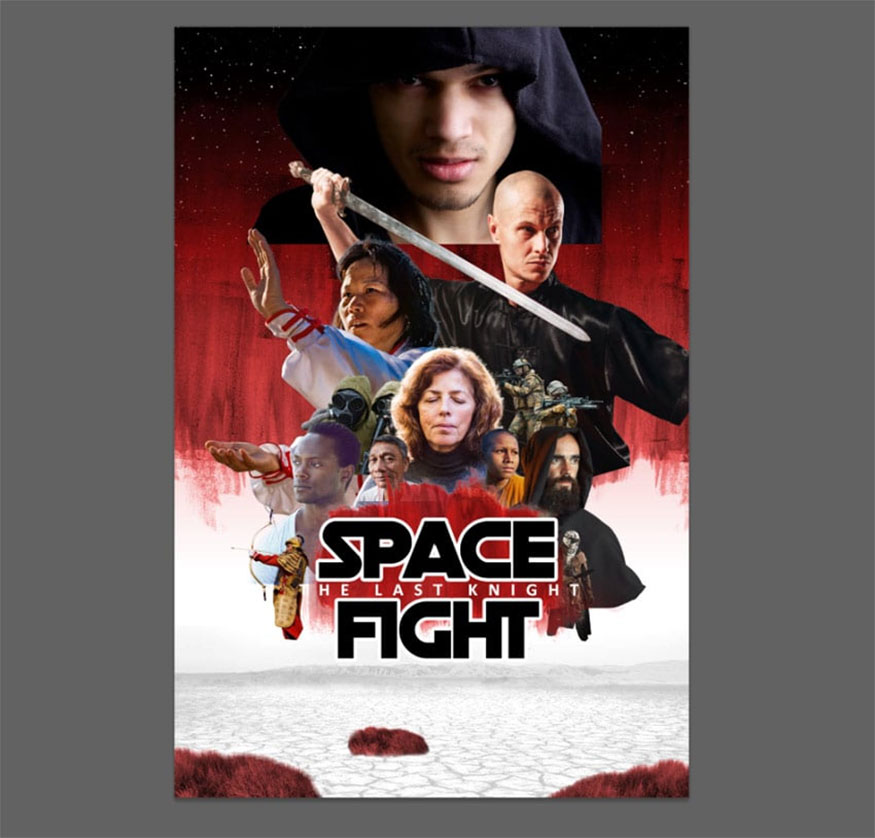
5. Complete the Star Wars Movie Poster in Photoshop
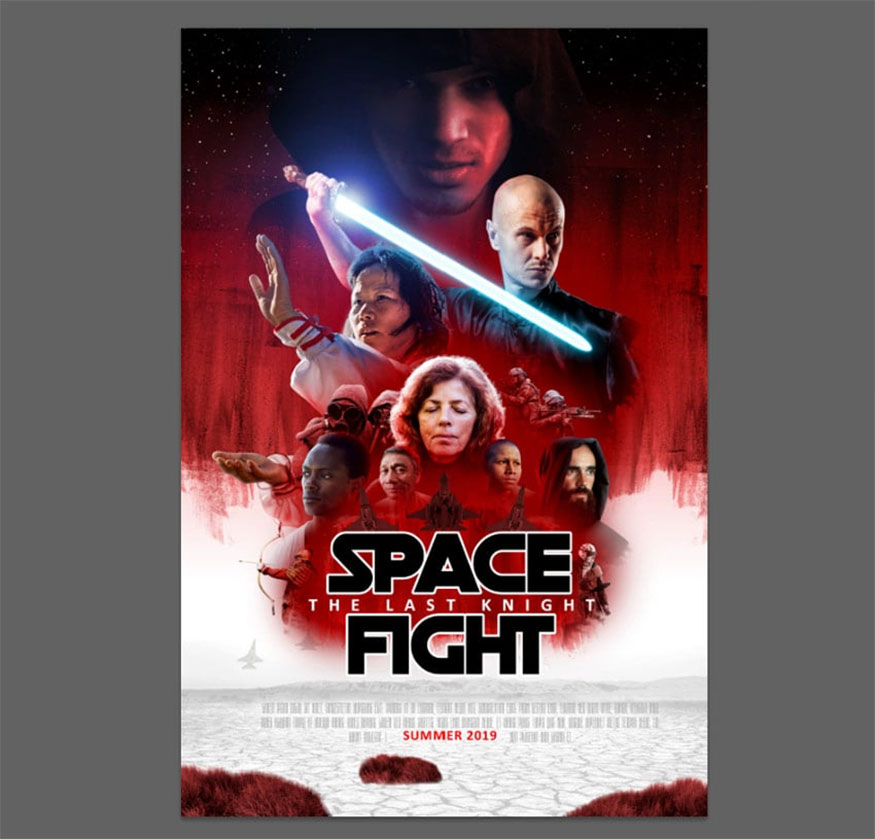
- Step 1: Focus on the details to complete the poster. Darken the character in the hood to make him more mysterious.
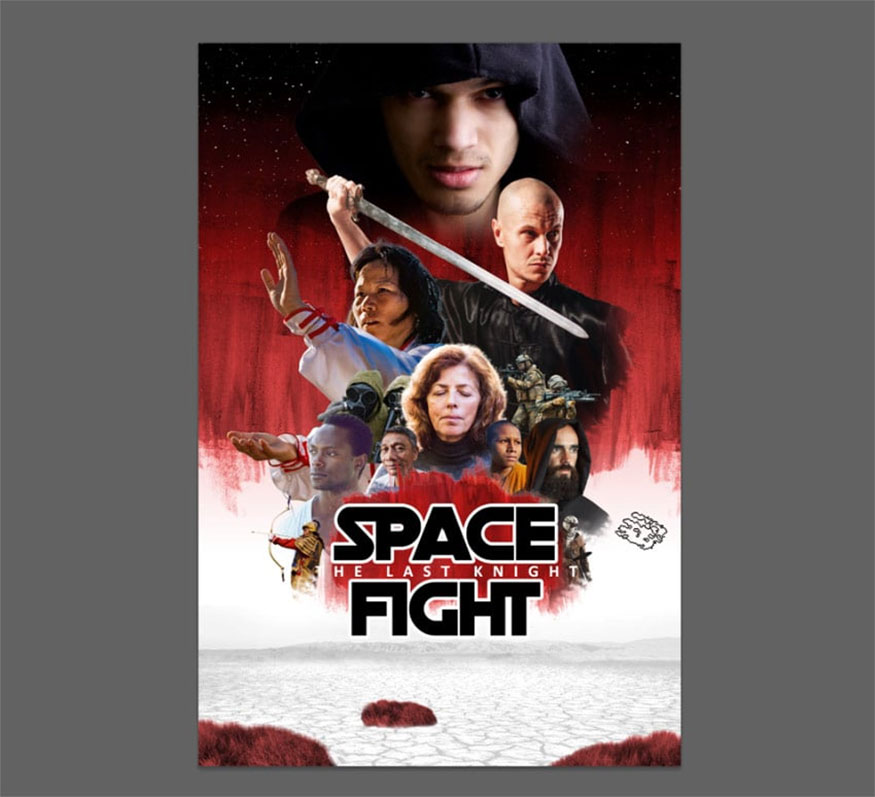
- Step 2: Add a jet to decorate the text.
- Step 3: Add a jet to the background.
- Step 4: Add some Lorem Ipsum text in Ultra Condensed font.
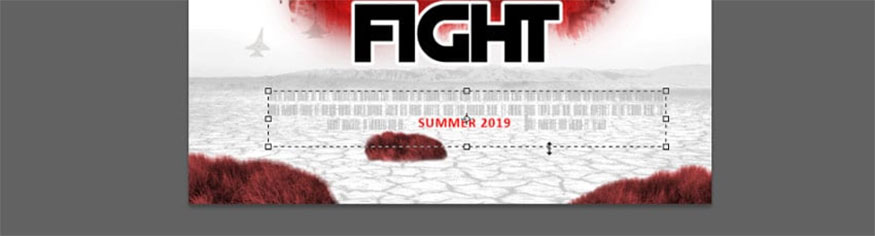
- Step 5: Add white light to the text to make it better.
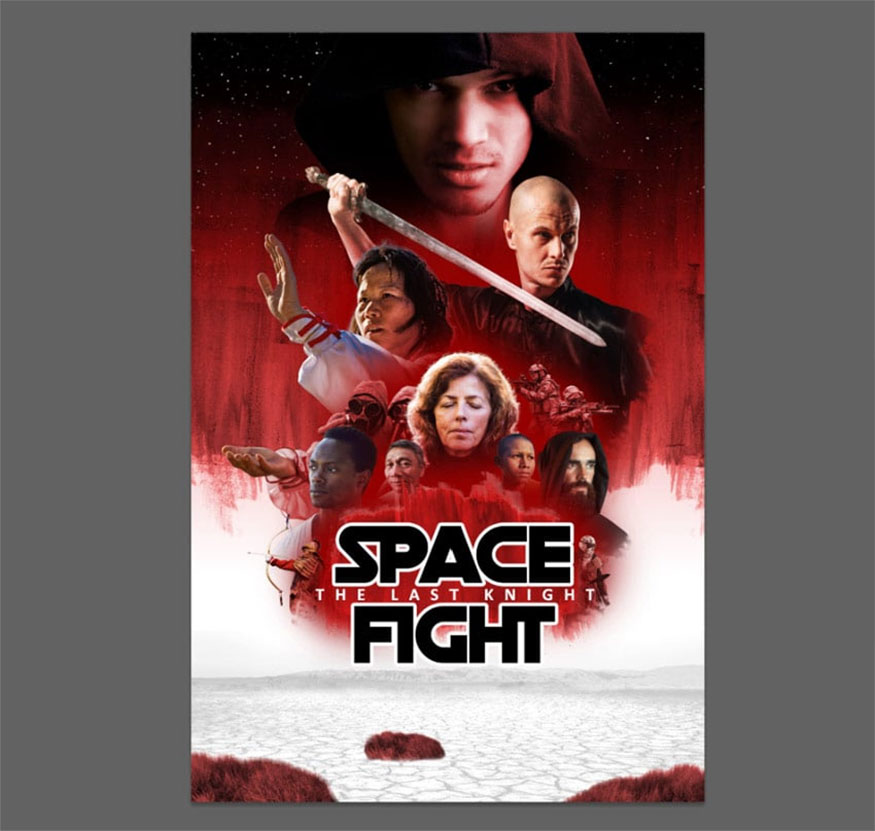
- Step 6: Review the entire layout to make it more symmetrical.
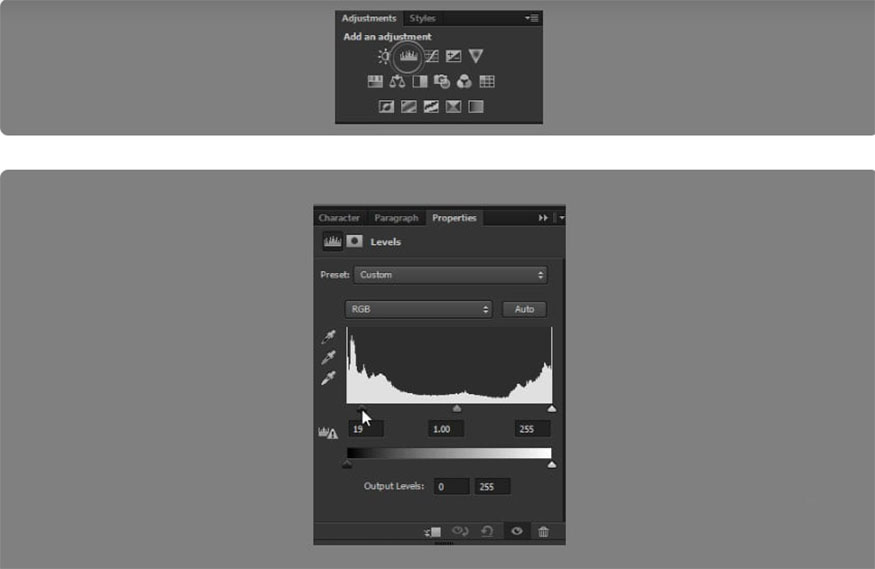
- Step 7: Add a Levels adjustment at the top to increase the contrast of the image.
- Step 8: Paint over the mask to reveal the darkest part.
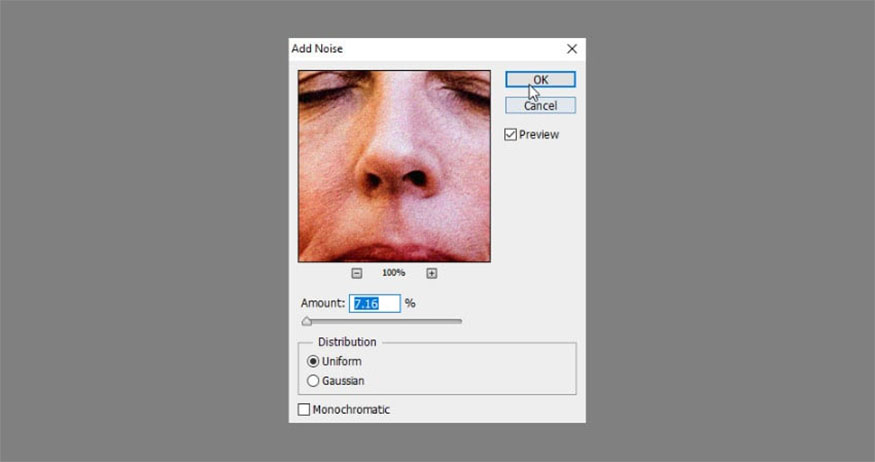
- Step 9: Once completed, copy the entire image to the new file, then go to Filter => Noise => Add Noise.
- Step 10: Copy this layer (Ctrl-J). Go to Filter => Other => High Pass. Drag the radius to display only the edges.
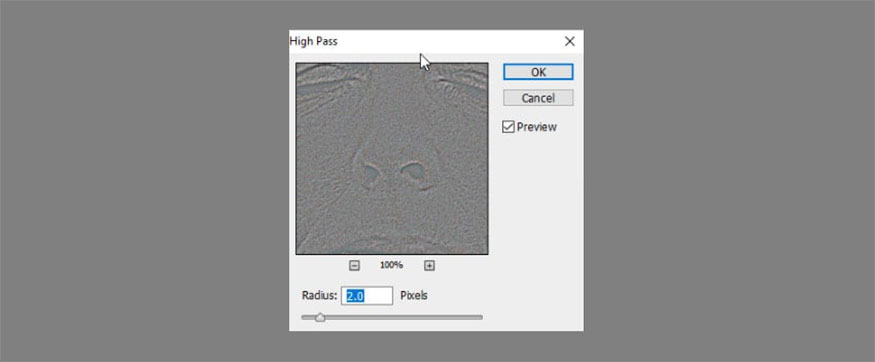
- Step 11: Change the Blend Mode to Linear Light to sharpen the details.
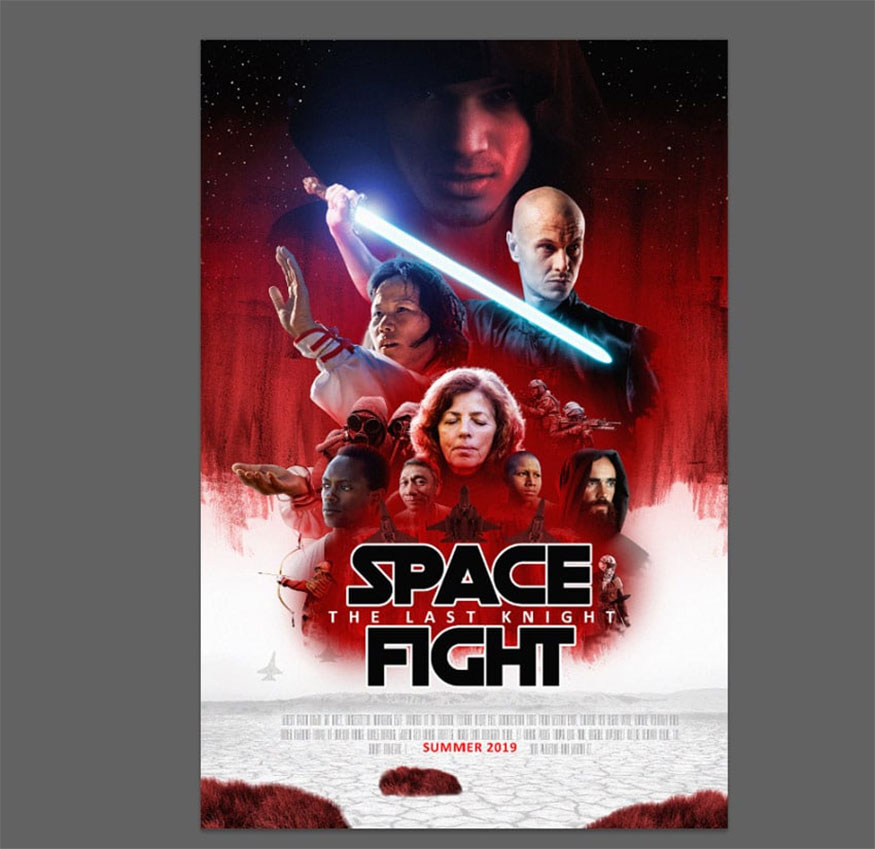
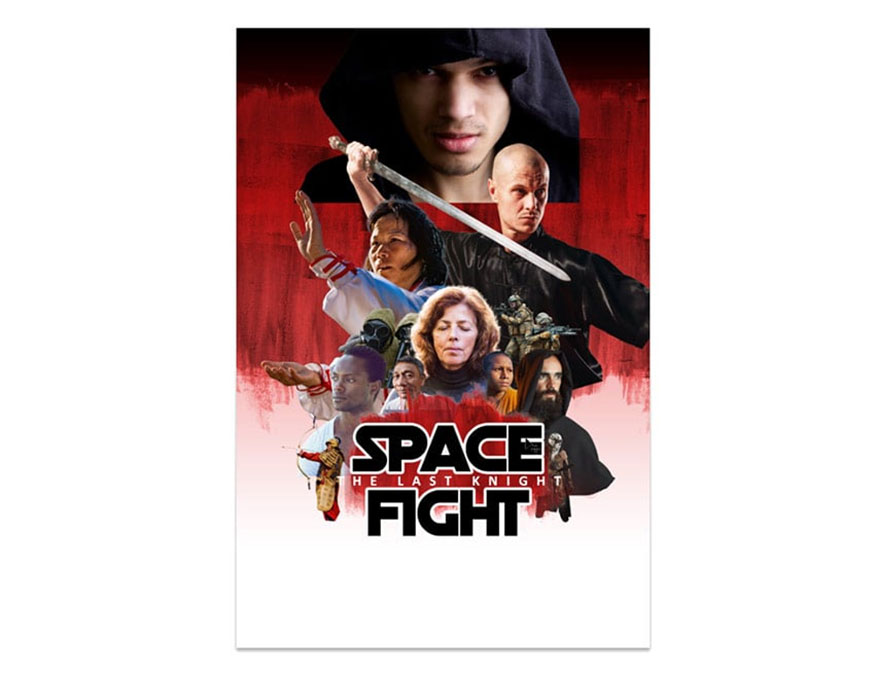
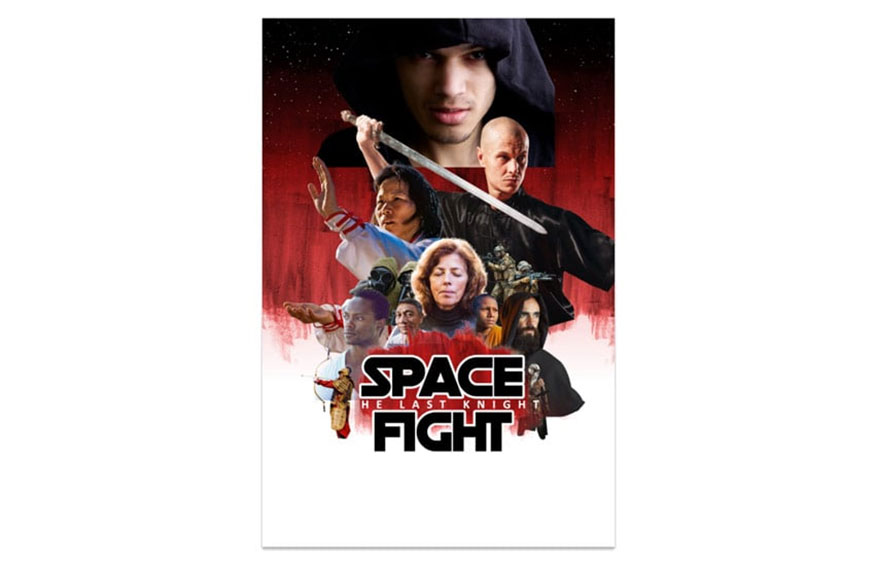
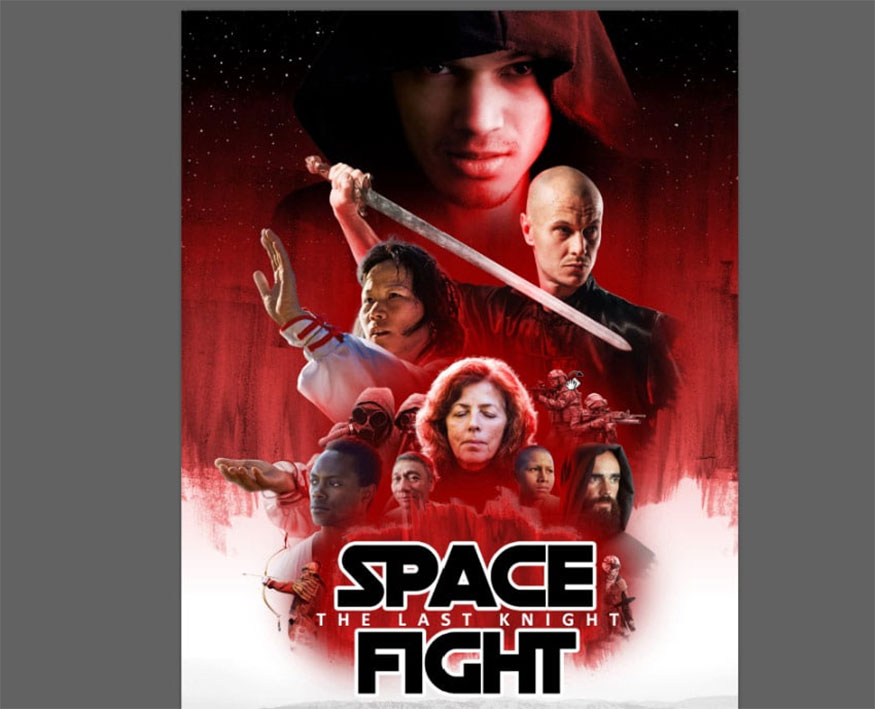
So, we have completed how to create a movie poster inspired by Star War using Photoshop. Wishing you success with the detailed instructions above to create your own satisfactory movie poster template.
- How To Create a Vintage Movie Poster in Photoshop
- How to design a classic movie poster in Photoshop


VIP Products


Best Selling Products
Genuine Adobe Illustrator account
99 USD
Upgrade Genuine Office 365
49 USD
Copyright Adobe Lightroom Account
59 USD
Autodesk All App Account Copyright
120 USD
Genuine Cheap Canva Pro
39 USD
Plugin Retouch4me
69 USD
Upgrade genuine Capture One account
120 USD
MidJourney Account
29 USD
Freepik Premium Account
59 USD
Adobe Photoshop Copyright - Full App
120 USD
Windows 10 & 11 Pro Key
36 USD
ChatGPT Plus Account (GPT-4)
16 USD
Upgrade Duolingo Super
29 USD
Adobe Premiere Pro Account
99 USD
Capcut Pro 1 Year
39 USD