Best Selling Products

Windows 10 & 11 Pro Key
36 USD

Copyright Adobe Lightroom Account
59 USD

Upgrade genuine Capture One account
120 USD

ChatGPT Plus Account (GPT-4)
16 USD

Plugin Retouch4me
69 USD

Autodesk All App Account Copyright
120 USD

Genuine Cheap Canva Pro
39 USD

Upgrade Genuine Office 365
49 USD

Genuine Adobe Illustrator account
99 USD

MidJourney Account
29 USD

Upgrade Duolingo Super
29 USD

Adobe Premiere Pro Account
99 USD

Freepik Premium Account
59 USD

Adobe Photoshop Copyright - Full App
120 USD

Capcut Pro 1 Year
39 USD
How to design a classic movie poster in Photoshop
Nội dung
- 1. How to start creating a movie frame in Photoshop
- 2. How to create a frame in Photoshop
- 3. How to add text to a classic movie poster frame in Photoshop
- 4. How to add a photo to a classic movie poster in Photoshop
- 5. How to add screen elements
- 6. How to add film grain in Photoshop
- 7. How to add paper texture
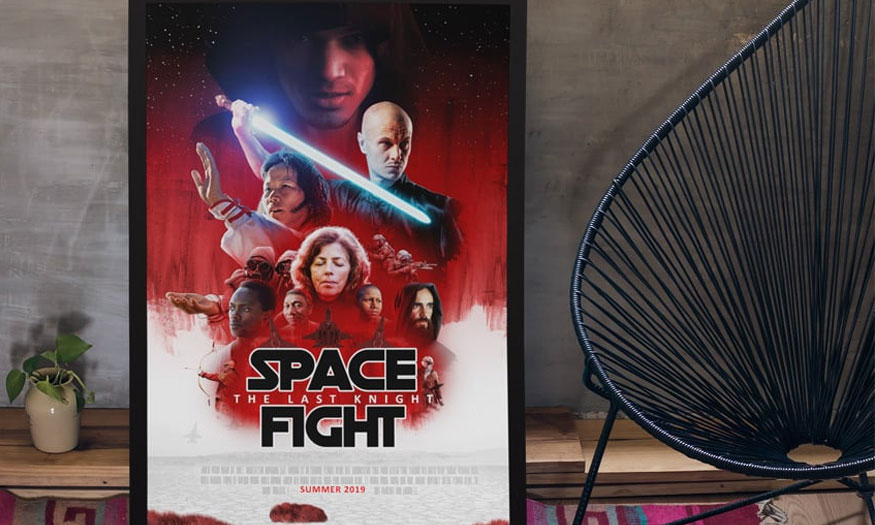
Classic movie posters need to give viewers an impressive feeling, a bit nostalgic. The article below SaDesign will share with readers in detail how to create classic movie posters in Photoshop simply but still attractive.

Classic movie posters need to give viewers an impressive feeling, a bit nostalgic. The article below SaDesign will share with readers in detail how to create classic movie posters in Photoshop simply but still attractive.
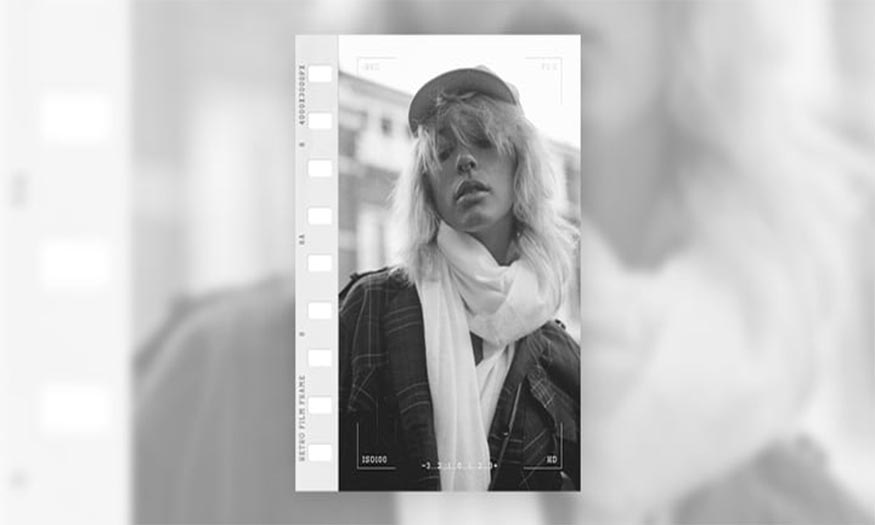
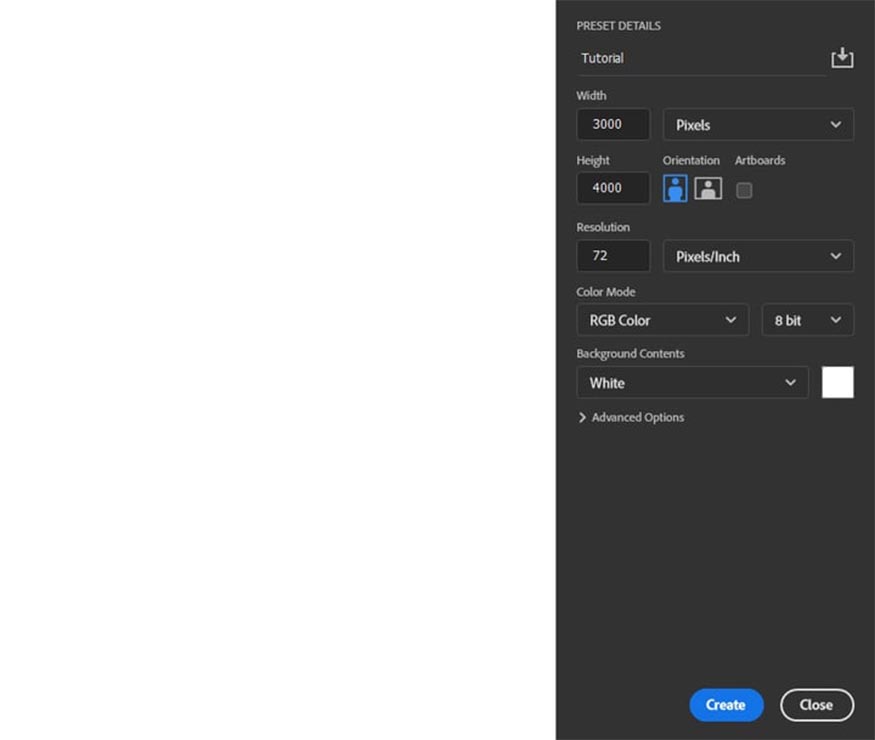
1. How to start creating a movie frame in Photoshop
Choose File => New and setting Width to 3,000px, Height to 4,000px and Resolution to 72 px/in.
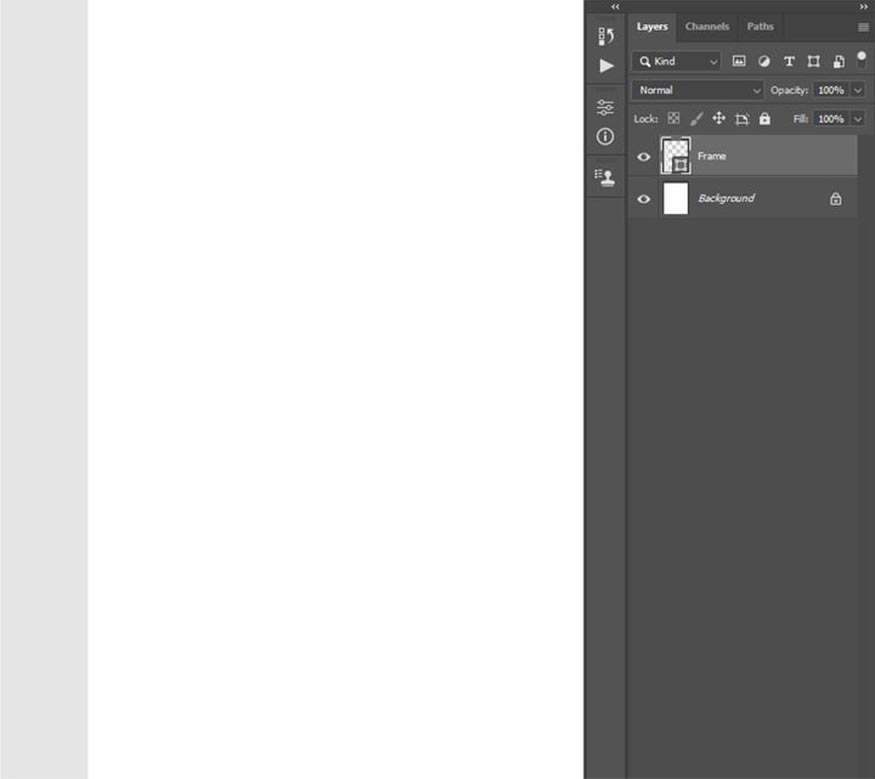
2. How to create a frame in Photoshop
Step 1: Select the Rectangle Tool (U) then click anywhere inside the canvas to create a new rectangle layer, setting width to 450px, Height to 4,000px.
Set the Fill Solid Color to #e5e5e5, position this layer so that it lines up with the left edge and vertical center of the canvas. Name this layer “Frame”.
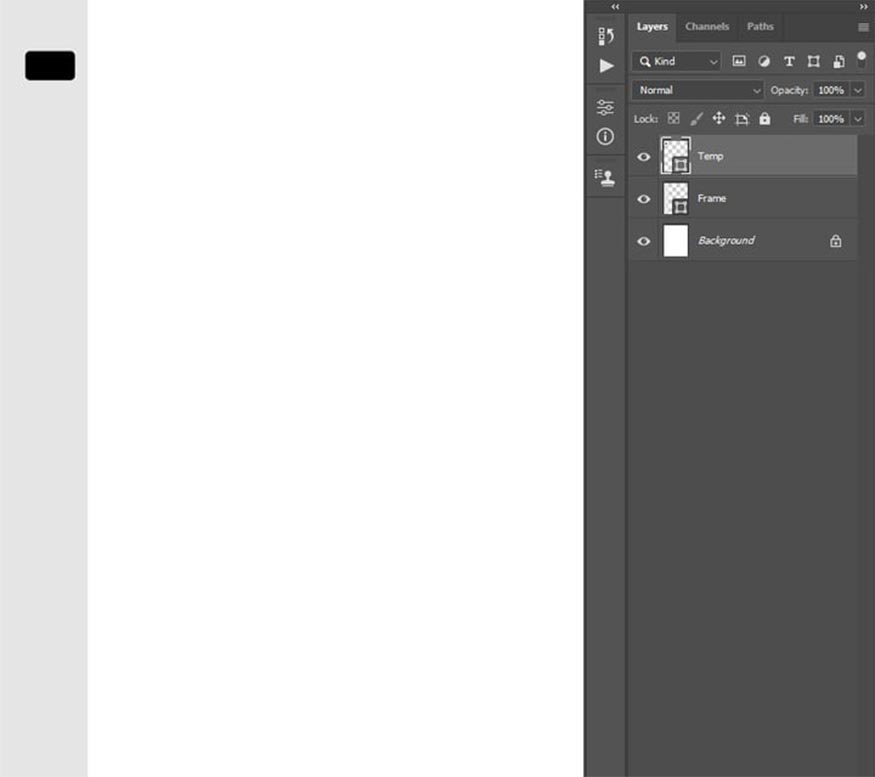
Step 2: Select the Rectangle Tool (U) then click anywhere inside the canvas to create a new rounded rectangle layer and set Width to 255px, Height to 150px and Radius to 25px.
Set the Fill Solid Color to #000000 and position this layer as shown below. Name this layer “Temp”.
Step 3: Press Ctrl + J to duplicate this layer and use Move Tool (V), place this layer below. Repeat this step until you have filled in the frame completely.
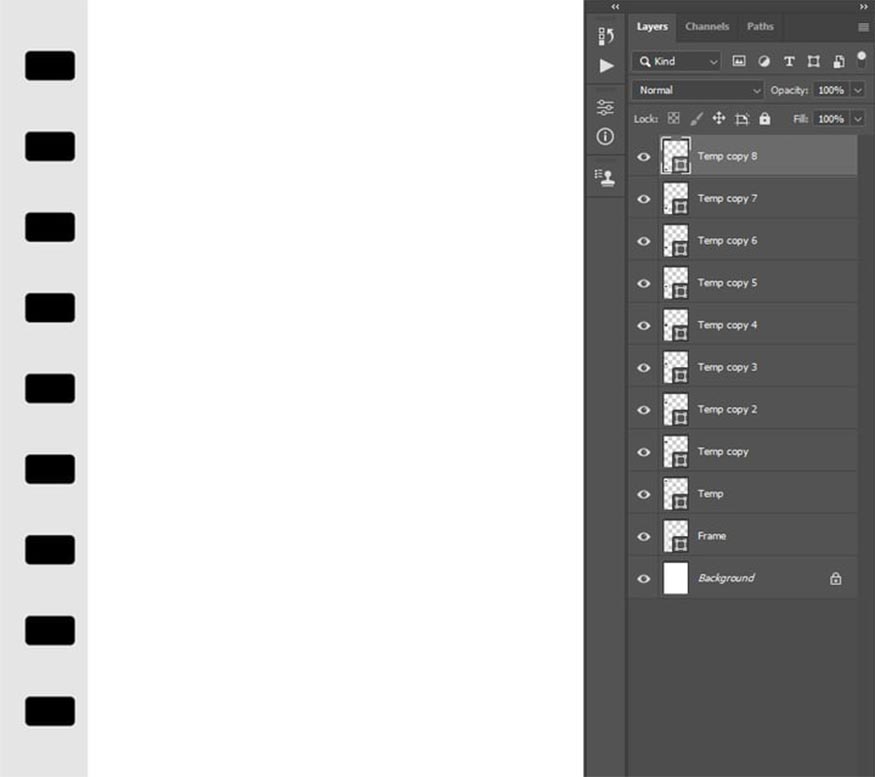
Step 4: Press Ctrl on the current layer thumbnail to create a selection for this layer. Hold Ctrl + Shift, then click on the thumbnails of all remaining Temp layers to create a selection for all.
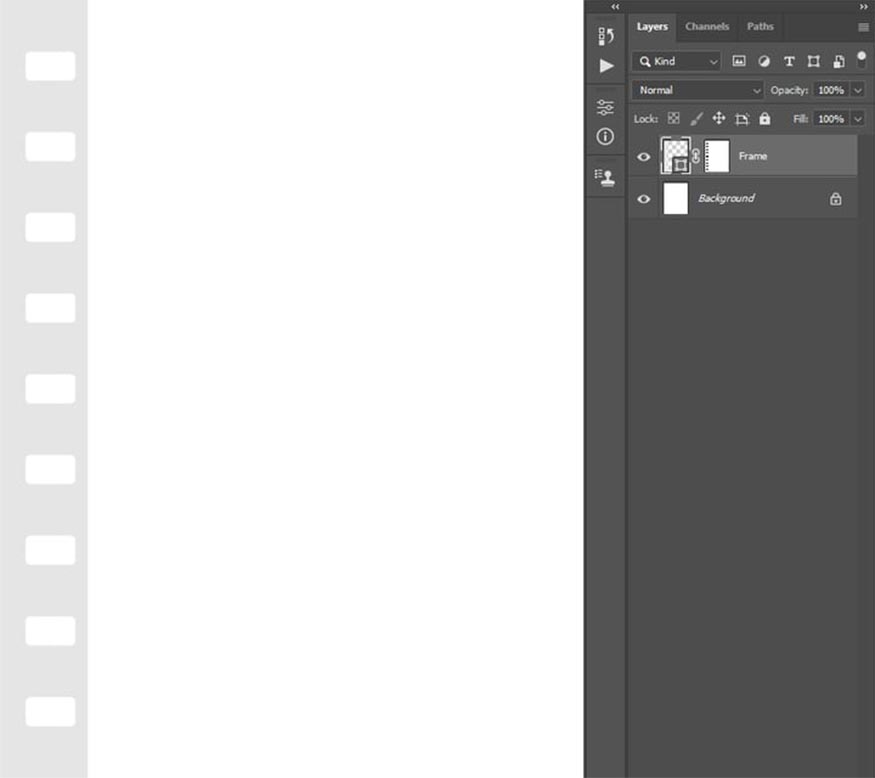
Then, select the Frame layer, continue to select Layer => Layer Mask => Hide Selection to hide the selected area of the layer and reveal the remaining parts.
Finally, select the Temp layer and press Shift and click on the Temp copy 8 layer to select all the layers in the middle. Right click on any of them and select Delete Layers.
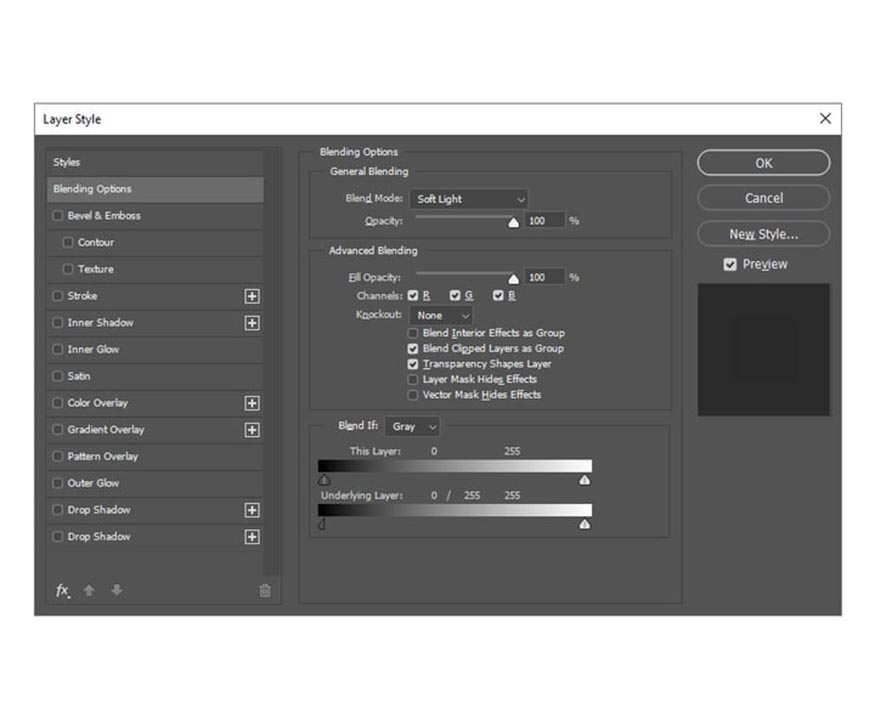
Step 5: Right click on this layer then select Blending Options. Continue selecting and checking Bevel & Emboss, then use the settings below:

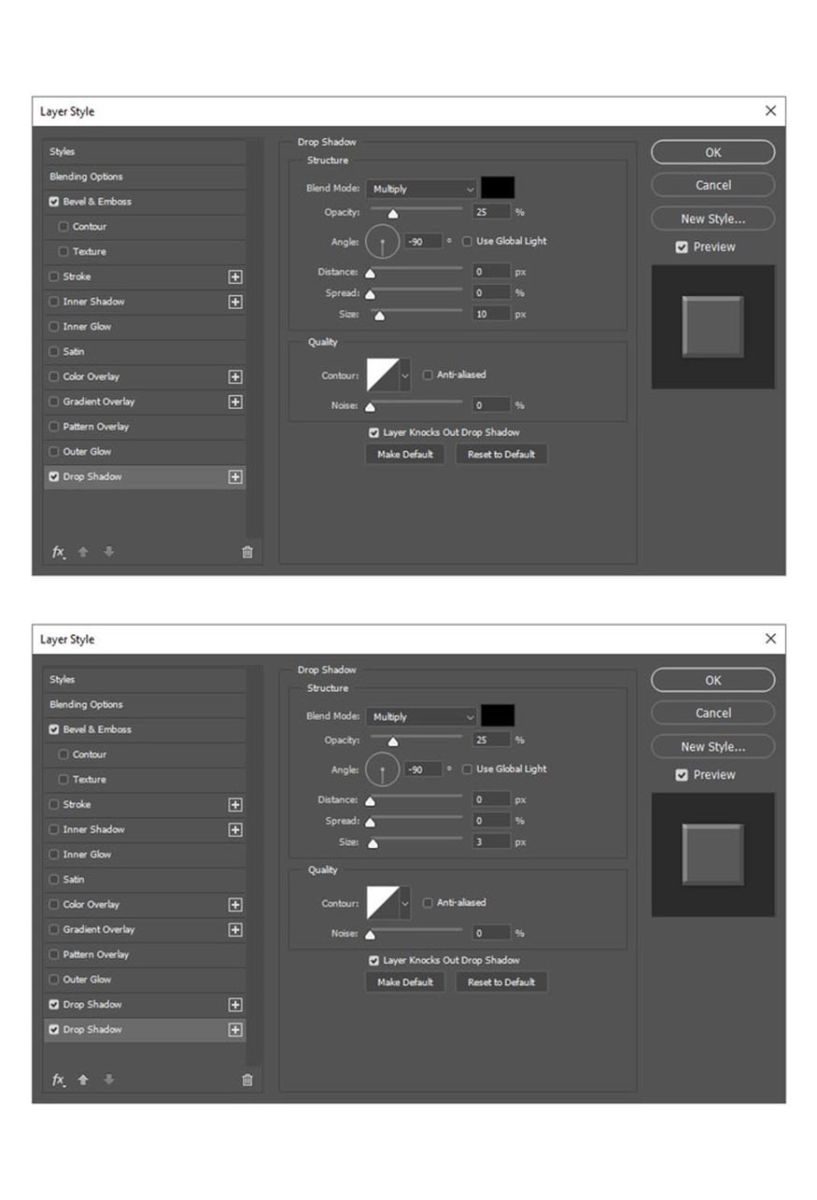
Step 6: Right click on this layer and select Blending Options. Then select and check the Dropshadow style and use the settings below.
Next, click the plus icon of the Dropshadow layer style tab to copy the bottom style and use the settings below.
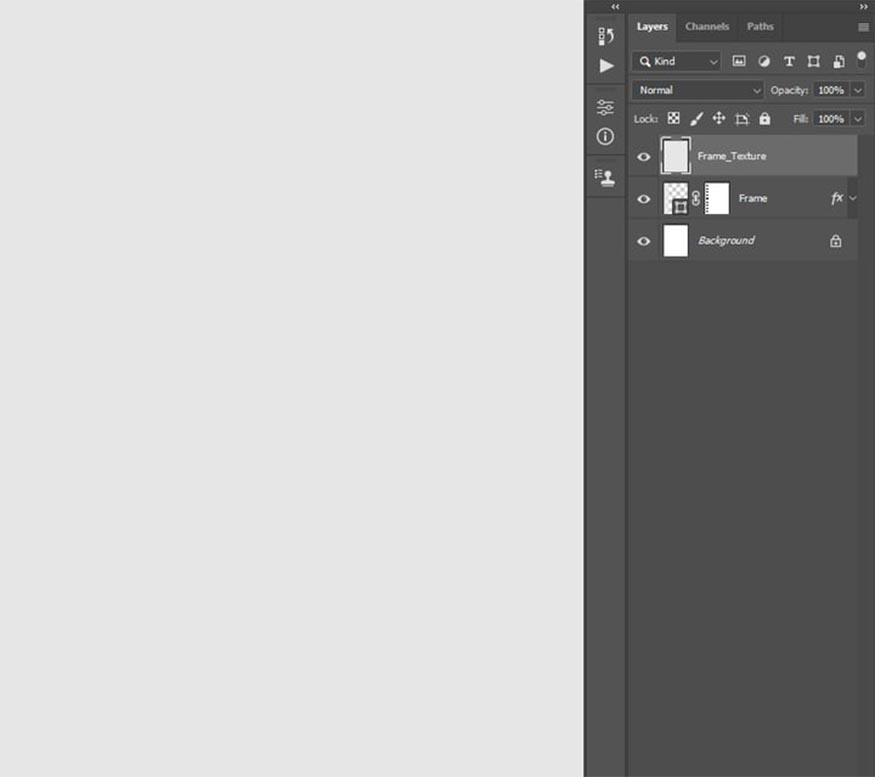
Step 7: Press Ctrl + Shift + N to create a new layer and name it “Frame_Texture”.
Set the foreground color to #e5e5e5, choose Edit => Fill, and then set Contents to Foreground Color, Mode to Normal, and Opacity to 100%.
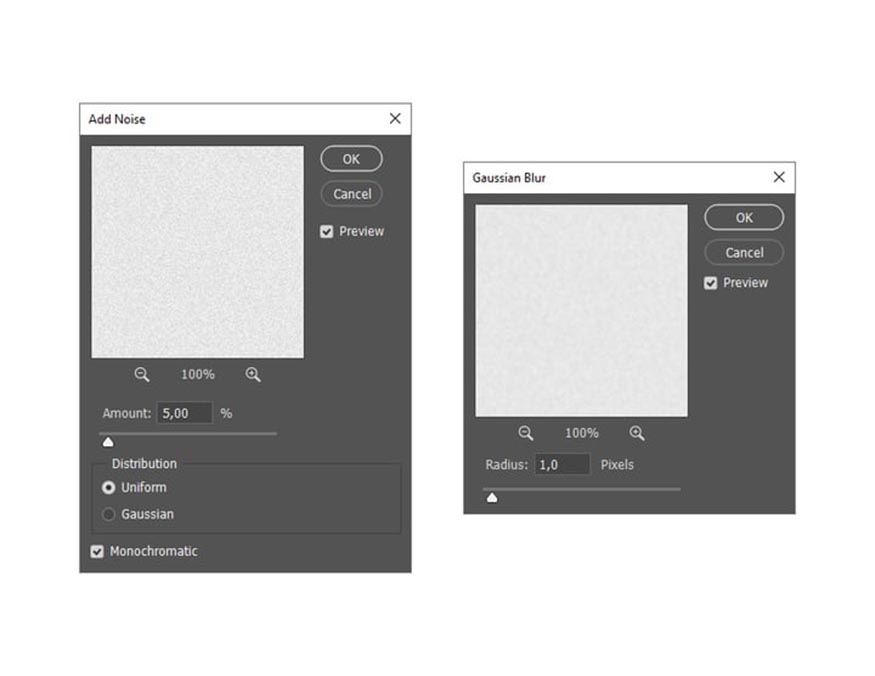
Step 8: Right click on this layer then select Convert to Smart Object. Select Filter => Noise => Add Noise and set Amount to 5%, Distribution to Uniform, and select Monochromatic.
Then, choose Filter => Blur => Gaussian Blur, and set the radius to 1px.
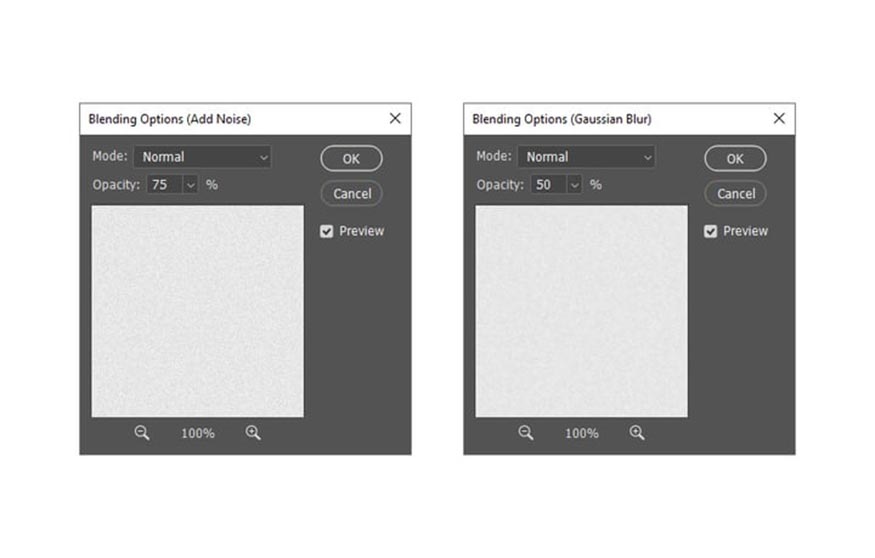
Step 9: Double click to edit the blending options of Add Noise filter and set the Opacity to 75%. Then, double click to edit the blending options of Gaussian Blur filter and set the Opacity to 50%. Finally, choose Ctrl+Alt+G to create the clipping mask.
3. How to add text to a classic movie poster frame in Photoshop
Step 1: Select the Horizontal Type Tool (T), set Font to Retro Grade, Font Size to 75px, Alignment to Left, Text Color to #808080, and Tracking to 100. Click anywhere inside the canvas and enter the text “Retro Film Frame” or whatever text you want.
Next, go to Edit => Transform => Rotate 90° Counter Clockwise to rotate the text and position it as shown below:

Step 2: Use the same method to add text layers. Here are the results:
poster-phim-co-dien-trong-photoshop-12
4. How to add a photo to a classic movie poster in Photoshop
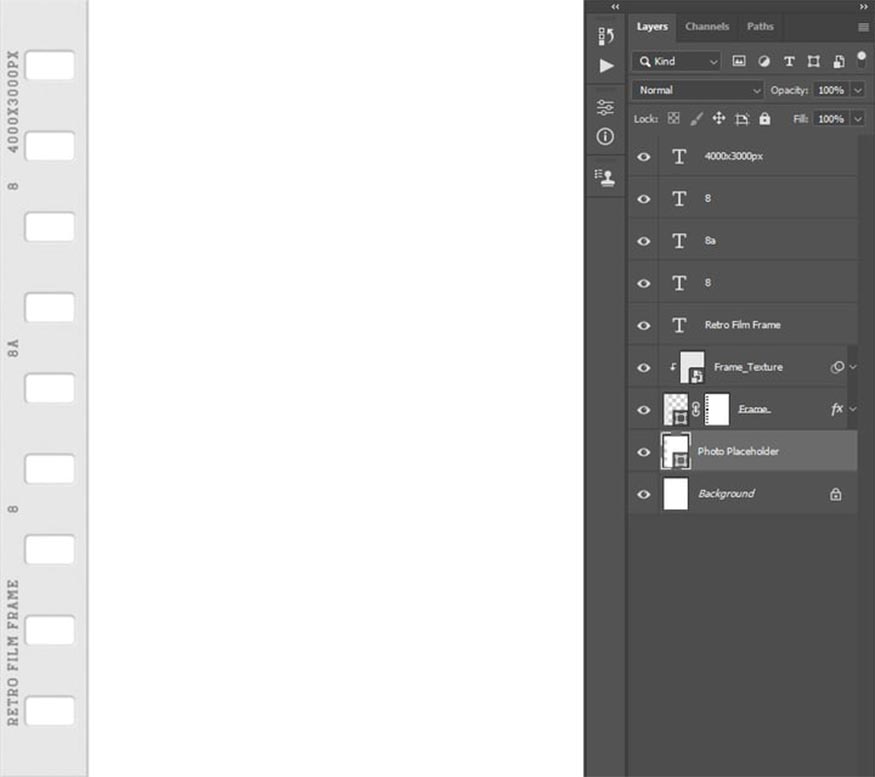
Step 1: Select the background layer, select the Rectangle Tool (U), click anywhere inside the frame to create a new rectangular layer, set Width to 2550px, Height to 4000px.
Then, set the Fill Solid Color to #ffffff, position this layer so it lines up with the right edge and vertical center of the canvas. Name this layer “Photo Placeholder”.
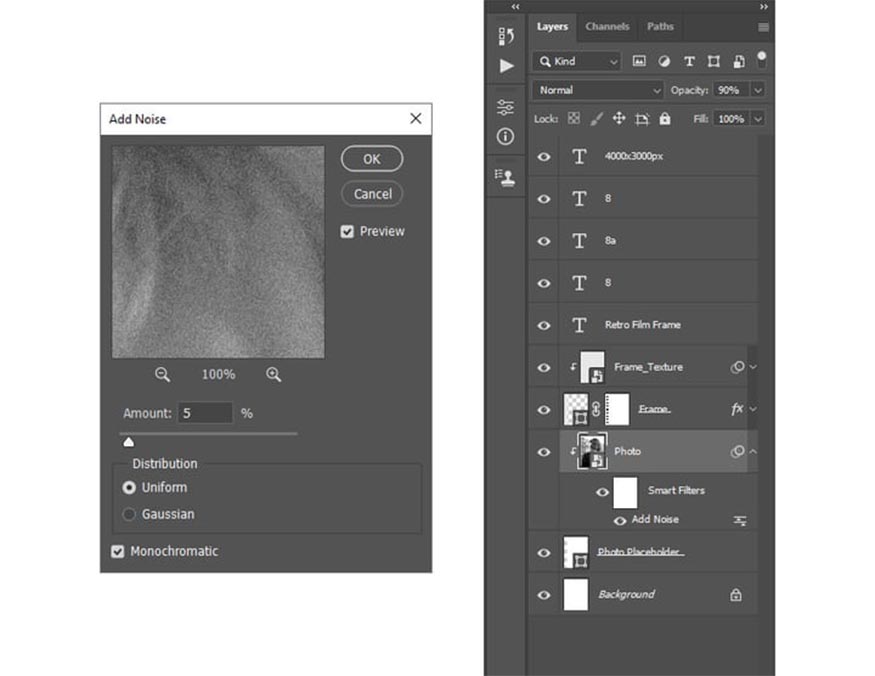
Step 2: Choose File => Place Embedded, select the image from the link and click Place. Adjust the width and height of the image to fit the Photo Placeholder layer. Then choose Ctrl+Alt+G to create a clipping mask and name this layer “Photo”.
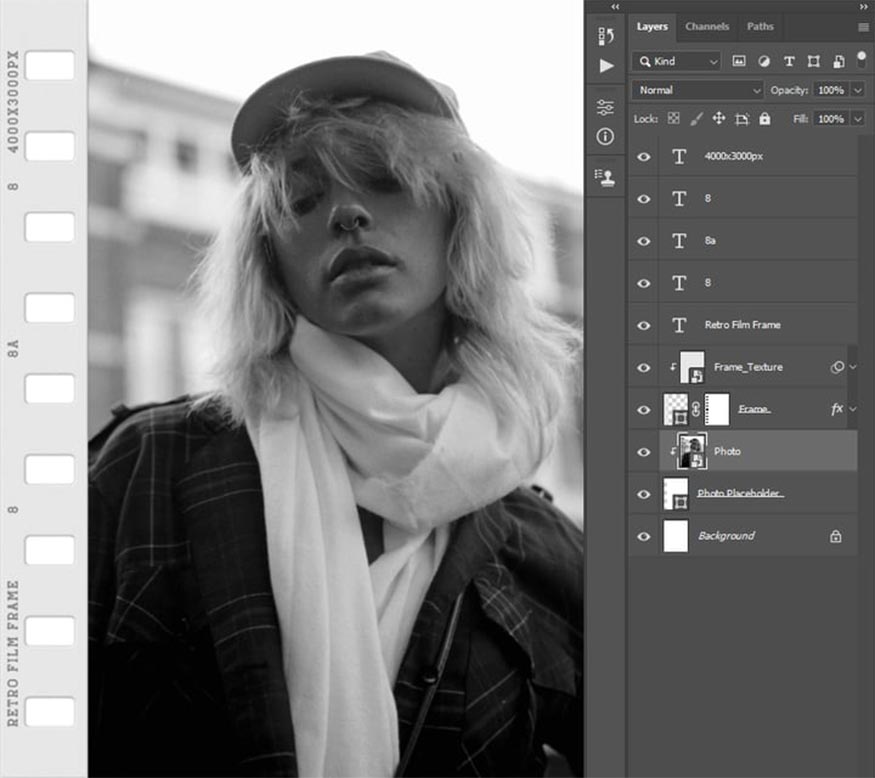
Step 3: Select Filter > Noise > Add Noise and set Amount to 5%, Distribution to Uniform and check Monochromatic. Then set this layer's Opacity to 90%.
5. How to add screen elements
Step 1: Select the image layer in the layers panel. Then select the Line Tool, set the Stroke Solid Color to #000000, Stroke Width to 4px and click anywhere inside the canvas, then drag to create a new layer with a width of 400px.
Press Shift and click on the starting point of the horizontal line to create a vertical line with a height of 400px and take one corner of the border.
Finally, the position is as follows:

Step 2: Press Ctrl+J to duplicate this layer. Then press Ctrl+T to display the options to transform, rotate and position this layer relative to another angle.
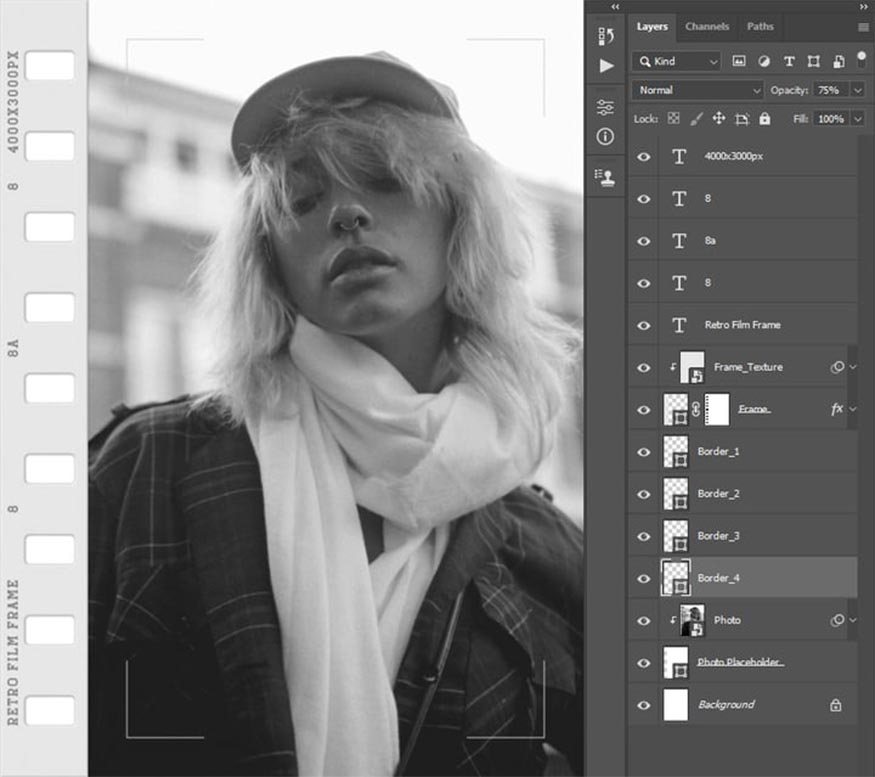
Repeat this process two more times to create a border in each corner of the photo.

Step 3: Name this layer “Border_1” and name the other layers accordingly. Set the Stroke Solid Color of the top 2 borders to #bfbfbf and the bottom 2 borders to #ffffff. Finally, set the opacity of all border layers to 75%.
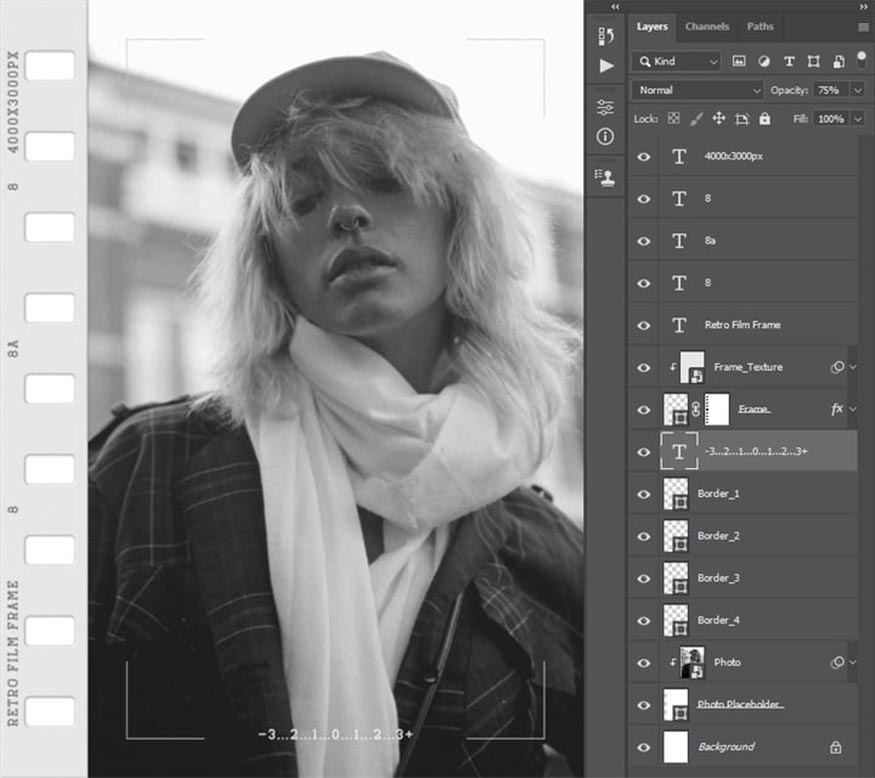
Step 4: Select the Horizontal Type Tool (T), set the Font to Retro Grade, Font Size to 75px, Alignment to Left, Text Color to #ffffff and Tracking to 100.
Then, click anywhere inside the canvas and type text “-3...2...1...0...1...2...3+” or any text you want then position it as shown below. Change the Opacity to 75%.
Step 5: Repeat the steps above to add more text layers.

6. How to add film grain in Photoshop
Step 1: Select the top layer in the layers panel and press Ctrl+shift+N to create a new layer. Then, set the foreground color to #000000 and select Edit => Fill, set Contents to Foreground Color, Mode to Normal, and Opacity to 100%.
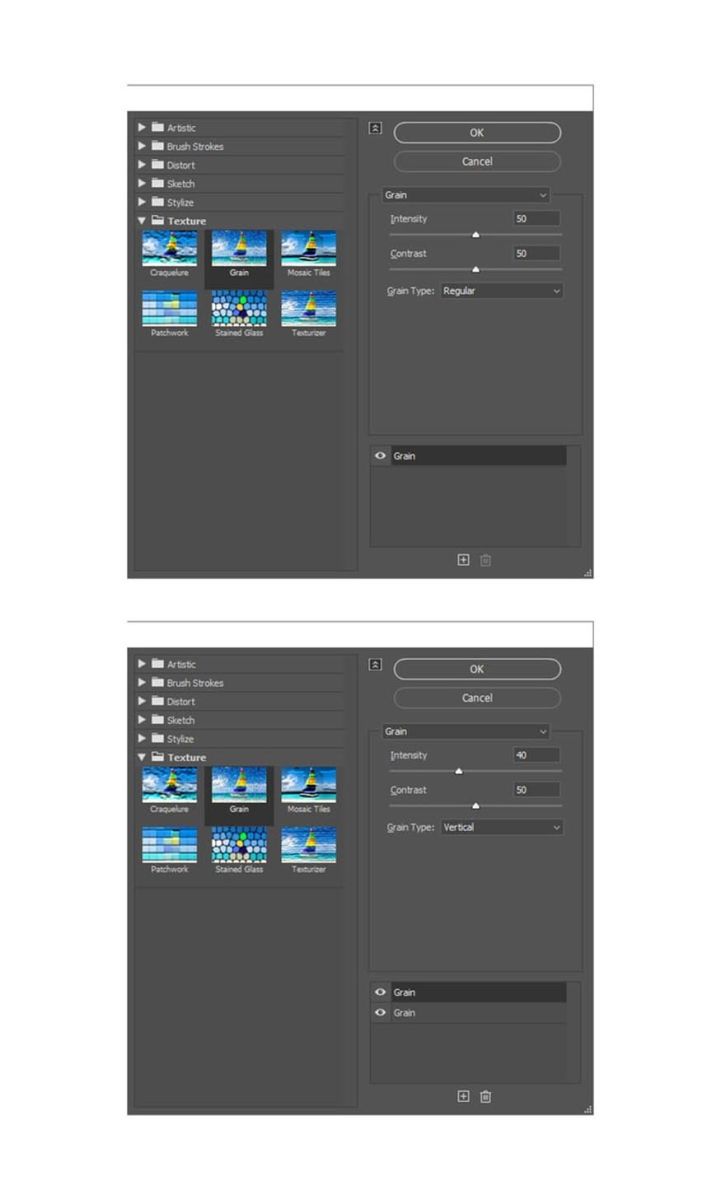
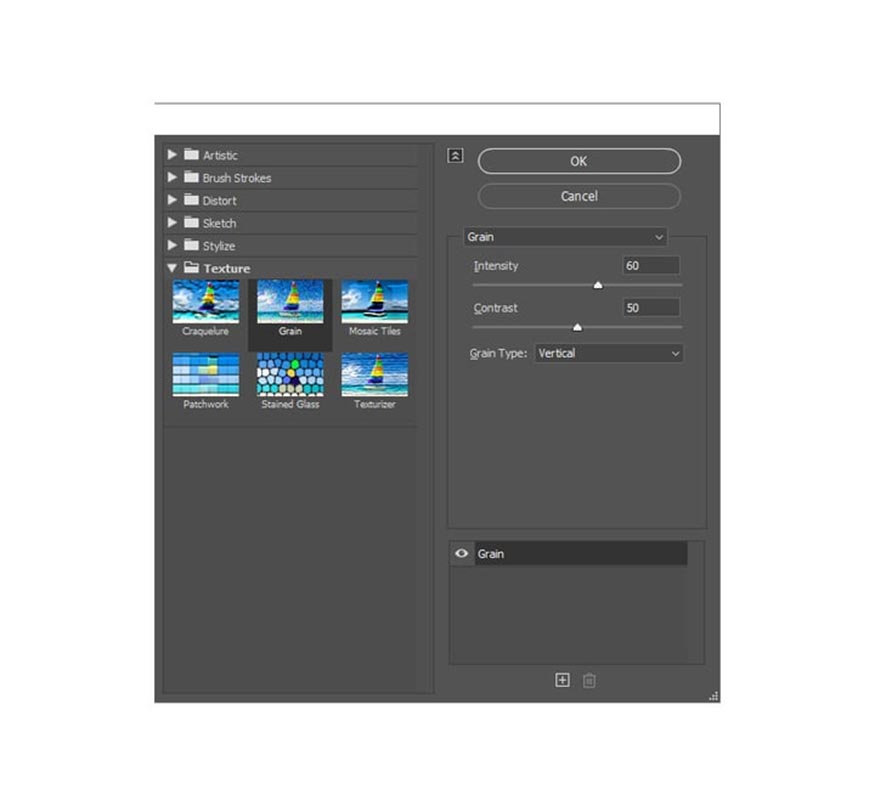
Then select Filter => Filter Gallery => Texture => Grain and set as follows:
- For the first grain filter, set Intensity to 50, Contrast to 50, and Grain Type to Regular.
- For the second filter, set Intensity to 40, Contrast to 50, and Grain Type to Vertical.
Step 2: Select Image => Adjustmentments => Levels and set Shadow input Level to 15, Highlight input Level to 105. Change the Blending Mode of this layer to Screen.

Step 3: Select the layer below then select Ctrl+Shift+N to create a new layer. Set the foreground color to #000000, choose Edit => Fill, then set Contents to Foreground Color, Mode to Normal, and Opacity to 100%.
Continue selecting Filter => Filter Gallery => Texture => Grain, set Intensity to 60, Contrast to 50, and Grain Type to Vertical.
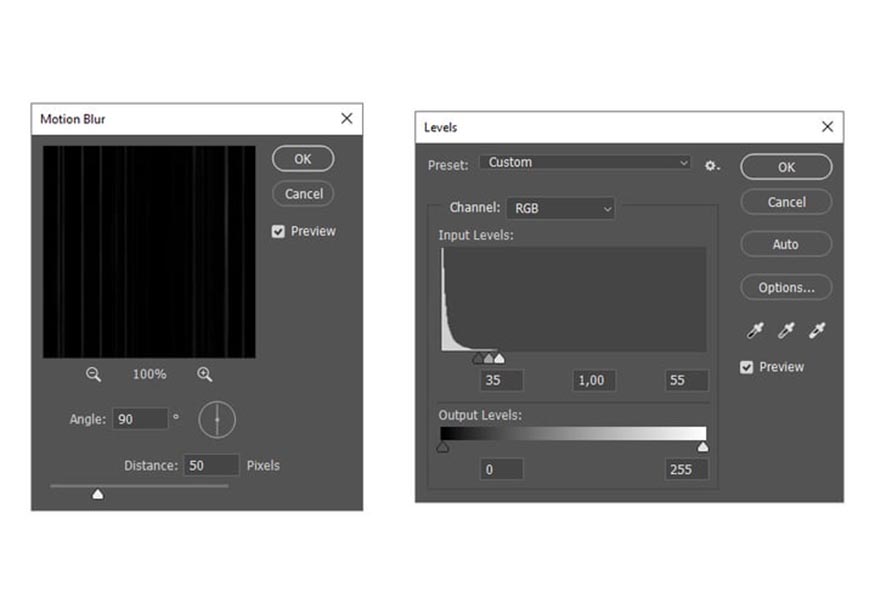
Step 4: Select Filter => Blur => Motion Blur and set Angle to 90° and distance to 50px.
Then, select Layer => Adjustments => Levels and set Shadow Input Level to 35, Highlight Input Level to 55.
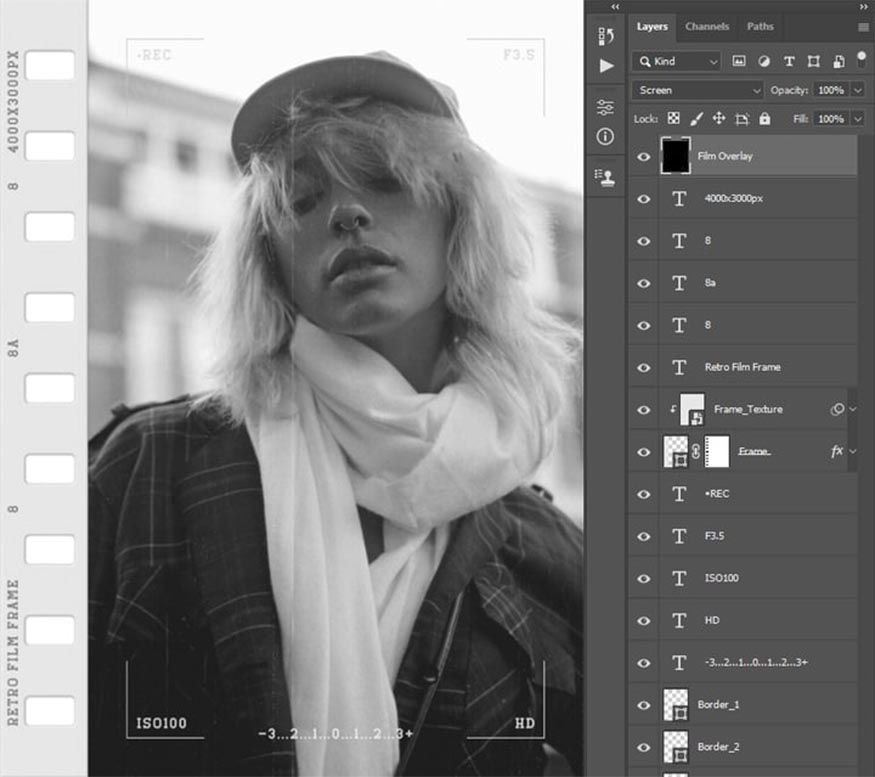
Step 5: Change this layer's Blending Mode to Screen and set the Opacity to 50%. Then, press Ctrl and click on Layer 1 to select both layers at once and press Ctrl-E to merge them into one layer.
Next, press Ctrl-T to bring up the transform options and set the Width and Height to 250%.
Finally, change Blending Mode to Screen and name the new layer “Film Overlay”. You can use the Move Tool (V) to position the layer as desired.
7. How to add paper texture
Step 1: Select File => Place Embedded, select the texture from the link and click Place. Adjust the Width and Height of the image so that the paper covers the canvas.
Then, change this layer's Blending Mode to Screen and name the layer “Texture”.
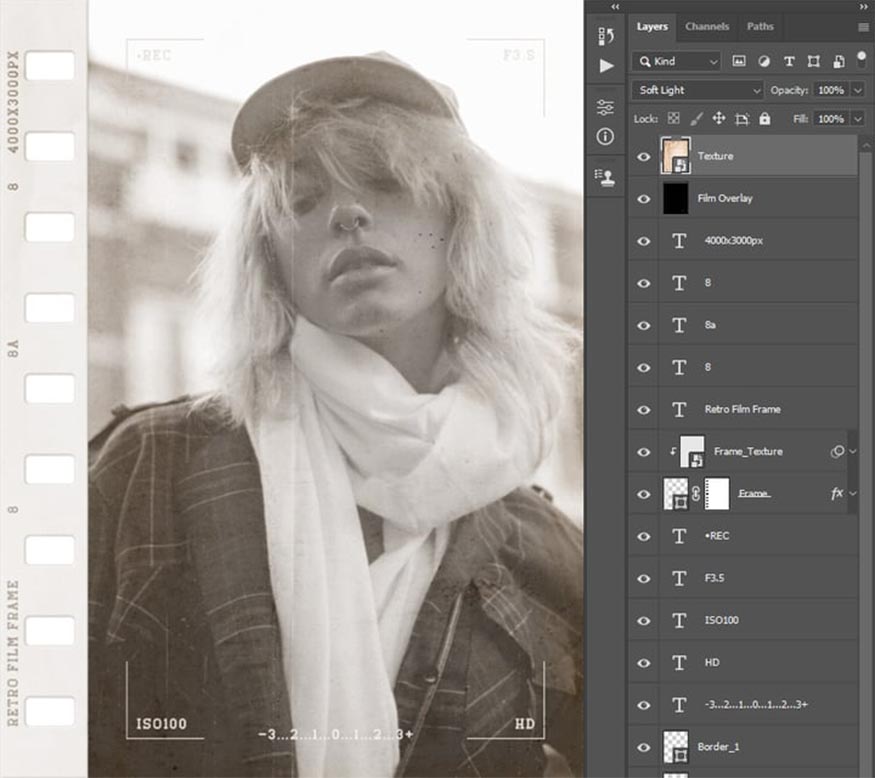
Step 2: Double-click this layer and in the newly opened file, press Ctrl-Shift-U to desaturate this layer and Ctrl-S to save the changes. Close this file and return to the original file. Then, right click on the Texture layer and make the settings as shown below:
So, above are all the ways to create classic movie posters in Photoshop that SaDesign wants to share with readers. Hope this article will help you in the process of editing your poster.
- How To Create a Vintage Movie Poster in Photoshop
- How To Create Promotional Posters in Photoshop


VIP Products


Best Selling Products
Windows 10 & 11 Pro Key
36 USD
Copyright Adobe Lightroom Account
59 USD
Upgrade genuine Capture One account
120 USD
ChatGPT Plus Account (GPT-4)
16 USD
Plugin Retouch4me
69 USD
Autodesk All App Account Copyright
120 USD
Genuine Cheap Canva Pro
39 USD
Upgrade Genuine Office 365
49 USD
Genuine Adobe Illustrator account
99 USD
MidJourney Account
29 USD
Upgrade Duolingo Super
29 USD
Adobe Premiere Pro Account
99 USD
Freepik Premium Account
59 USD
Adobe Photoshop Copyright - Full App
120 USD
Capcut Pro 1 Year
39 USD