Best Selling Products

Upgrade Genuine Office 365
49 USD

Plugin Retouch4me
69 USD

Freepik Premium Account
59 USD

Upgrade genuine Capture One account
120 USD

MidJourney Account
29 USD

Genuine Adobe Illustrator account
99 USD

Capcut Pro 1 Year
39 USD

Adobe Premiere Pro Account
99 USD

Adobe Photoshop Copyright - Full App
120 USD

Autodesk All App Account Copyright
120 USD

Genuine Cheap Canva Pro
39 USD

ChatGPT Plus Account (GPT-4)
16 USD

Copyright Adobe Lightroom Account
59 USD

Upgrade Duolingo Super
29 USD

Windows 10 & 11 Pro Key
36 USD
How to create a transparent background in Photoshop
Nội dung
- 1. How to create a transparent background in Photoshop using Blend If
- 2. How to create a transparent background in Photoshop using the color range
- 3. How to create a transparent background in Photoshop using Select and Mask
- 4. How to create a transparent background in Photoshop using Pen Tool & Refine Edge
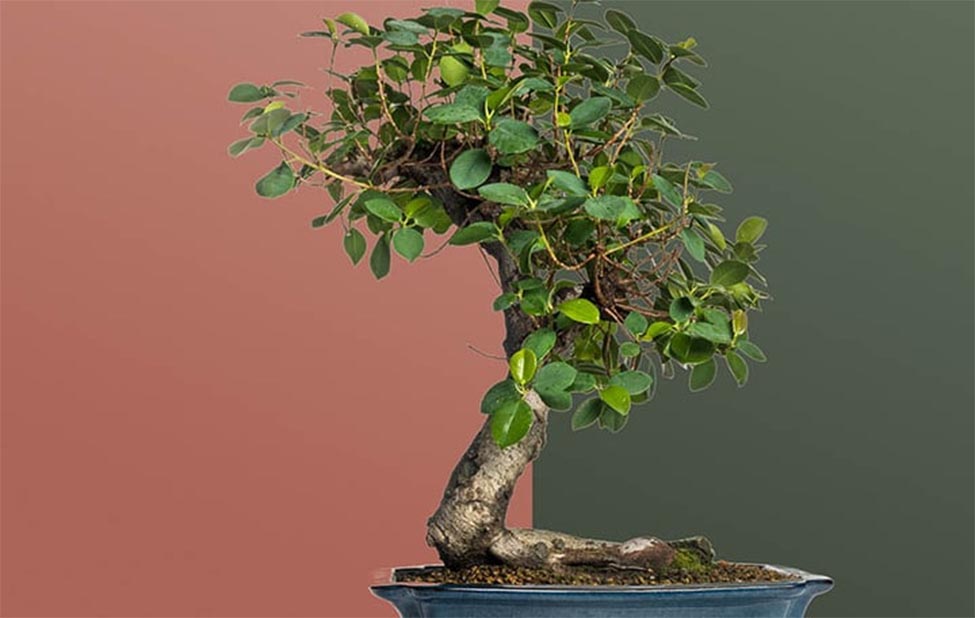
How to create a transparent background in Photoshop is an issue that many people are interested in because this is one of the tricks frequently used to create realistic and beautiful artistic photos. . This tool has many diverse and rich choices of unique, beautiful transparency effects. Below SaDesign will share with readers how to create a transparent background in Photoshop simply and easily.
How to create a transparent background in Photoshop is an issue that many people are interested in because this is one of the tricks frequently used to create realistic and beautiful artistic photos. . This tool has many diverse and rich choices of unique, beautiful transparency effects. Below SaDesign will share with readers how to create a transparent background in Photoshop simply and easily.

1. How to create a transparent background in Photoshop using Blend If
Step 1: Double click on the layer you want to extract and at the bottom of the Layer Style panel, you will see Blend If. Here you will see this layer's slider.
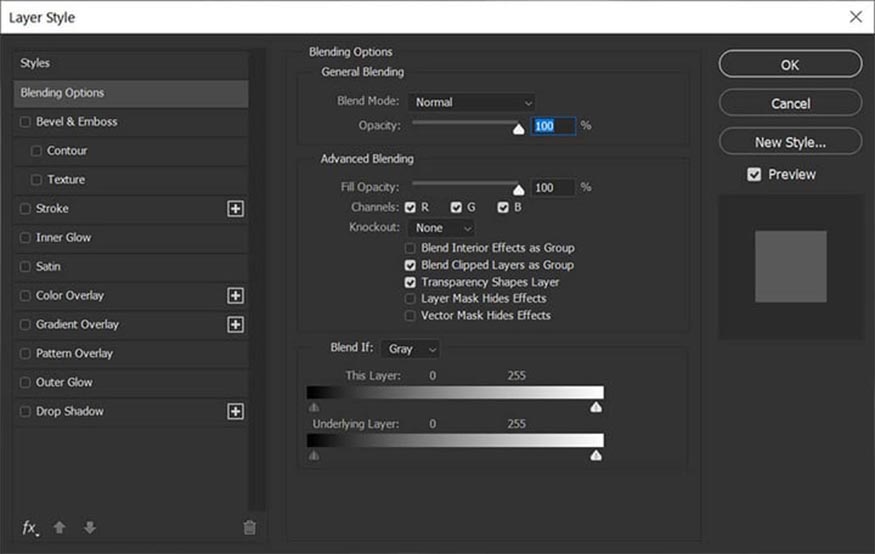
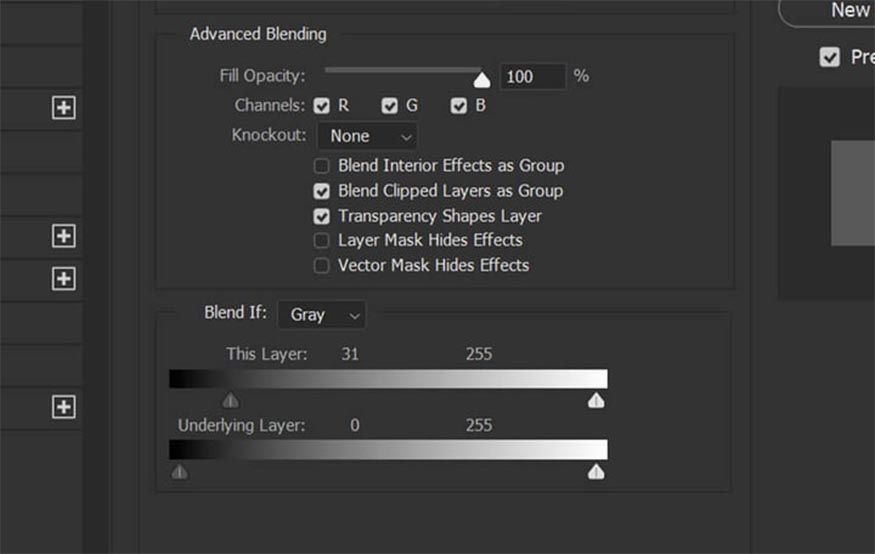
Step 2: BlendIf works by choosing which range of values should be blended, rendering any part of the image with those values transparent. You select a value by sliding the toggle buttons. The left toggle will target better values, while the right toggle will target brighter values. You slide the left switch in and remove the black background.
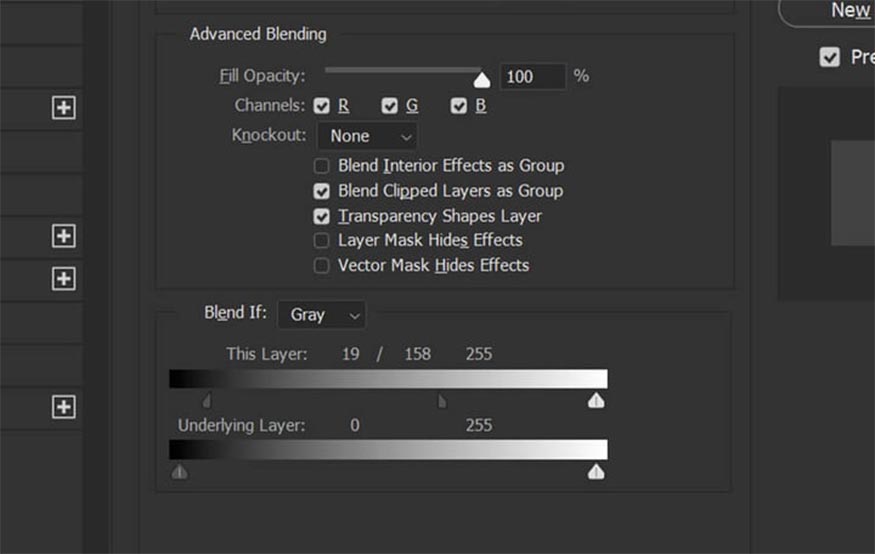
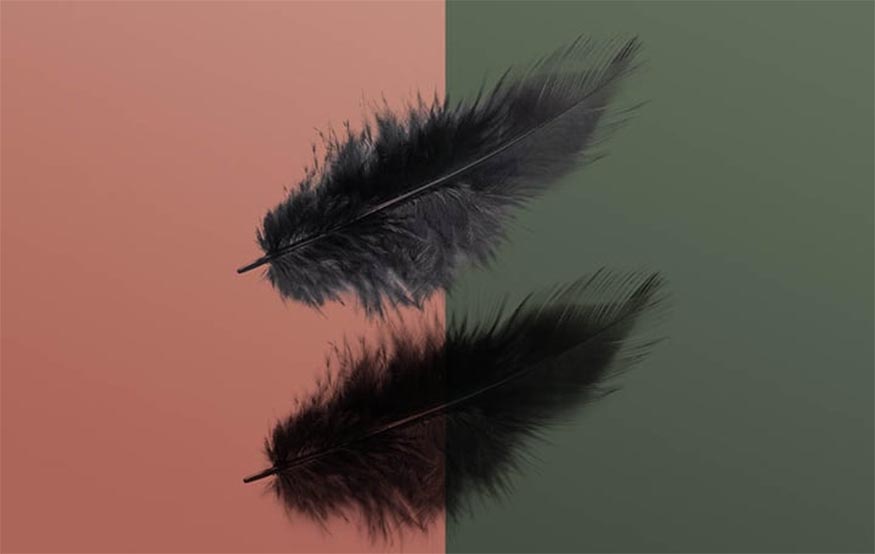
Step 3: Now, the background has disappeared, but our photo is quite jagged and unattractive. To create a smoother and more beautiful transition, hold Alt and separate the transition buttons. Dragging the right switch to the right creates softer and more refined edges.
The distance you drag the toggle button will be changed each time. BlendIf is a very intuitive tool with no automatic settings. You just need to slide until it feels right and stop.
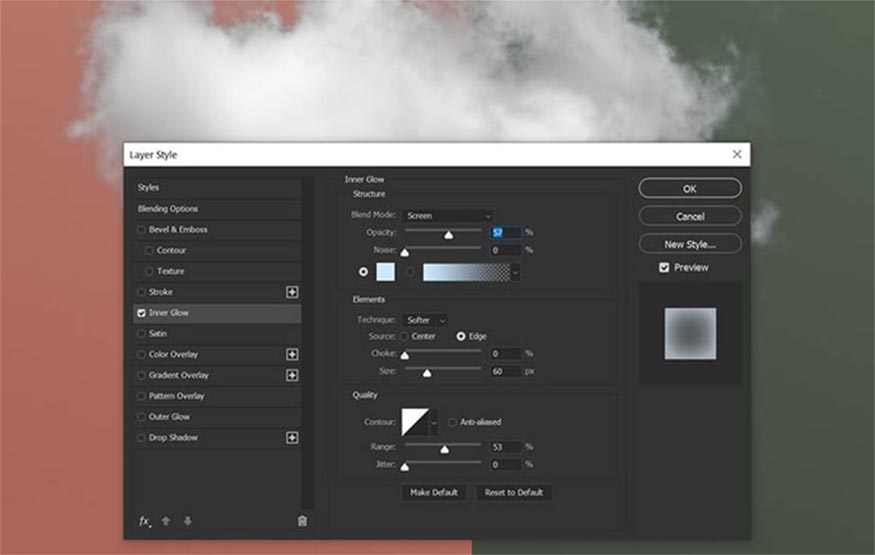
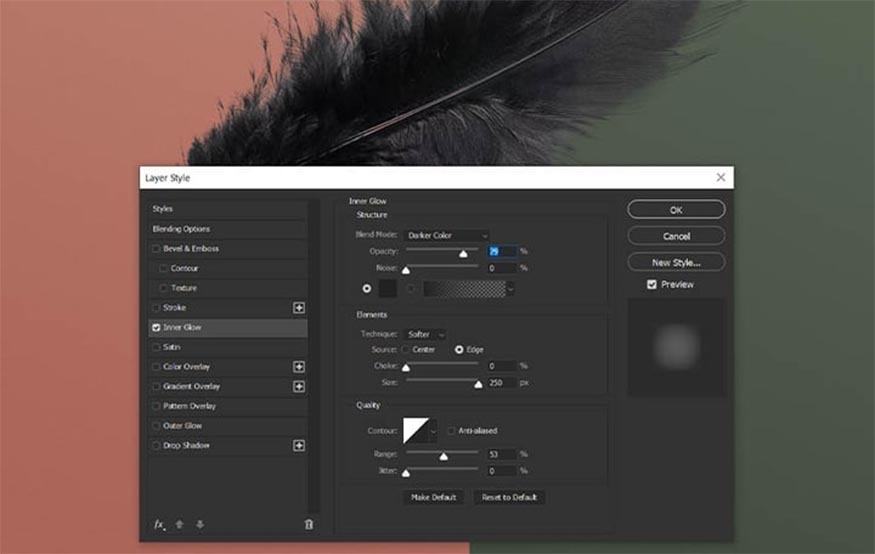
Step 4: At this point, the photo still has a lot of edges left. And to fix this, add the Inner Glow layer. However, if you try to correct this, the light will appear at the edges of the photo.
You can choose: Right click => Convert to Smart Object.
Step 5: And now we can add Inner Glow to remove the edges.
Step 6: You can follow the same steps with the image on a white background, instead to adjust the toggles on the right. For this layer, we still use Inner Glow to remove any remaining white background. Note that you need to set the blend mode and change the color to darker and gray.
Step 7: Actually, you can choose to use Blend If or Blend Modes depending on your preference. Blend If will give you a more sturdy and solid feel, while Blend Modes will give you a more fuzzy and softer feel. You should also note that BlendIf works with values, so the image does not need to have a black or white background. It simply lies on a brighter or darker background than the object and has a noticeably different value.

2. How to create a transparent background in Photoshop using the color range
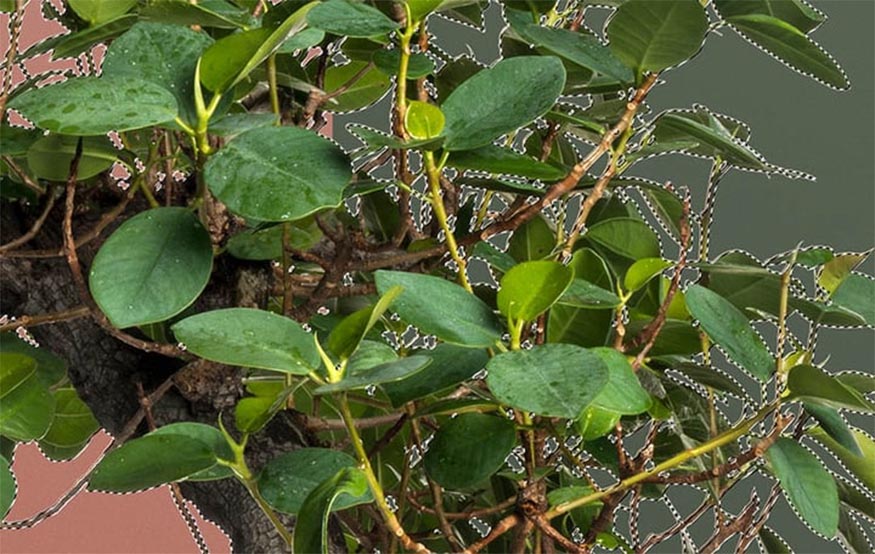
Step 1: One of the ways to create a transparent background in Photoshop that many people apply today is choosing a color range. This is often suitable for subjects on studio backgrounds with tonal ranges that are too wide for Blend If. Unlike Blend If, Select Color Range will pay more attention to color.
Go to Select => Color Range to open the Color Range selection panel.
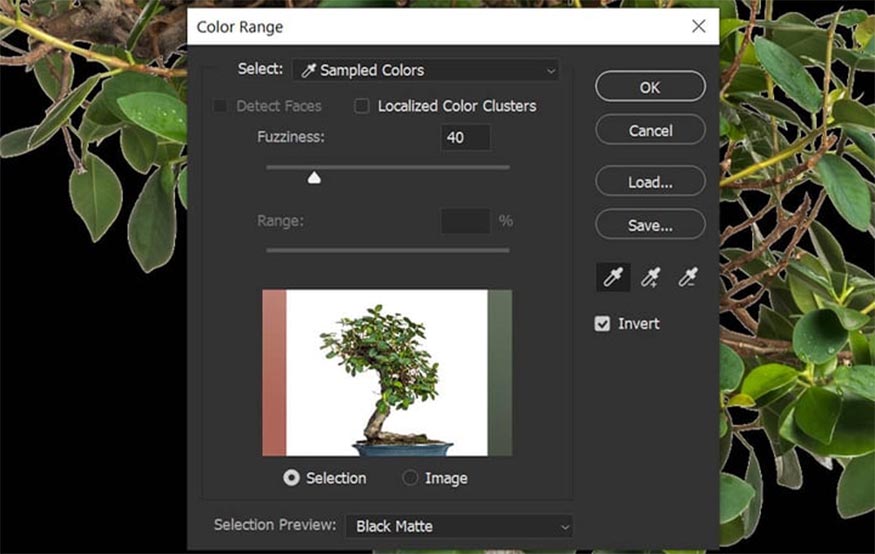
Step 2: Set some settings:
-
Fuzziness: 40
-
Selection Preview: Black Matte
-
Invert: Checked
You can click to select the color you want Photoshop to use - in this case a white background is used. If your background has shadows or many similar color tones, you can hold down the Shift key to add color to the selection, then select OK if you are satisfied.
Step 3: Add Layer Mask for the photo.
Step 4: Hold down the Ctrl key and click on the layer mask to activate the selection. Next, select Select => Modify => Contract and Contract by 2. If 2 is too strong, you can change it to 1.
Step 5: Go to Select => Inverse to invert the selection. Continue choosing Edit => Fill to fill the selection with black.
If you feel the edges of the layer mask are a bit rough, you can open the Properties panel and add a Feather of size 0.4px.
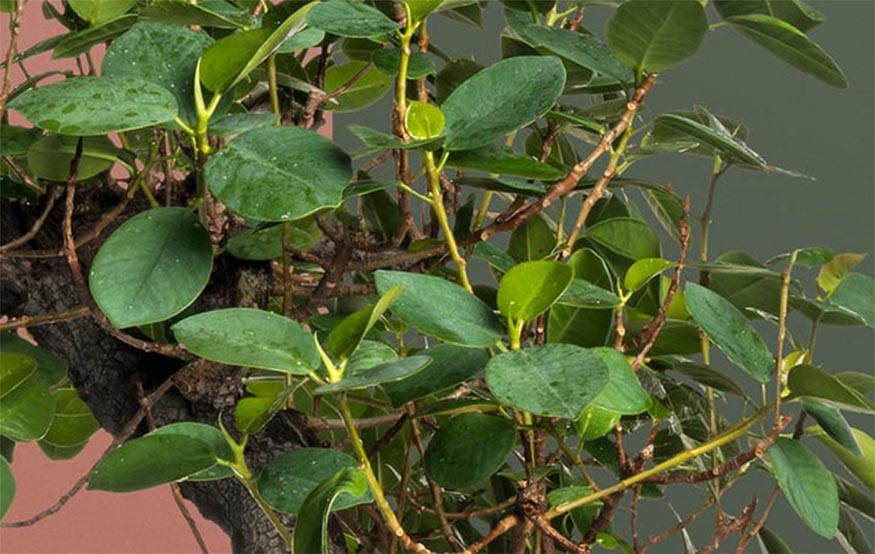
Step 6: Finally, if you see any areas that shouldn't have covered, use a hard round Brush set to white and select that area. This will help the spots brighter on a white background.

3. How to create a transparent background in Photoshop using Select and Mask
Step 1: First, you need to select your subject by selecting Select Subject and add a layer mask.
Step 2: Go to Select and Mask by pressing the button in the Options bar above or by double-clicking on the Layer Mask => Select and Mask.
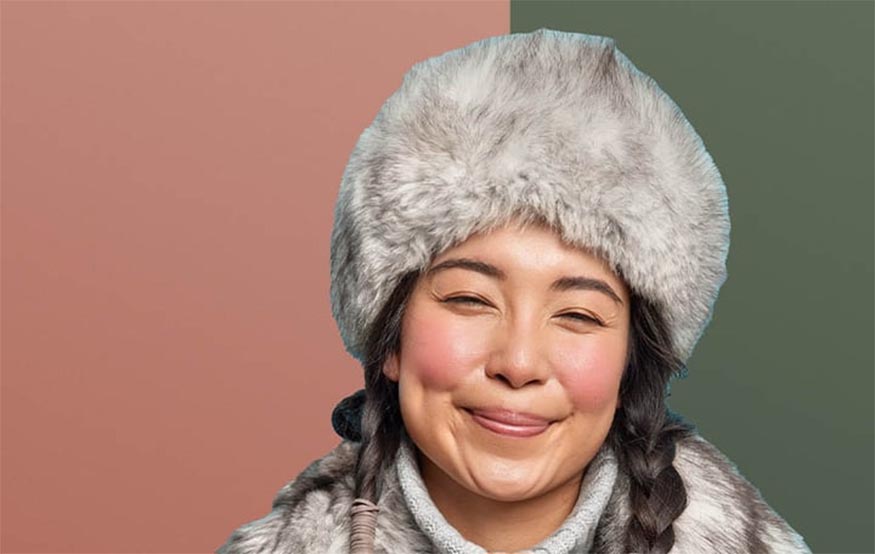
Step 3: Select Check Smart Radius then check the Radius to 4px. Additionally, you also need to make sure the Refine Edge brush is active and located on the left side. Click Refine Hair in the upper options bar to refine the selection around.
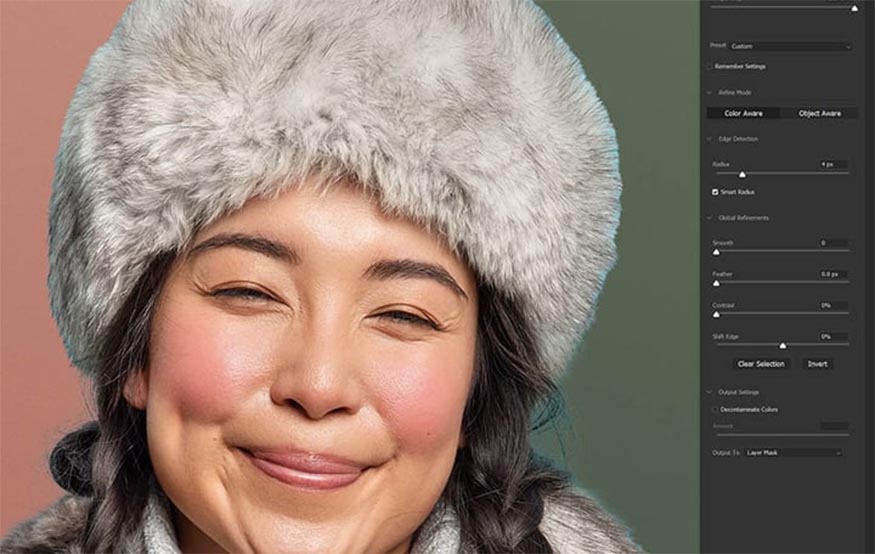
Step 4: To process the fur, we use the Refine Edge brush tool. Click and drag the tool across the edges of the furs. Refine Edge will start to pick up the fur detail but will leave the background blue.
If Refine Edge is having difficulty separating the subject from the background, you can switch to the Object Aware option in the properties panel on the right.

Step 5: Select Select and Mask to make further adjustments. If you mess things up in your image, you can still choose Cancel.
There are a few other ways we can deal with leftover edges in Select and mask. First, you set Shift Edge to -10 to move the edge inward.
Shift Edge work well on objects or surfaces without texture, but it doesn’t work with fur and hair.
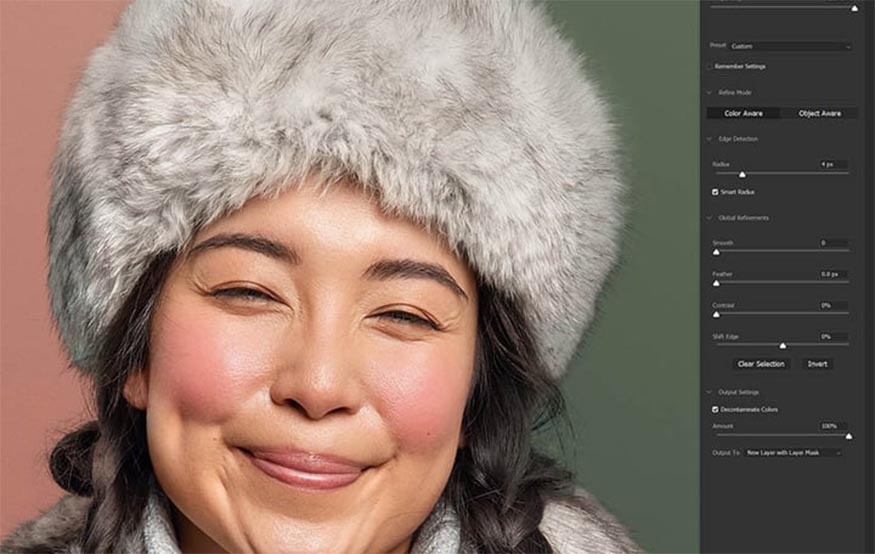
So instead, you can check the Decontaminate Colors in Output Setting. Photoshop will bring the color from the selected object to that edge.
Step 6: Set the Amount to 100 and change the Output to New Layer with Layer Mask.
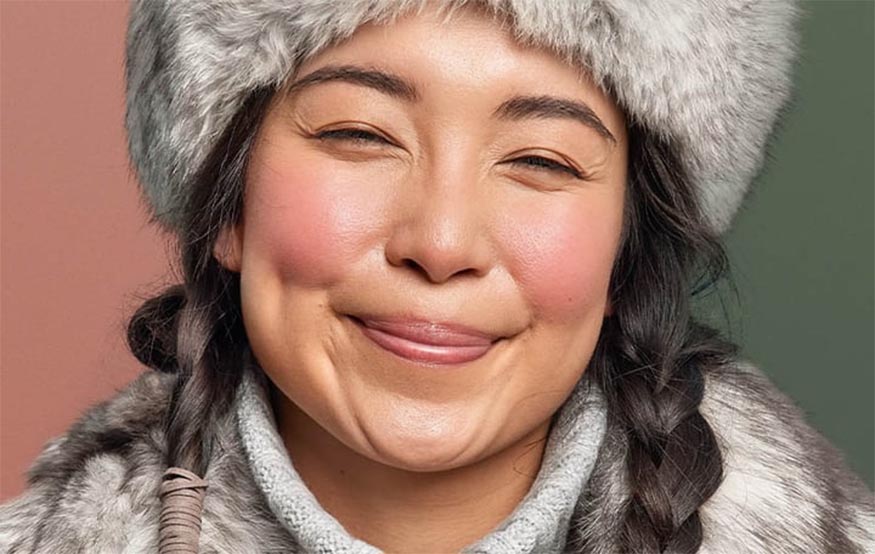
Step 7: Now, you need to unhide the original layer and layer mask. Delete the layer mask in the decontamination color layer. Then, select Clip layer Decontamate Color to the original layer and layer mask.
Now, we can add a new layer mask to the Decontamated layer and mask out all the areas that don't look good. In this case, the area around the subject's hair.
Step 8: If you still have some of that color, you can remove it by painting on a Clipped layer set to Blend Modes.
Use the Eyedropper tool to select a color close to the area you are drawing. The Blend Mode will depend on the surface you are drawing on and what needs to be hidden.
Below is a general guide on when to use Blend Mode, remember that you can always use them separately or together.
- Color: Used to color, allowing the edge to match the hair color
- Hue: Used as a substitute for Color.
- Multiphy: Used to darken lighter edges.
- Darken Color: Used as an alternative to Multiphy.
- Normal: Use Normal when the painted edges have low detail and nothing is lost because the color is flat.
- Lighten: Lighten the hair, making the details brighter than the edges.
- Screen: Use Screen as a replacement for Lighten.
4. How to create a transparent background in Photoshop using Pen Tool & Refine Edge
Step 1: Pen Tool & Refine Edge is a duo that helps remove backgrounds from both people and objects, featuring a combination of smooth and textured edges.
Select the Pen Tool and make sure it is set to Path.
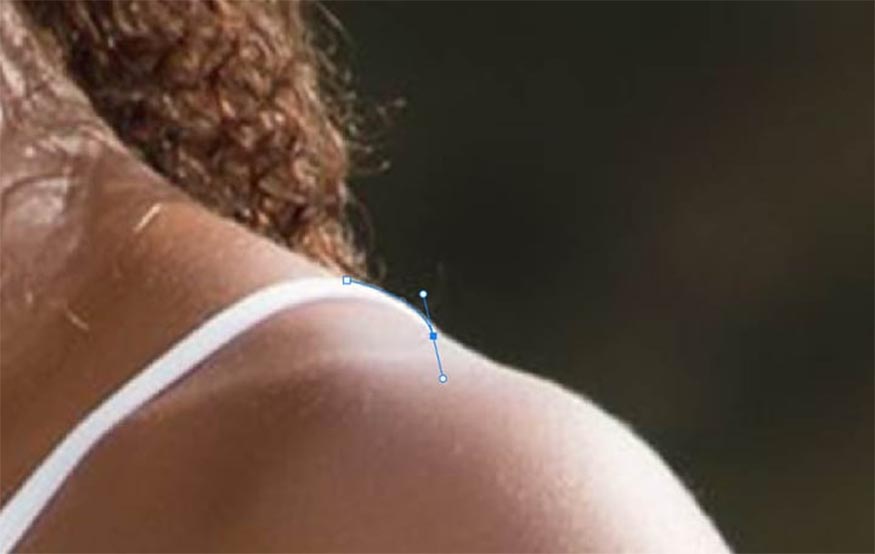
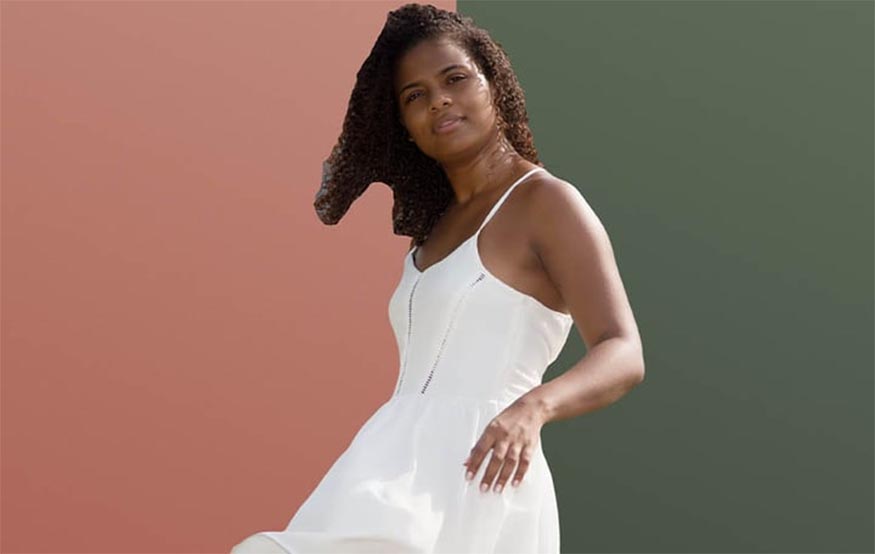
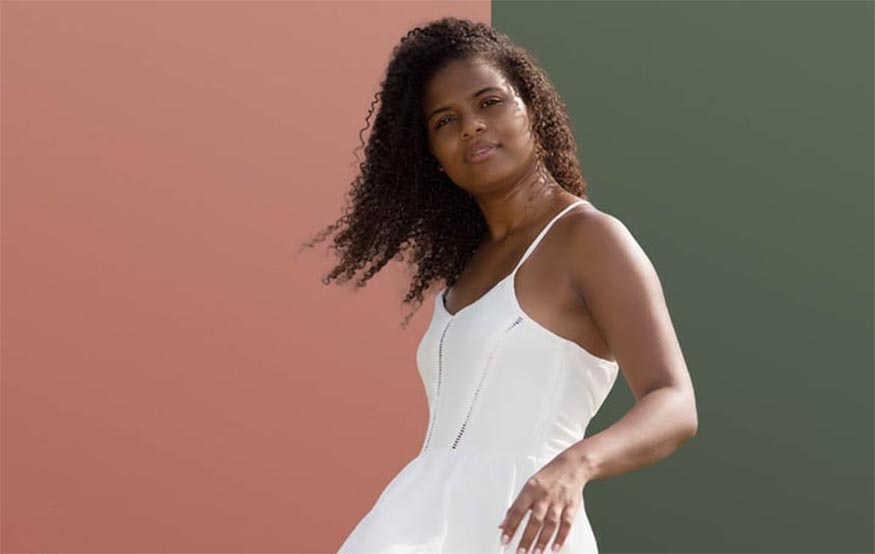
Step 2: Click to place the Anchor Point on the smooth part of the object. SaDesign will start just below the girl's hair, right at the strap of her dress.
Click and hold to place the second Anchor Point. Want to place the Anchor Point where the curve starts and ends. Here, the arc of her strap ends, which is where the spike is located.
Before leaving of the anchor point, drag to curve the path, let it follow the edge that you're trying to separate.
Step 3: Hold Alt to adjust Path's Controller Points. The controller will help guide the path from one anchor to another. You can modify these points at any time. Then, place another anchor down on the edge of the subject.
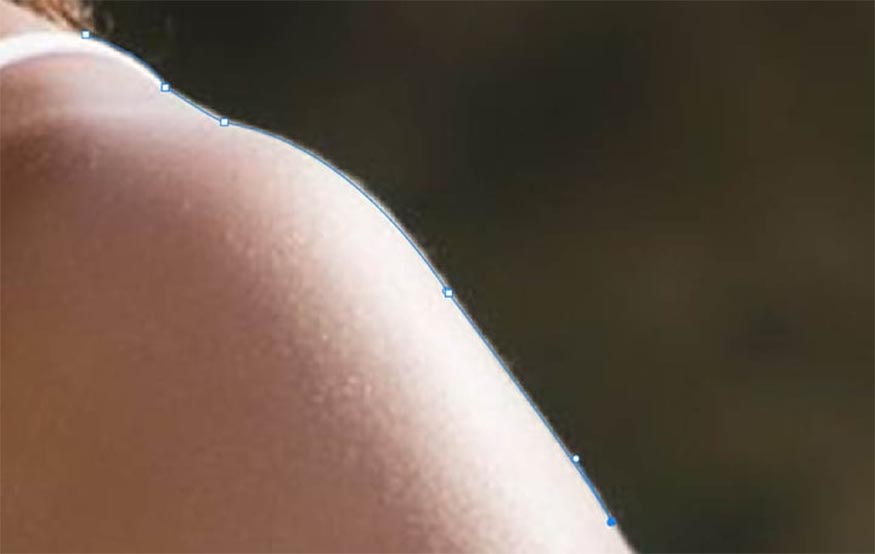
Step 4: The less you place the anchors, the smoother the egdes are. You need to use the Pen Tool a lot because it gives you beautiful and sharper photos. Repeat those steps until you have created a connected path around the subject but ignoring the hair.
Step 5: When the path ends, you can add a layer mask on the Canvas, right click => Fill Path, fill the path with black.
Step 6: You should add a 0.4px Feather to your layer mask by using the Properties panel.
Then right click => Convert to Smart Object. This will help you safely remove the subject's hair without damaging the body's mask.
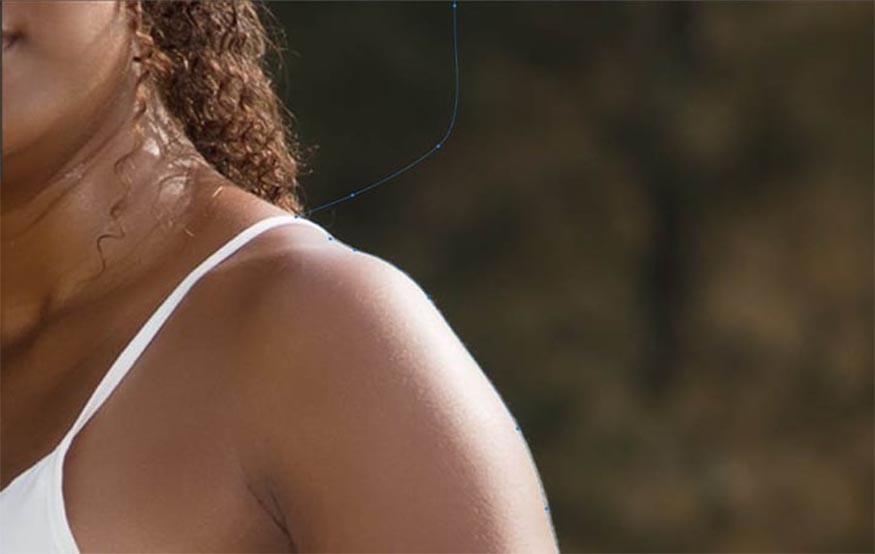
Step 7: Use the Magnetic Lasso tool or the Quick Select tool to create a selection around the subject's hair. Add a new Layer Mask to the subject.
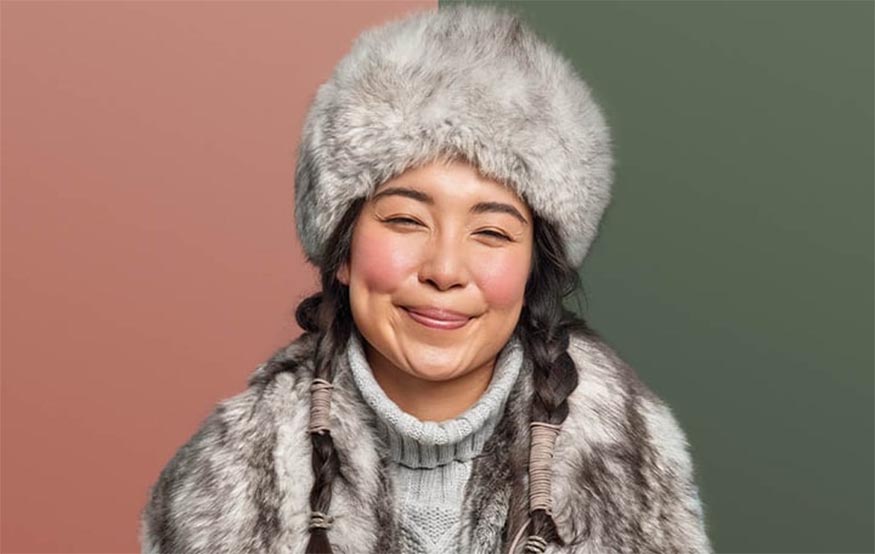
Step 8: Finally, go to Select and Mask and use the same Refine Edge techniques as above.
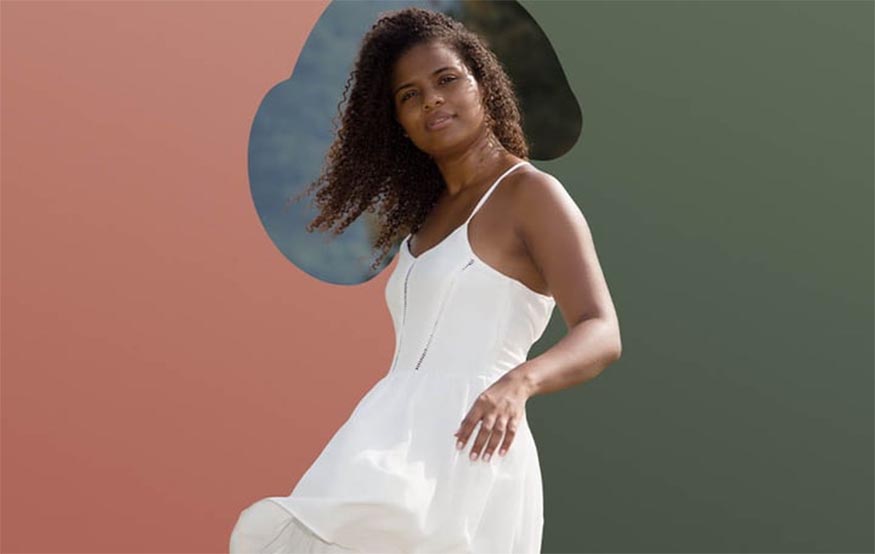
Above are some ways to create transparent backgrounds in Photoshop that SaDesign wants to share with readers. Hopefully this article will help readers in photo editing.


VIP Products


Best Selling Products
Upgrade Genuine Office 365
49 USD
Plugin Retouch4me
69 USD
Freepik Premium Account
59 USD
Upgrade genuine Capture One account
120 USD
MidJourney Account
29 USD
Genuine Adobe Illustrator account
99 USD
Capcut Pro 1 Year
39 USD
Adobe Premiere Pro Account
99 USD
Adobe Photoshop Copyright - Full App
120 USD
Autodesk All App Account Copyright
120 USD
Genuine Cheap Canva Pro
39 USD
ChatGPT Plus Account (GPT-4)
16 USD
Copyright Adobe Lightroom Account
59 USD
Upgrade Duolingo Super
29 USD
Windows 10 & 11 Pro Key
36 USD