Best Selling Products

Genuine Adobe Illustrator account
99 USD

MidJourney Account
29 USD

Autodesk All App Account Copyright
120 USD

Genuine Cheap Canva Pro
39 USD

Windows 10 & 11 Pro Key
36 USD

Plugin Retouch4me
69 USD

Capcut Pro 1 Year
39 USD

Upgrade genuine Capture One account
120 USD

Adobe Photoshop Copyright - Full App
120 USD

ChatGPT Plus Account (GPT-4)
16 USD

Copyright Adobe Lightroom Account
59 USD

Adobe Premiere Pro Account
99 USD

Freepik Premium Account
59 USD

Upgrade Genuine Office 365
49 USD

Upgrade Duolingo Super
29 USD
Instructions for creating a mockup on a black hoodie in Photoshop
Nội dung
Mockups are images that describe designs commonly used in the fashion field. If you are interested in how to create a mockup on a black Hoodie in Photoshop, let's find out the details with SaDesign in the article below!
Mockups are images that describe designs commonly used in the fashion field. If you are interested in how to create a mockup on a black Hoodie in Photoshop, let's find out the details with SaDesign in the article below!

1. What is a mockup?
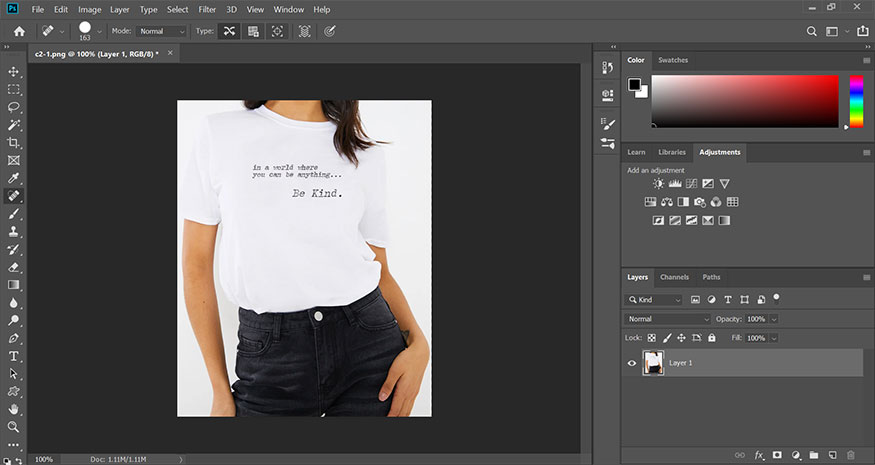
A mockup is a visualization or design of an app, web page, or product that illustrates what the final outcome might look like. In user experience design, mockups define the purpose and intent of a design, often including visual elements such as structure, layout, color schemes, typography, and editorial copy.
Mockups are considered an effective method to save time, effort, and money for design testing. You can completely repair and change the mockup easily.
Mockup designs help customers see realistic images of the product. Usually, mockup models are very carefully designed to create an impressive and professional look.
2. How to create a black hoodie mockup
To create a mockup, we first need to start creating a hoodie mockup. So you need to create yourself a 3D model of the hoodie.
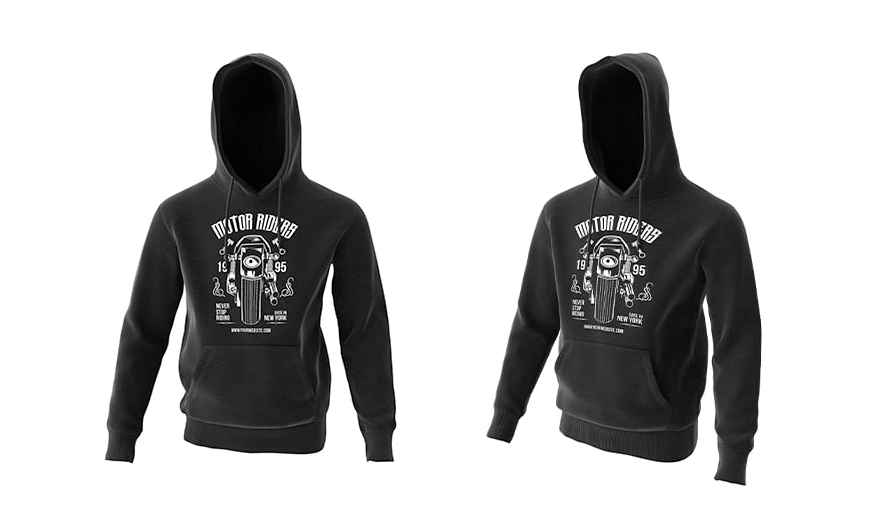
3. Instructions for creating a perspective of a black hoodie model in front
To create a perspective of a black hoodie model in front, follow these basic steps:
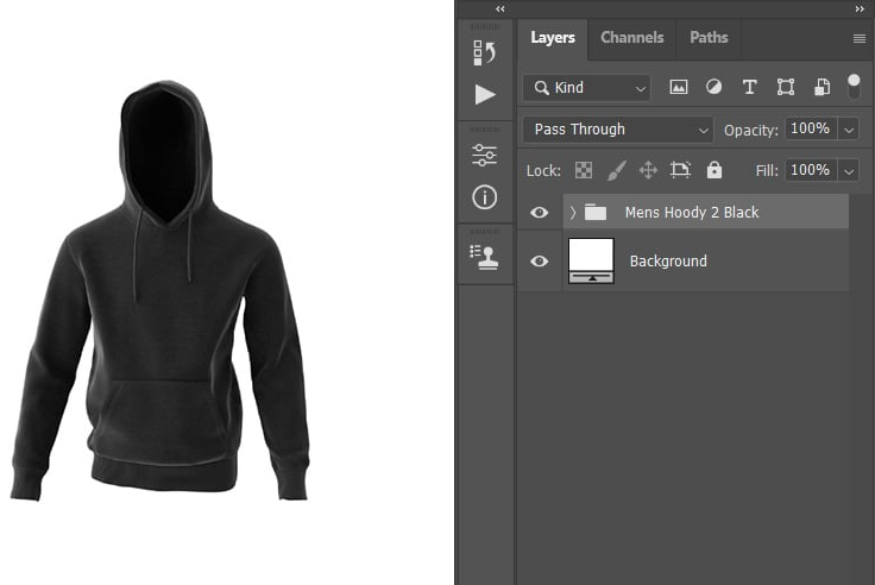
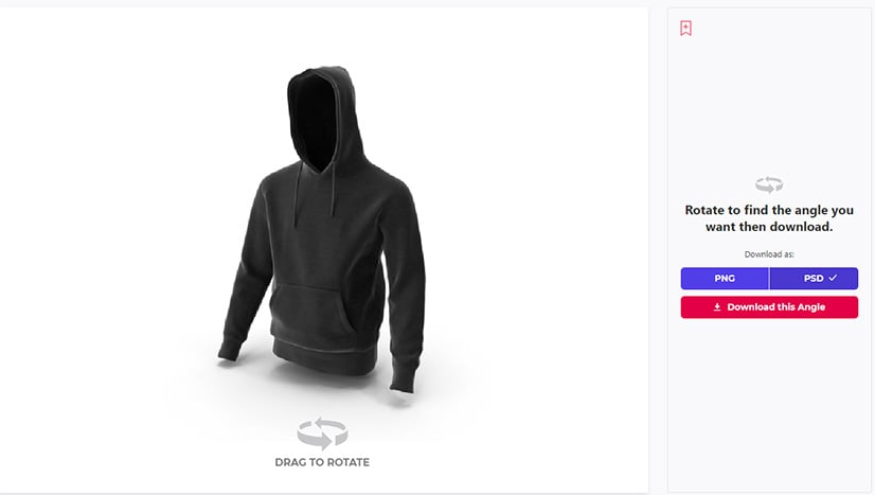
- Step 1: Create a black hoodie model in front by clicking View 360 Render, then adjust the forward view angle. Set Download as to PSD, click Download this Angle.
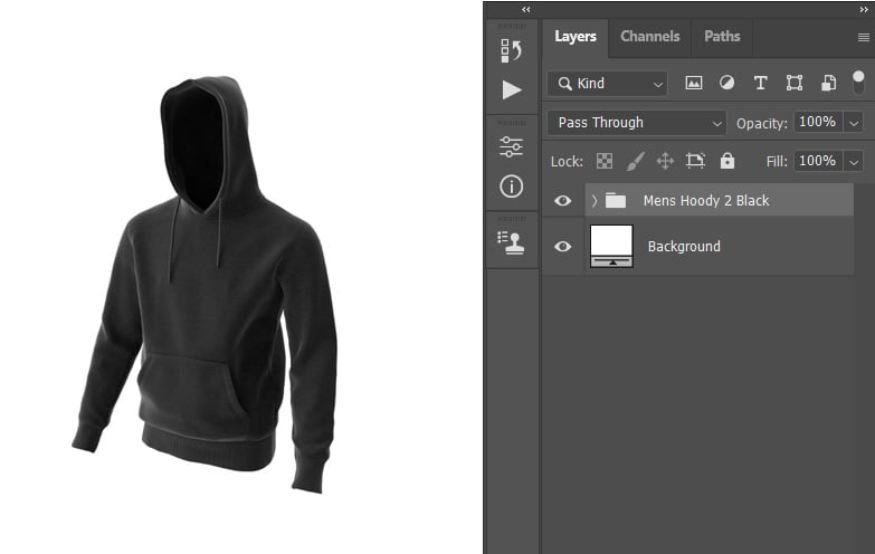
- Step 2: After getting the 3D model, go to File => Open => select the PSD file you just downloaded => Open => select the Shadows layer.
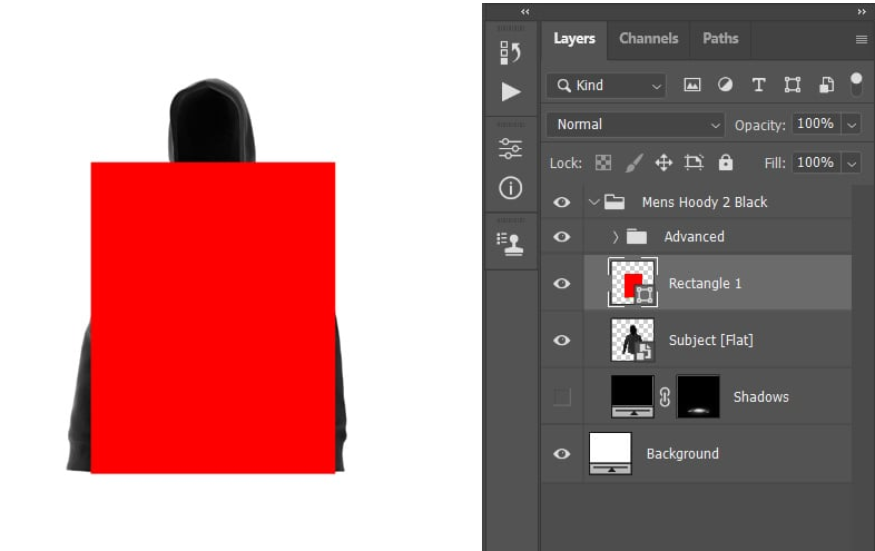
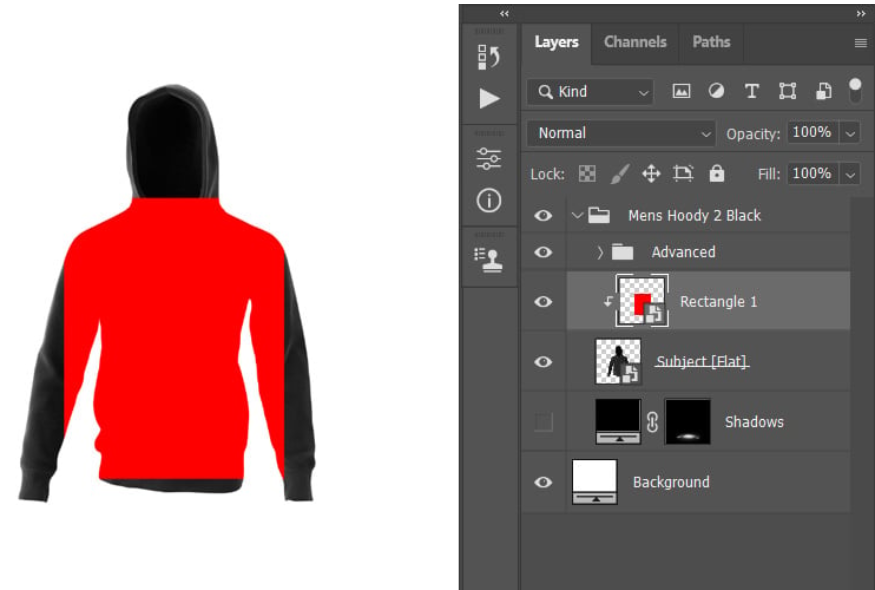
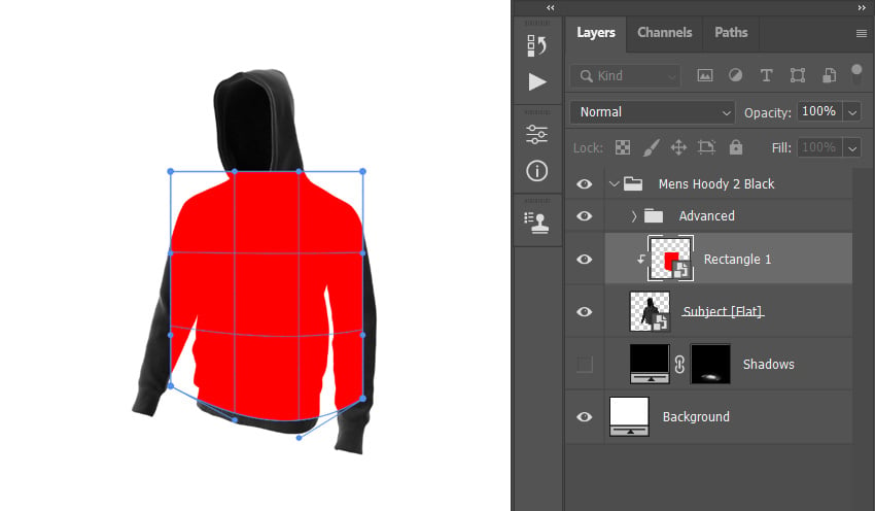
- Step 3: Click on the Subject layer [Flat] => change the foreground color to color code #ff0000. Click on the Rectangle Tool (U) => click inside the canvas then drag to create a new rectangular layer with dimensions that cover the front of the hoodie.
![Click on the Subject layer [Flat]](/pictures/picfullsizes/2024/06/23/create-a-mockup-on-a-black-hoodie-in-photoshop-4.png)
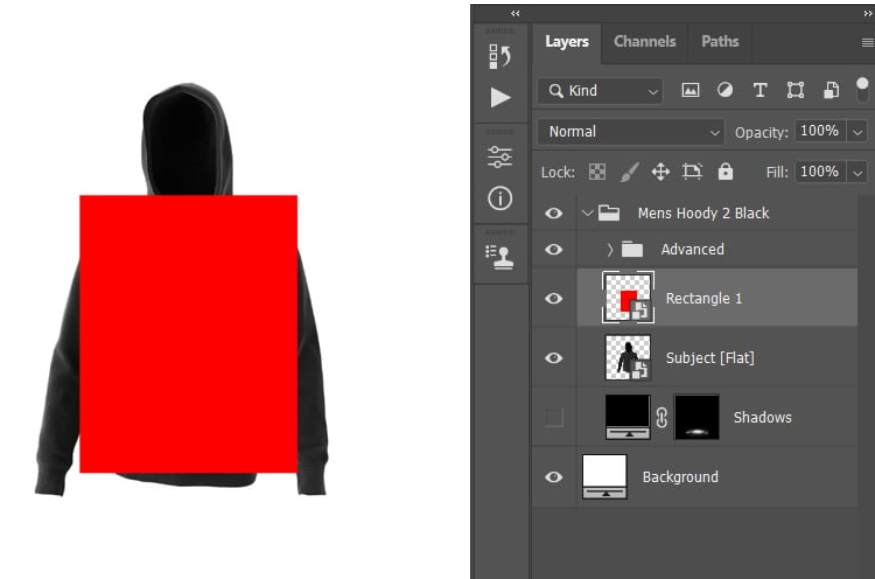
- Step 4: Press Ctrl-T to convert this layer, set the parameters for Width and Height to 125%.
- Step 5: Right click on this layer and select Convert to Smart Object. Press the keyboard shortcut Ctrl-T to transform the layer, setting Width and Height to 85%.
- Step 6: Press the shortcut Ctrl-Alt-G to create a clipping mask.
- Step 7: Press Ctrl-T to transform the layer, you can right-click anywhere inside the transform box, then click Warp and warp layer as you see in the image below:

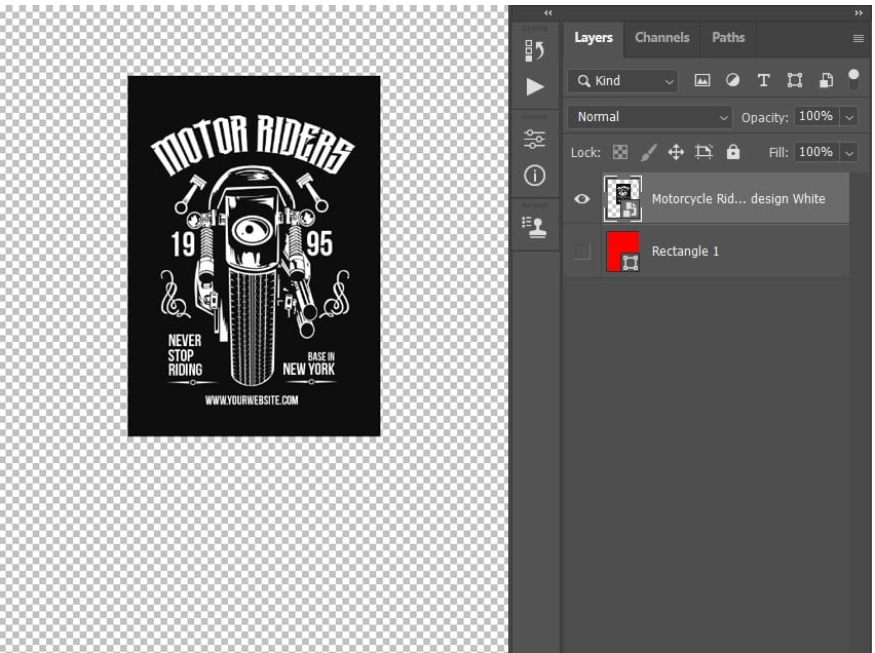
- Step 8: Double click on the thumbnail of this layer, in the newly opened file you need to hide the Rectangle 1 layer. Go to File => Place Embedded => select the image from the link => select Place. Continue transforming and positioning the design as you see below:
- Step 9: Go to File => Save to save the changes. After saving, you need to close these files.
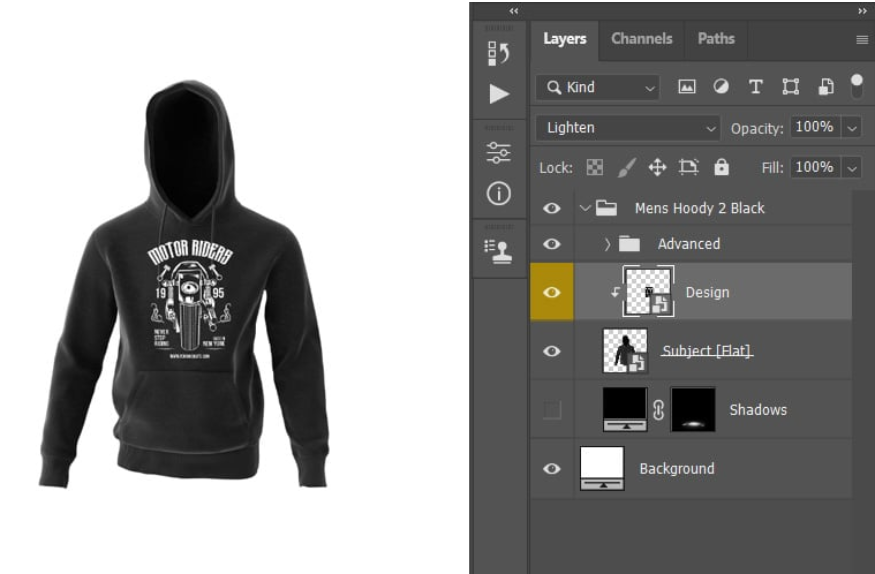
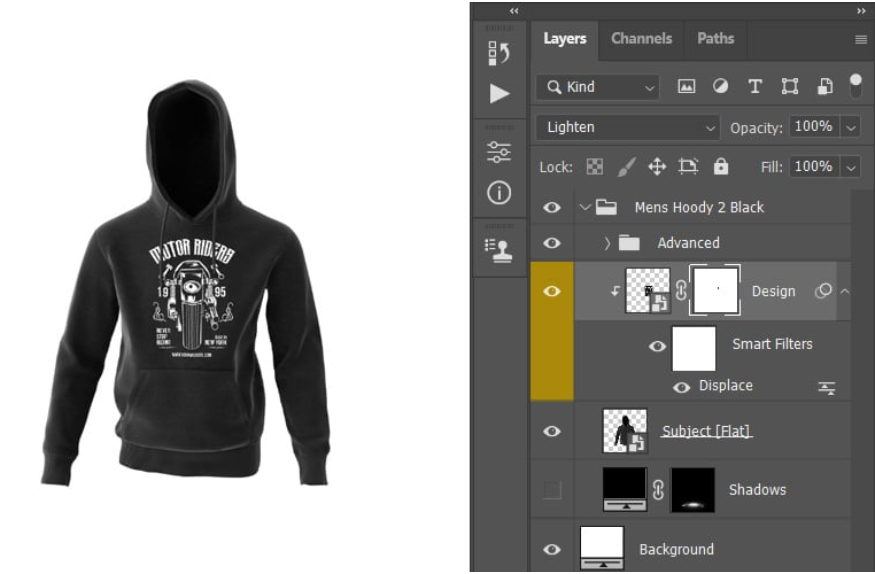
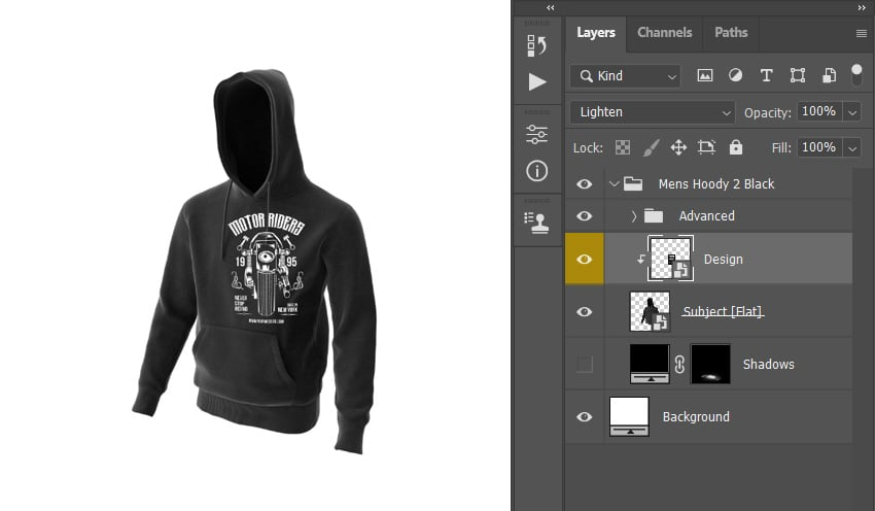
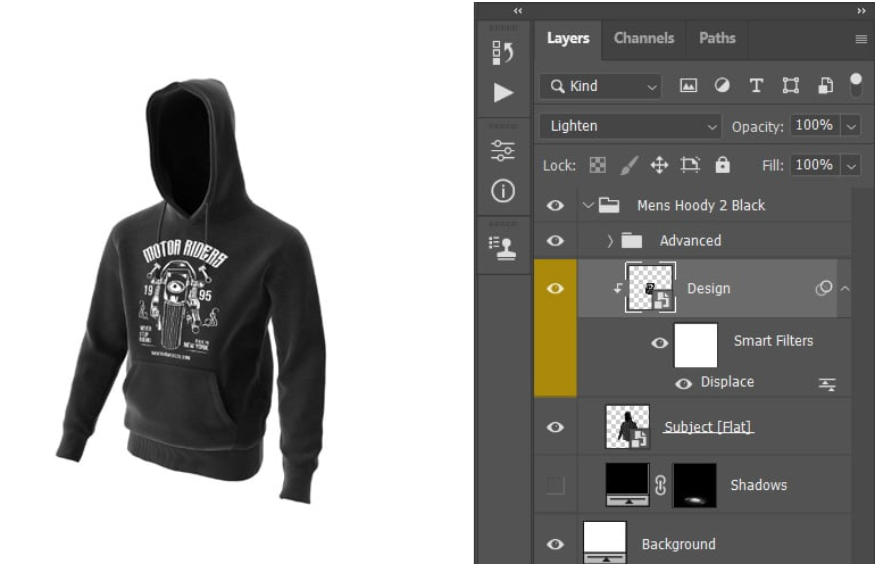
Go back to the mockup file, select the Rectangle 1 layer, change the Blending Mode value of this layer to Lighten, and name them “Design”.
Right-click on this layer and select Yellow to highlight them in yellow, which makes finding them easier, because this is the main layer for the model.
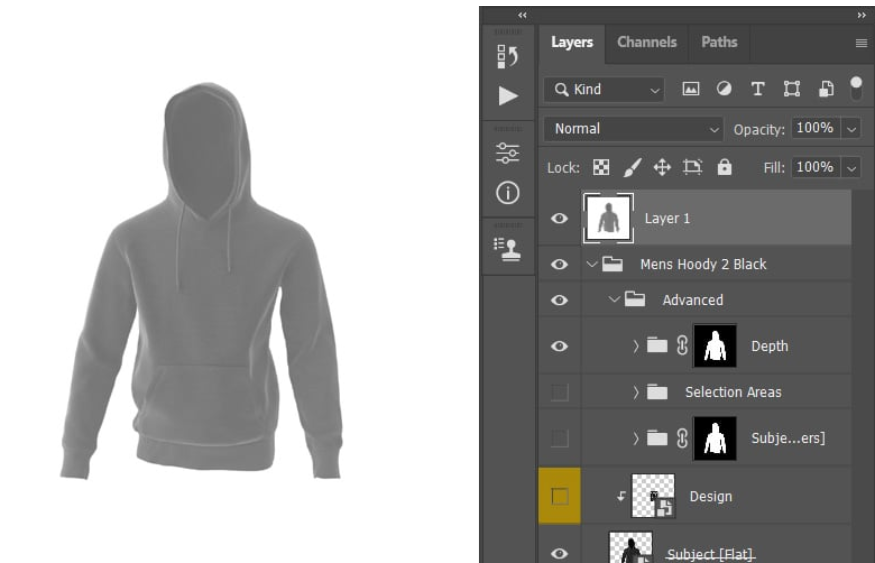
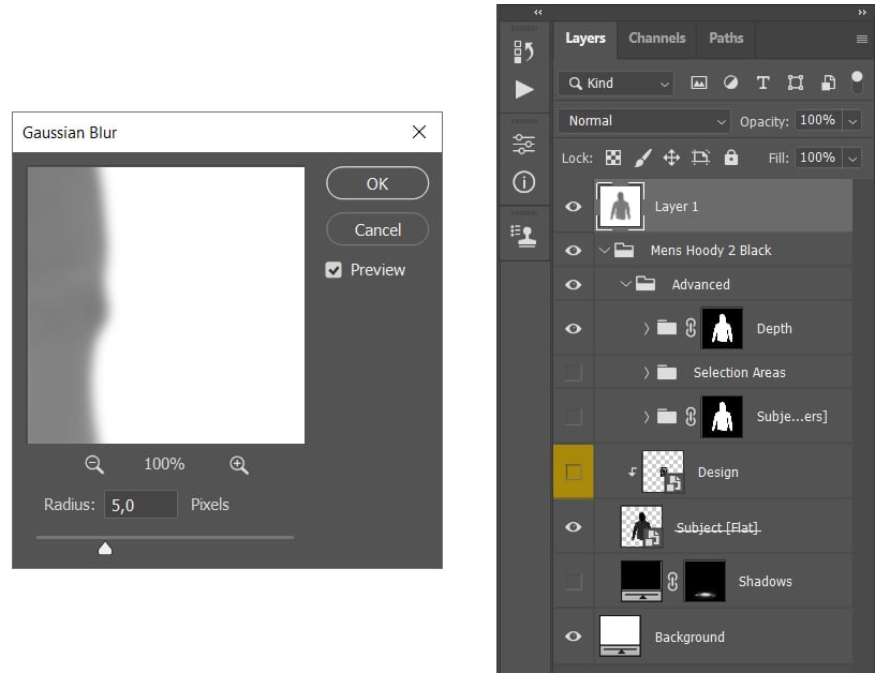
- Step 10: Place the design on the hoodie for a more realistic look, you need to create a Displacement Map. Then, go to Image => Duplicate to copy this file into the newly opened file. Hide the Design layer and show the Depth folder.
Click on Mens Hoody 2 Black => select Ctrl-Alt-Shift-E on the keyboard to create a screenshot.
- Step 11: Go to Filter => Blur => Gaussian Blur. Set the Radius parameter to 5 px.
Go to Image => Mode and change the value of Mode to 8 Bits/Channel.
Go to File => Save As as PSD and close the file.
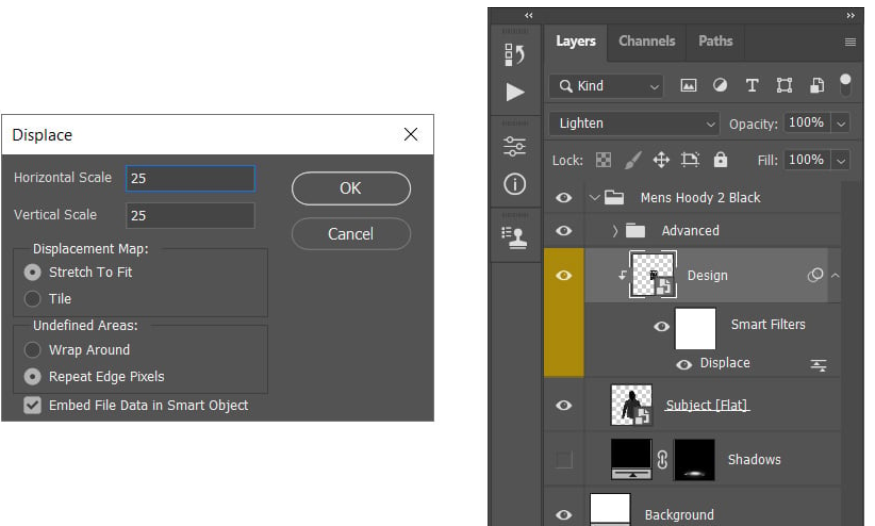
- Step 12: Go back to the simulation file, select the Design layer => go to Filter => Distort Displace.
Set the value for Horizontal and Vertical to 25, Displacement Map to Stretch To Fit, and change Undefined Areas to Repeat Edge Pixels.
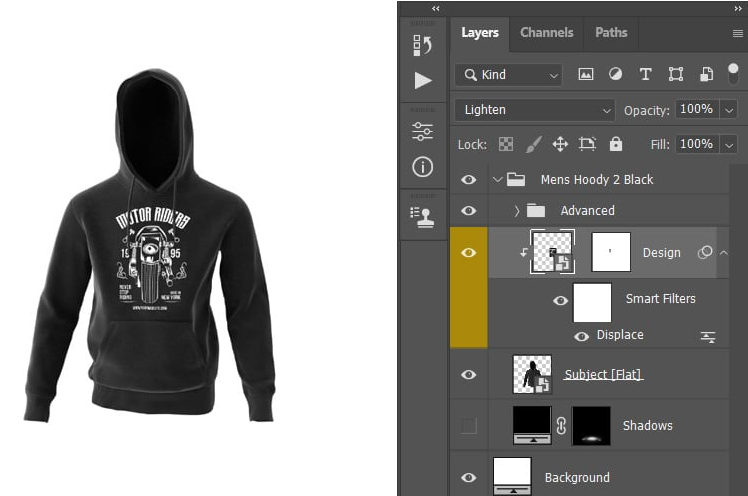
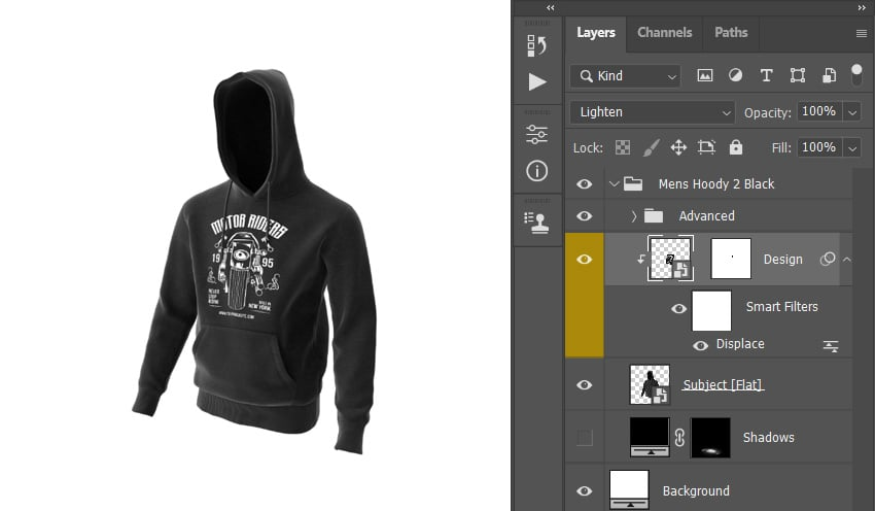
- Step 13: Add a layer mask by going to Layer => Layer Mask => Reveal All.
Set the foreground color to color code #000000, select the Brush Tool (B), choose a soft brush to brush over the outlines of the hoodie so that the design doesn't cover them.
- Step 14: Select the link icon between the layer thumbnail and the mask to unlink them. Then, click on the layer thumbnail, press Ctrl-T to transform this layer.
Right-click anywhere inside the transform box, click Warp. Curve the design layer so that it matches the hem of the hoodie.
4. Create a side view of a black hoodie model
- Step 1: Click View 360 Render to adjust the perspective to the side. Set Download as to PSD, select Download this Angle.
- Step 2: Go to File => Open, select the newly downloaded PSD file => select Open, then hide the Shadows layer.
- Step 3: Apply the same as done in the perspective above the hoodie to create, position and transform the smart object layer. Pay attention to adjusting Warp to suit the side view.
- Step 4: Place the design on the smart object, then click on the Rectangle 1 layer.
Next, change the Blending Mode of this layer to Lighten, name it “Design” and change the color to Yellow.
- Step 5: Press Ctrl-T and right-click anywhere inside the transform box and select Warp. Adjust the verticality to help the design fit the hoodie's hem.

- Step 6: Replace the design with the same method as applied to the previous context.
- Step 7: Click Layer => Layer Mask => Reveal All to add a layer mask. Set the foreground color to color code #000000, then select the Brush Tool (B), select a soft brush and brush over the hem of the shirt.

- Step 8: Click on the link icon of the layer and mask thumbnails to unlink them. Click to select the layer thumbnail and press Ctrl-T to transform this layer. You can right-click anywhere inside the transform box, then click Warp. Adjust the warp threads so that the design fits the hoodie perfectly.
Hopefully, the ways to create a mockup on a black Hoodie in Photoshop that Sadesign brings in the article above has helped readers clearly understand how to do it and apply it successfully to their designs. Let's try again many times until you get satisfactory results!
- Create a very interesting Glitch effect in Photoshop
- How to achieve a double exposure text effect using Photoshop


VIP Products


Best Selling Products
Genuine Adobe Illustrator account
99 USD
MidJourney Account
29 USD
Autodesk All App Account Copyright
120 USD
Genuine Cheap Canva Pro
39 USD
Windows 10 & 11 Pro Key
36 USD
Plugin Retouch4me
69 USD
Capcut Pro 1 Year
39 USD
Upgrade genuine Capture One account
120 USD
Adobe Photoshop Copyright - Full App
120 USD
ChatGPT Plus Account (GPT-4)
16 USD
Copyright Adobe Lightroom Account
59 USD
Adobe Premiere Pro Account
99 USD
Freepik Premium Account
59 USD
Upgrade Genuine Office 365
49 USD
Upgrade Duolingo Super
29 USD