Best Selling Products

Adobe Photoshop Copyright - Full App
120 USD

Upgrade Genuine Office 365
49 USD

MidJourney Account
29 USD

Adobe Premiere Pro Account
99 USD

Plugin Retouch4me
69 USD

Copyright Adobe Lightroom Account
59 USD

ChatGPT Plus Account (GPT-4)
16 USD

Upgrade Duolingo Super
29 USD

Capcut Pro 1 Year
39 USD

Genuine Adobe Illustrator account
99 USD

Genuine Cheap Canva Pro
39 USD

Freepik Premium Account
59 USD

Autodesk All App Account Copyright
120 USD

Upgrade genuine Capture One account
120 USD

Windows 10 & 11 Pro Key
36 USD
How to add tattoos to photos in photoshop SIMPLY with SaDesign
Tattooing is an art, expressing yourself through each tattoo. However, if you cannot stand the pain of getting a tattoo, you can try adding a tattoo to your photo in Photoshop. Join SaDesign to see how to add tattoos.

Tattooing is an art, expressing yourself through each tattoo. However, if you cannot stand the pain of getting a tattoo, you can try adding a tattoo to your photo in Photoshop. Join SaDesign to see how to add tattoos.

Using Photoshop to add tattoos to objects in Photoshop is one of the most popular ways today. By combining many tools together, we will have realistic-looking tattoos. Please refer to the detailed steps below.
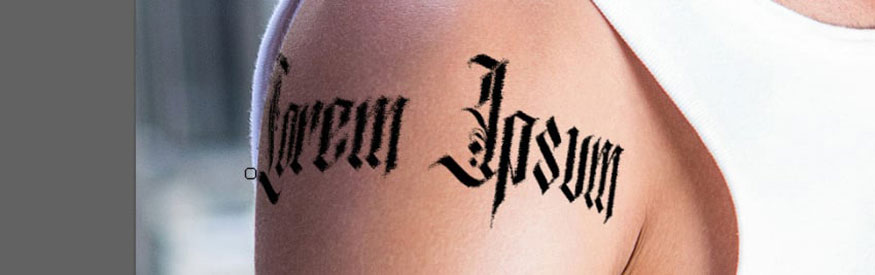
Step 1: Open the photo you want to add a tattoo to in Photoshop.
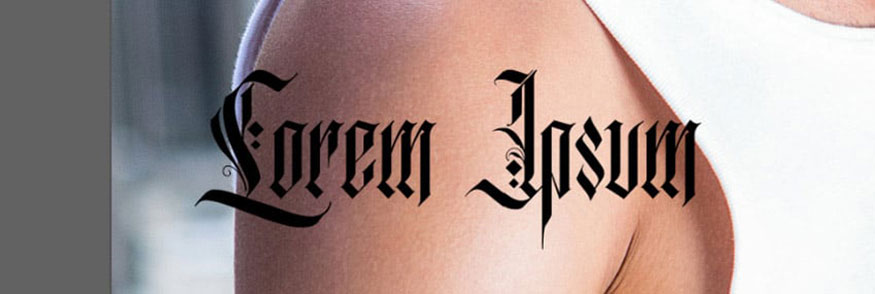
On the toolbar, select Type Tool (T) to add the text you want to tattoo. Change the font to a tattoo style font (e.g. RockSands). Center the text and resize it accordingly.
Note, the text must be wider than the area you are placing it.
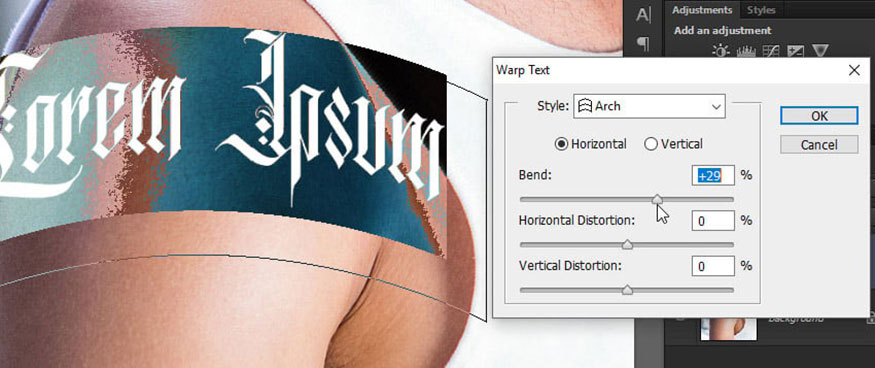
Step 2: On the text layer, right-click and select Create Warped Text or Warped Text depending on the version. In the Style section, choose a style that matches the shape and perspective of the body part you're working on.
Step 3: Emphasize the text to create a highlight for the tattoo. Select the text layer and open the Character panel (Window => Character). Select the first three letters and reduce their width to 75%. Reduce the distance between them to 10 .

Select the first two letters and continue changing the width and spacing as shown below to make the effect even stronger.

Finally, select the first letter and add some changes as shown below to add more impact to it.

Adjust the other side of the tattoo text in the same way. Note, the angle of the letter is not too sharp.
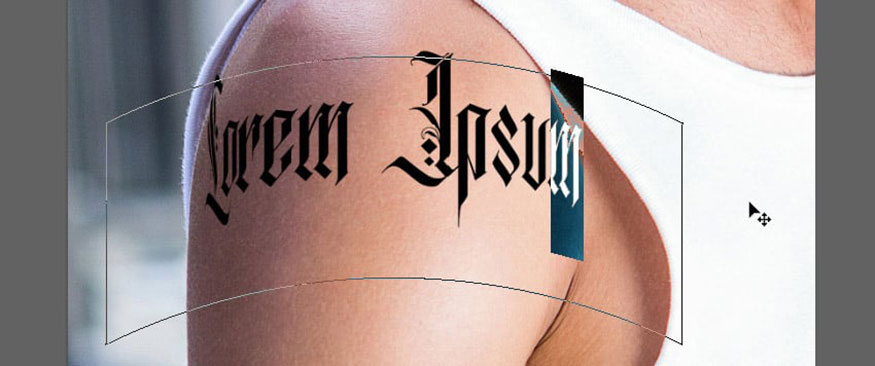
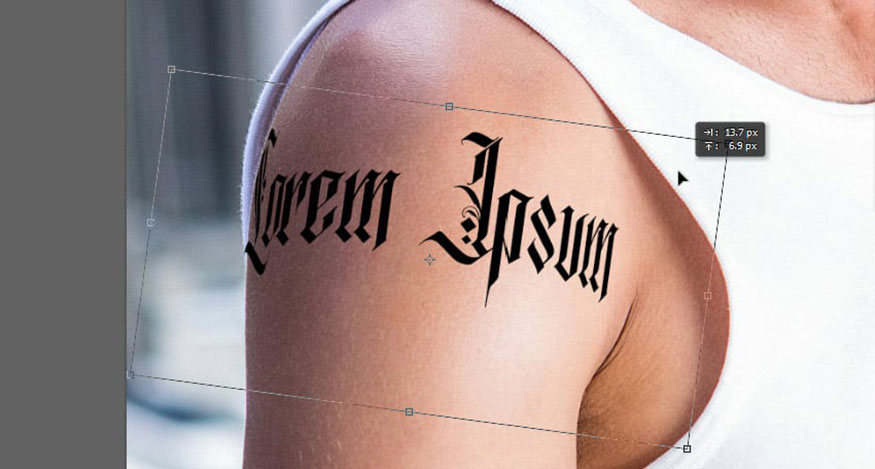
Step 4: Reposition and resize the text if necessary by using the Free Transform Tool (Ctrl+T). Right click and select Rasterize Type.
Step 5: Duplicate the background layer using the key combination Ctrl+J and drag it to the top.
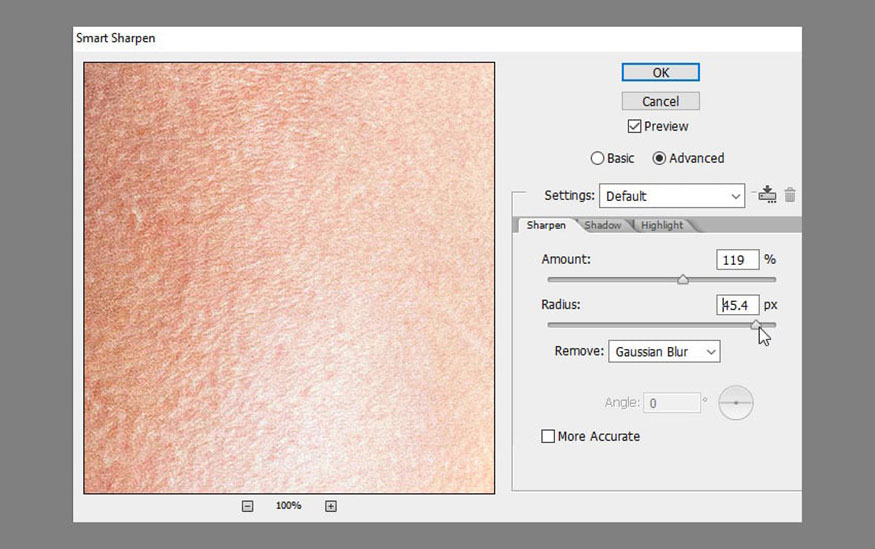
On the menu bar, go to Filter => Sharpen => Smart Sharpen and enhance the texture with it.
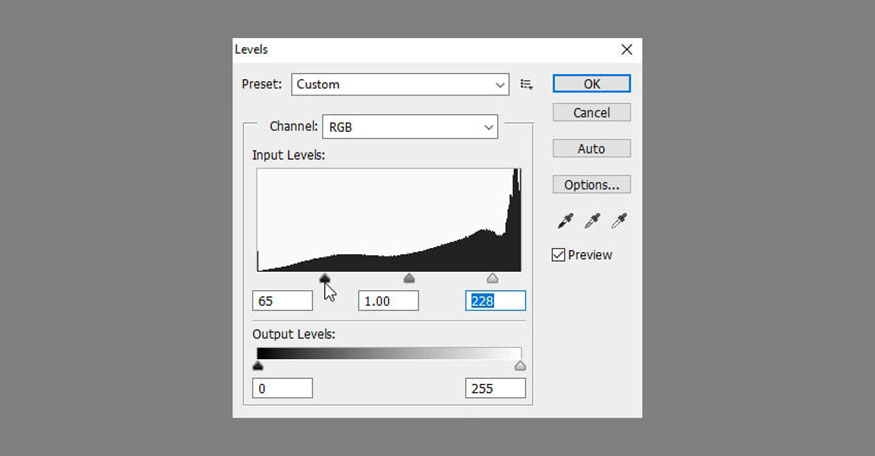
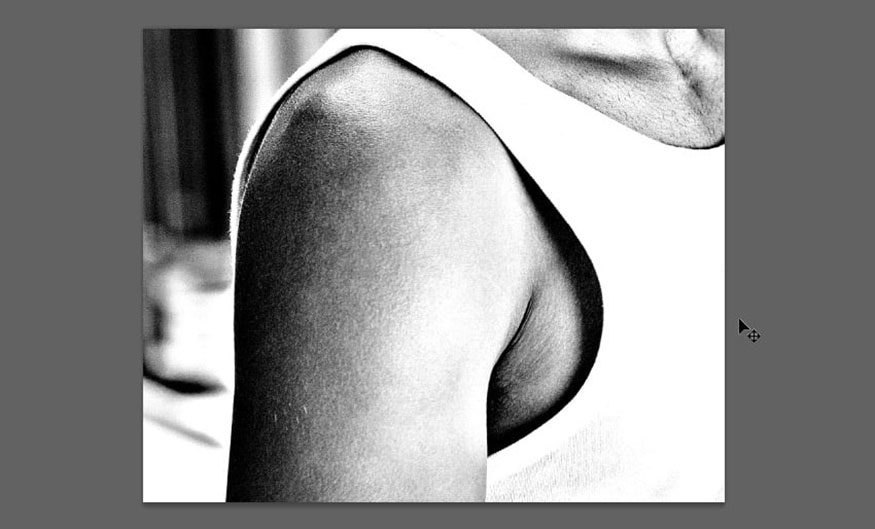
On the menu bar, go to Image => Adjustments => Desaturate, then go to Image => Adjustments => Levels. Increase contrast by dragging the left and the white toward the center. Don't go too far—we need the skin's texture.
Step 6: Copy this image and save it as a separate file. Name it “Map”.
Step 7: Hide this layer and return to the text layer. Go to Filter => Distort => Displace. Click OK and select the Map file. After applying the deformation, you should consider if it is too strong or too weak. If necessary, undo and repeat, this time adjusting the values accordingly.

Step 8: Group text (Ctrl+G). Add Layer Mask to the group. Paint black to remove the outer parts of the body.
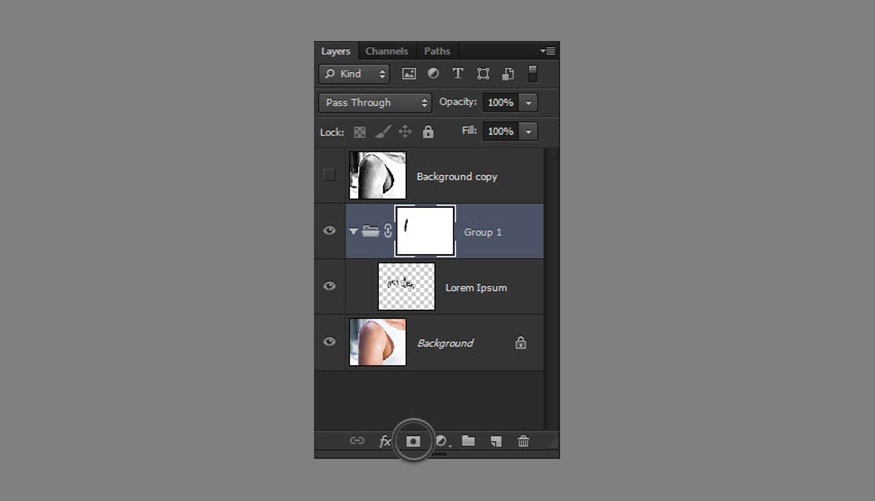
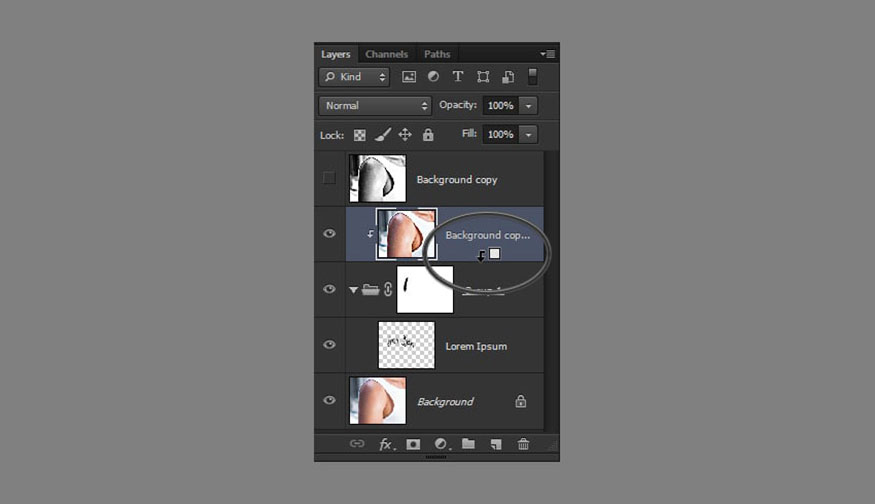
Step 9: Duplicate the background layer and drag it across the group. Sharpen it with the Smart Sharpen filter. Hold down the Alt key and click on the line between the layers to cut it into the group below.

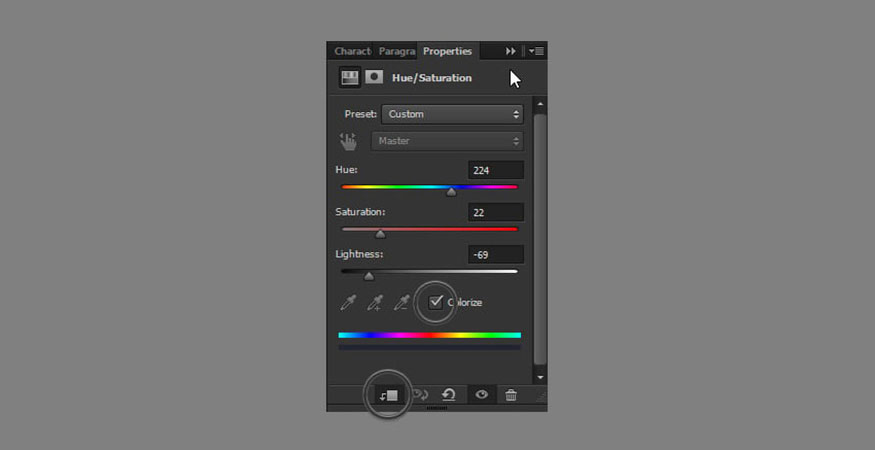
Step 10: Add a Hue/Saturation adjustment to make the tattoo a dark blue color. Change its Blend Mode to Darken.

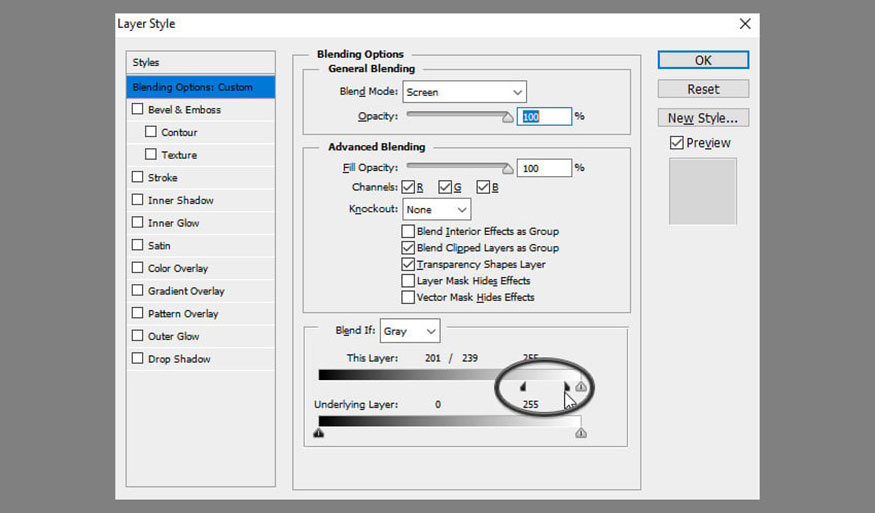
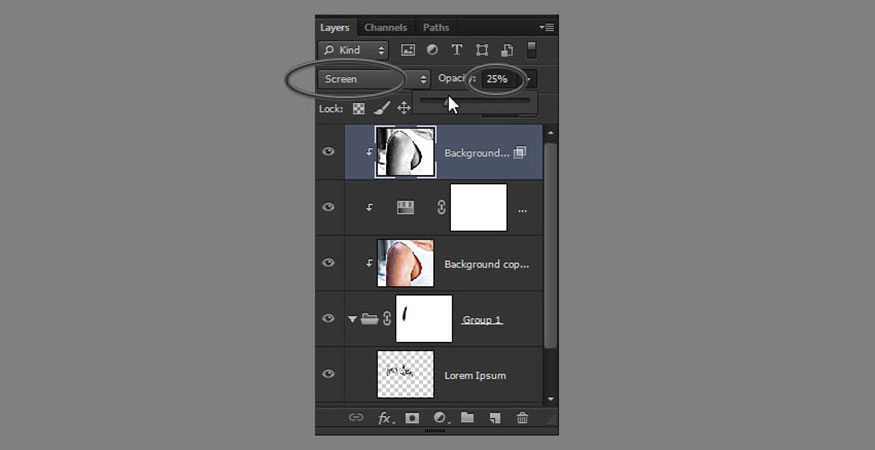
Step 11: Reveal the upper layer and crop it. Change its Blend Mode to Screen. Double-click this layer to open the Layer Style dialog box. At the bottom of this dialog box, there is a Blend If section, hold Alt and drag the upper black marker to the right. This way you will remove the effect from the shadow part of the skin. Hold Alt to separate the marker for a gradual effect. Reduce Opacity for more realistic shine.
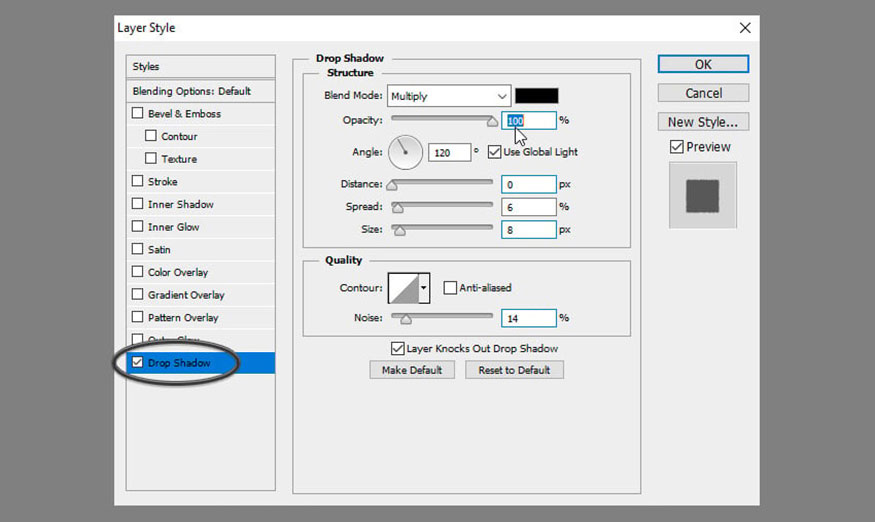
Step 12: Double-click the text layer (not the group) to open its Layer Style panel. Add Drop Shadow to simulate some gentle shine.
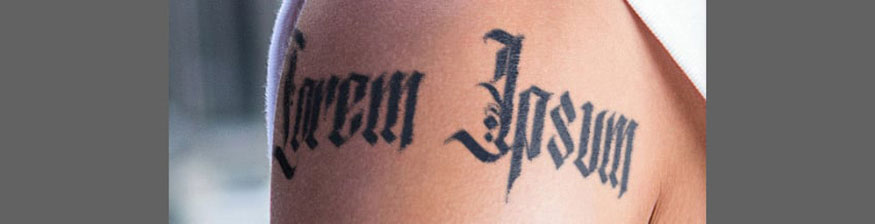
Step 13: If you want to make this effect more visible, you can also add Outer Glow in the Layer Style panel. Adjust its Opacity, Size and Noise.


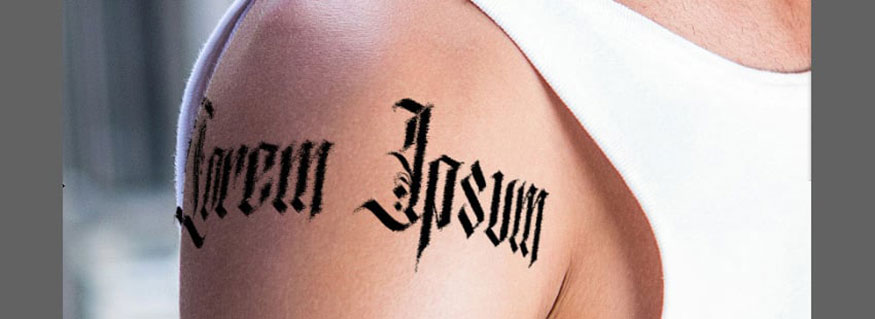
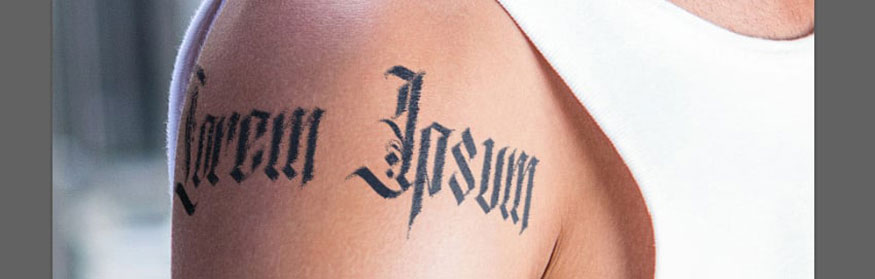
So, you have finished adding tattoos to photos in Photoshop. The character now has a realistic-looking tattoo.
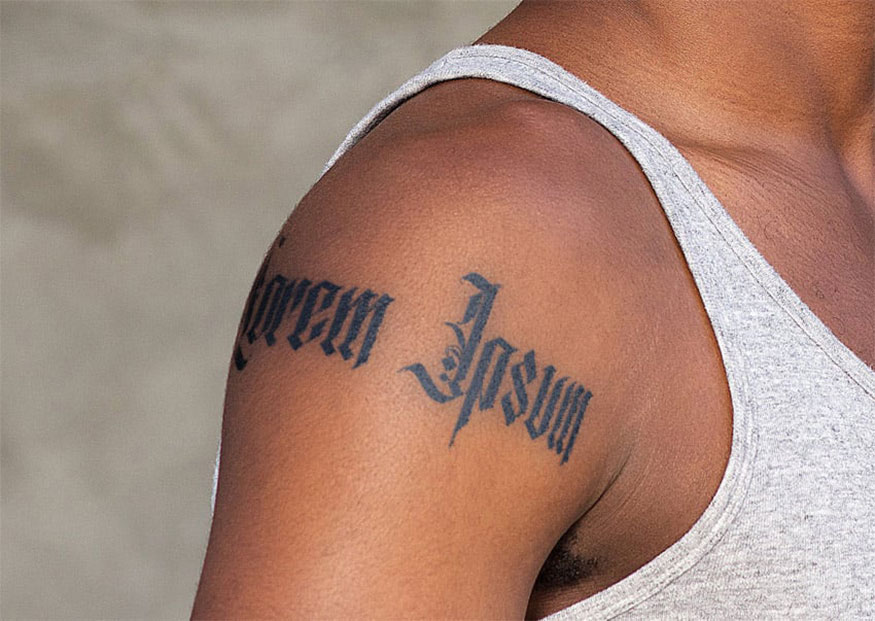
Above is general information on how to add tattoos to photos in Photoshop. It's not difficult to do, you can do it yourself following the instructions. Feel free to change the parameter settings depending on your photo for the best effect.


VIP Products


Best Selling Products
Adobe Photoshop Copyright - Full App
120 USD
Upgrade Genuine Office 365
49 USD
MidJourney Account
29 USD
Adobe Premiere Pro Account
99 USD
Plugin Retouch4me
69 USD
Copyright Adobe Lightroom Account
59 USD
ChatGPT Plus Account (GPT-4)
16 USD
Upgrade Duolingo Super
29 USD
Capcut Pro 1 Year
39 USD
Genuine Adobe Illustrator account
99 USD
Genuine Cheap Canva Pro
39 USD
Freepik Premium Account
59 USD
Autodesk All App Account Copyright
120 USD
Upgrade genuine Capture One account
120 USD
Windows 10 & 11 Pro Key
36 USD