Best Selling Products

Upgrade Genuine Office 365
49 USD

Genuine Adobe Illustrator account
99 USD

Copyright Adobe Lightroom Account
59 USD

MidJourney Account
29 USD

Freepik Premium Account
59 USD

Genuine Cheap Canva Pro
39 USD

Windows 10 & 11 Pro Key
36 USD

Upgrade Duolingo Super
29 USD

Upgrade genuine Capture One account
120 USD

Autodesk All App Account Copyright
120 USD

Adobe Premiere Pro Account
99 USD

Plugin Retouch4me
69 USD

Capcut Pro 1 Year
39 USD

Adobe Photoshop Copyright - Full App
120 USD

ChatGPT Plus Account (GPT-4)
16 USD
How to create a greeting card template in Photoshop
Nội dung
- 1. How to choose Canvas, preset for card printing document
- 2. How to set up a Canvas for an external site
- 3. Instructions for saving a printed card file
- 4. How to choose the color palette and font for the card.
- 5. Create the designs needed in the birthday card
- 6. Instructions for saving cards for printing
How to design a happy birthday that is both unique, impressive, and personal? Below, SaDesign will guide you through one of the extremely simple ways to create a greeting card template in Photoshop.

How to design a happy birthday that is both unique, impressive, and personal? Below, SaDesign will guide you through one of the extremely simple ways to create a greeting card template in Photoshop.

1. How to choose Canvas, preset for card printing document
First of all, you need to select a new document. In the Print tab, select A4 size, then rename the file to "Birthday Card Template Inside".
- Uncheck the Artboard box
- Page orientation: Landscape
- Optimal print resolution: 300 PPI (Pixels Per Inch)
- Color mode: CMYK
- Color bit: 16 bit.
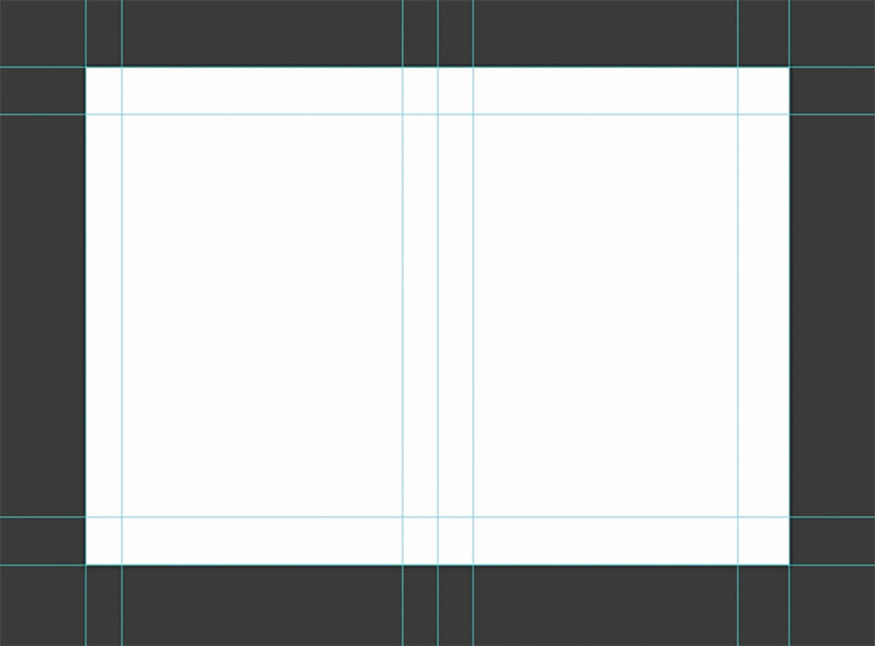
2. How to set up a Canvas for an external site
- Step 1: Go to Workspace at the top right, select Essentials. This is intended to provide the tools you need to create cards.

- Step 2: Press Command-R to open the ruler, change the measurement system to cm by right-clicking on the ruler.

- Step 3: Use a ruler to drag and drop guide lines on the drawing to create margins.
- Left outer margin: 1.5 cm
- Right outer margin: 1.5 cm
- Top margin: 2 cm
- Bottom margin: 2 cm
- Middle inner margin: 3 cm.
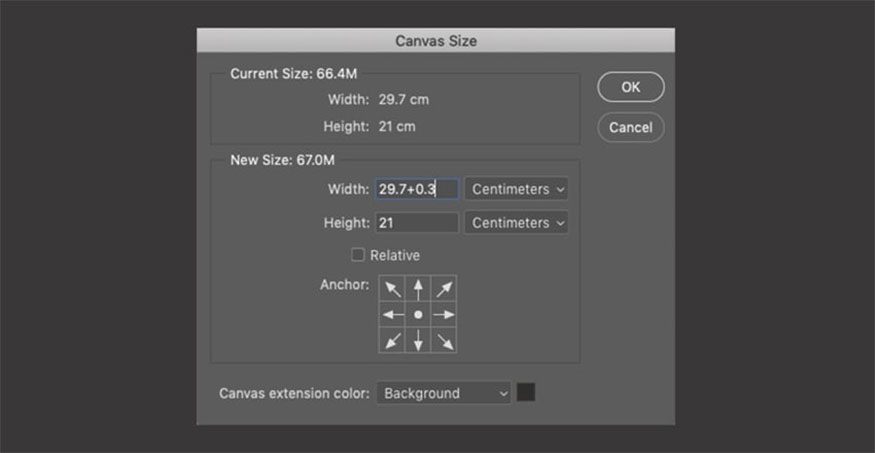
- Step 4: To add a border, go to Image => Canvas Size. In New Size, add 0.3cm to the width and height.
3. Instructions for saving a printed card file
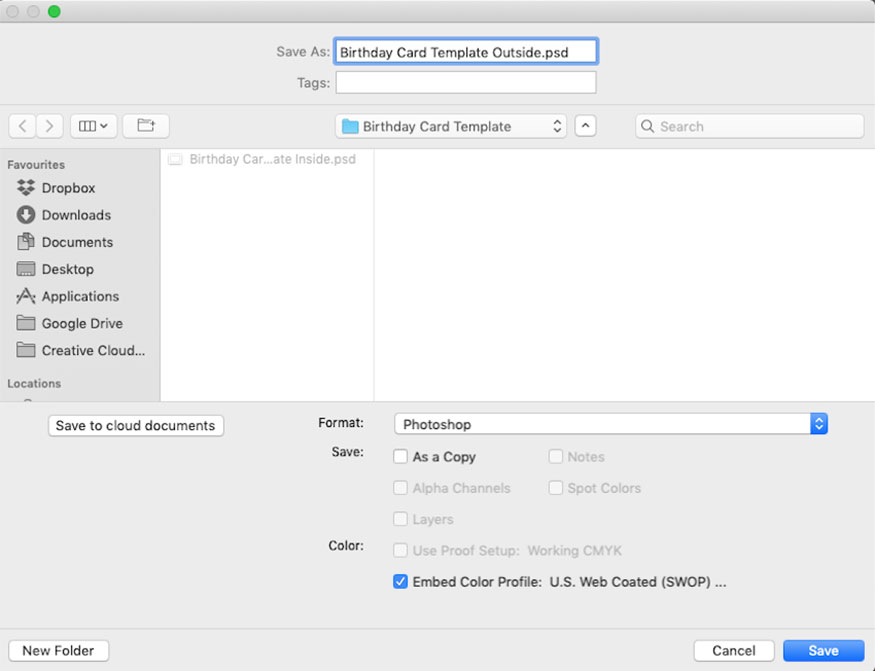
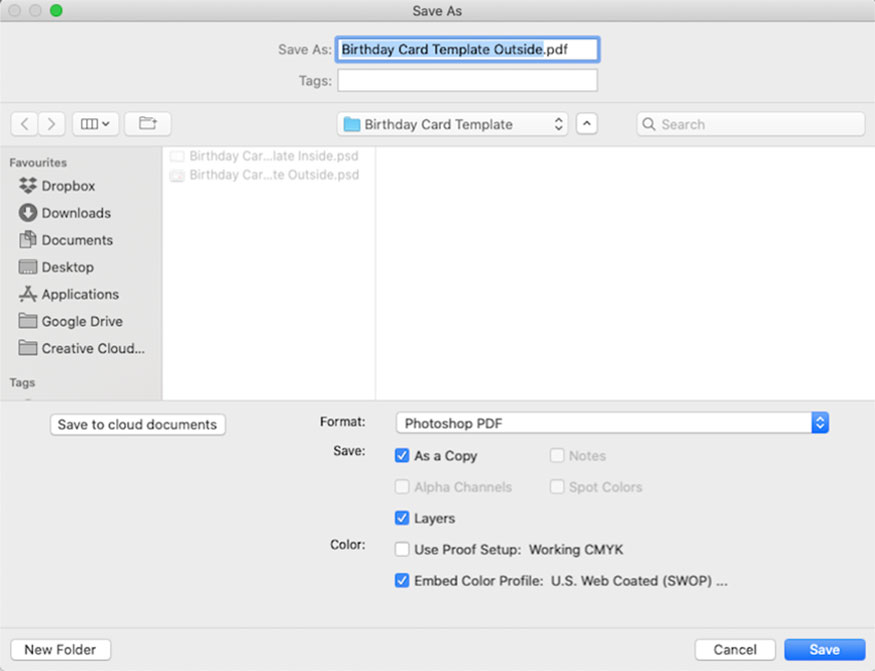
- Step 1: Go to File => Save As (or press the keyboard shortcut Command -Shift-S) to save the greeting card format with default settings (Format: Photoshop) to your computer.

- Step 2: Save another copy of the greeting card format file with default settings (Format: Photoshop) to your computer. Rename the file to “external birthday card template”.
4. How to choose the color palette and font for the card.
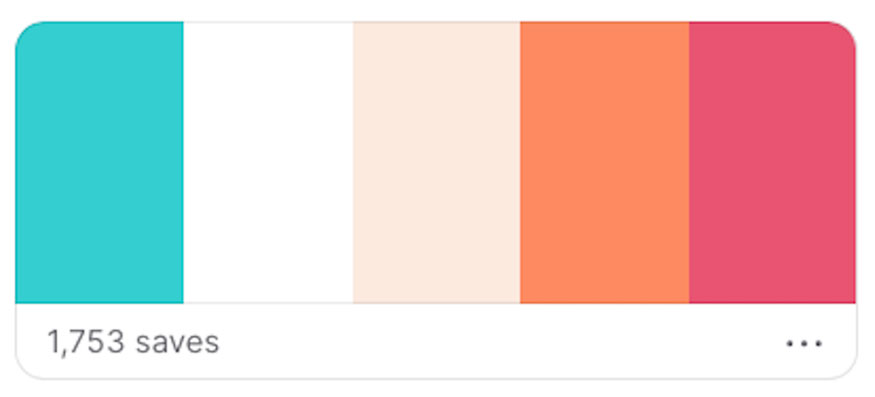
In the instructions below, we will use the manual doodle style. We will choose from a popular color scheme. Here we use the following colors:
-
Teal: #45C2C9
-
White: #FFFFFF
-
Cream: #FDEADE
-
Orange: #F6895F
-
Pink: #EA5370
Once we have the right color scheme, we will complete the font for the birthday card. In this tutorial we used Chamberline and Doodle fonts because they fit the handmade style quite well. You can choose the font that you feel is suitable.
5. Create the designs needed in the birthday card
To design the birthday card we need to create birthday-related elements such as bunting and confetti using the Brush tool and the color palette we chose above. previous part.
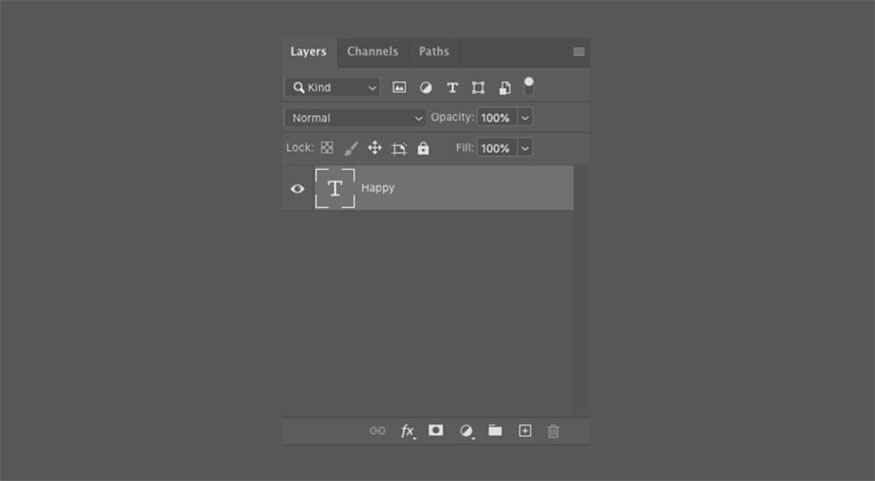
- Step 1: Create a new Layer and name it "Happy", write "Happy" on the right side of the card using Chamberline and Doodle fonts. Then, you choose the color for the text using the Eyedropper tool (I).
- Step 2: Press Command -T to convert and maintain aspect ratio, increasing the layer width to 7.5 cm.
- Step 3: Create a new Layer using the font Horizontal Type Tool (T) and name it "Birthday". Write "Birthday" in the font you want and choose the color from your palette. Write “Birthday” right below "Happy".

- Step 4: Convert the layer while maintaining the aspect ratio and increase the layer's width to 7.5 cm.
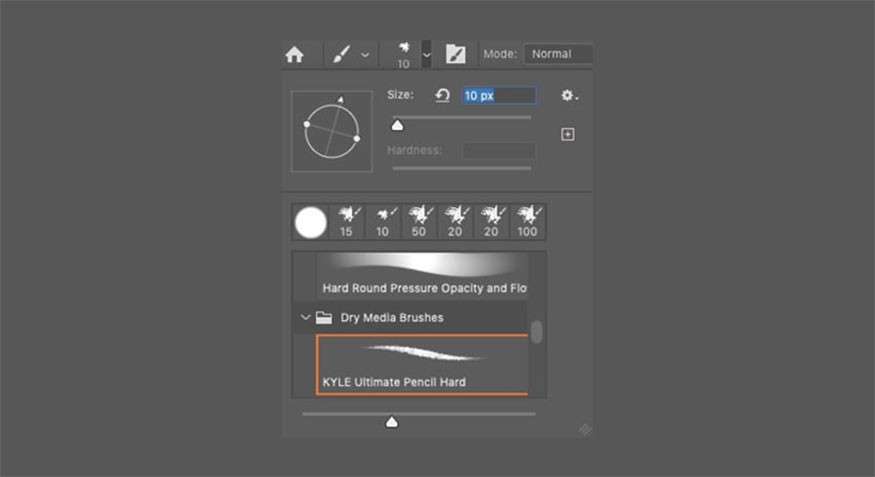
- Step 5: Select the brush in the Brush tool to create all the doodle art.
- Step 6: Create new Layers and name them "Typography Decor". Select the Brush Tool (B) to create zigzag lines around the words. Use the brush at 20 pt to outline each word with squiggly lines. Then hide all the layers to create the rest of the design.

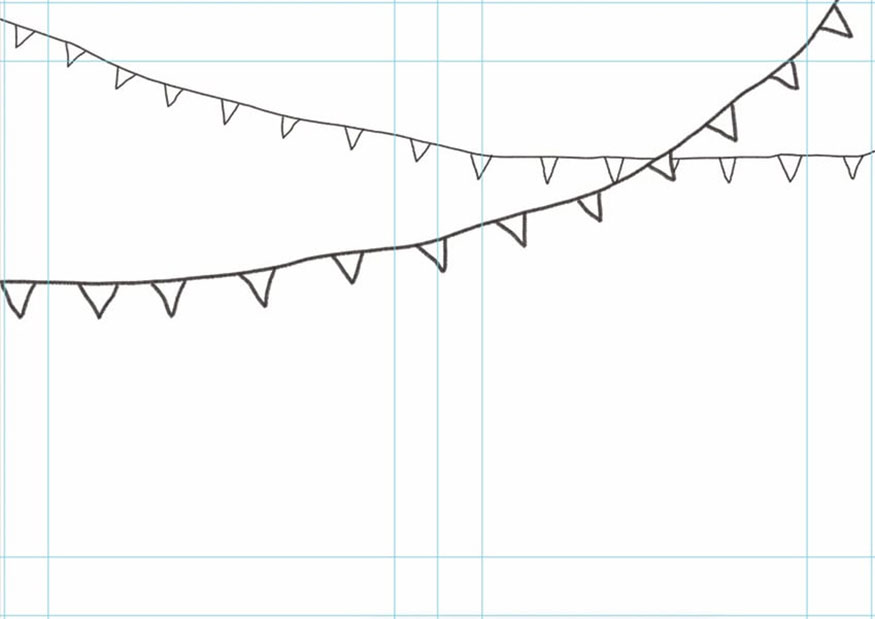
- Step 7: Create a new Layer and name it "Bunting Small Outline". Draw Bunting 1 with the brush at 10 pt size with a hexagon shape.
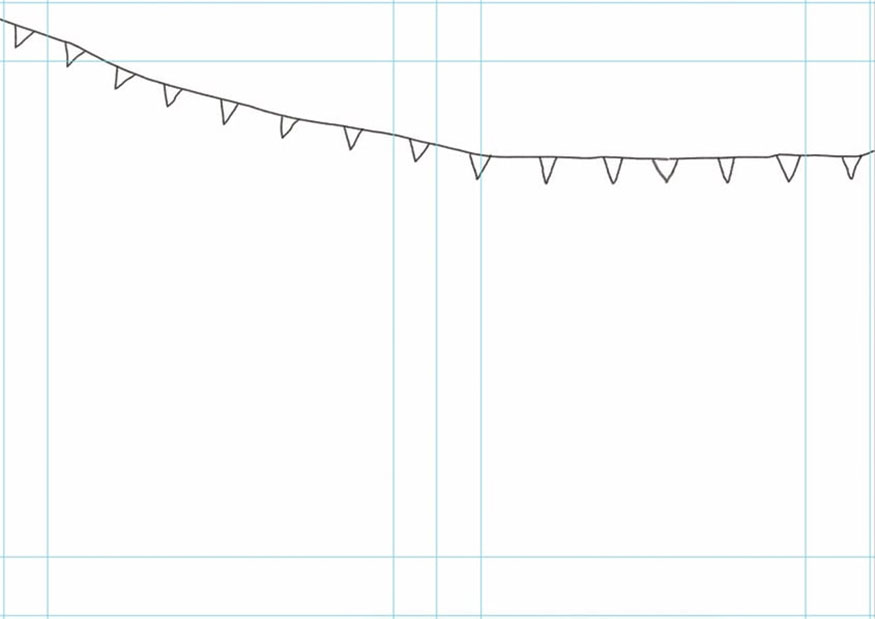
- Step 8: Create a new Layer and name it "Bunting Big Outline". Then draw Bunting 2 using a 20 pt brush with a hexagon shape.
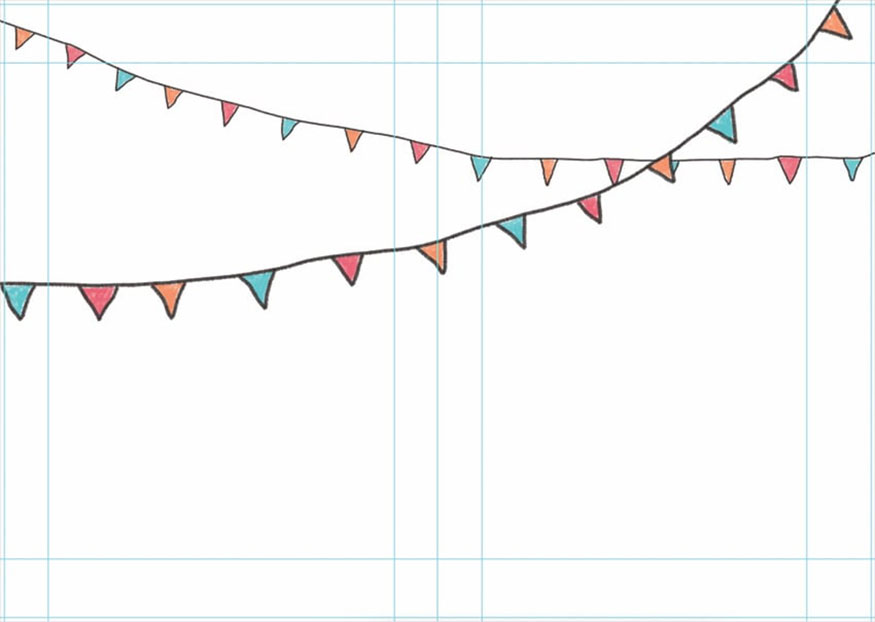
- Step 9: Create a new Layer and name it "Bunting Small Fill", using a brush at 20pt, fill the bunting with multiple colors from the palette.
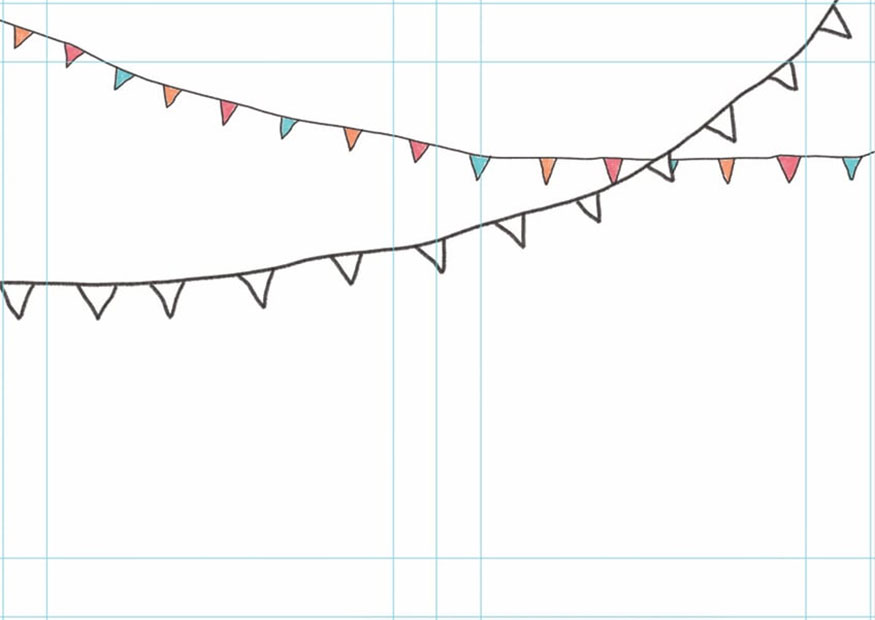
- Step 10: Create a new Layer and name it "Bunting Big Fill", using a brush with size 20 pt, fill the bunting with many colors.
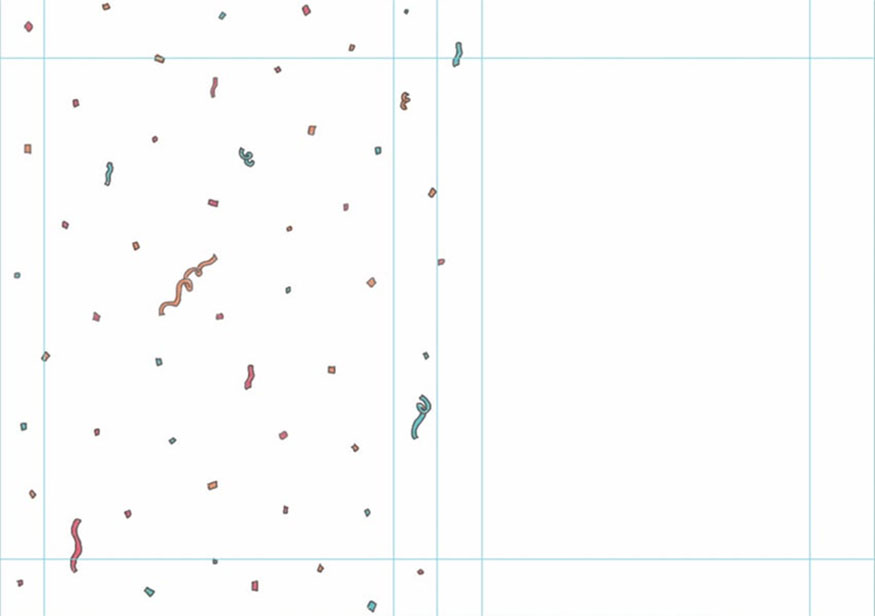
- Step 11: Create a new Layer and name it "Confetti", draw confetti on the entire card with a brush at 10 pt, unhide all layers except the palette layer to save the file.

- Step 12: Open the file "Birthday Card Template Inside" and create a new layer, name it "Confetti Outline". Draw confetti on the left side of the card using a 10 pt brush. The right side of the card is used to write a birthday message.
You can absolutely draw the birthday greeting by hand or use the Horizontal Type Tool (T). For birthday cards we can write by hand, so we can leave the right side of the card blank.
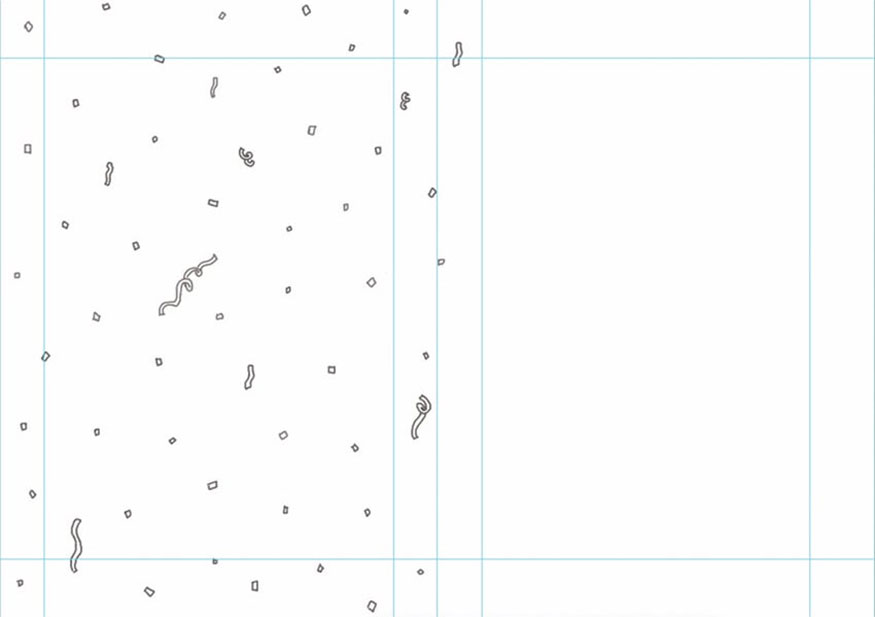
- Step 13: Create a new Layer and name it "Confetti Fill", use a brush at 20pt, fill in the multicolored confetti.
6. Instructions for saving cards for printing
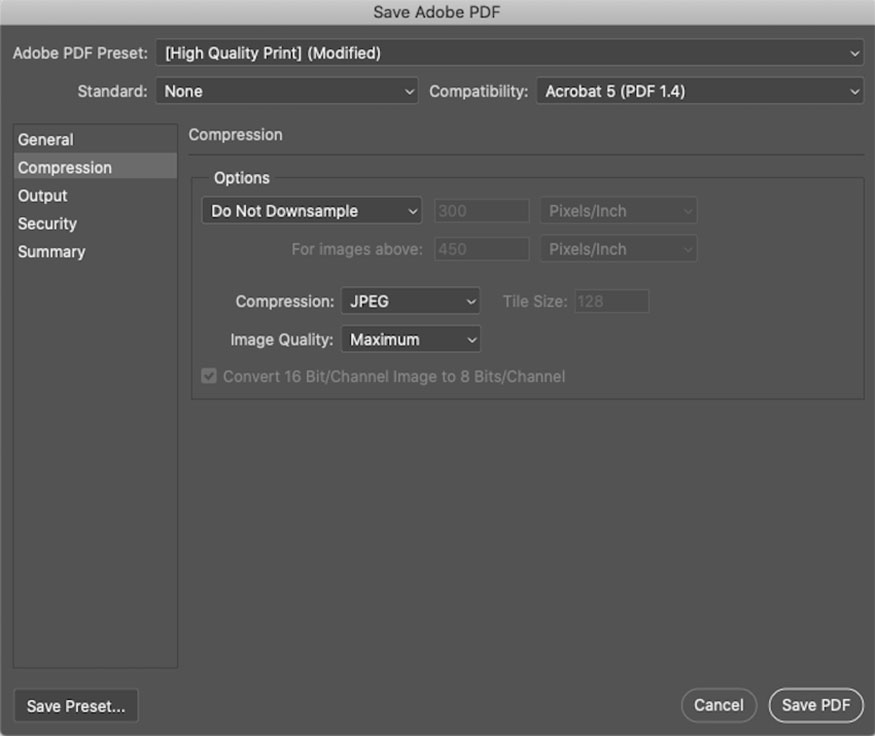
- Step 1: Now save the files as PDF in the same location. Press Command -Shift-S and save the file with the same name in Photoshop PDF format.
- Step 2: Select High quality printing, uncheck preserve Photoshop editing capabilities.

- Step 3: Go to Compression, change the compression option to Do Not Downsample and save the file.
Now you need to save both files after selecting the presets.
This is the result of the card template we get in Photoshop.
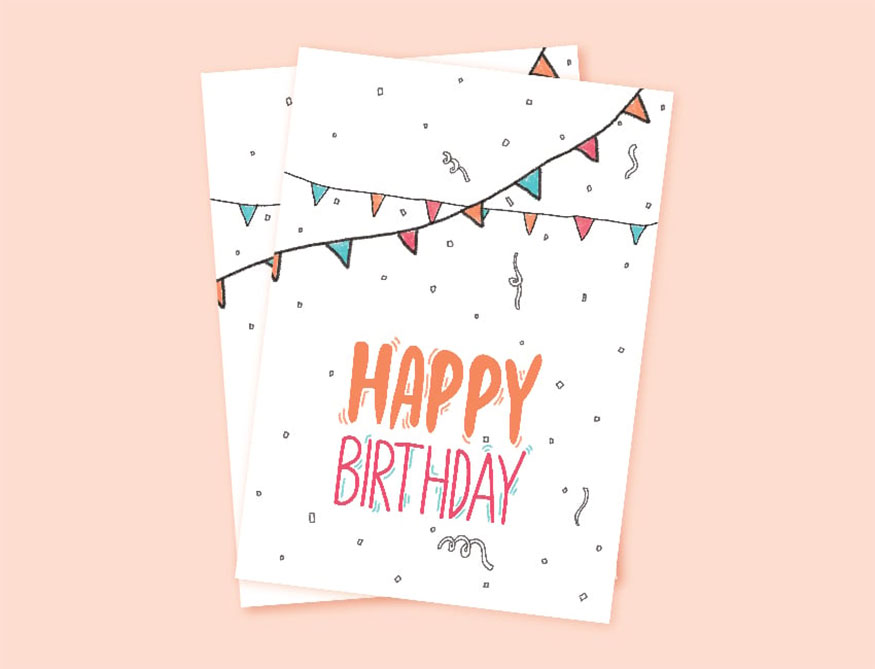
So, our instructions above have helped you know how to create a greeting card template in Photoshop simply and easily. Wish you success in applying it to your design!
- Develop a trifold brochure template in Photoshop
- How to create a baseball card template in Photoshop


VIP Products


Best Selling Products
Upgrade Genuine Office 365
49 USD
Genuine Adobe Illustrator account
99 USD
Copyright Adobe Lightroom Account
59 USD
MidJourney Account
29 USD
Freepik Premium Account
59 USD
Genuine Cheap Canva Pro
39 USD
Windows 10 & 11 Pro Key
36 USD
Upgrade Duolingo Super
29 USD
Upgrade genuine Capture One account
120 USD
Autodesk All App Account Copyright
120 USD
Adobe Premiere Pro Account
99 USD
Plugin Retouch4me
69 USD
Capcut Pro 1 Year
39 USD
Adobe Photoshop Copyright - Full App
120 USD
ChatGPT Plus Account (GPT-4)
16 USD