Best Selling Products

Adobe Photoshop Copyright - Full App
120 USD

ChatGPT Plus Account (GPT-4)
16 USD

Adobe Premiere Pro Account
99 USD

Freepik Premium Account
59 USD

Upgrade Duolingo Super
29 USD

Plugin Retouch4me
69 USD

Genuine Adobe Illustrator account
99 USD

Autodesk All App Account Copyright
120 USD

Copyright Adobe Lightroom Account
59 USD

Genuine Cheap Canva Pro
39 USD

Capcut Pro 1 Year
39 USD

Upgrade Genuine Office 365
49 USD

MidJourney Account
29 USD

Upgrade genuine Capture One account
120 USD

Windows 10 & 11 Pro Key
36 USD
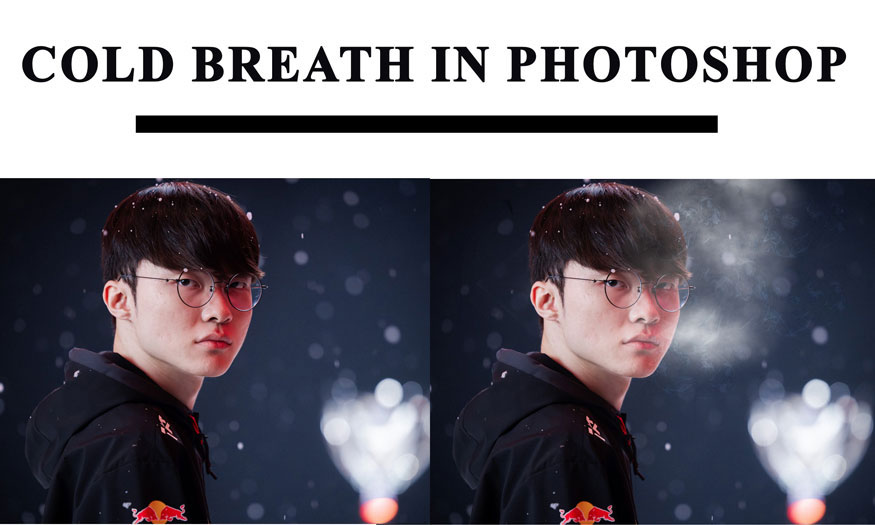
How to create a very impressive winter breath in Photoshop
A photo with a character breathing smoke has the perfect winter vibe. The faint mist of smoke gently lingered in front of him, making the person in the photo seem colder. Now there is no need to wait for winter to come, even in the warm summer you can create a winter atmosphere in Photoshop. Join SaDesign to discover how to do it right below.

A photo with a character breathing smoke has the perfect winter vibe. The faint mist of smoke gently lingered in front of him, making the person in the photo seem colder. Now there is no need to wait for winter to come, even in the warm summer you can create a winter atmosphere in Photoshop. Join SaDesign to discover how to do it right below.
Steps to create winter breath in Photoshop
Step 1: First, let's open the photo we want to create a winter in Photoshop.
On the menu bar, click File => Open => select the appropriate image and then click Open.
Here I want to create a winter breath for the player Esport Faker.
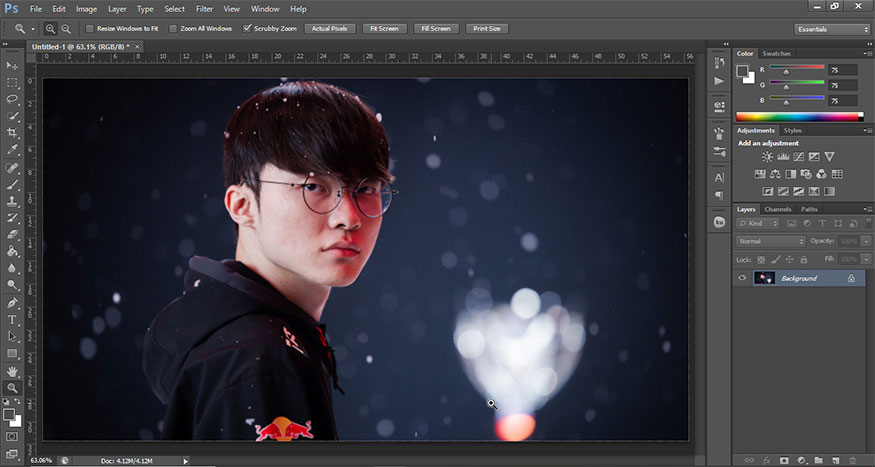
Step 2: On the toolbar, set Foreground and Background to black and white. Select Create a new layer (open page icon) at the bottom of the layers panel to create a new layer.
.jpg)
Select Filter => Render => Clouds.
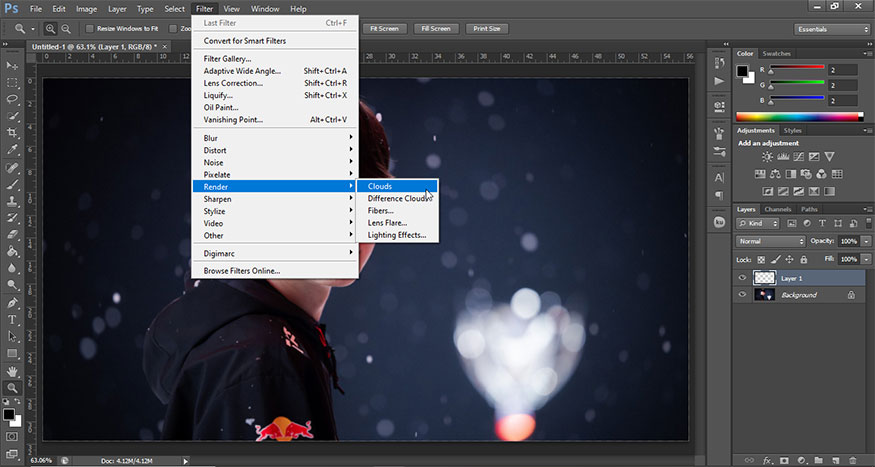
We have the result like this.
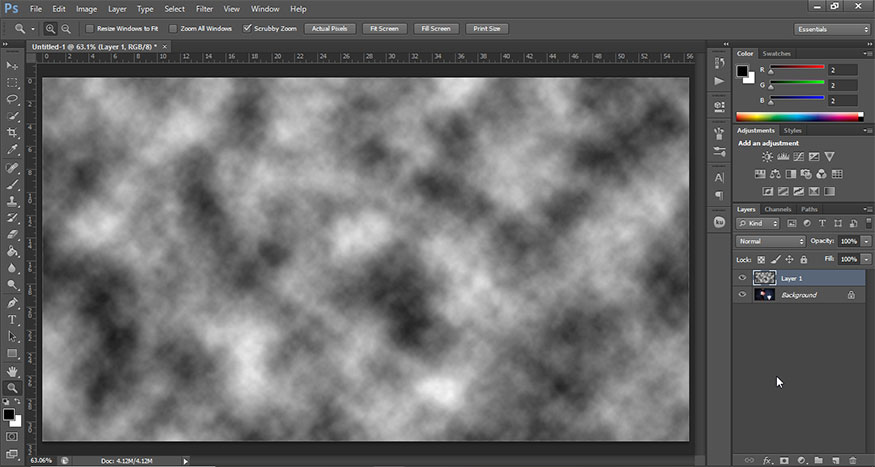
On the toolbar, select the Rectangular Marquee Tool to cut out a part of the cloud, so that it is equal to the object's face or slightly smaller. Then press Ctrl+J to duplicate the selection. Delete the original cloud.
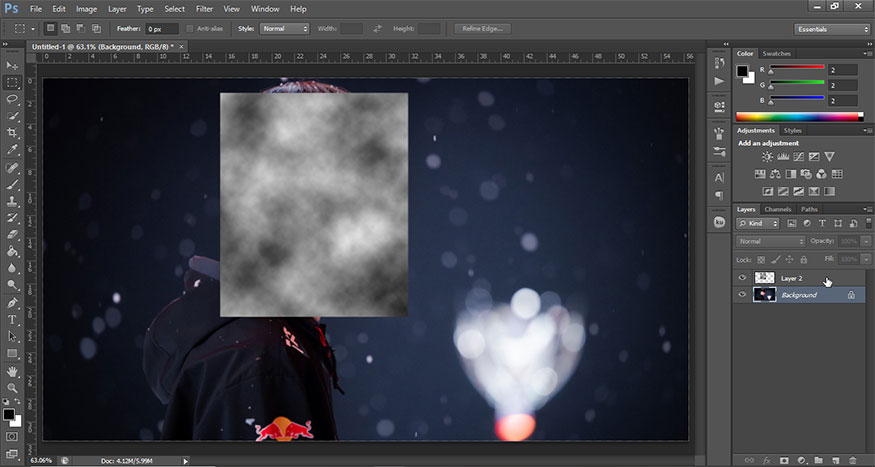
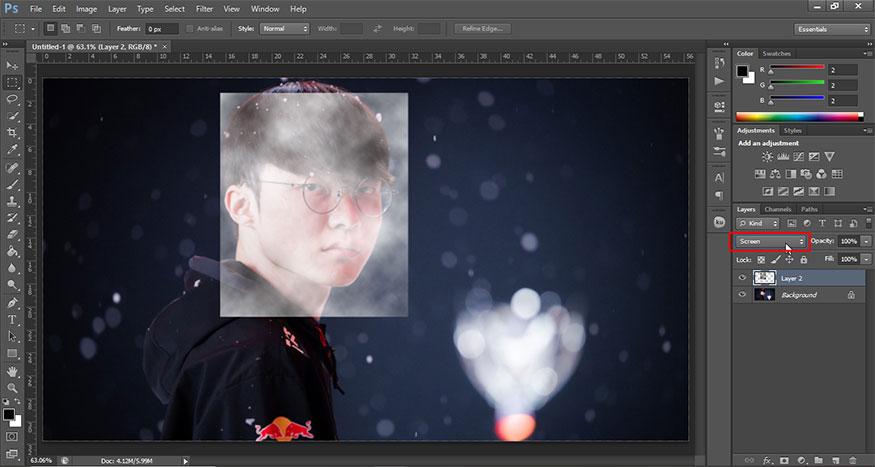
Step 3: Change Layer Mode of the cloud to Screen.
On the menu bar, select Image => Adjustments => Brightness/Contrast. Set Brightness: -60 and Contrast: 100.
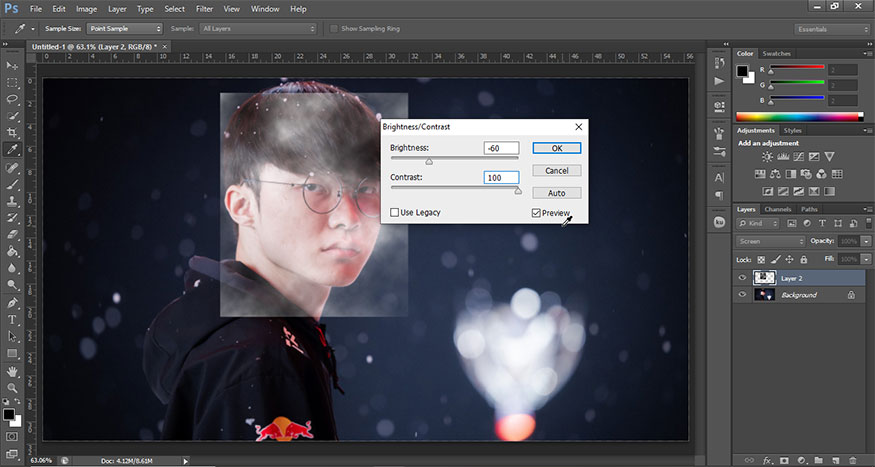
Press Ctrl+T to use the Transform tool to zoom in and place the cloud over the subject's mouth in the area where you want the smoky breath. Adjust the breathing position until you are most satisfied.

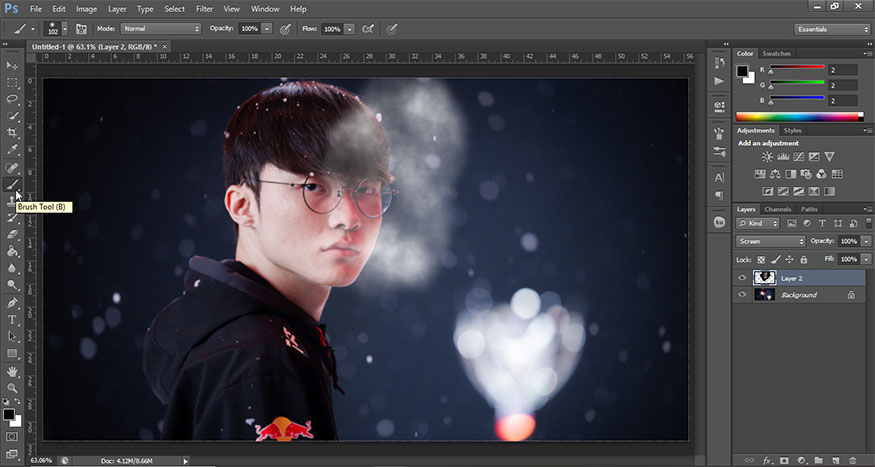
Step 4: At the bottom corner of the layers panel, select Add a mask to add a Layer Mask to the cloud layer. On the toolbar select a soft round Brush, set the color to black, then paint over the edges of the cloud. Use a brush to paint unnecessary areas to shape the clouds to create the initial cold breath shape.
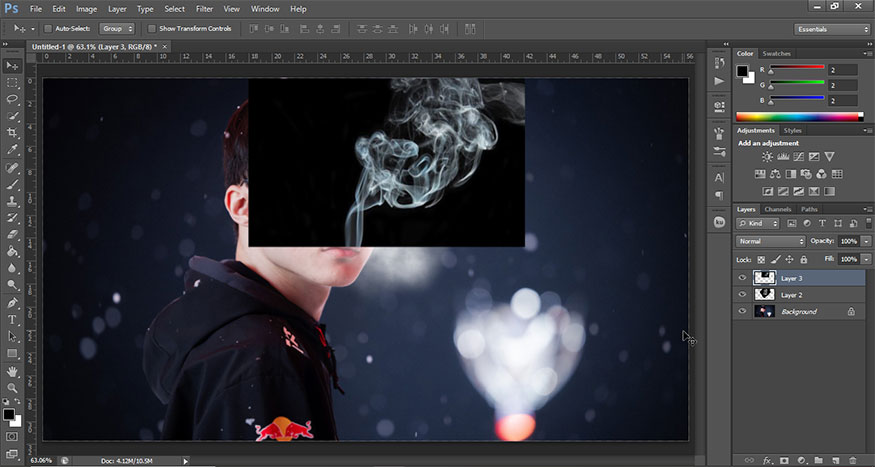
Step 5: Download an image of thin smoke with a black background to your device, then open it on your canvas.
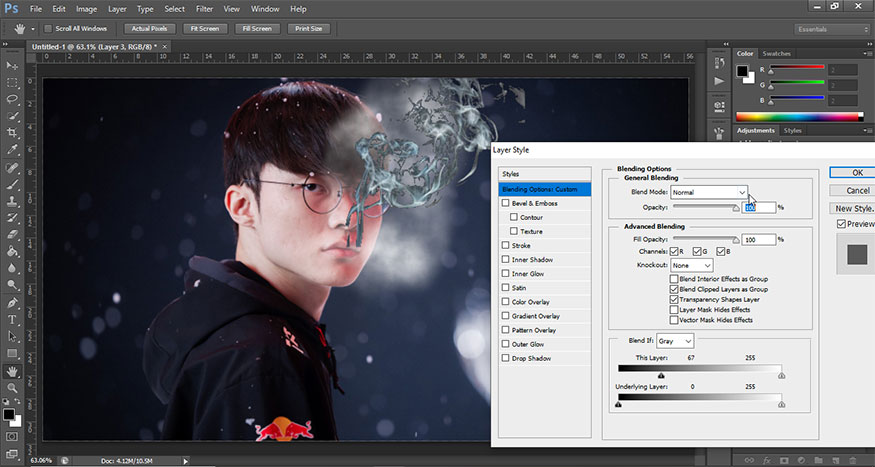
Double click on the layer containing the uploaded smoke image to open the Layer Style. Go down to Blend If and then adjust the Current Layer transitions so that it looks as smoke-like as possible. This will help to remove somewhat the black background from the smoke.
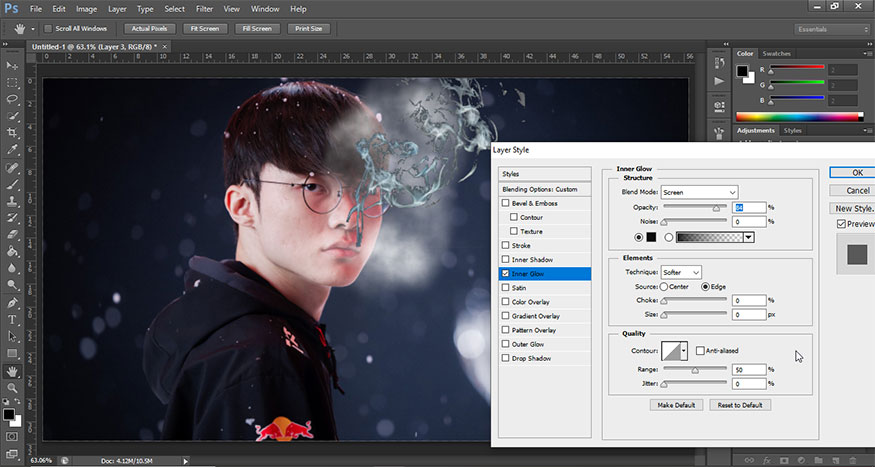
Step 6: Add an Inner Glow effect to this smoke layer by setting the parameters in the image below. You can also customize your photo to suit your needs. This will help hide some of the remaining black background.
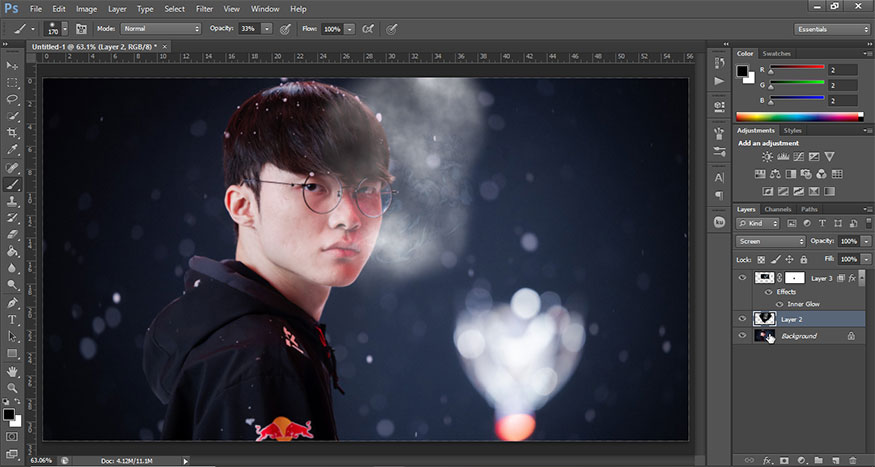
Step 7: Set this smoke layer to Overlay and then add a Layer Mask. Use a soft round Brush to black, then paint over to remove unnecessary excess and blend the smoke into the breath.
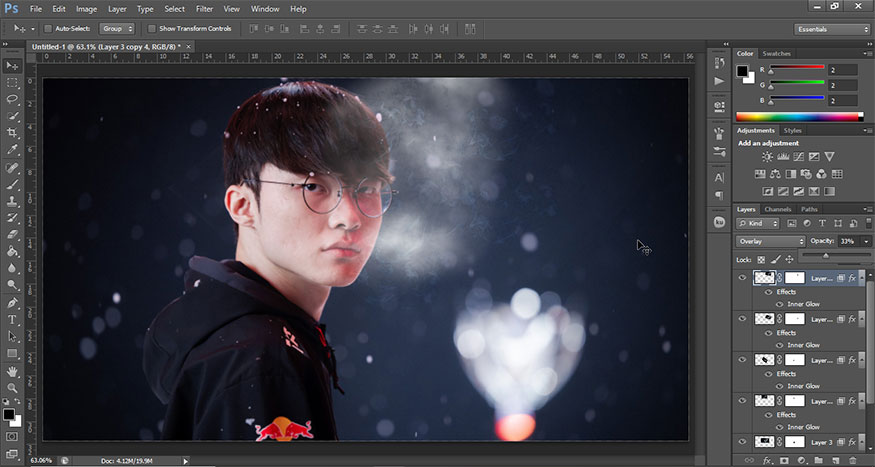
Step 8: Duplicate this layer then transform the smoke layer to add more breathing effects. Try moving the layer to different positions with different sizes to see the most natural blending.
Reduce the Opacity to make the effect more subtle.
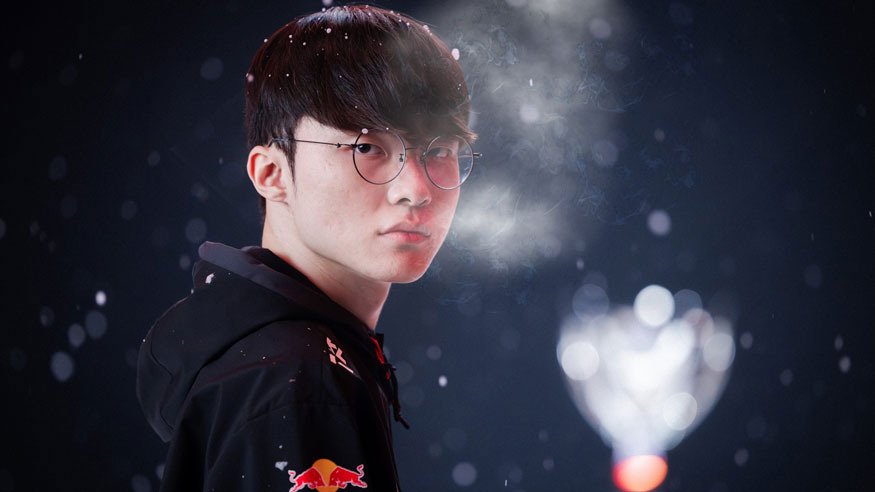
So we have finished creating the winter breath in Photoshop, the subject seems to exhale the whole winter. With a few adjustments, you can also use this feature to create smoke as well as other slightly foggy effects that are great for close-up portraits.
Above is a collection of extremely simple steps to create a winter breath in Photoshop. The first few times you do it, the results may not be smooth but don't give up, do it many times to get the best quality photo. Hopefully the above shares from SaDesign can help you edit your photos.
- Summer to Winter Snow Photo Transformation in Photoshop
- Create an ice text effect in Adobe Photoshop with SaDesign


VIP Products


Best Selling Products
Adobe Photoshop Copyright - Full App
120 USD
ChatGPT Plus Account (GPT-4)
16 USD
Adobe Premiere Pro Account
99 USD
Freepik Premium Account
59 USD
Upgrade Duolingo Super
29 USD
Plugin Retouch4me
69 USD
Genuine Adobe Illustrator account
99 USD
Autodesk All App Account Copyright
120 USD
Copyright Adobe Lightroom Account
59 USD
Genuine Cheap Canva Pro
39 USD
Capcut Pro 1 Year
39 USD
Upgrade Genuine Office 365
49 USD
MidJourney Account
29 USD
Upgrade genuine Capture One account
120 USD
Windows 10 & 11 Pro Key
36 USD