Best Selling Products

Freepik Premium Account
59 USD

Upgrade Duolingo Super
29 USD

Genuine Cheap Canva Pro
39 USD

Adobe Photoshop Copyright - Full App
120 USD

Capcut Pro 1 Year
39 USD

Genuine Adobe Illustrator account
99 USD

Upgrade Genuine Office 365
49 USD

Windows 10 & 11 Pro Key
36 USD

Autodesk All App Account Copyright
120 USD

Copyright Adobe Lightroom Account
59 USD

Plugin Retouch4me
69 USD

Upgrade genuine Capture One account
120 USD

MidJourney Account
29 USD

ChatGPT Plus Account (GPT-4)
16 USD

Adobe Premiere Pro Account
99 USD
Easy make a rain effects in Photoshop with SaDesign
Nội dung
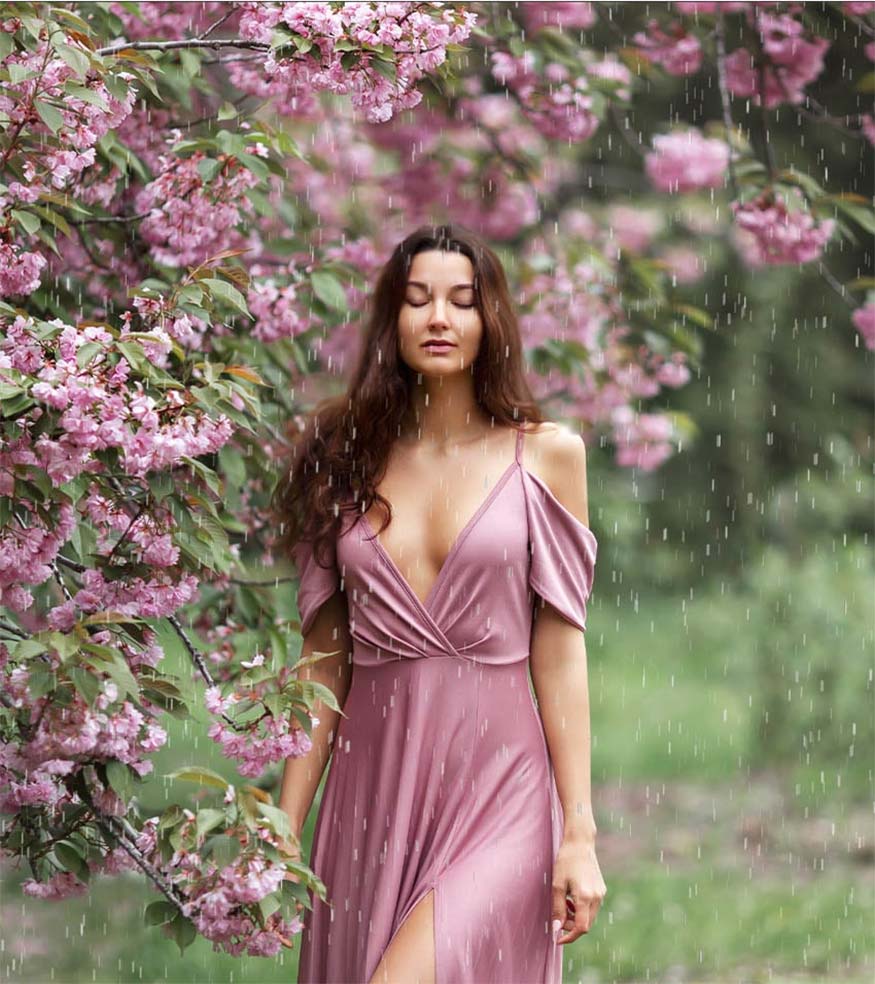
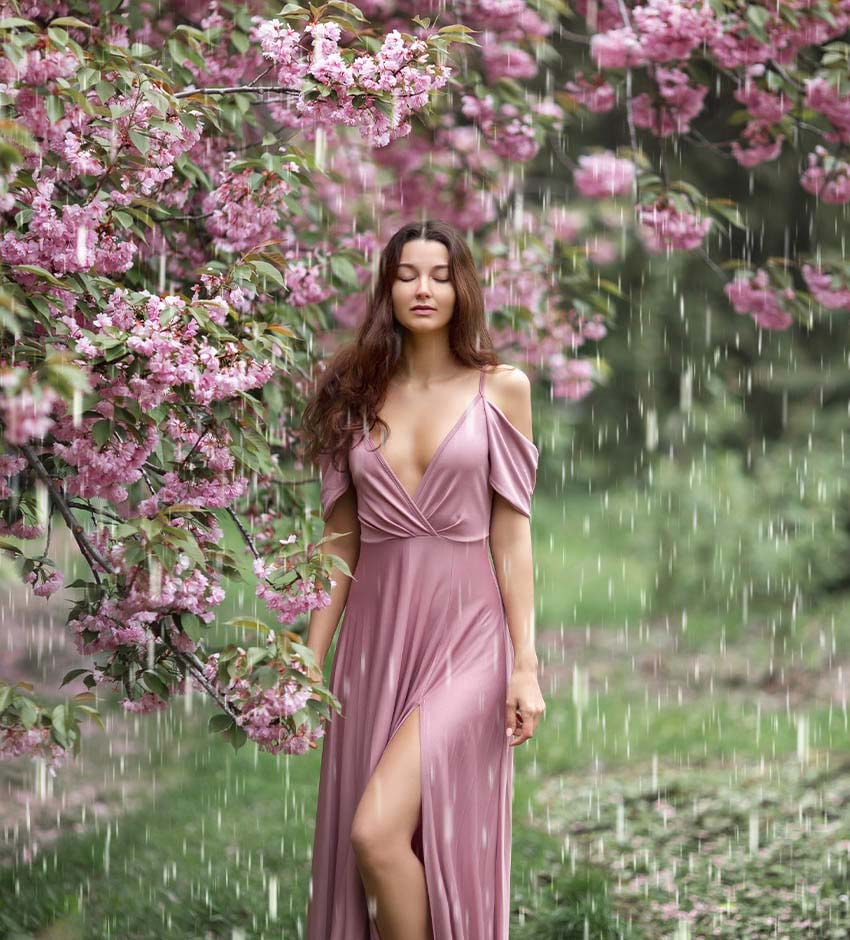
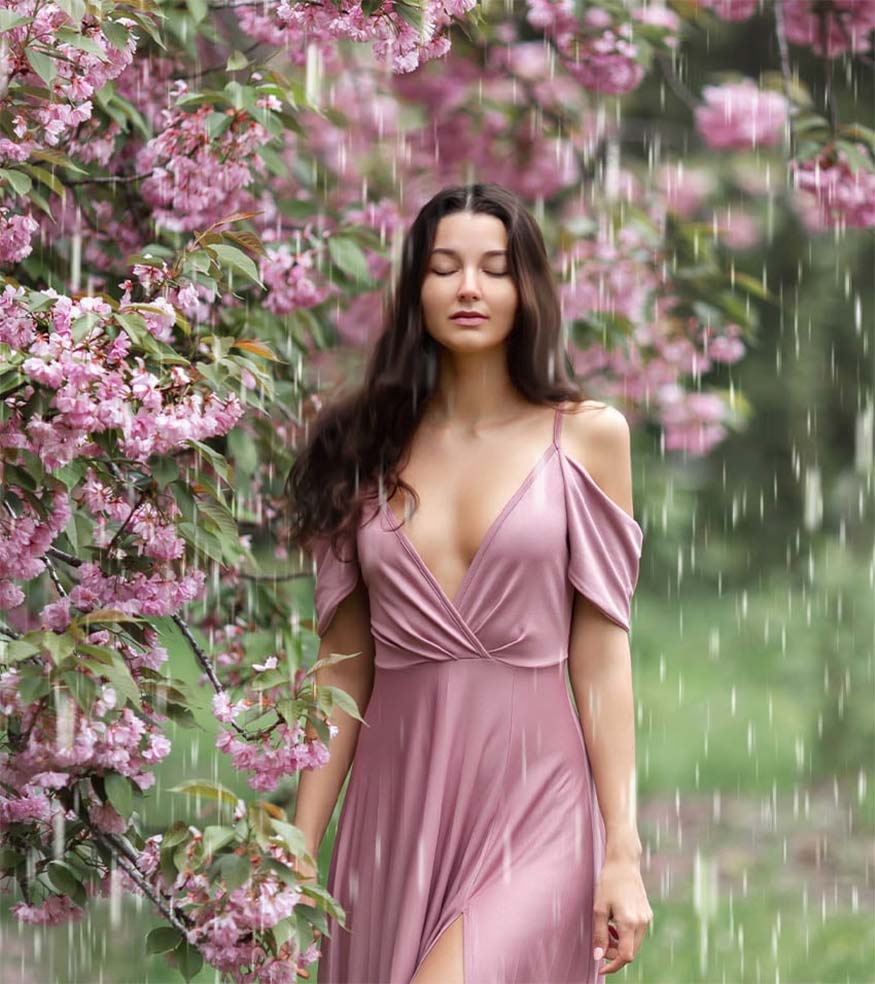
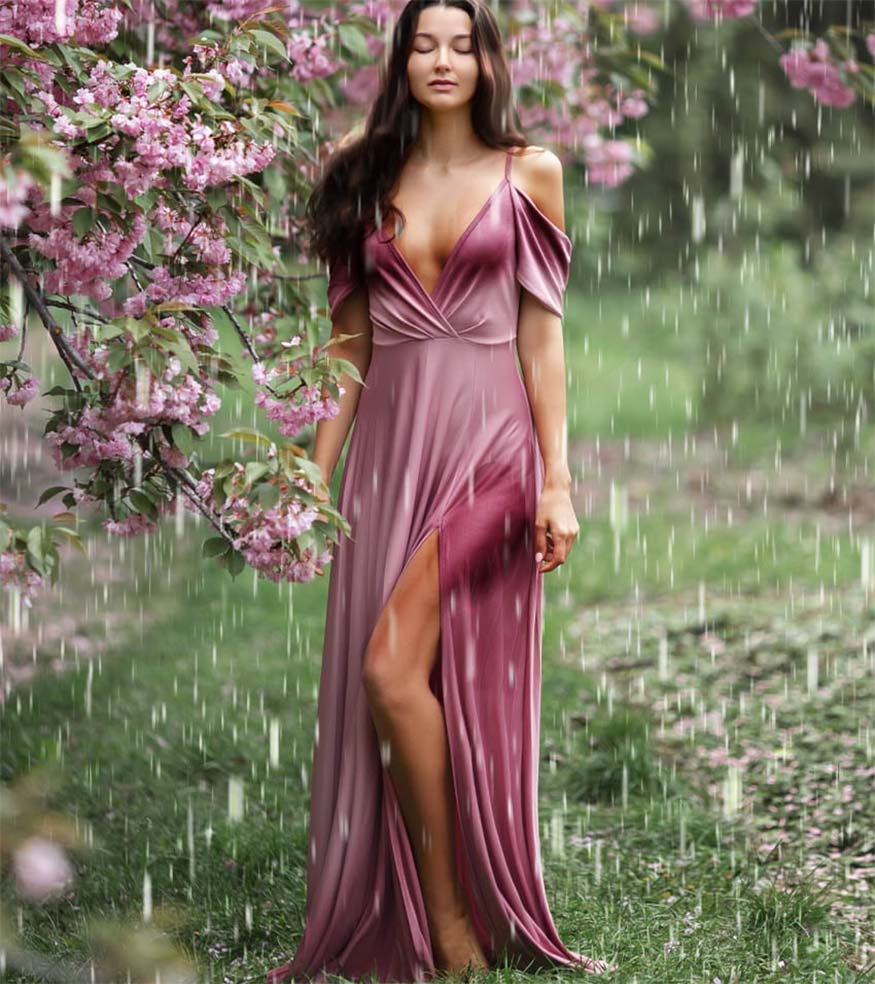
The rain effect in photoshop is one of the interesting weather effects that you absolutely should not ignore during the photo editing process. With just a few simple steps, you can create all types of rain from light drizzle to heavy rain. Specifically how to do this, you will immediately follow the sharing that SaDesign brings below.

The rain effect in photoshop is one of the interesting weather effects that you absolutely should not ignore during the photo editing process. With just a few simple steps, you can create all types of rain from light drizzle to heavy rain. Specifically how to do this, you will immediately follow the sharing that SaDesign brings below.
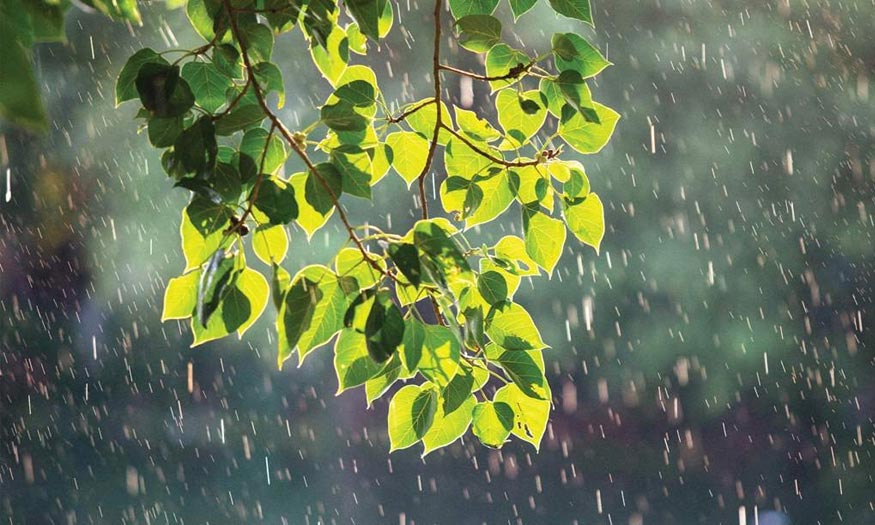
1. How to add a rain effect in Photoshop
To add a rain effect in Photoshop, follow these steps:
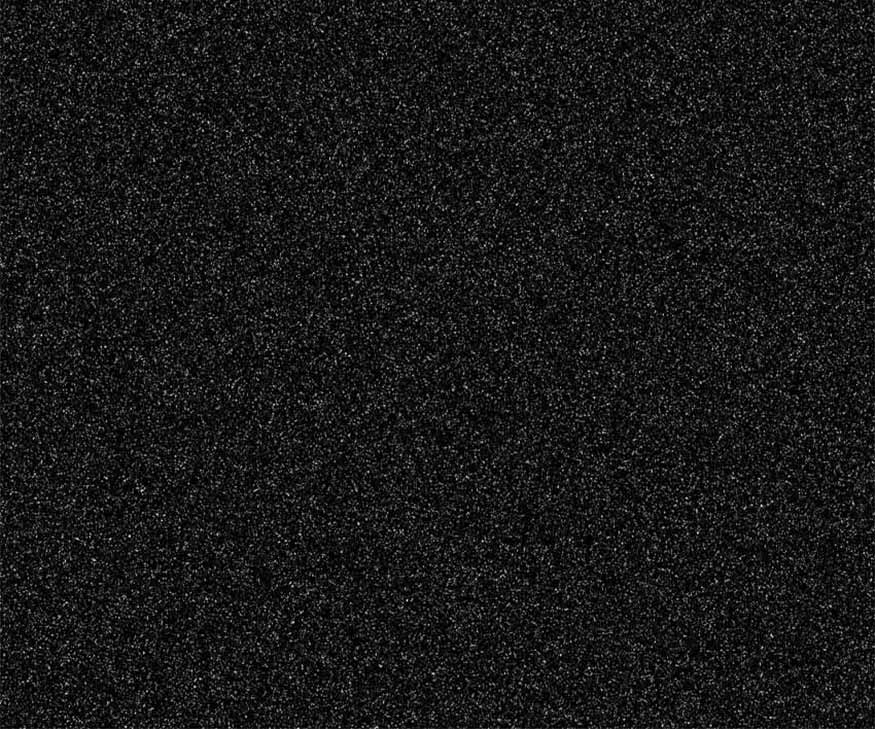
- Step 1: First of all, you need to create rain patterns by creating a New Layer and filling them with black, name for this layer is “Dots”.
Then go to Filter => Pixelate => Mezzotint, set Type to Coarse Dots.
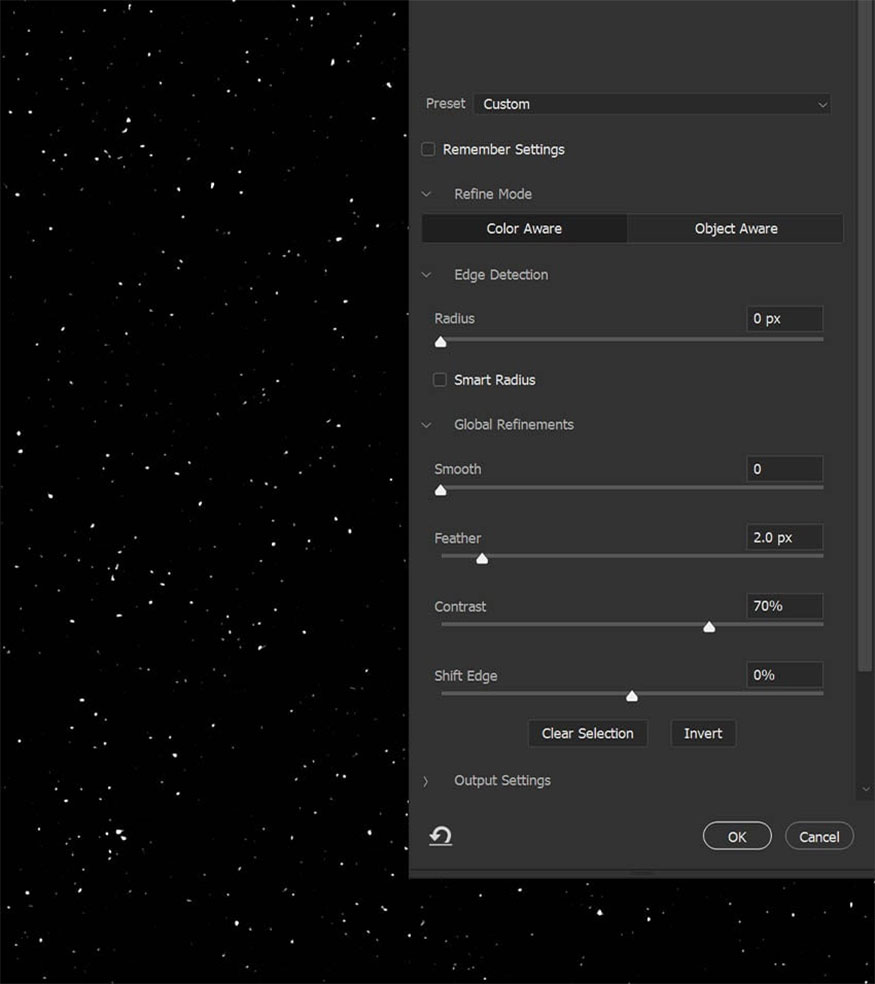
- Step 2: Zoom close up and go to Select => Color Range. Here, click on the white dots and set Fuzziness to 200, then click OK. Select the white points so that we can add a Layer Mask and mask them.

- Step 3: Enter Select and Mask in the Properties panel. In Global, click OK to thin the dots. The clearer the dots, the heavier the rain will appear.
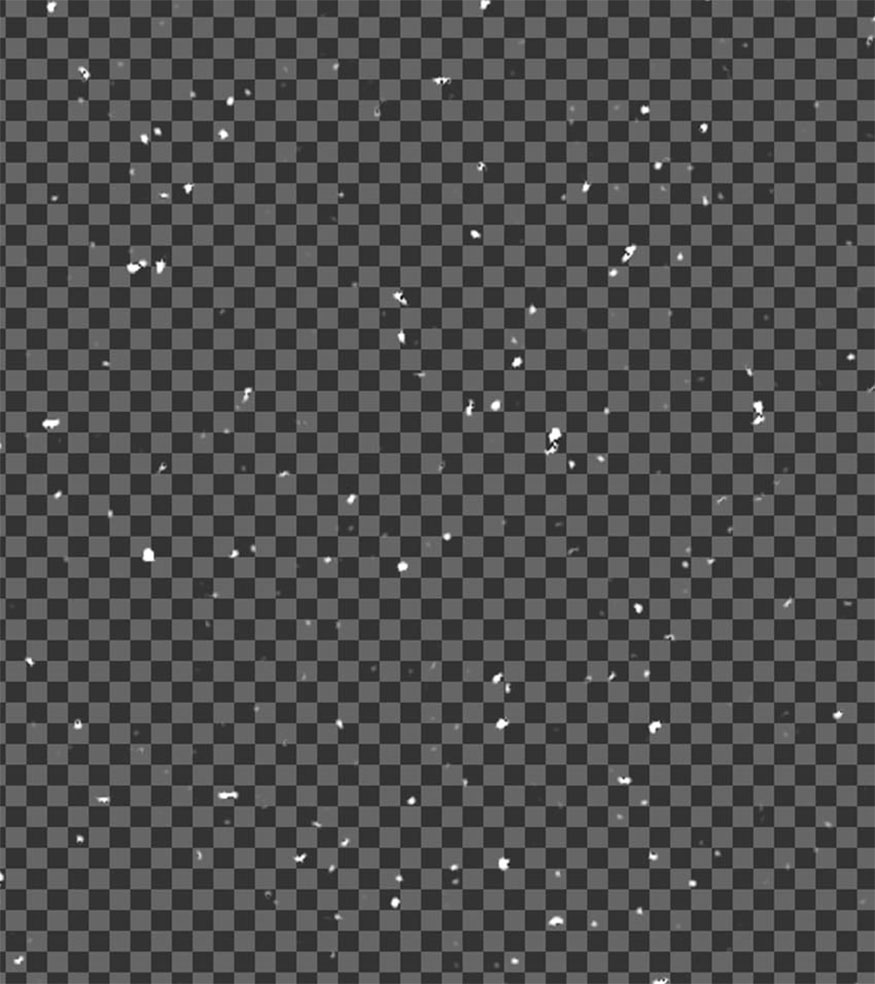
- Step 4: Duplicate the "Dots" layer by pressing Ctrl + J twice for a total of three dot layers. Select the dots, then right click and select merge layers. This makes the dots appear stronger.
Since you're creating a rain effect with a portrait image, you can increase the size of the dots using the Transform tool.
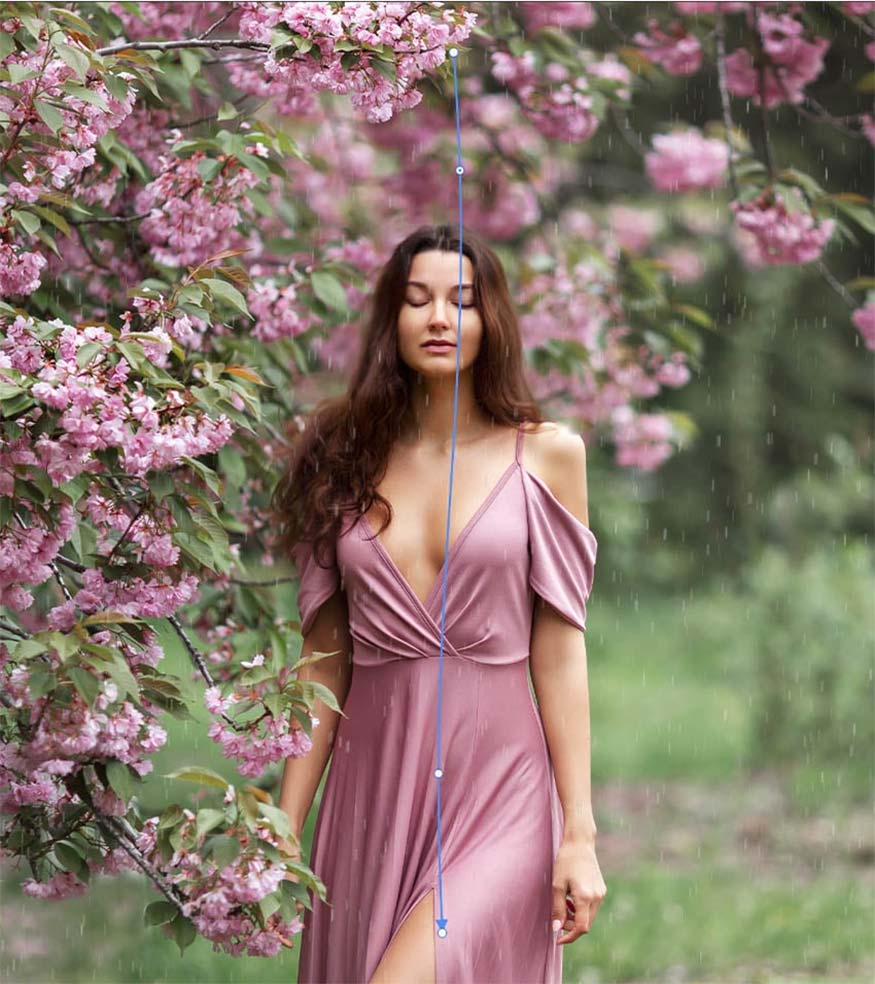
- Step 5: Go to Filter => Blur Gallery => Path Blur. Extend the blue blurred lines so that they are vertical.
Next, create variation in the rain's motion by placing two points on the path, then dragging them in opposite directions.
Click on the Movement Speed tool to adjust the amount of rain, reduce Movement Speed to 20–25% => OK. If you want a downpour, setting the parameter for Movement Speed to about 50–75% is appropriate.
- Step 6: Duplicate the rain texture a few more times to make them stronger. Then right click and select Merge Layers.
- Step 7: For the rain layer in front and behind the object, adjust the brightness, size and color of the rain if necessary.
To adjust the color, just go to Image => adjustmentments => Hue/Saturation => Colorize. You can use Hue and Lightness to adjust the color of the rain.
You can change layer modes such as Overlay, Soft Light, Color Dodge and Screen to suit the edited image.
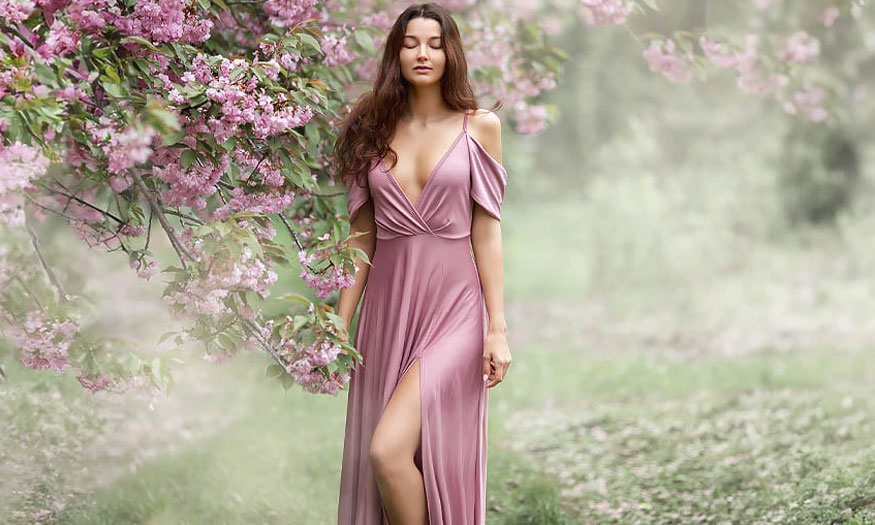
2. Instructions for wetting hair and clothes in Photoshop
After creating the rain effect, you need to wet the subject's hair and clothes to create more realism for the image by:
- Step 1: We will start with hair by selecting Select Subject and Layer Mask to extract the subject. Then use the Smudge tool to smudge the hair. The purpose of this action is to make the hair look heavy and wet, so you need to remove flyaways hair.
Create and cut a brightness/contrast layer onto the object, sett its contrast to 100. Use the Layer Mask tool to remove the brightness/contrast layer from everywhere except the hair.
If needed you can choose the Vibrance adjustment layer to remove some of the saturation from the hair, as adding contrast can cause the pixels to become oversaturated.
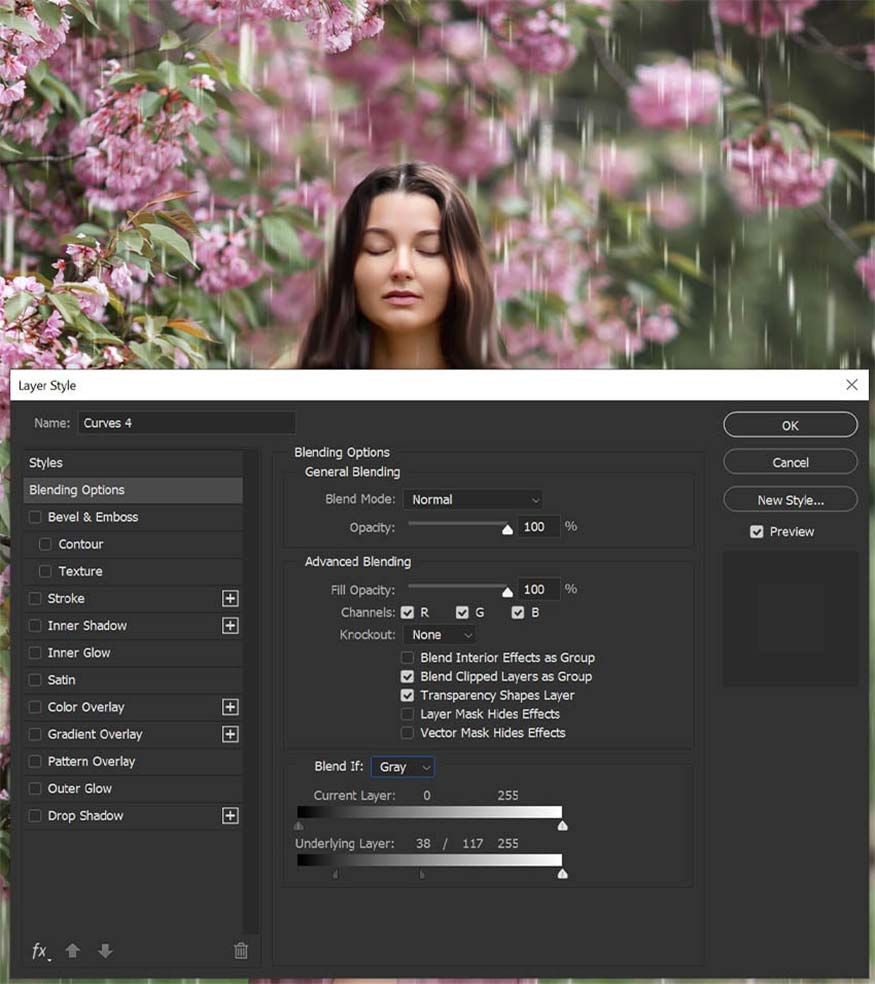
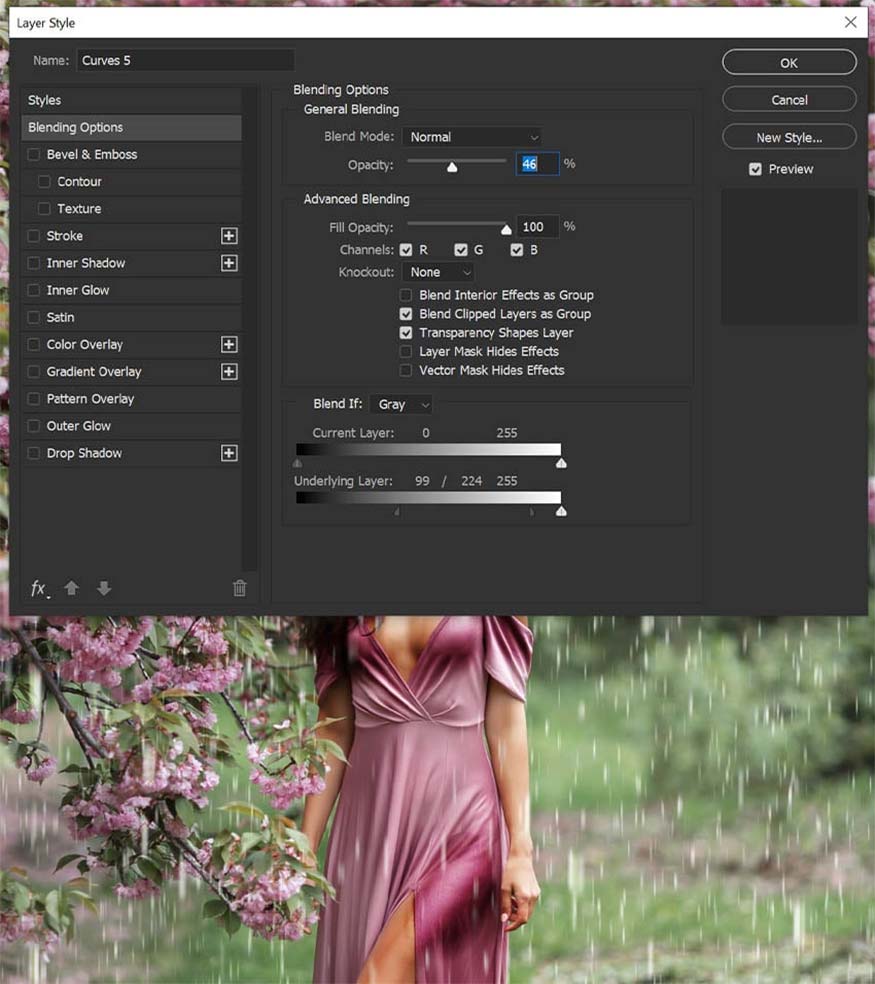
- Step 2: Next, create and cut the Curves layer above the brightness/contrast layer, highlighting the points that need to stand out.
Use the Blend If tool to highlight the hair.
Use the Layer Mask tool to remove the Curves layer everywhere except the hair to create the effect of making the hair wet.
Hold Alt to detach the Blend If button.
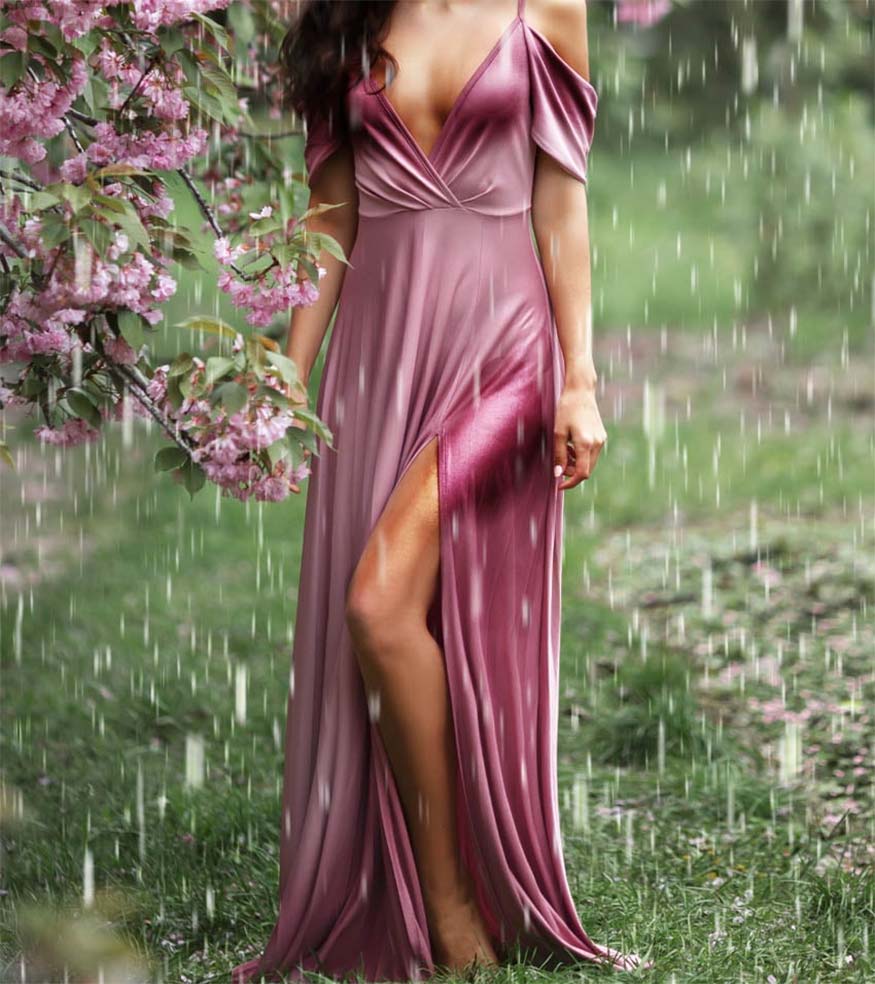
- Step 3: Create and cut new layers into the object, set them to Soft Light mode. Use the semi-soft round Brush tool to paint wet spots on areas such as the chest and skirt.
Use multiple layers to create a steamy look. You can adjust the layers' Opacity tool if needed.
- Step 4: Create and cut another Curves layer above the current layers in the theme. Increase highlights and use Blend If to highlight points in the photo.
Invert the Layer Mask with Ctrl-I, turning the layer mask to black. Create a curved layer to hide the wet parts of the subject's legs and chest.
- Step 5: Repeat the above step until you are satisfied with the result.
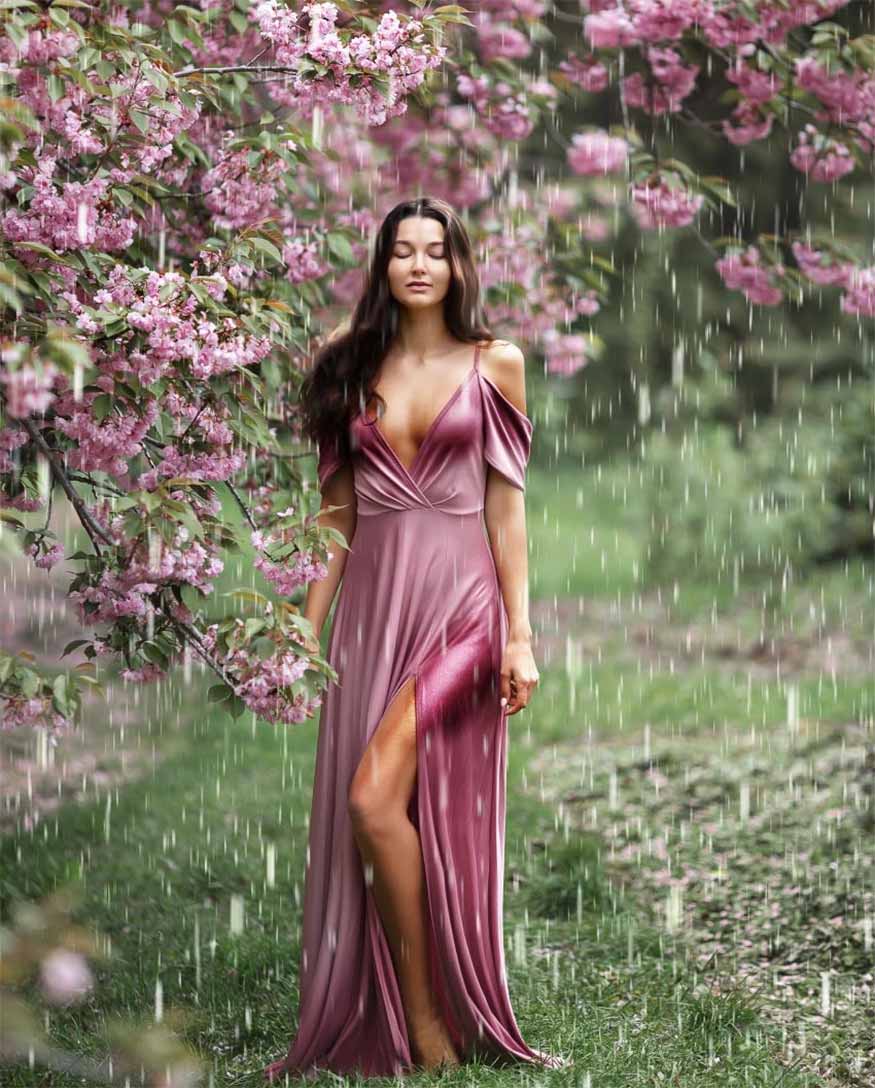
Above are detailed instructions on how to create a very simple rain effect in Photoshop. Try applying it to your images and you will see this is an extremely interesting and useful effect in photoshop!


VIP Products


Best Selling Products
Freepik Premium Account
59 USD
Upgrade Duolingo Super
29 USD
Genuine Cheap Canva Pro
39 USD
Adobe Photoshop Copyright - Full App
120 USD
Capcut Pro 1 Year
39 USD
Genuine Adobe Illustrator account
99 USD
Upgrade Genuine Office 365
49 USD
Windows 10 & 11 Pro Key
36 USD
Autodesk All App Account Copyright
120 USD
Copyright Adobe Lightroom Account
59 USD
Plugin Retouch4me
69 USD
Upgrade genuine Capture One account
120 USD
MidJourney Account
29 USD
ChatGPT Plus Account (GPT-4)
16 USD
Adobe Premiere Pro Account
99 USD